


Introduction
This can be one of the simplest problems to solve IF you’re taking advantage of our backups system. Simply recreate the site and run a backup restore.
If not using our backups system then this may be a little trickier. Below we’ll cover the possible options that may be available to you.
TABLE OF CONTENTS
Use a Local or Remote Backup Restore
Restoring a deleted site is straightforward:
- Create a new site with the same name and on the same server as the old site
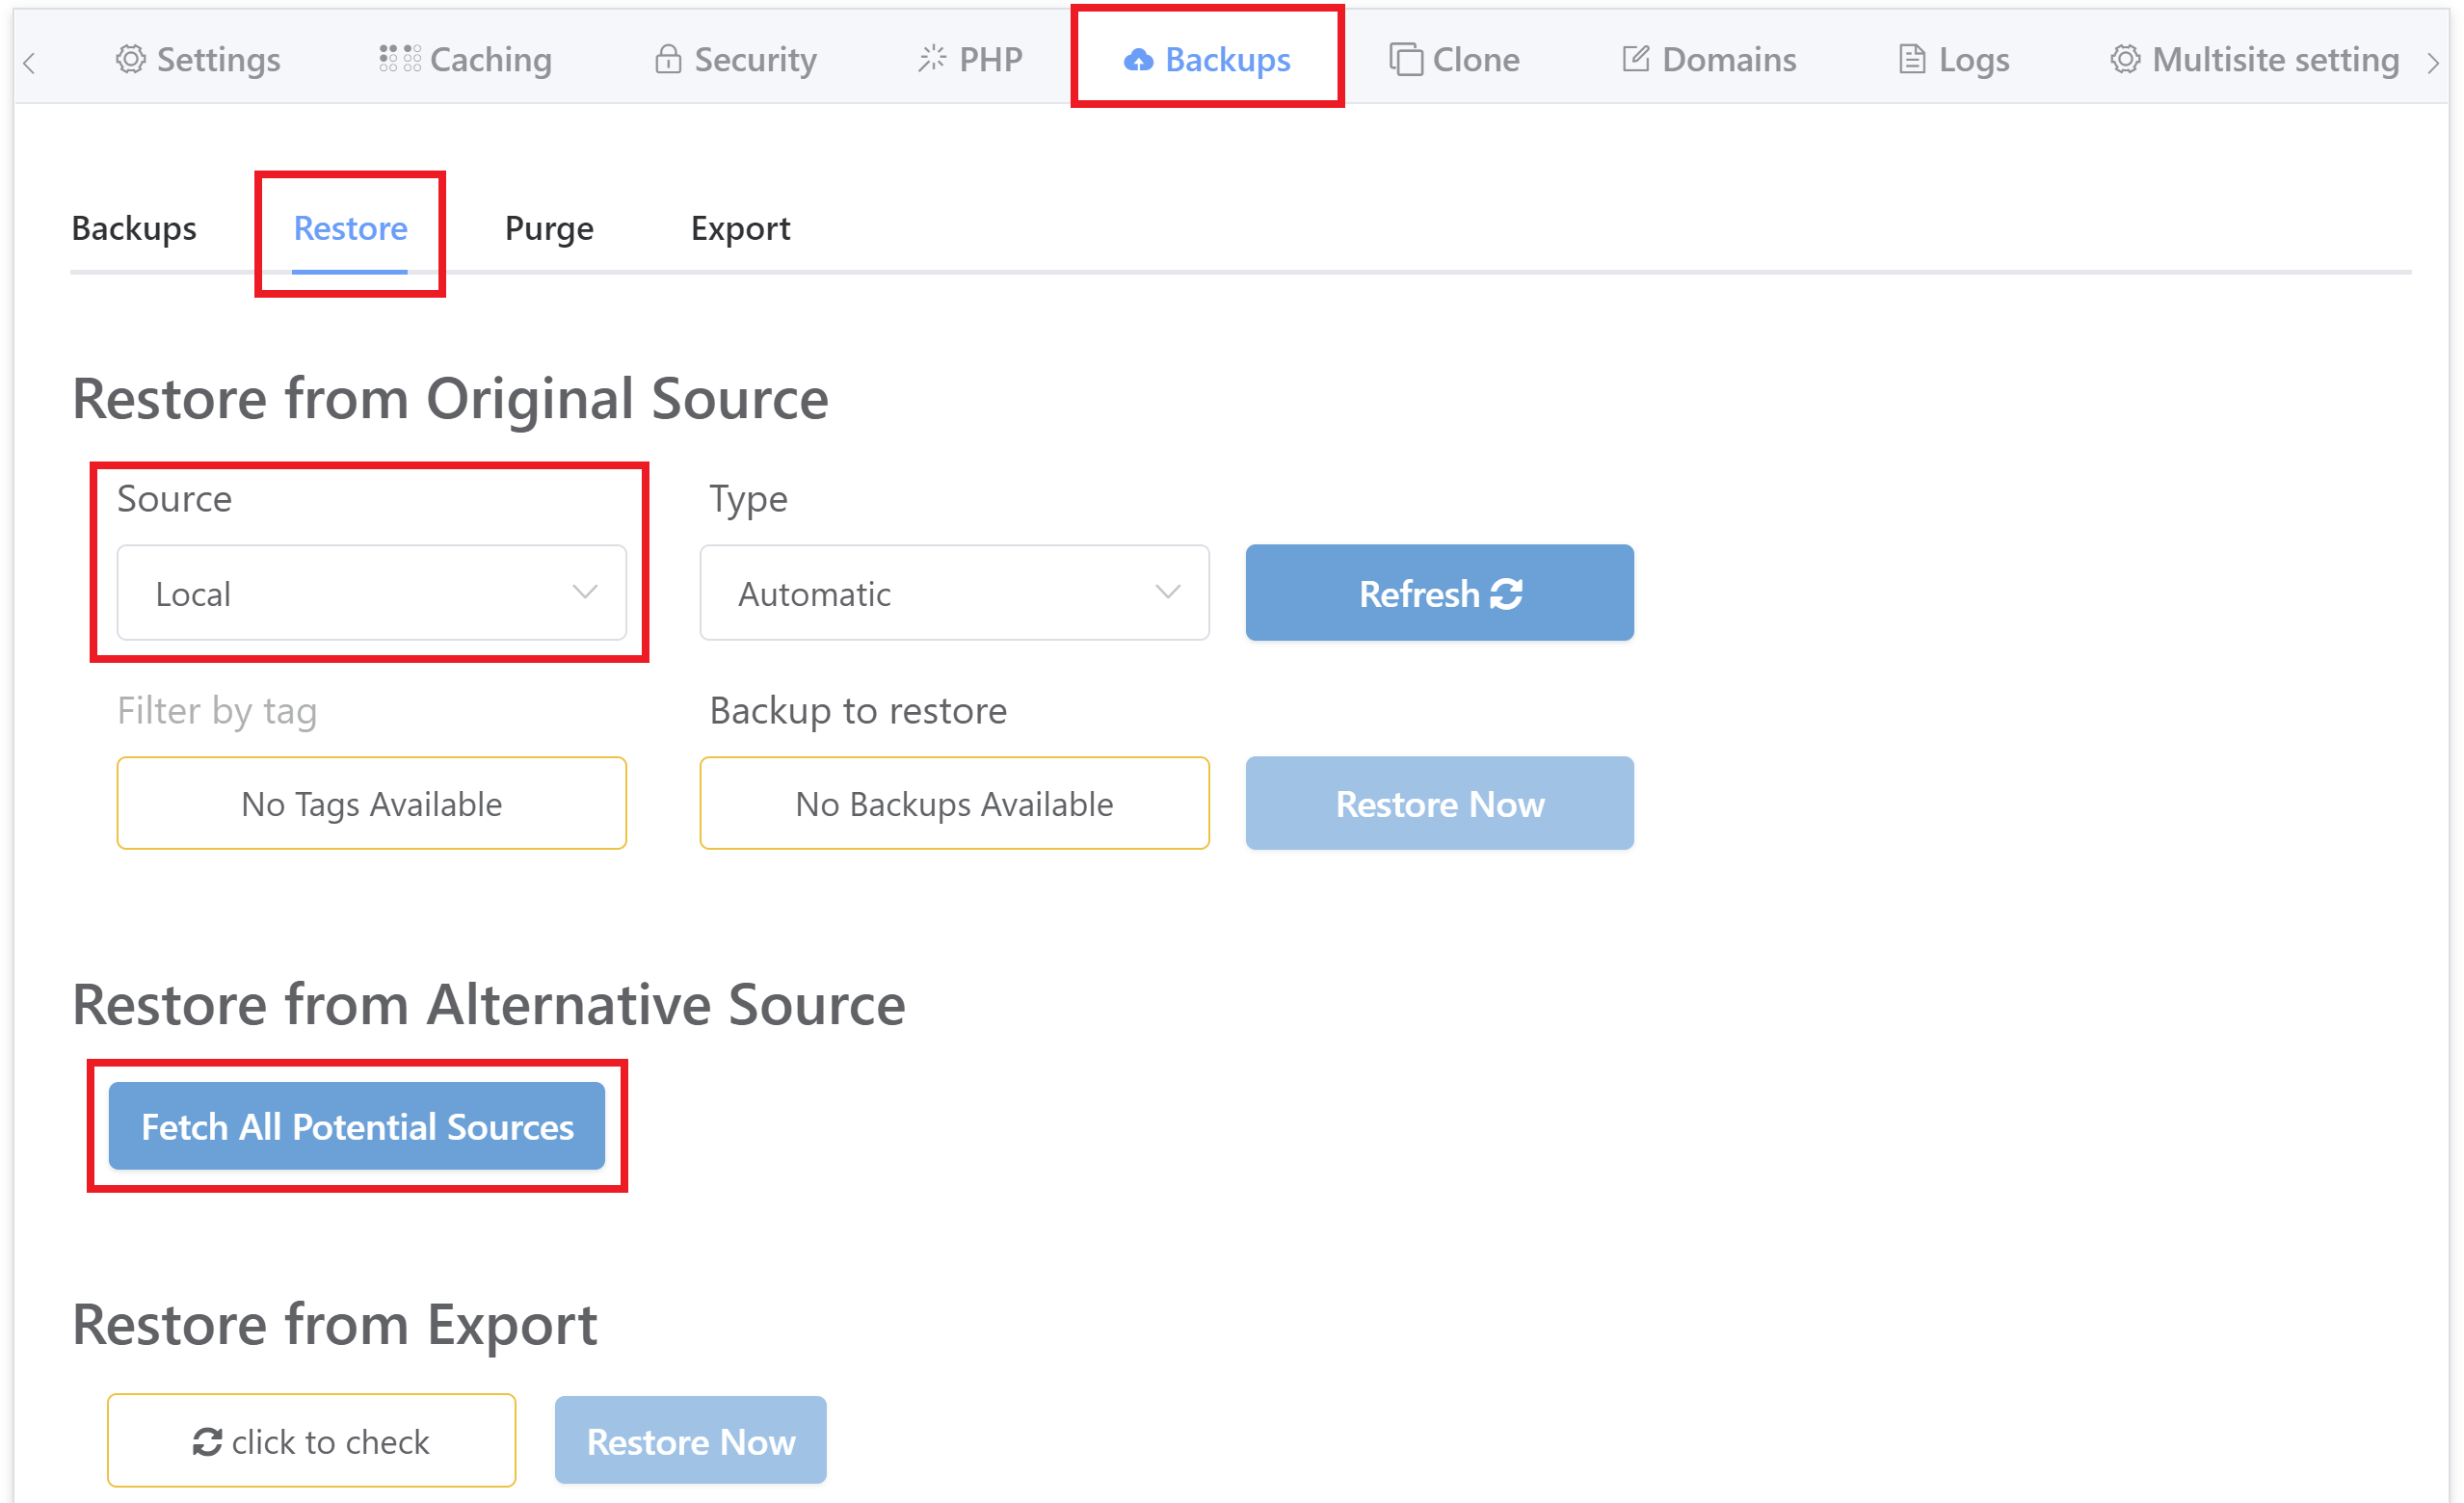
- Open the site configuration modal window and go to the Backups tab.
- In the Restore section, choose from the available backups (local or remote) and run the restore.
Voila! Your site is back in business!
More info on local and remote backups on the V2 system can be found here:
- V2 Backups Part 2. Setting Up Local Website Backups
- V2 Backups Part 3. Setting Up Remote Website Backups
For legacy backups on the older V1 system, you can follow the commands outlined in this article:
If You Don’t Have a vCanopy Backup
Below are two further options that may help you get back up and running. Unfortunately, if neither of these is possible then a rebuild of the site from the ground up will likely be necessary. You may be able to get previous content from archive.org.
POTENTIAL OPTION #1
If you don’t have a backup that you can use for a quick restore then the next step would be check for a backup you have elsewhere.
It’s possible you used All-In-One WP Migration or a similar plugin and may still have a backup hidden away in a storage provider like Dropbox or locally on your computer.
This includes any work that may have been done during the websites development.
POTENTIAL OPTION #2
If these aren’t available then a server restore at your server provider may be the only route to getting the site back.
Depending on what else is on the server, this may not be a viable option, but if it only contains the one site or the other sites are all static, then this could get you back up and running in a few minutes.
Further Reading
For further information about how backup systems work, the available options for configuring them, and for setting up remote backups (available on V2), please see the articles listed below.
STRATEGY
V2 BACKUPS
- V2 Backups Part 1. How Backups Work / Management / Purging / Exports and Imports
- V2 Backups Part 2. Setting Up Local Website Backups
- V2 Backups Part 3. Setting Up Remote Website Backups
V1 BACKUPS
INFORMATION
The steps here are no longer necessary, but the info may be useful for other cases.
Backup Credentials Incorrect
We’re leaving the info purely for troubleshooting purposes should the “backup credentials incorrect” issue ever appear during debug.
STEP 1. FOLLOW THE SAME 3 STEPS:
- Create a new site with the same name and on the same server as the old site.
- Open the site configuration modal window and go to the Backups tab.
- In the Restore/Migrate/Clone section, choose Restore and select an available backup.
This restore will fail part way through, as right now it will not overwrite the existing database, or create a new one. It will, however, overwrite the wp-config.php and give you the details you need to recreate that database.
STEP 2. GET YOUR DATABASE DETAILS FROM YOUR WP-CONFIG.PHP FILE
Open up your sites customizer and click on the link to open up your sites wp-config.php file.
Here’s an example of the details you will need:
// ** MySQL settings - You can get this info from your web host ** //
/** The name of the database for WordPress */
define( 'DB_NAME', 'fMd_test2_com' );
/** MySQL database username */
define( ‘DB_USER’, ‘fMd_test2_com’ );
/** MySQL database password */
define( ‘DB_PASSWORD’, ‘HWPkaEsYbQFtHhSahPXUgVOpS’ );
STEP 3. SSH INTO YOUR SERVER
Follow these guides to get starte
Step 1. Generate your SSH Key
Step 2. Add your SSH Key to vCanopy (also see Add default SSH Keys)
Step 3. Connect to your server by SSH as Root user (we like and use Termius)
STEP 4. LOGIN TO MYSQL
Run the following command:
gp mysql login root
STEP 5. CREATE YOUR DATABASE
Run the following command, replacing “database_com” with your database name:
CREATE DATABASE database_com;
For example:
CREATE DATABASE fMd_test2_com;
STEP 6. CREATE YOUR DATABASE USER
Run the following, switching out “database_com” with your database user, and “p@ssw0rd” with your database password:
CREATE USER 'database_com'@'localhost' IDENTIFIED BY 'p@ssw0rd';
For example:
CREATE USER 'fMd_test2_com'@'localhost' IDENTIFIED BY 'HWPkaEsYbQFtHhSahPXUgVOpS';
STEP 7. GRANT PERMISSIONS
Run the following, switching your database credentials again:
GRANT SELECT, INSERT, UPDATE, DELETE, CREATE, INDEX, DROP, ALTER, CREATE TEMPORARY TABLES, LOCK TABLES ON database_com.* TO 'database_com'@'localhost';
For example:
GRANT SELECT, INSERT, UPDATE, DELETE, CREATE, INDEX, DROP, ALTER, CREATE TEMPORARY TABLES, LOCK TABLES ON fMd_test2_com.* TO 'fMd_test2_com'@'localhost';
Also, alternatively, you could grant all privileges with this instead:
GRANT ALL PRIVILEGES ON database_com.* TO '$database_com'@'localhost';"
And finally, flush privileges with:
FLUSH PRIVILEGES;
STEP 8. RE-RUN YOUR RESTORE
Back inside your vCanopy account, run your backup restore again to restore your website.
STEP 9. FIX PHPMYADMIN
Now we just need to set the correct database inside PHPMyAdmin. To do so, run the following command in your server, switching out “example.com” for your websites name:
gp site example.com -dbcreds