


Configuring ElasticPress
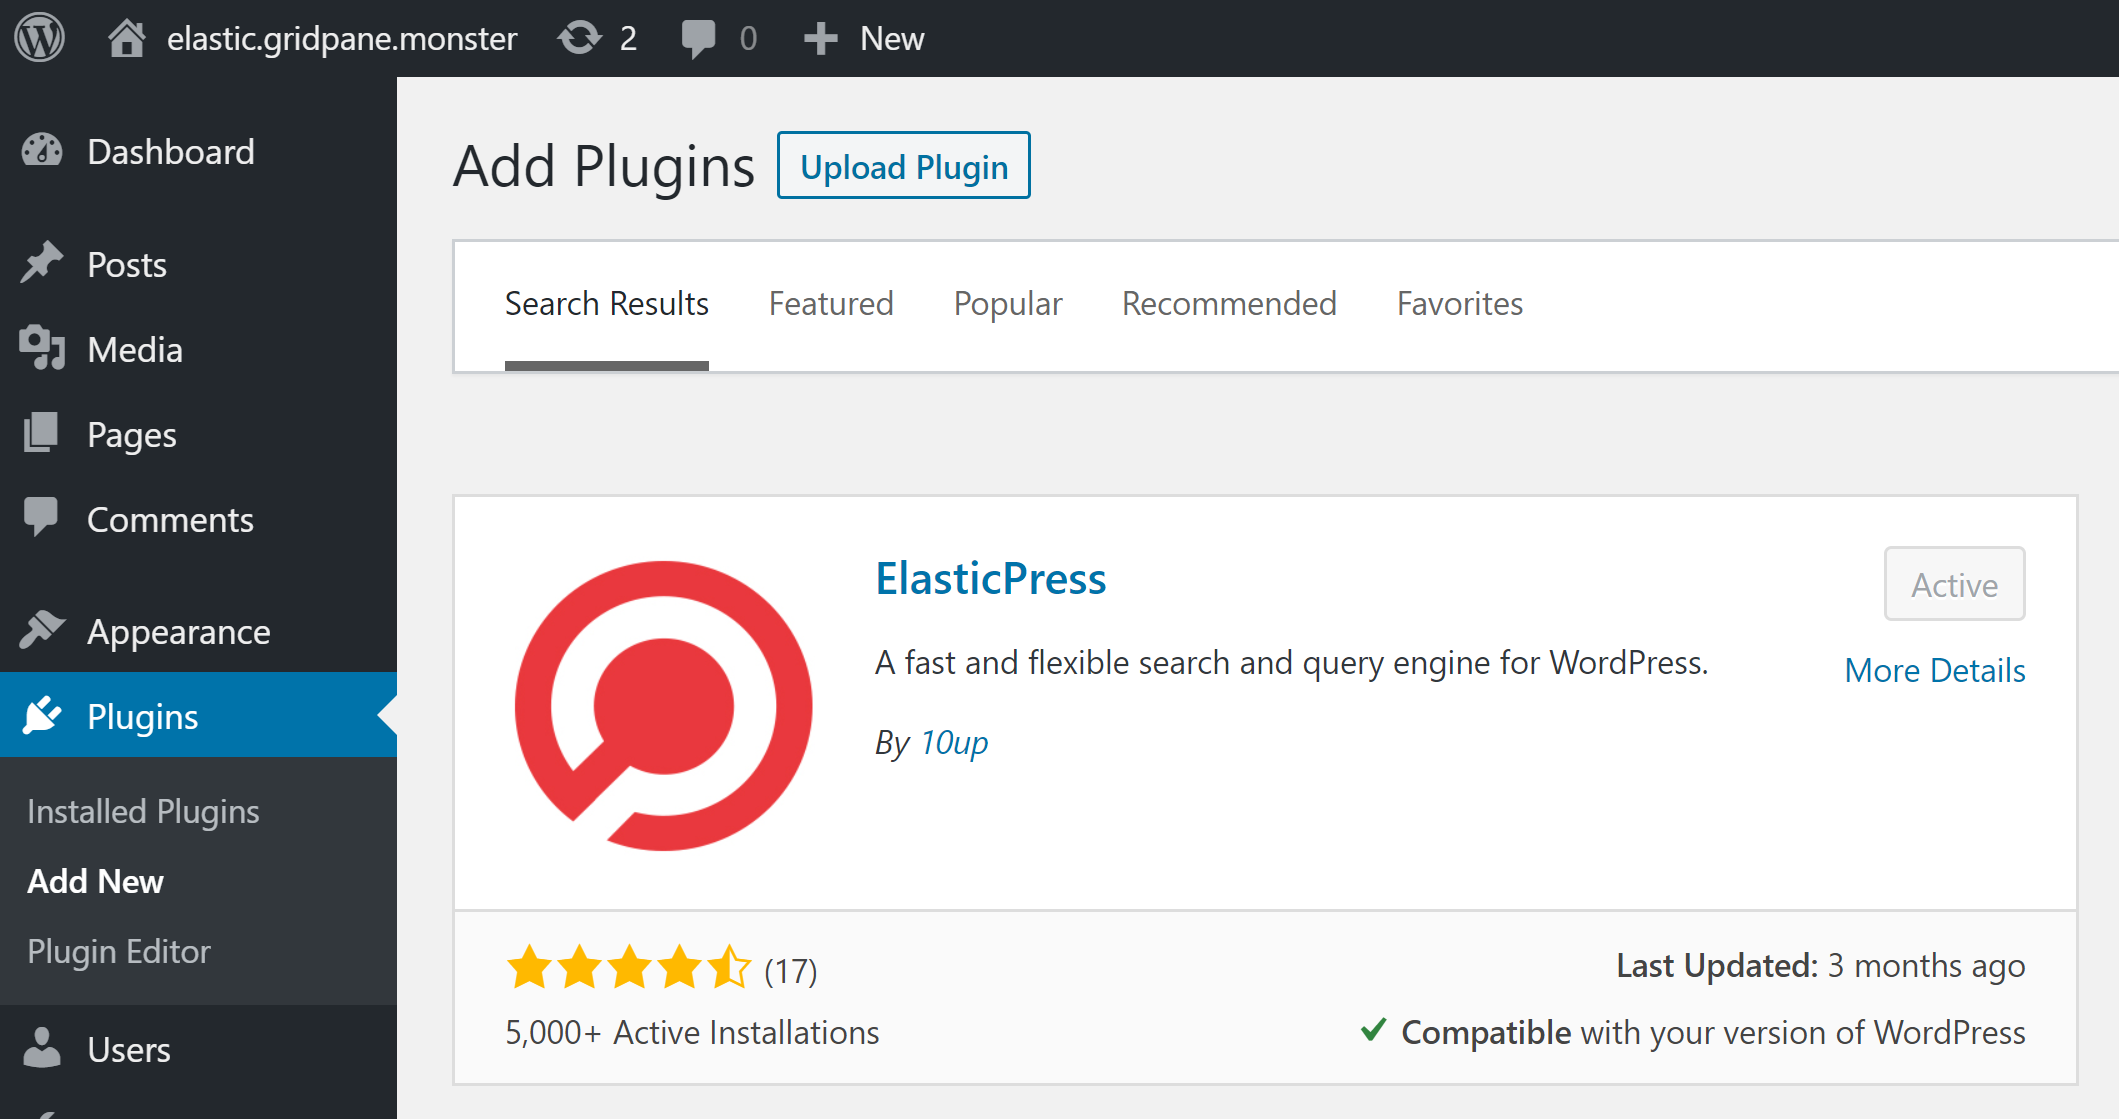
STEP 1. INSTALL THE PLUGIN
The plugin is available from the WordPress repo – simply search for ElasticPress, then install and activate it like any regular plugin.
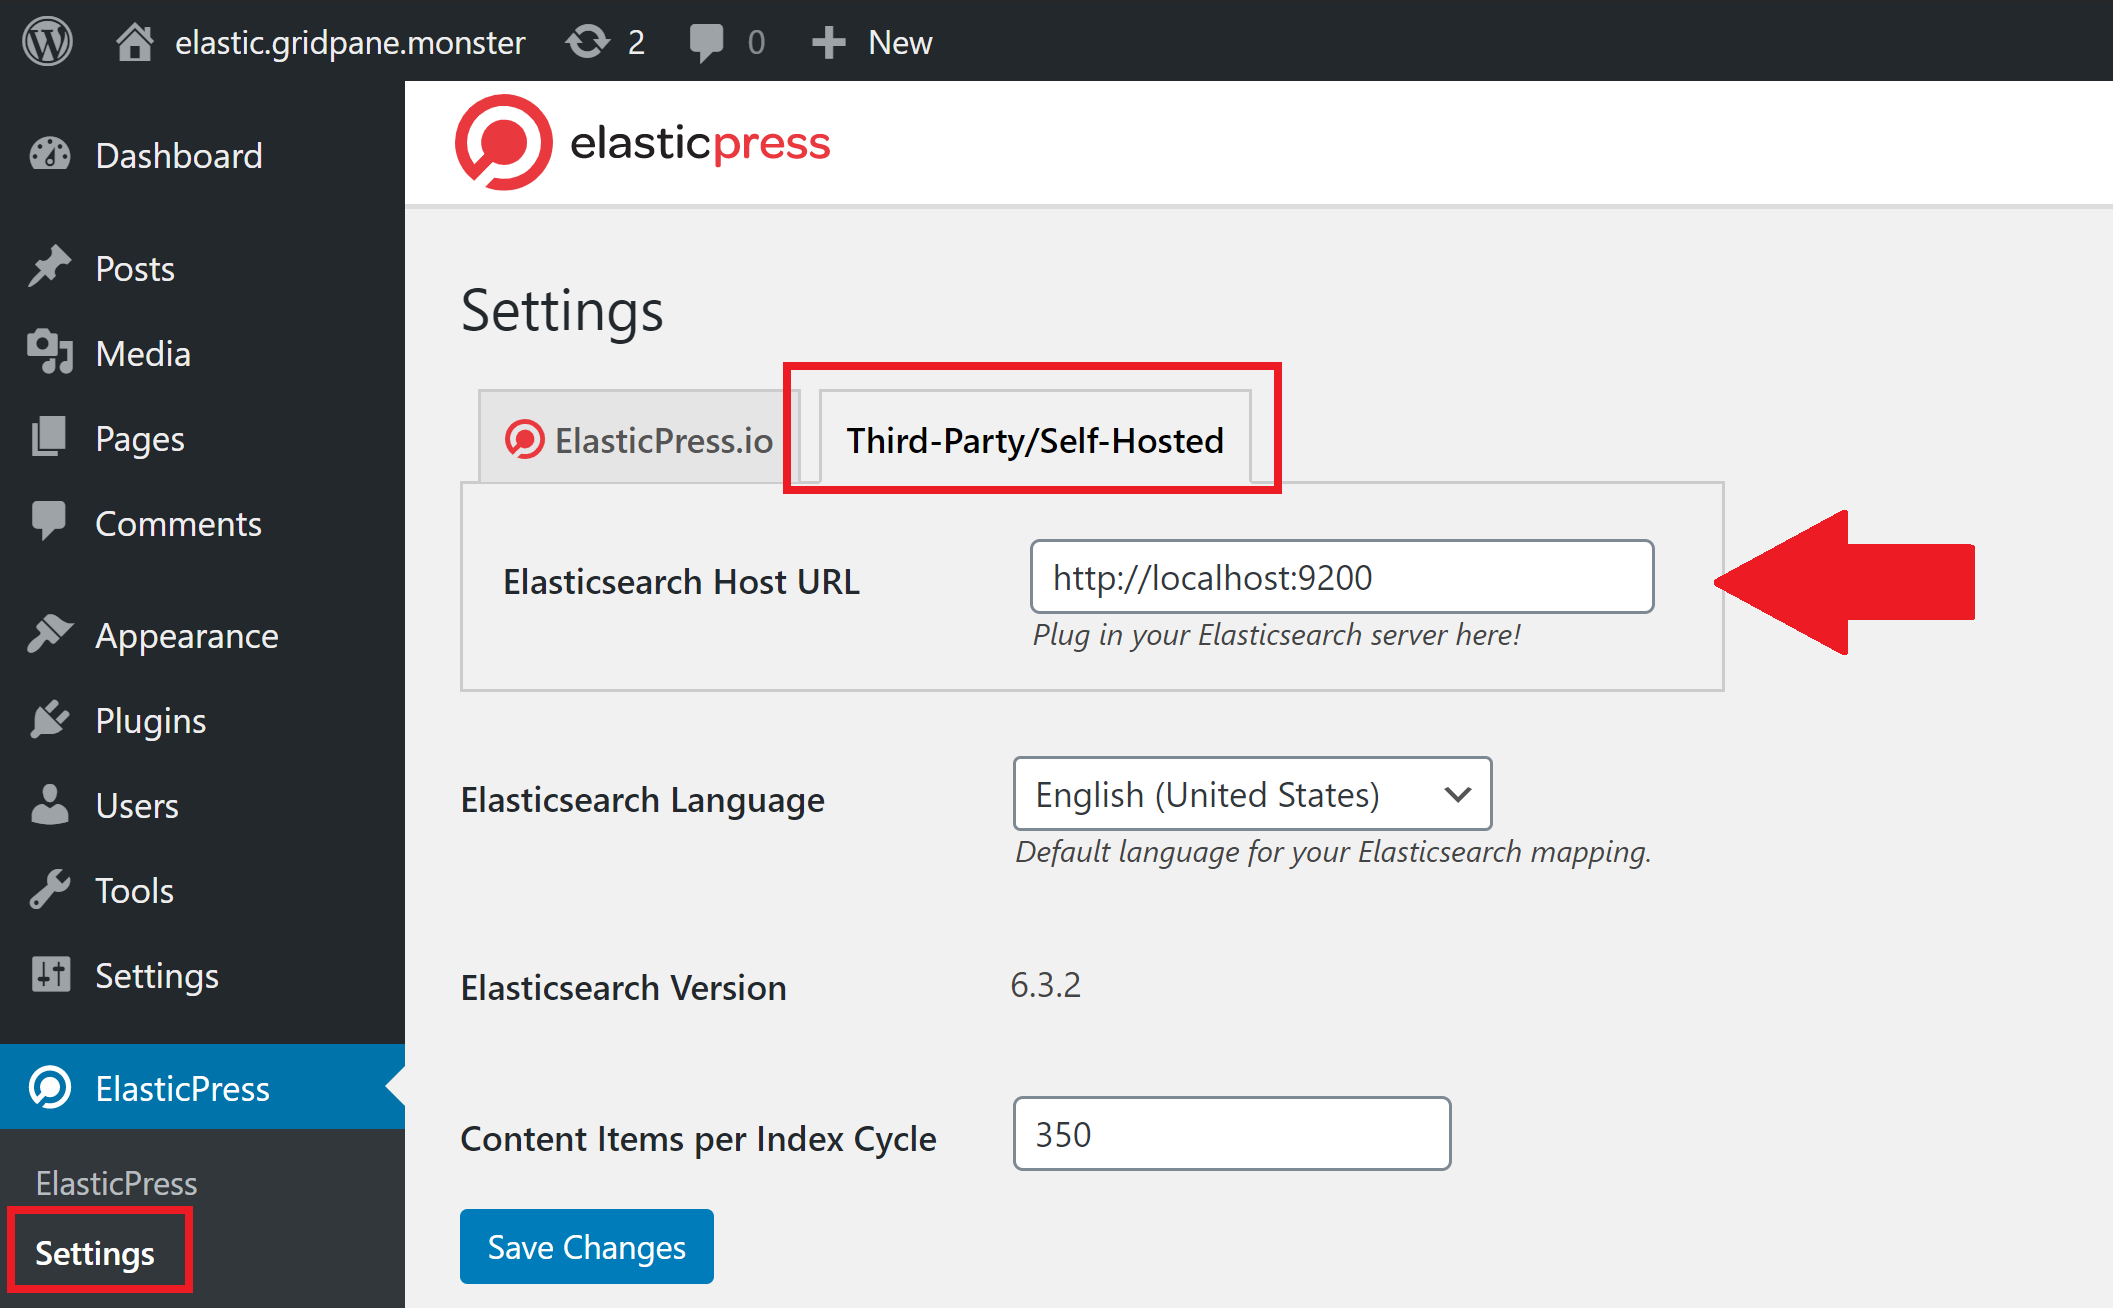
STEP 2. ENTER THE ELASTICSEARCH HOST URL
Inside your settings page, we need to enter the host URL.
The Elasticpress.io tab is for their paid integration. We need the “Third Party/Self Hosted” tab, and then enter HTTP://localhost:9200 in the Elasticsearch Host URL box. Then click Save.
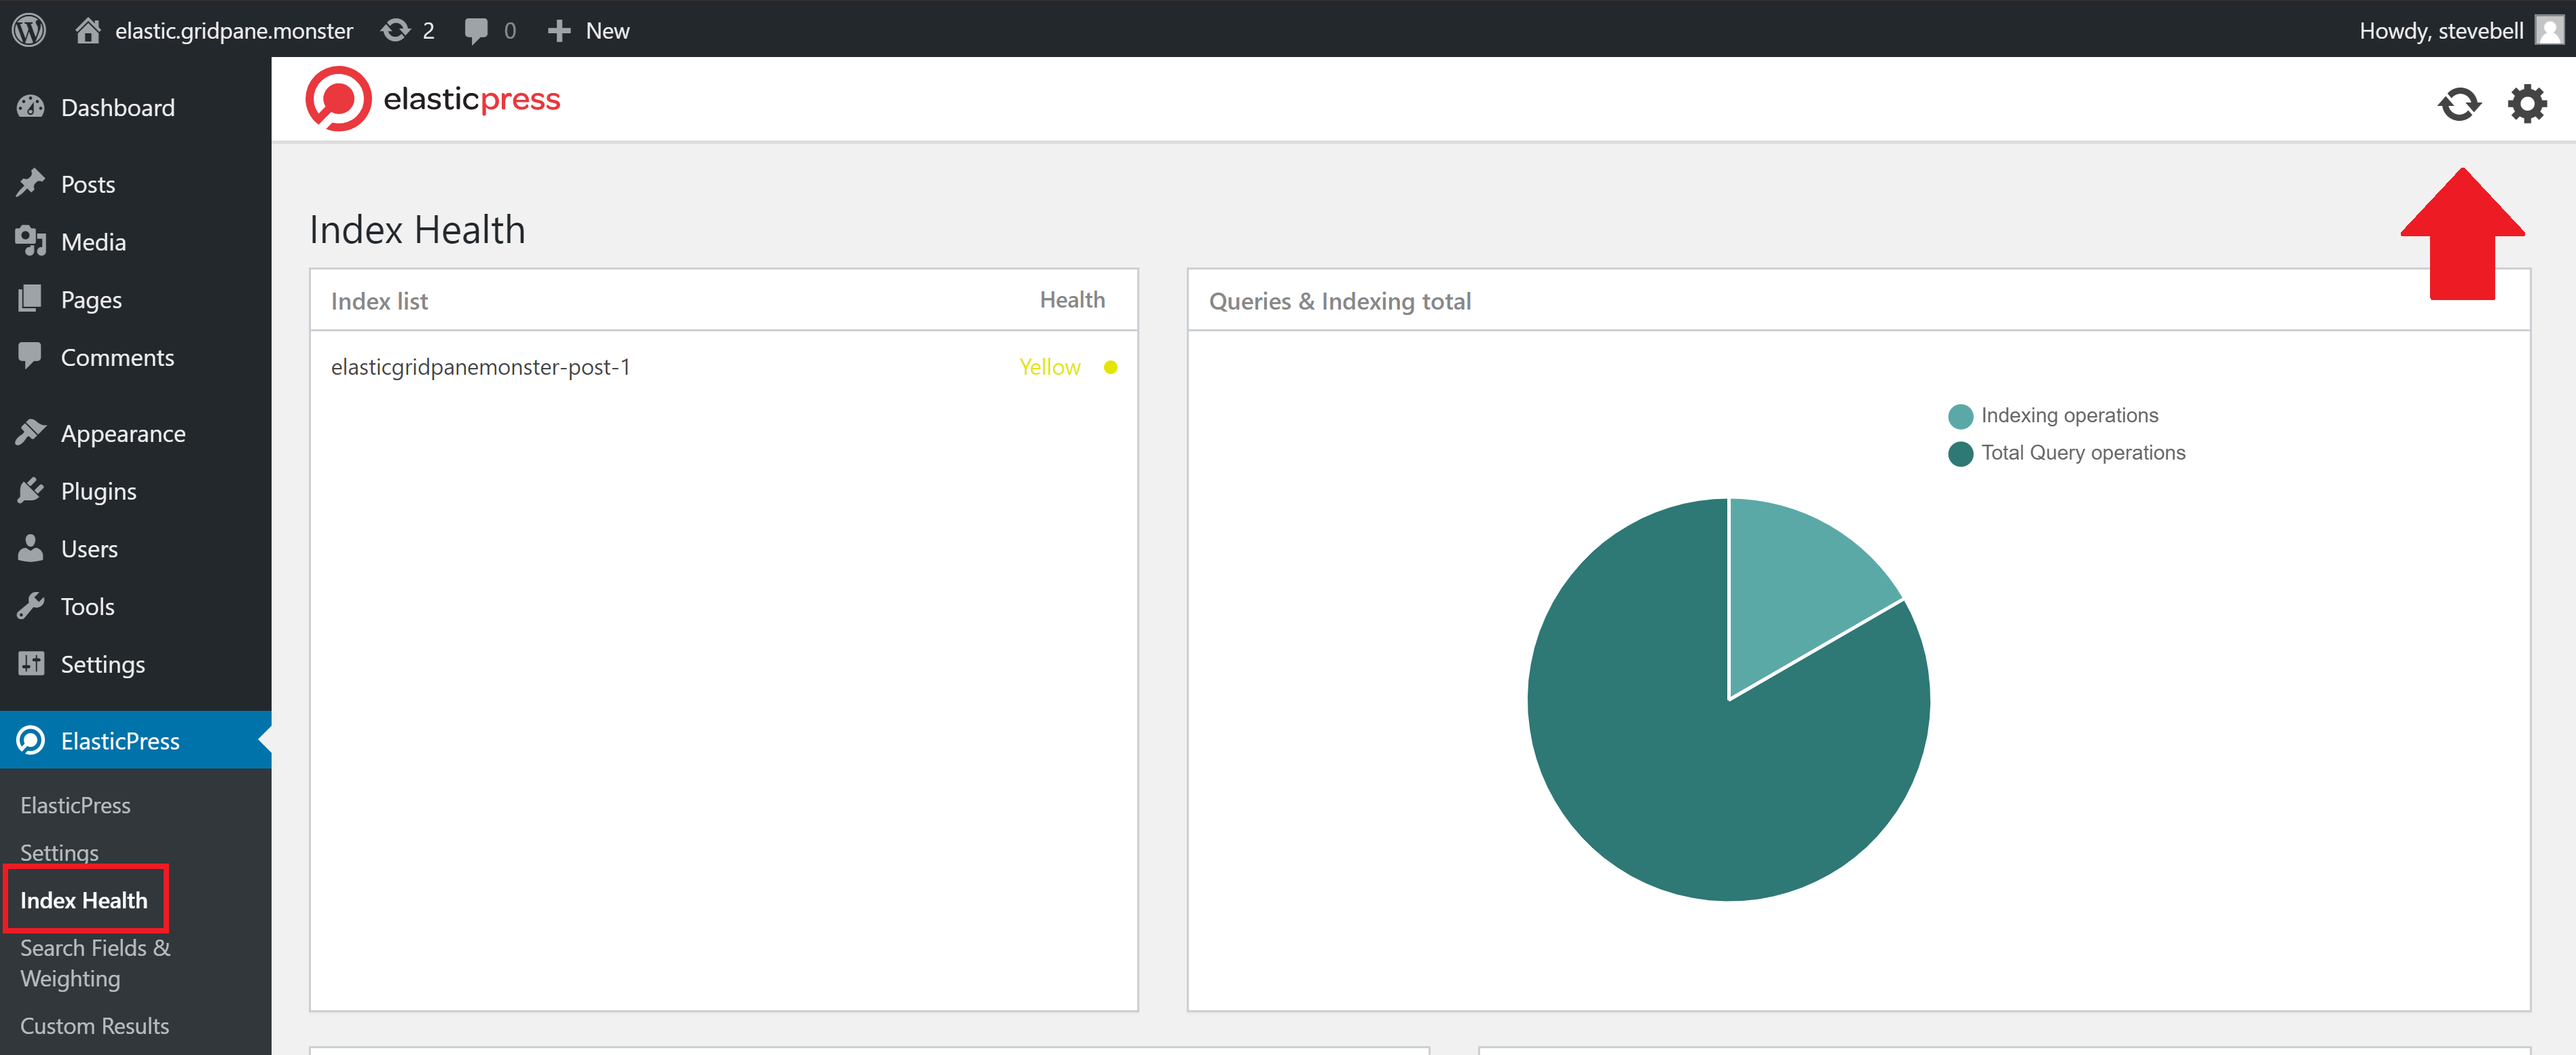
STEP 3. INDEX YOUR CONTENT
Now we’ve connected the plugin to the server we can index your website’s content. You should automatically be taken to the page where you can begin the process. Depending on the size of your database this can take some time.
Once complete, you may wish to check the “Index Health” page, and hit the refresh button in the top right-hand corner.
STEP 4. CUSTOMIZE YOUR SEARCH FEATURES
The ElasticPress plugin has a lot of customizable features that you can take advantage of to make your website’s search experience even better for your target audience.
Each section has a “learn more” dropdown with information about what each feature does.
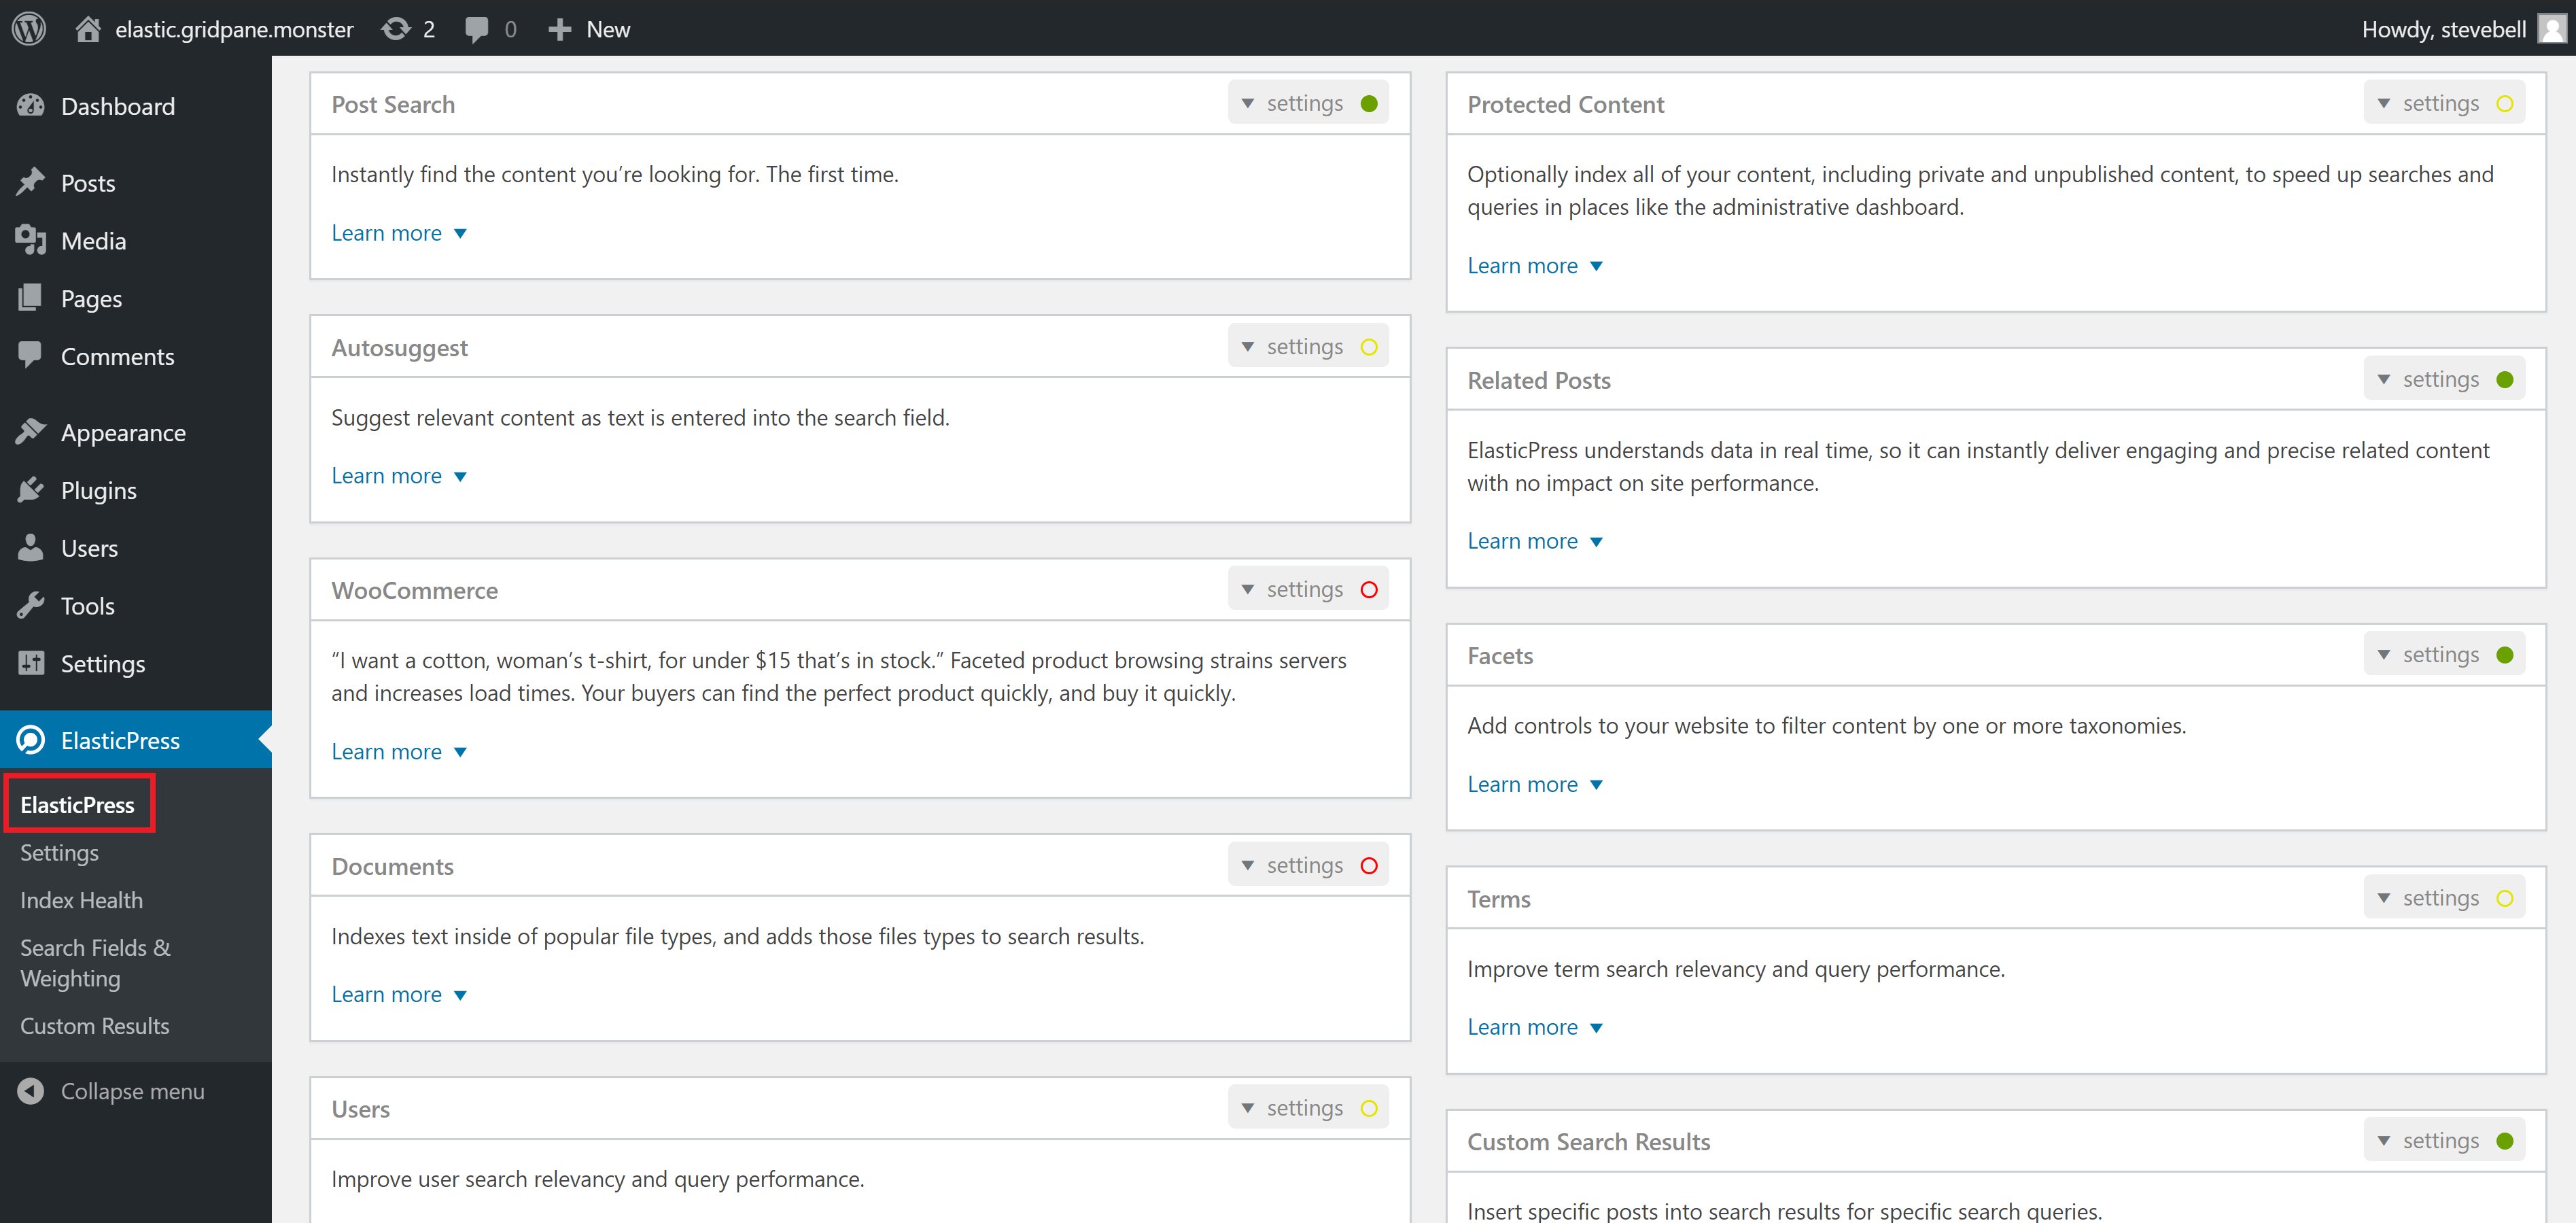
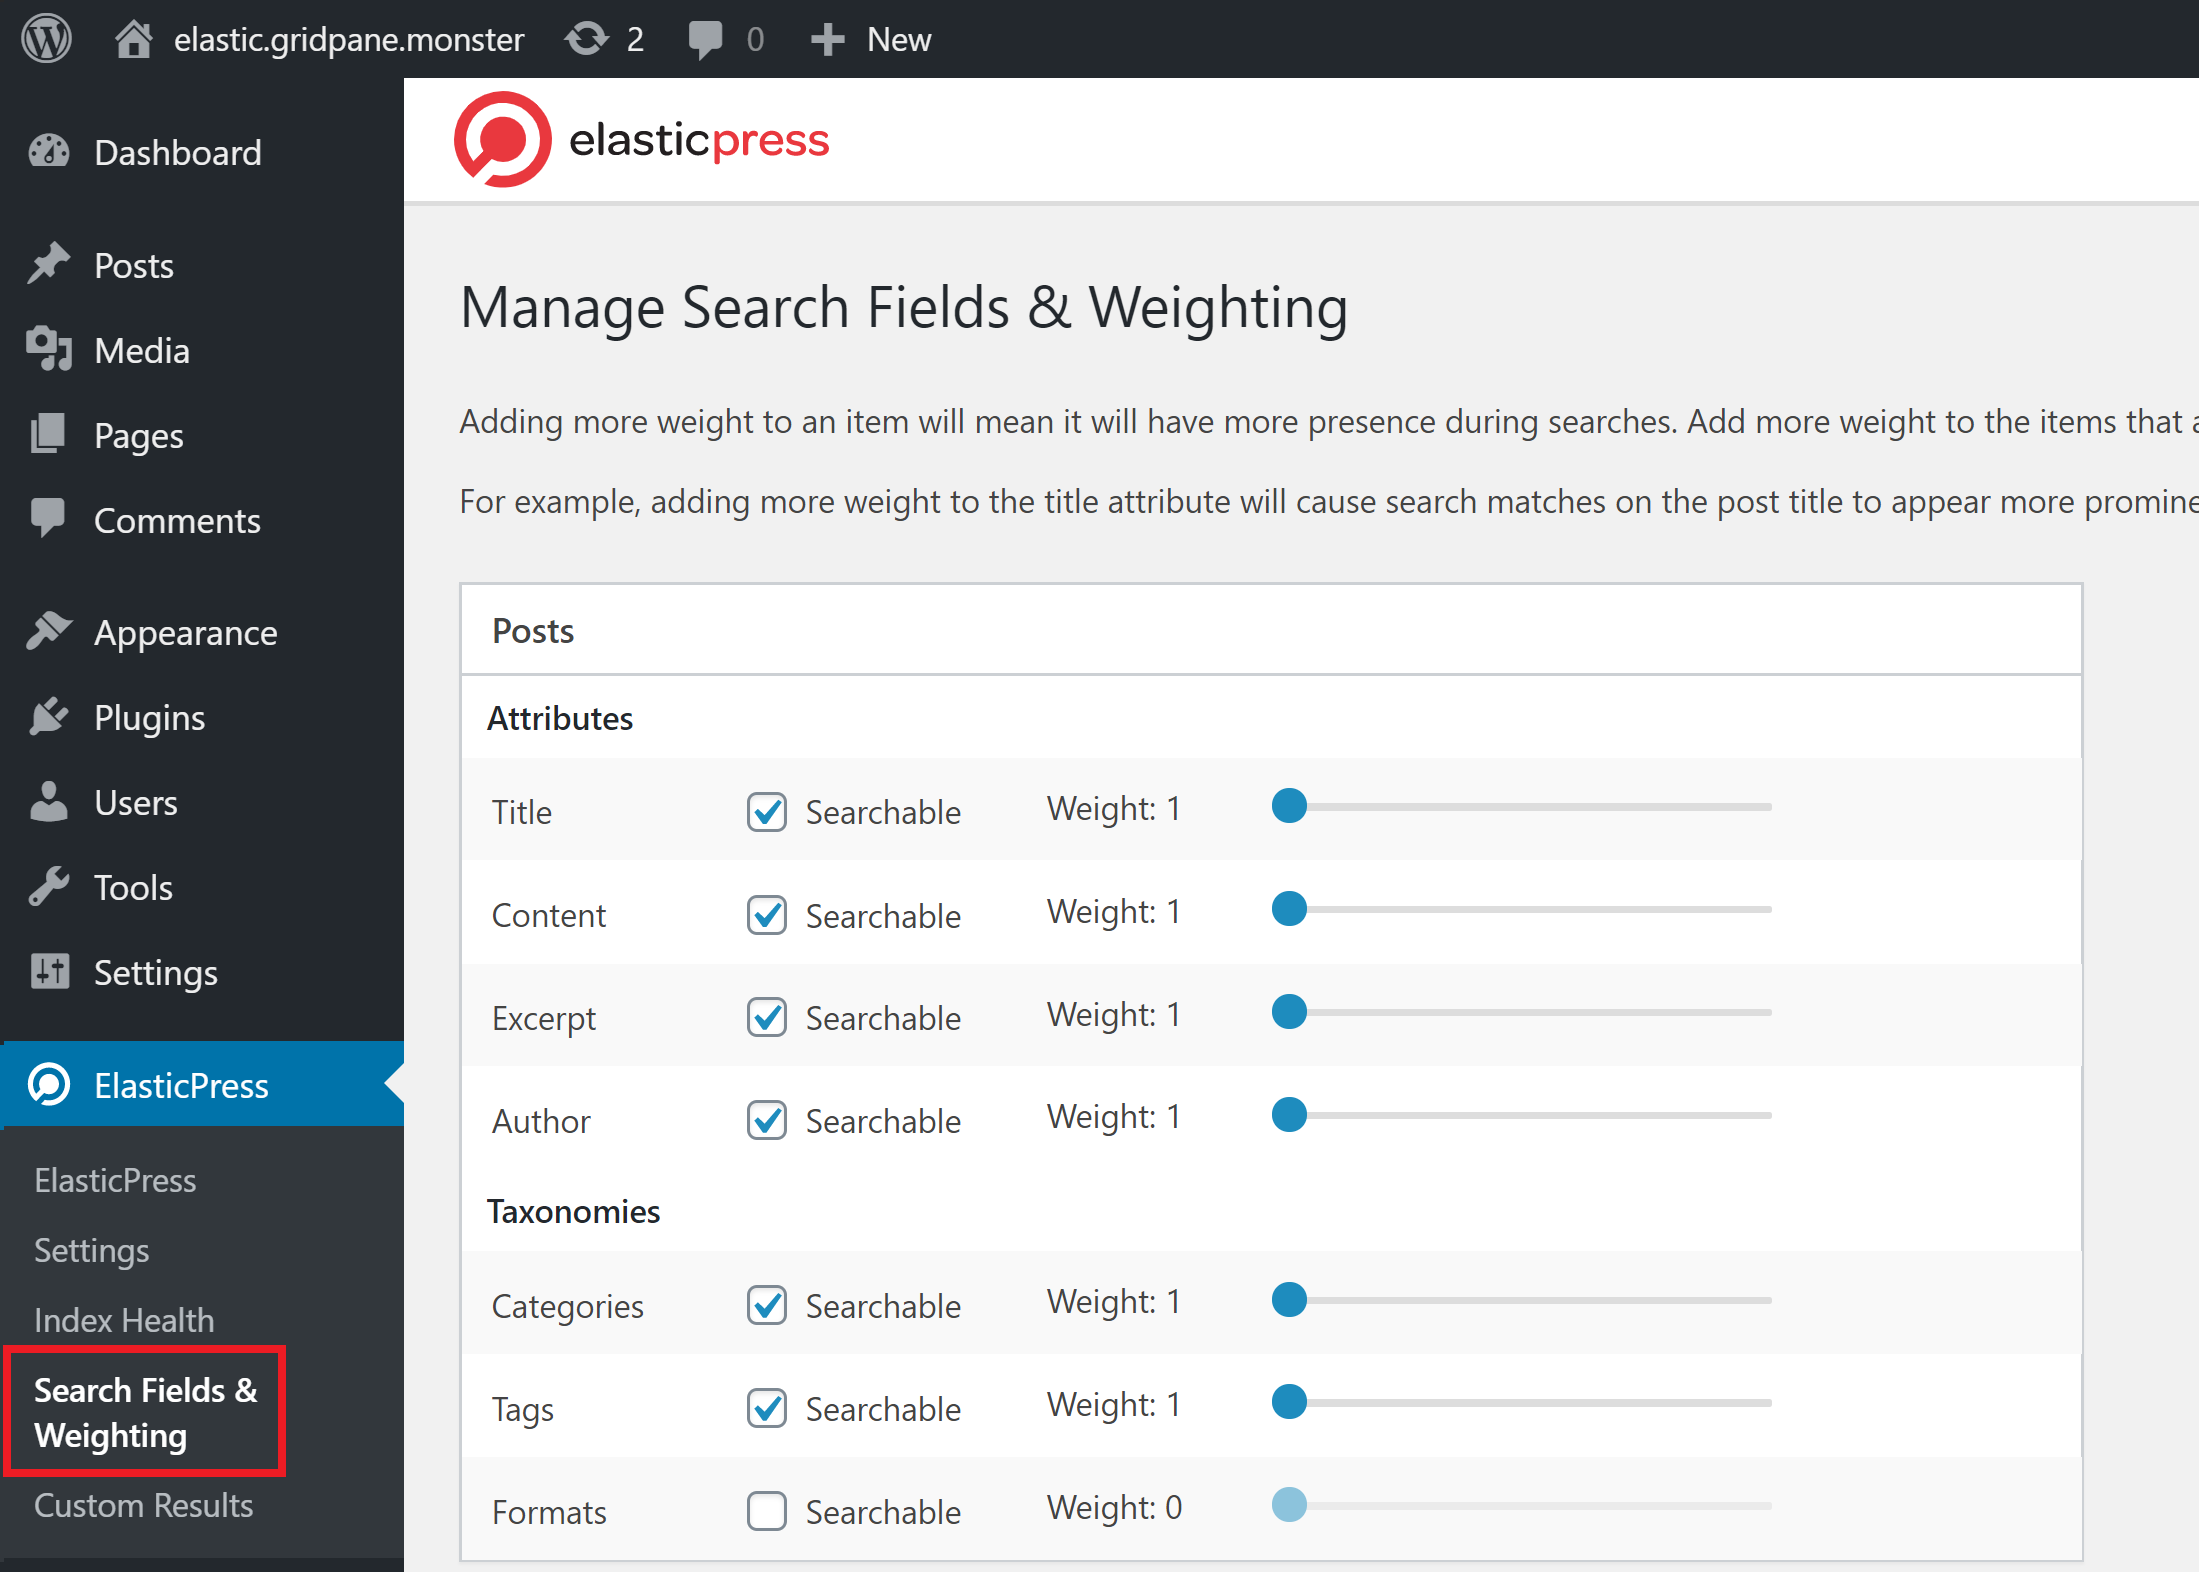
The plugin also has two additional settings pages. One is for managing search fields and “weighting”. Weighting means prioritizing specific results, for example, giving weight to page titles or excerpts, etc when a user performs a search.
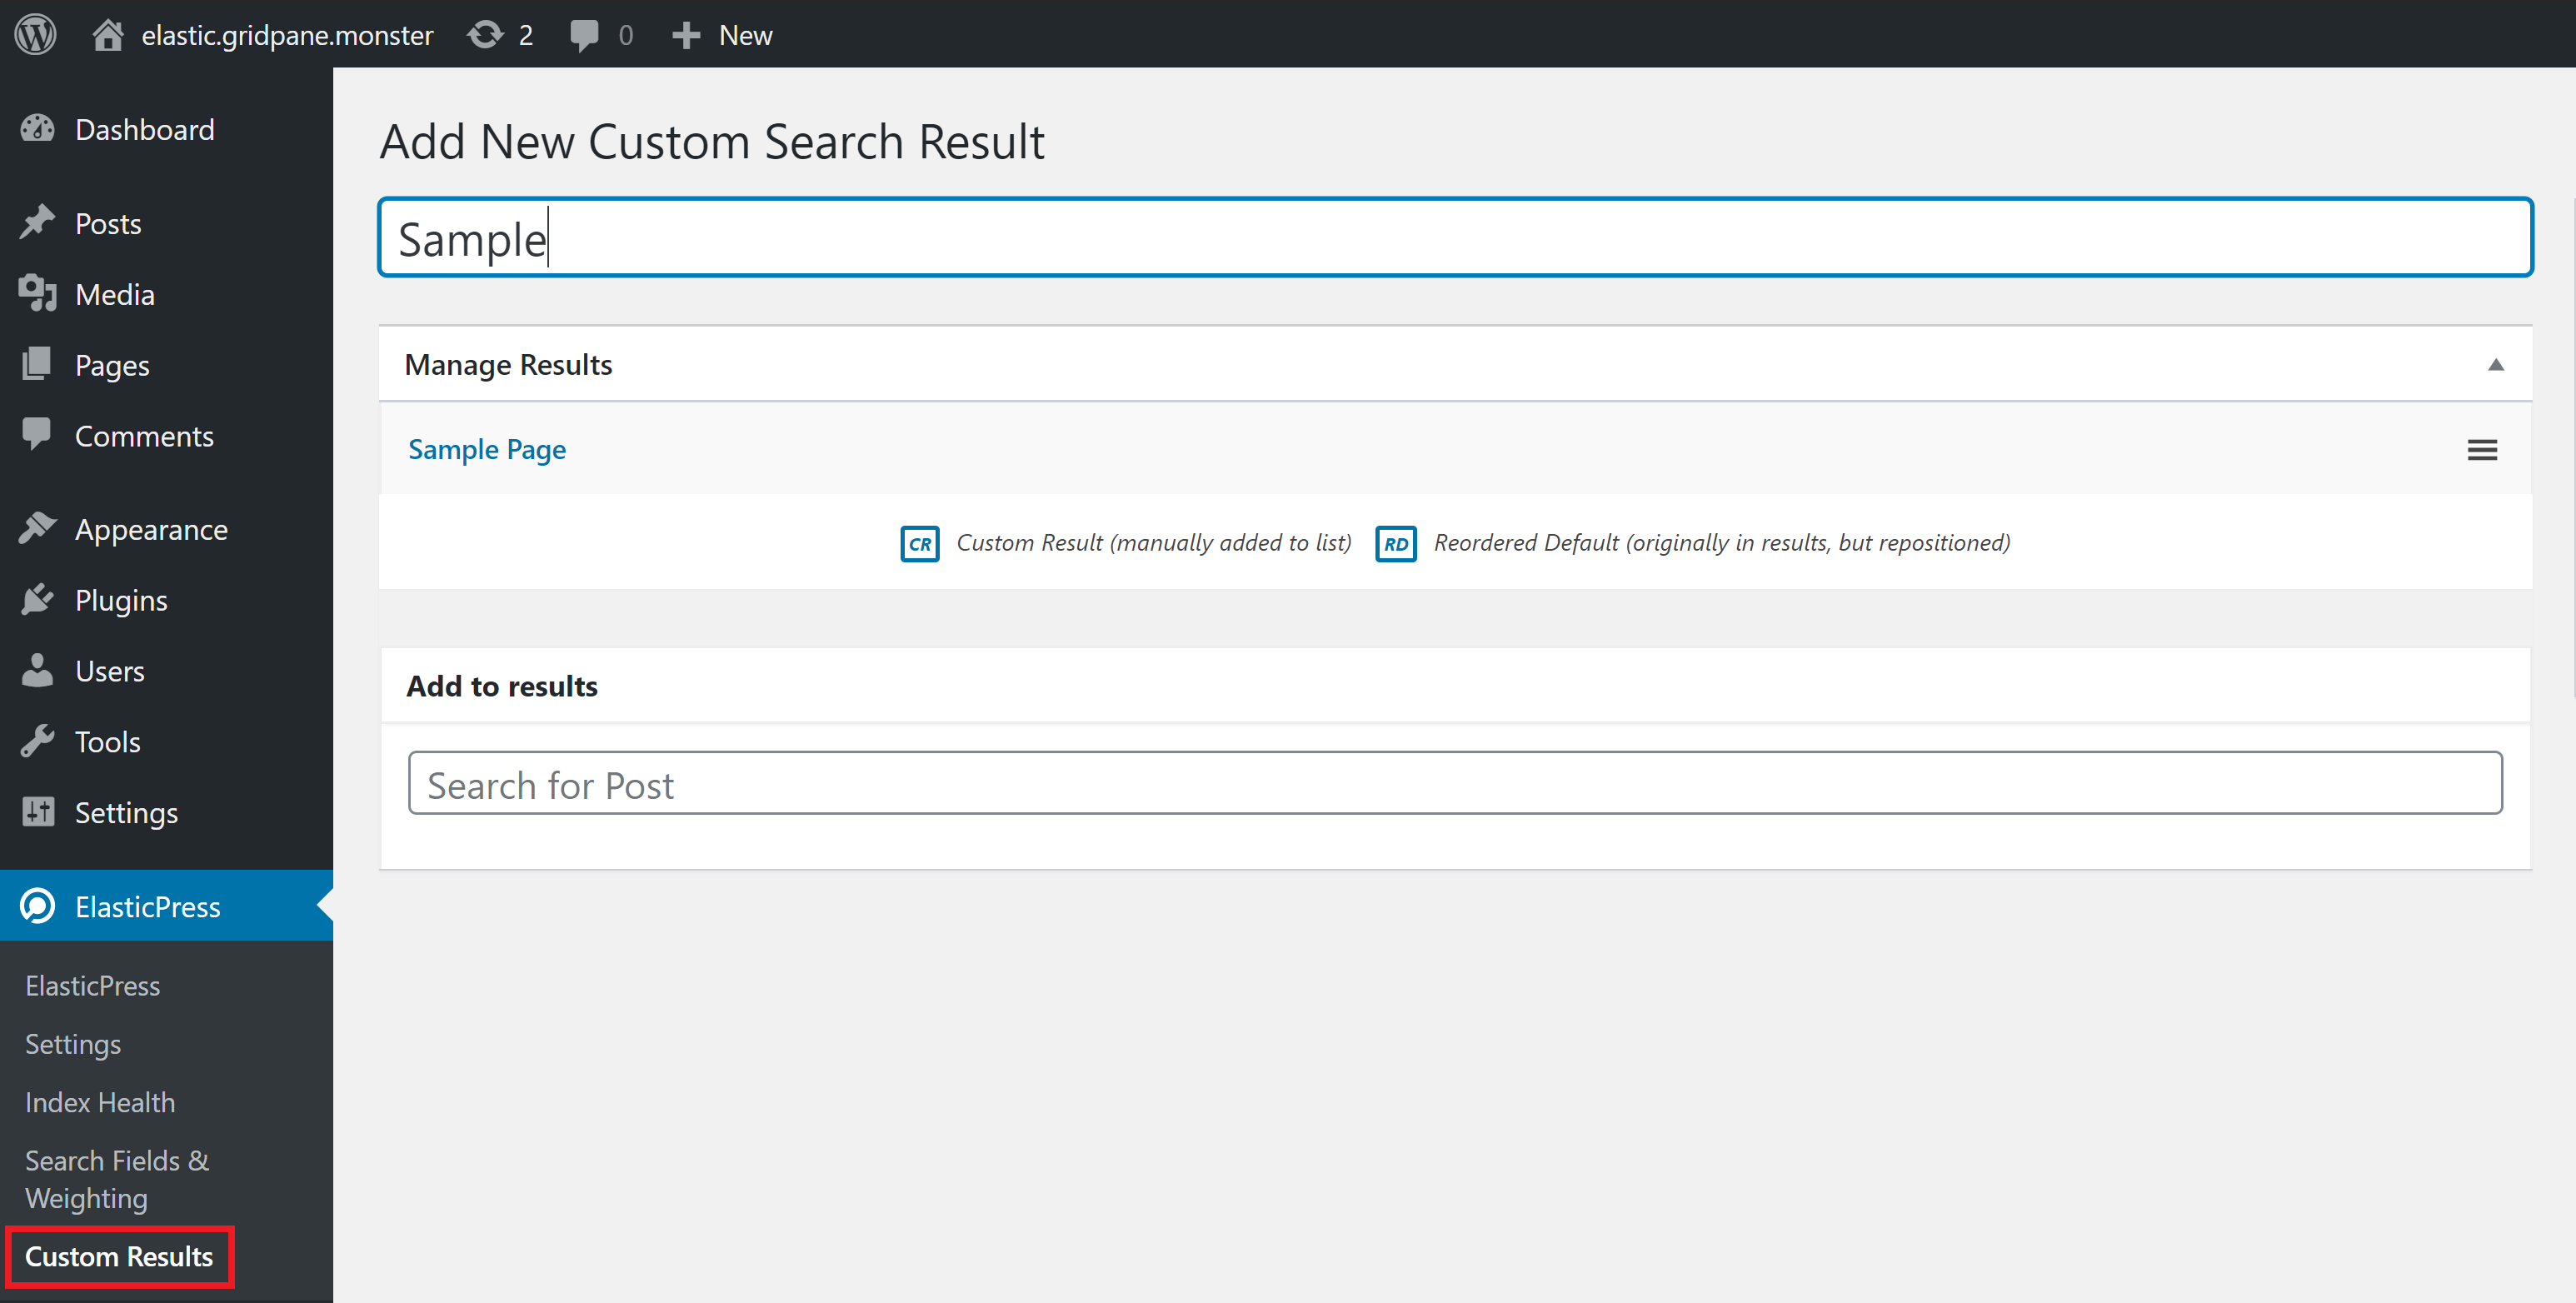
The other page is for creating custom search results.
Configure as needed 🙂
ElasticPress Autosuggest
ElasticPress 2.4 introduced autosuggest, which is a very cool feature that will automatically make suggestions for your existing content when users begin typing in your search fields. Many of the world’s largest websites use this functionality.

USING AUTOSUGGEST ON vCanopy
This is available on both Nginx and OpenLiteSpeed servers, but the setup and WordPress plugin settings are different for both.
To get started you’ll need to connect to your server – please see the following to get started:
Step 1. Generate your SSH Key
Step 2. Add your SSH Key to vCanopy (also see Add default SSH Keys)
Step 3. Connect to your server by SSH as Root user (we like and use Termius)
Enabling ElasticPress Autosuggest on Nginx
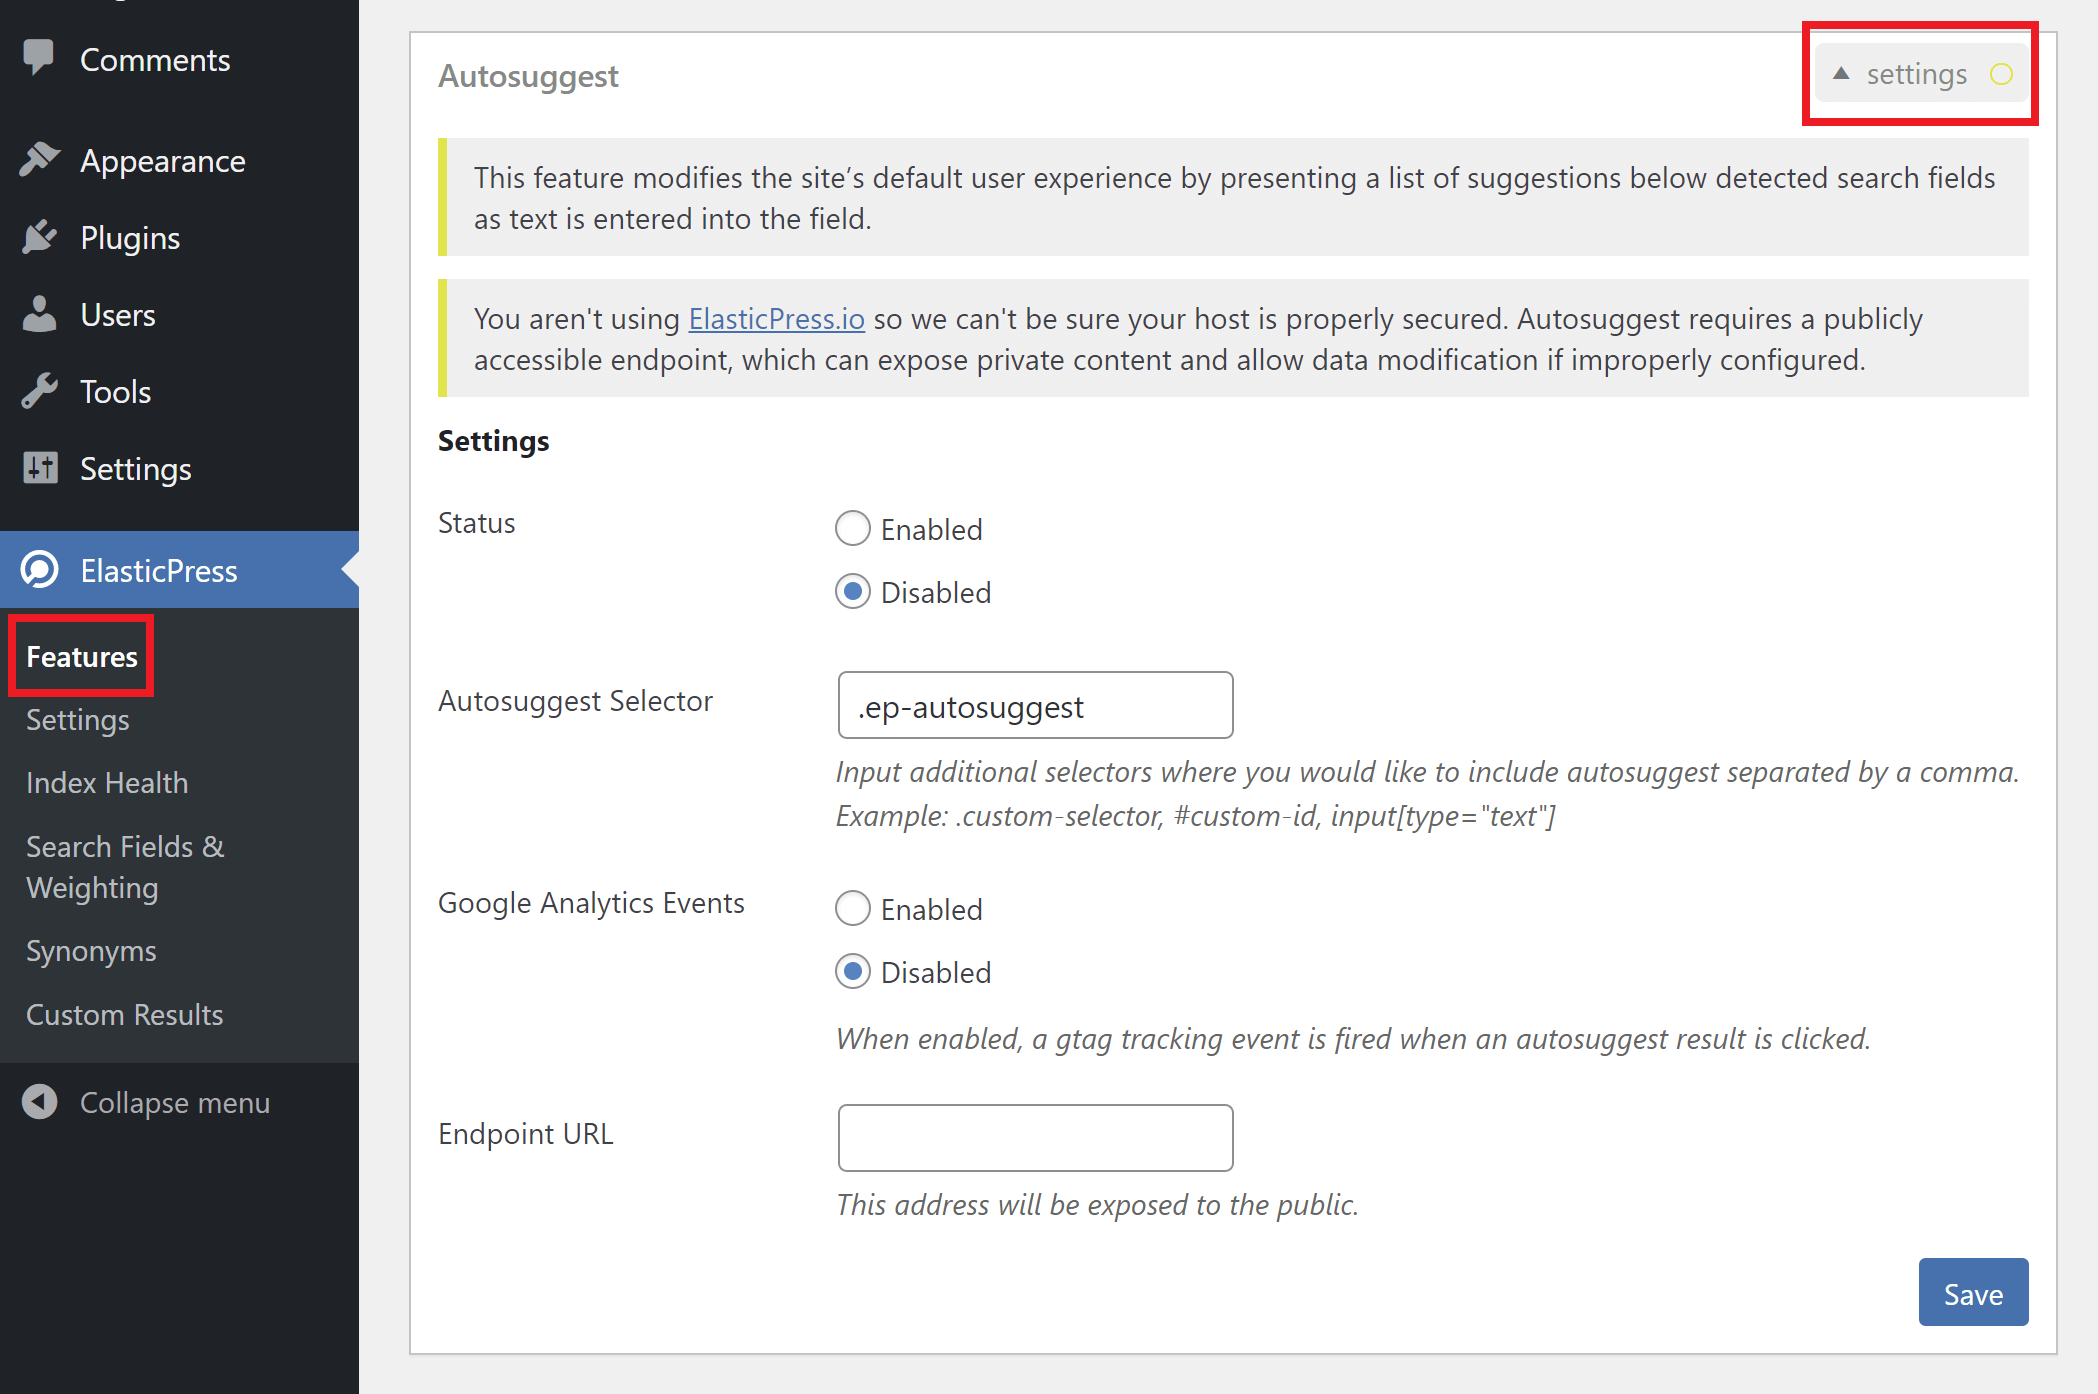
Inside Dashboard > ElasticPress > Features you’ll find the autosuggest feature.
Here you’ll see the following notice:
You aren’t using ElasticPress.io so we can’t be sure your host is properly secured. Autosuggest requires a publicly accessible endpoint, which can expose private content and allow data modification if improperly configured.
COMMUNITY CONTRIBUTION
The following was provided to us by one of the vCanopy community on how they implemented this on their website. You can also learn more here:
STEP 1. CREATE AN NGINX CONFIG
On your server, run the following command to create your ElasticPress auto-search config (switching out site.url for your URL):
nano /var/www/site.url/nginx/elasticautosearch-main-context.conf
This is the community code snippet, modified from the original snippet from 10up:
location /ep-autosuggest {
  # only allow POST requests
  limit_except POST {
    deny all;
  }

  # Perform our request
  rewrite ^/ep-autosuggest(.*) $1/_search break;
  proxy_set_header Host $host;

  # Use the URL of the server here
  proxy_pass http://localhost:9200;
  return 403;
}
Now save the file with CTRL+O followed by Enter. Exit nano with CTRL+X.
STEP 2. CHECK AND RELOAD NGINX
Check the Nginx configuration file with:
nginx -t
If no errors are returned, reload Nginx with:
gp ngx reload
STEP 3. ENABLE AUTOSUGGEST INSIDE OF WORDPRESS
Back inside your website, add “ep-autosuggest” as your Endpoint URL, and set the status to Enabled.
Note the message that says “Enabling this feature will require re-indexing your content.“
When you’re ready, click Save.
Enabling ElasticPress Autosuggest on OpenLiteSpeed (OLS)
Inside Dashboard > ElasticPress > Features you’ll find the autosuggest feature.
Here you’ll see the following notice:
You aren’t using ElasticPress.io so we can’t be sure your host is properly secured. Autosuggest requires a publicly accessible endpoint, which can expose private content and allow data modification if improperly configured.
Below we’ll look at how to safely configure this on OpenLiteSpeed.
STEP 1. EDIT YOUR WEBSITE’S BLOCKS.CONF
On OpenLiteSpeed we’ve created the blocks.conf include where you can add custom rule blocks. The contents of this file are added directly to your website’s vhconf once it’s regenerated.
Edit this file with:
nano /var/www/site.url/ols/blocks.conf
Add the following to your file, but edit line 10 and replace siteurl with your URL, removing the period. For example, for vCanopy.com this would be: context /vCanopycom-post-1/_search {.
extprocessor elastic {
  type                    proxy
  address                 localhost:9200
  maxConns                300
  initTimeout             60
  retryTimeout            60
  respBuffer              1
}

context /siteurl-post-1/_search {
  type                    proxy
  handler                 elastic
  addDefaultCharset       off
}
Now save the file with CTRL+O followed by Enter. Exit nano with CTRL+X.
STEP 2. ADD A REWRITE RULE
Next, we need to add a rewrite rule. Rule the following command, replacing site.url with your URL:
nano /var/www/site.url/ols/rewrites.conf
Add the following, again replacing “siteurl” with your URL without the period:
RewriteRule /siteurl-post-1(.*) http://elastic/$1 [P]
For example:
RewriteRule /vCanopycom-post-1(.*) http://elastic/$1 [P]
Now save the file with CTRL+O followed by Enter. Exit nano with CTRL+X.
STEP 3. REGENERATE YOUR WEBSITES VHCONF
Next, we need to regenerate your vhconf to add your updates with the following (replace site.url with your URL):
gpols site site.url
We’re now done with the server-side work.
STEP 4. CONFIGURE THE PLUGIN SETTINGS
In order for Autosuggest to work, the Endpoint URL box has to match the context path in step 1 but this time using the full URL, including the protocol:
https://site.url/siteurl-post-1/_search
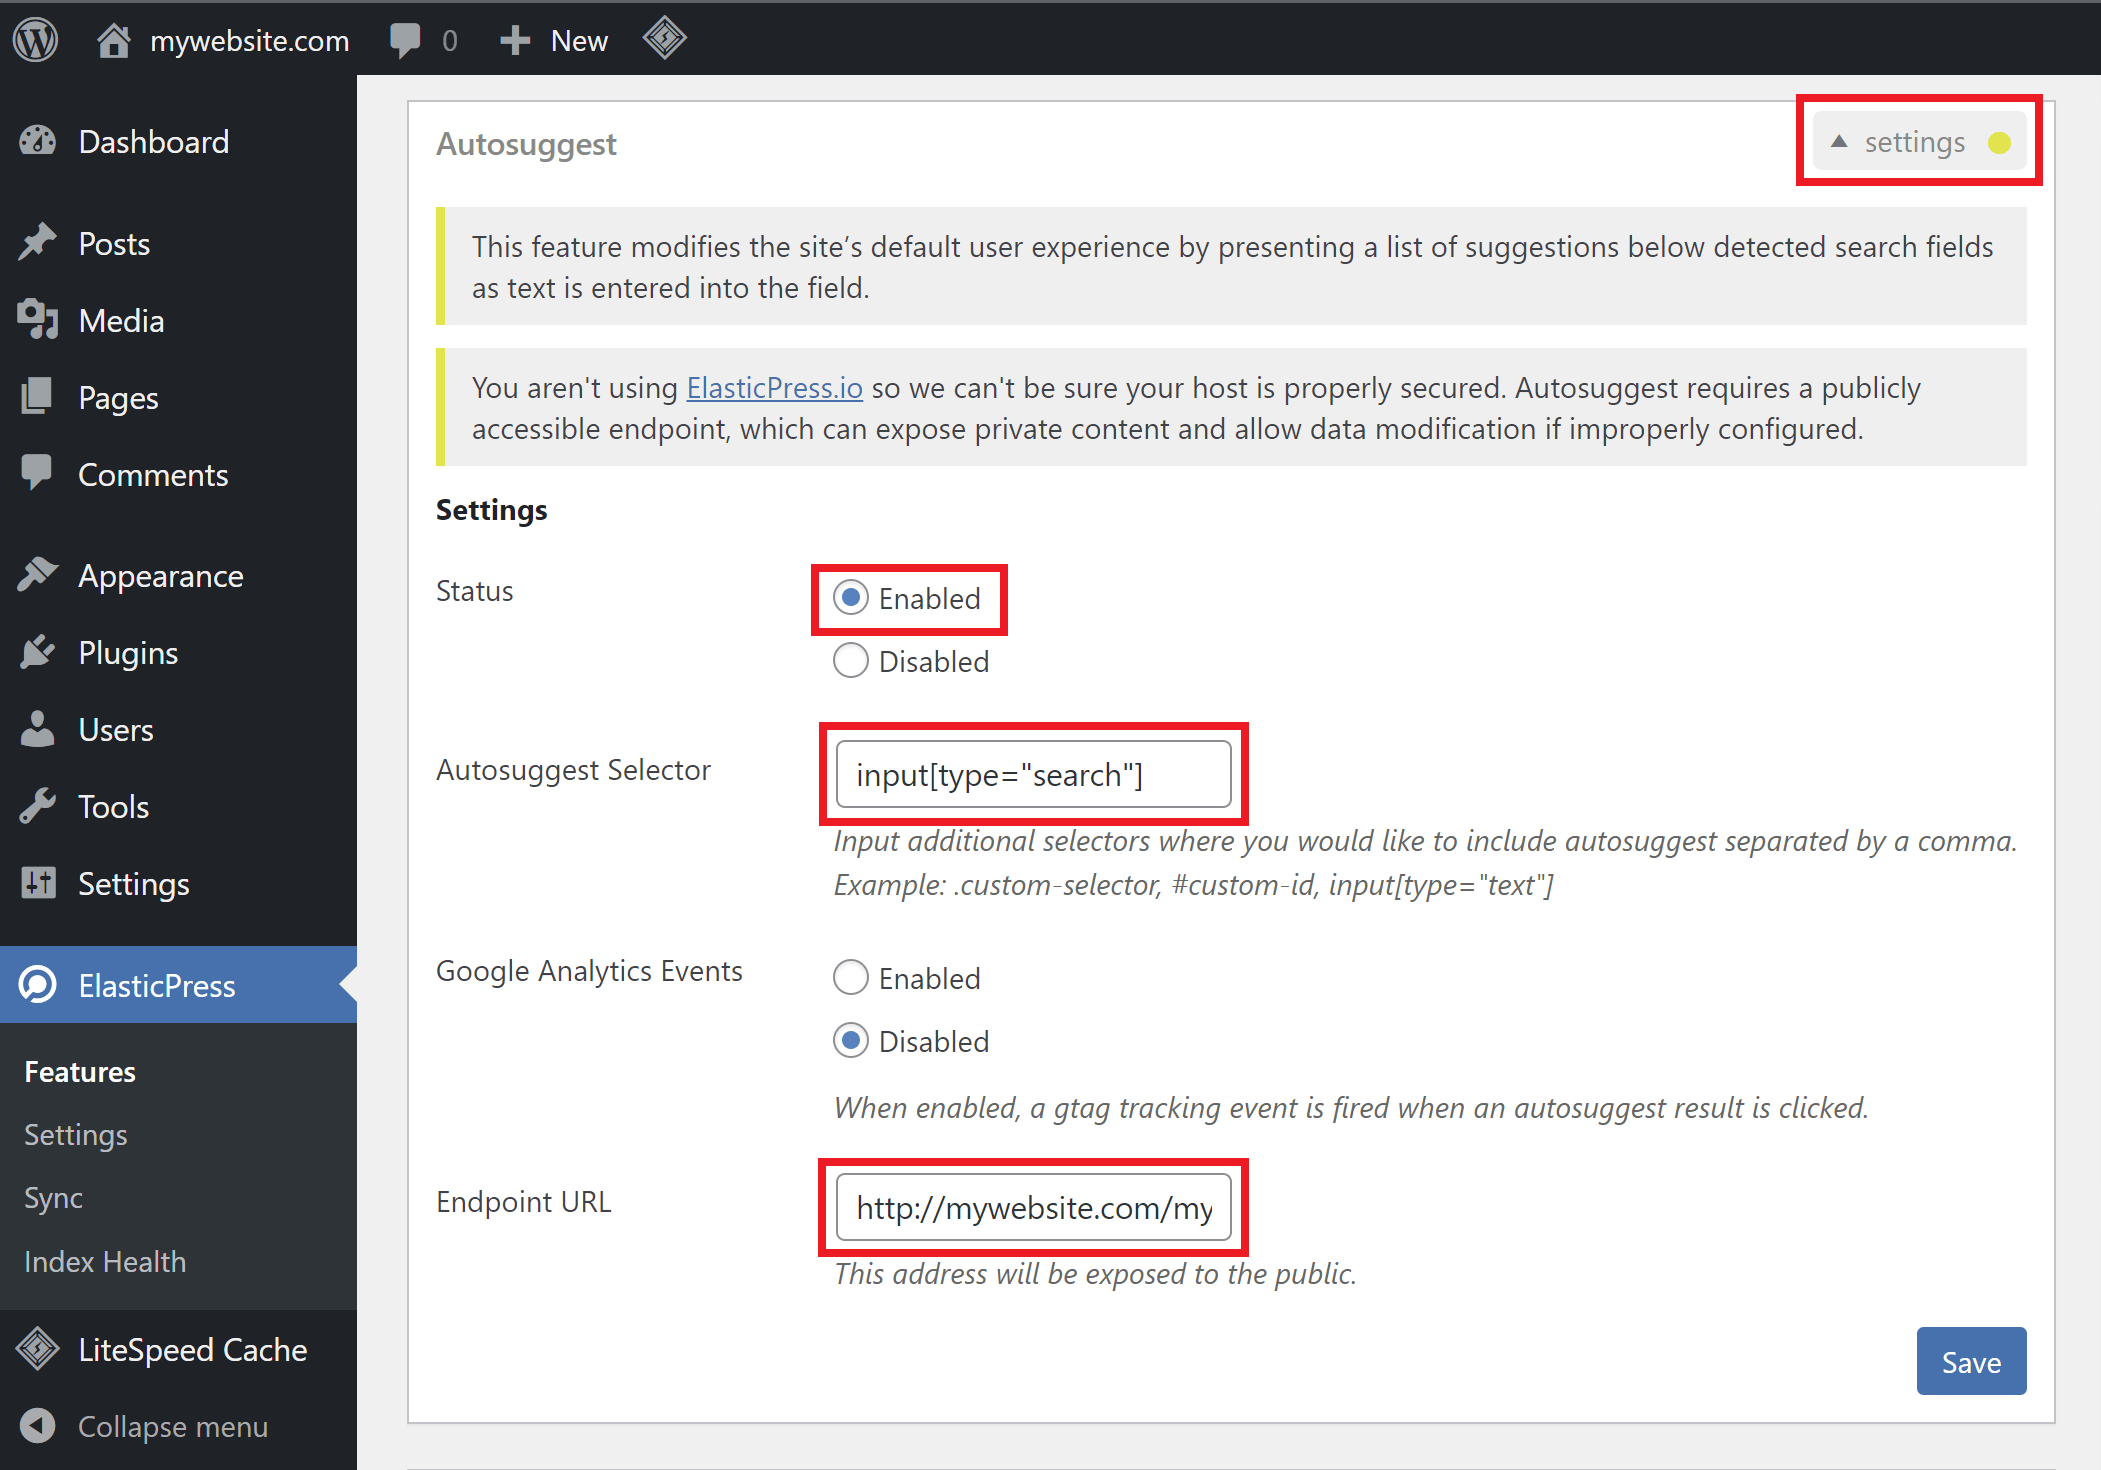
Here I’ve used input[type=”search”] as the Autosuggest selector since it’s the core WordPress search box.
If for some reason it’s not working then it’s likely that you need to update the autosuggest selector.