Verdant TCS

How to Increase the Disk Space of Your Google Cloud VM Instance With No Downtime

4 min read

If you have a server with Google and need to increase the amount of disk space, the process is a little more involved than with most other providers where storage is included as a part of the price plan. 

Nothing to worry about though and this guide will walk you through to not only increase your disk space but do it with zero downtime.

The commands in Part 3 and Part 4 will also work for similar providers where you can resize disk space independently of increasing your server size as a whole.

COMMAND LINE NOTICE

This process will require to you SSH into your server and run a few commands and assign your newly created disk space so that your server can begin to utilize it. Please see the guides below to get started. We'll be connecting to the server in Part 3.

Part 1. Create a Snapshot

Before resizing we highly recommend you take a snapshot (backup) of your VM instance, and also ensure you have backups in place for all of your websites. While it’s extremely unlikely that anything will go wrong, it’s always better to err on the side of caution, and extra backups never hurt anyone.

A snapshot will allow you to create a new VM instance that contains everything currently stored on your server. 

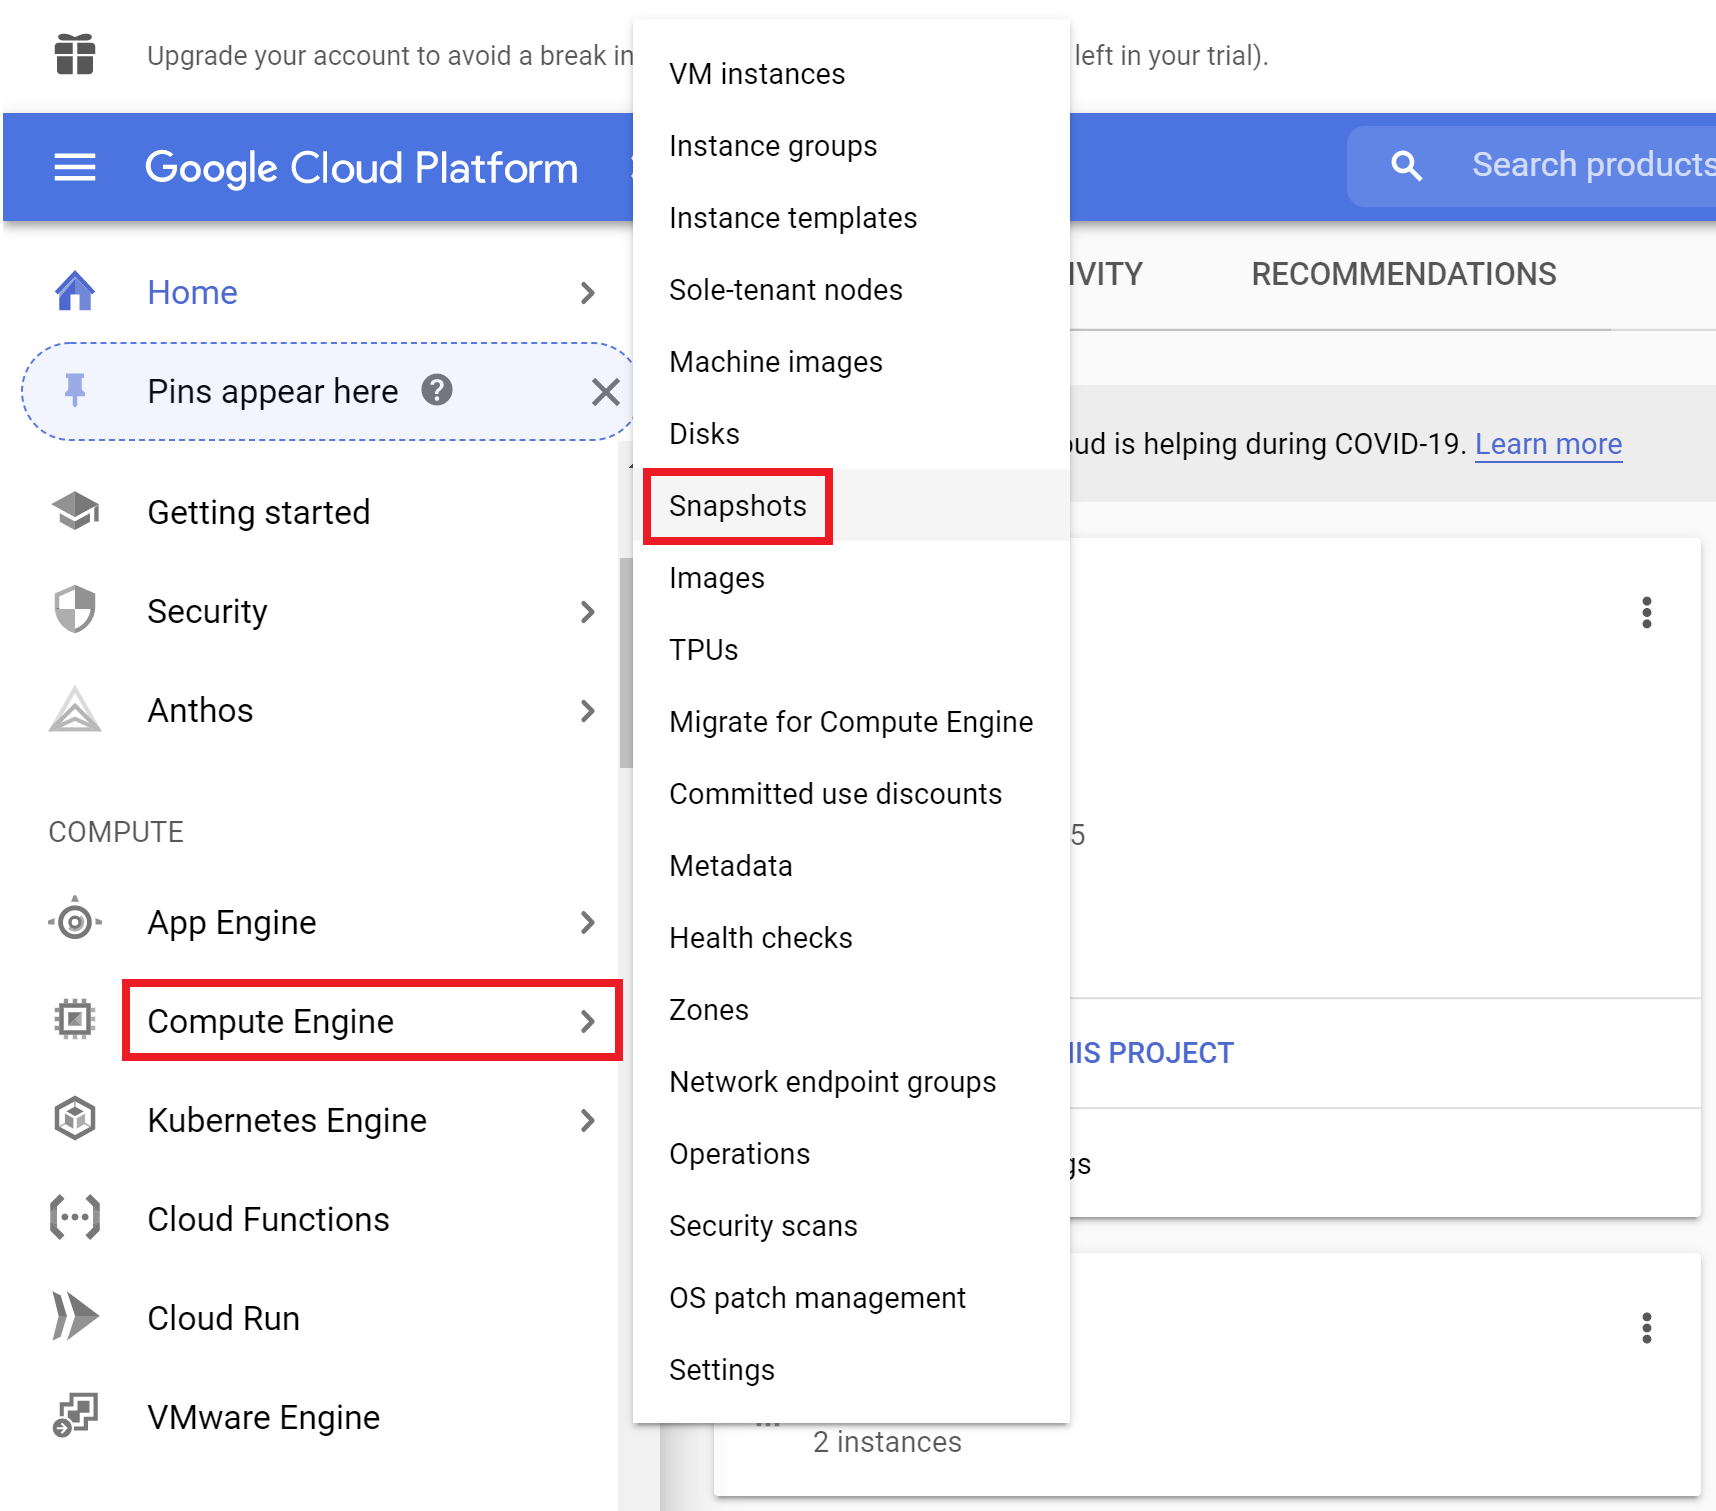
STEP 1. LOGIN TO YOUR GOOGLE CLOUD CONSOLE

Inside Google Cloud Console navigate to Compute Engine -> Snapshots.  

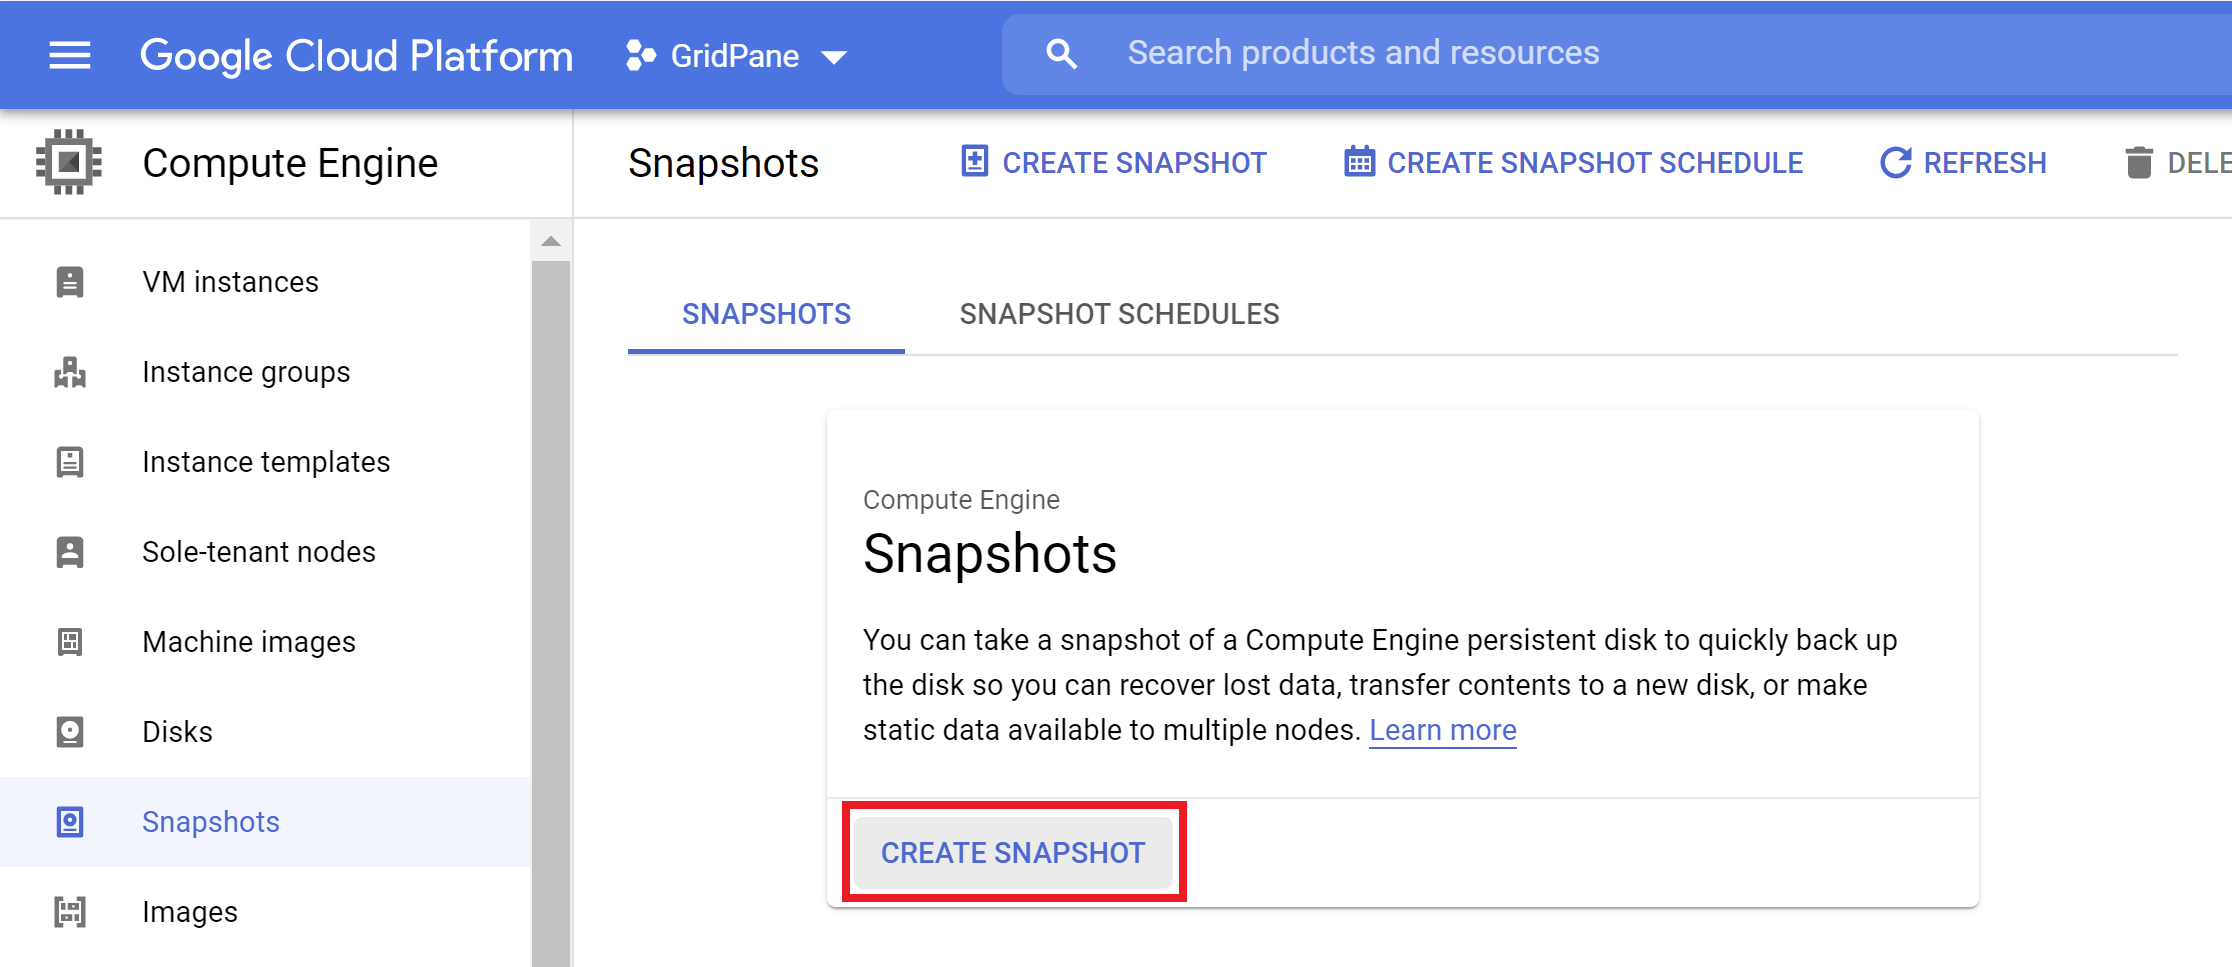
Next, click “Create Snapshot“.

Now you need to: –

  • Give your snapshot an appropriate name that is easy for you to identify
  • Enter a description
  • Select your server from the Source Disk dropdown
  • Select the region (optional)


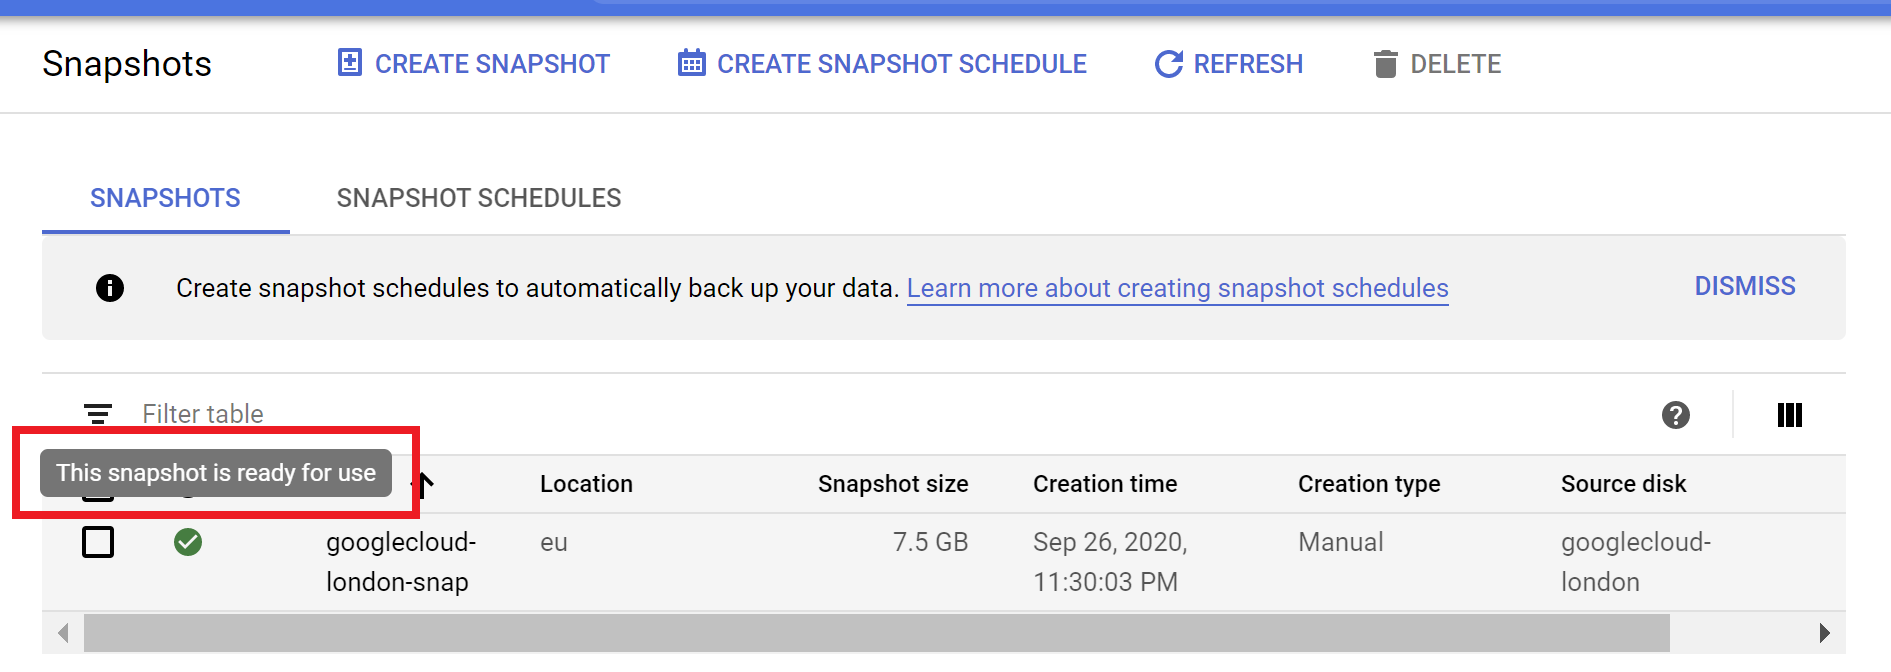
This is what my Snapshot looks like:

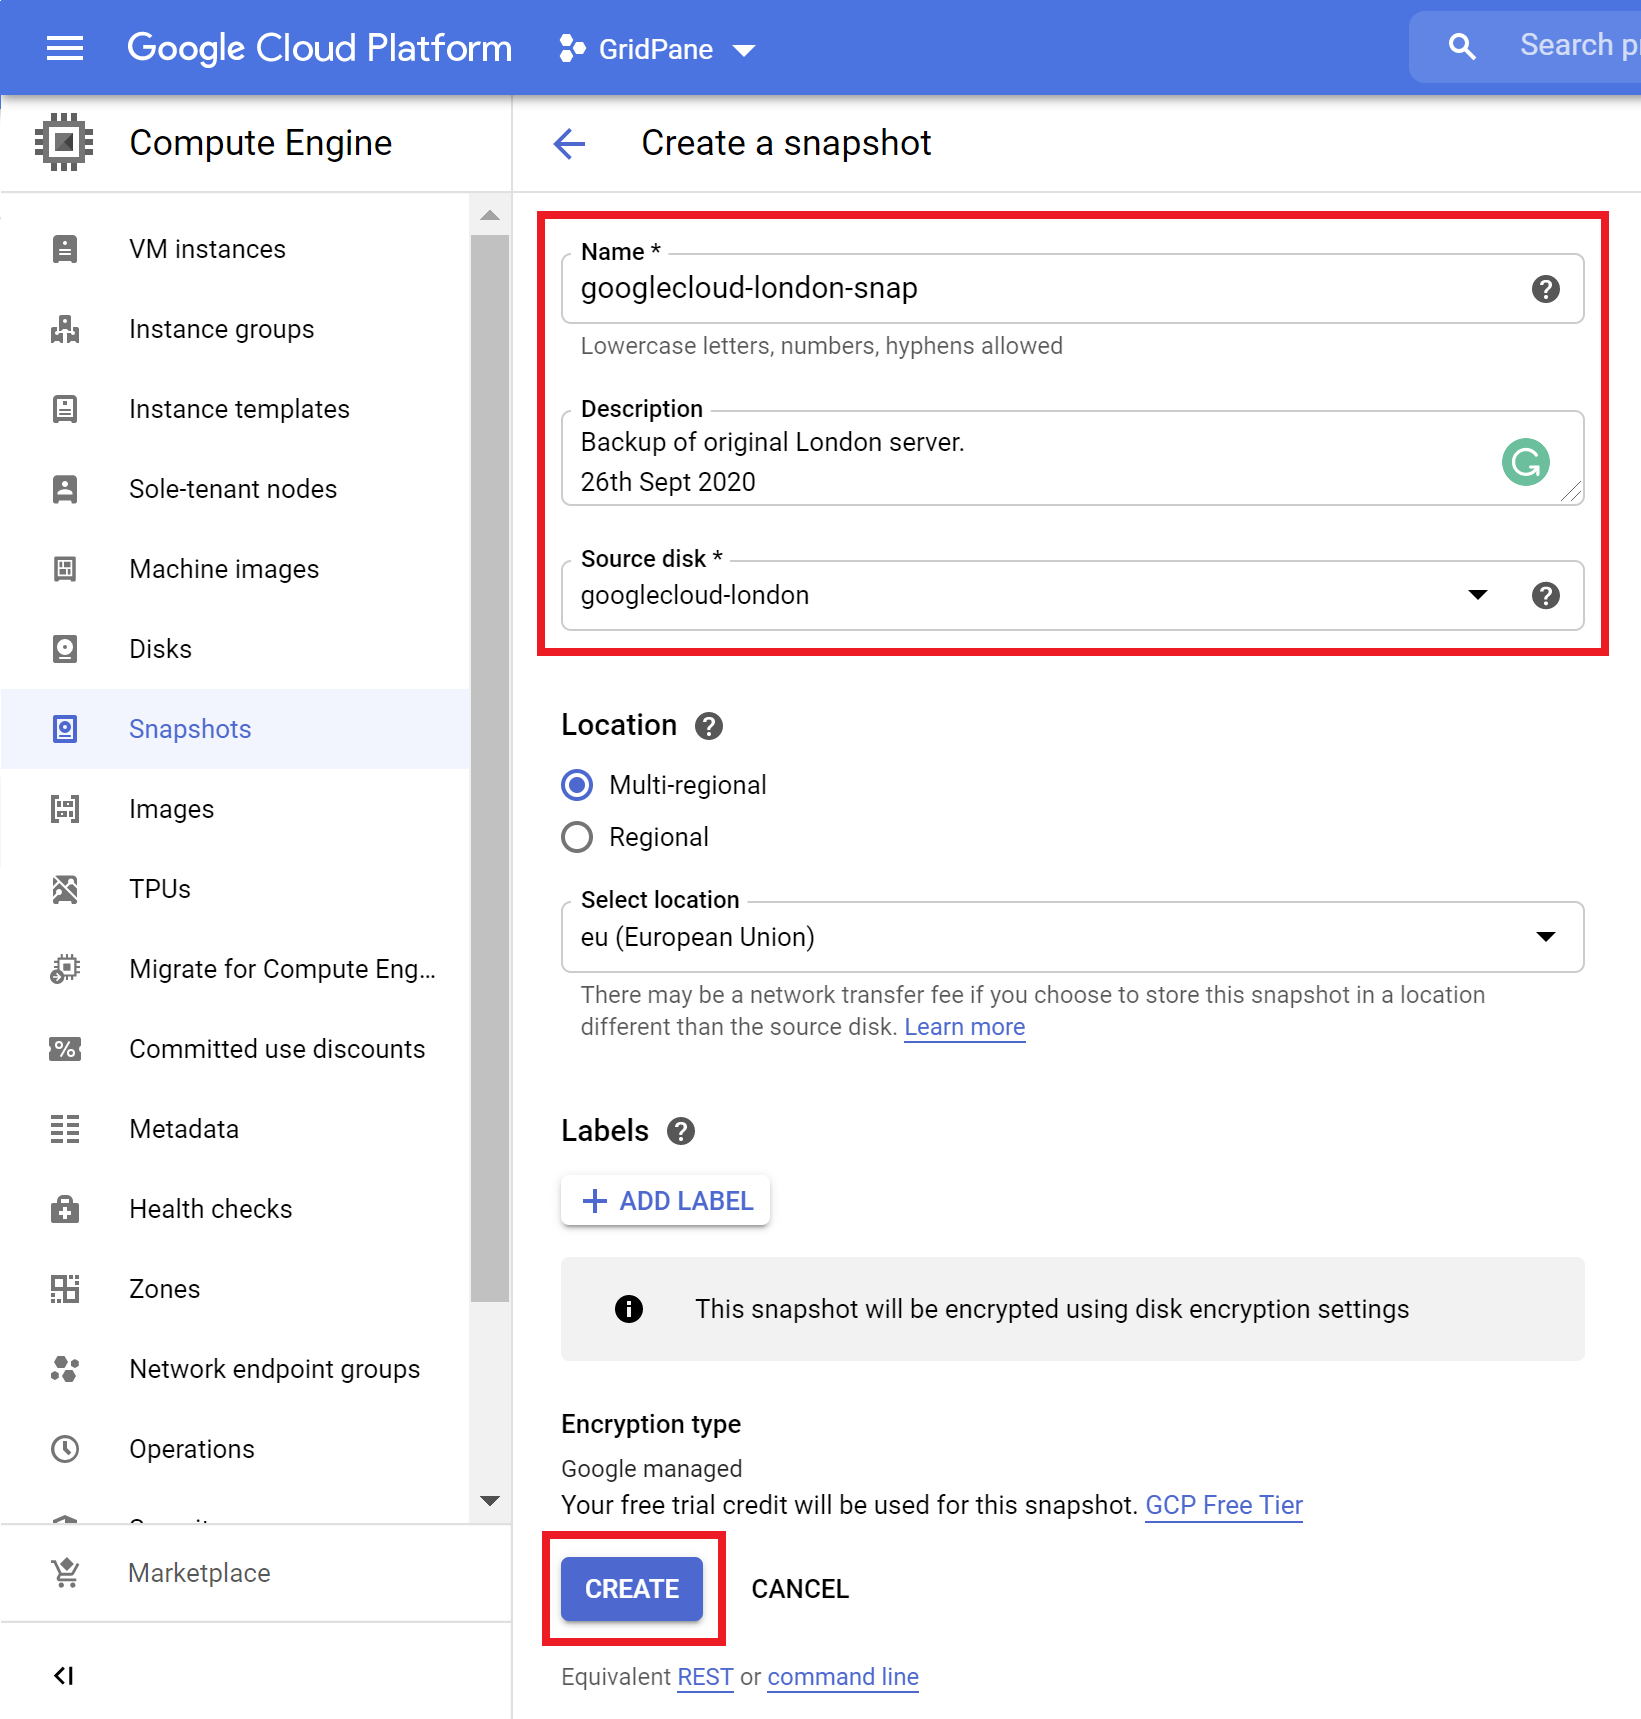
Once you’ve confirmed all the above details are correct hit the “Create” button. 

Proceed to Part 2 once your Snapshot has finished. Depending on how big your server is, this may take some time.
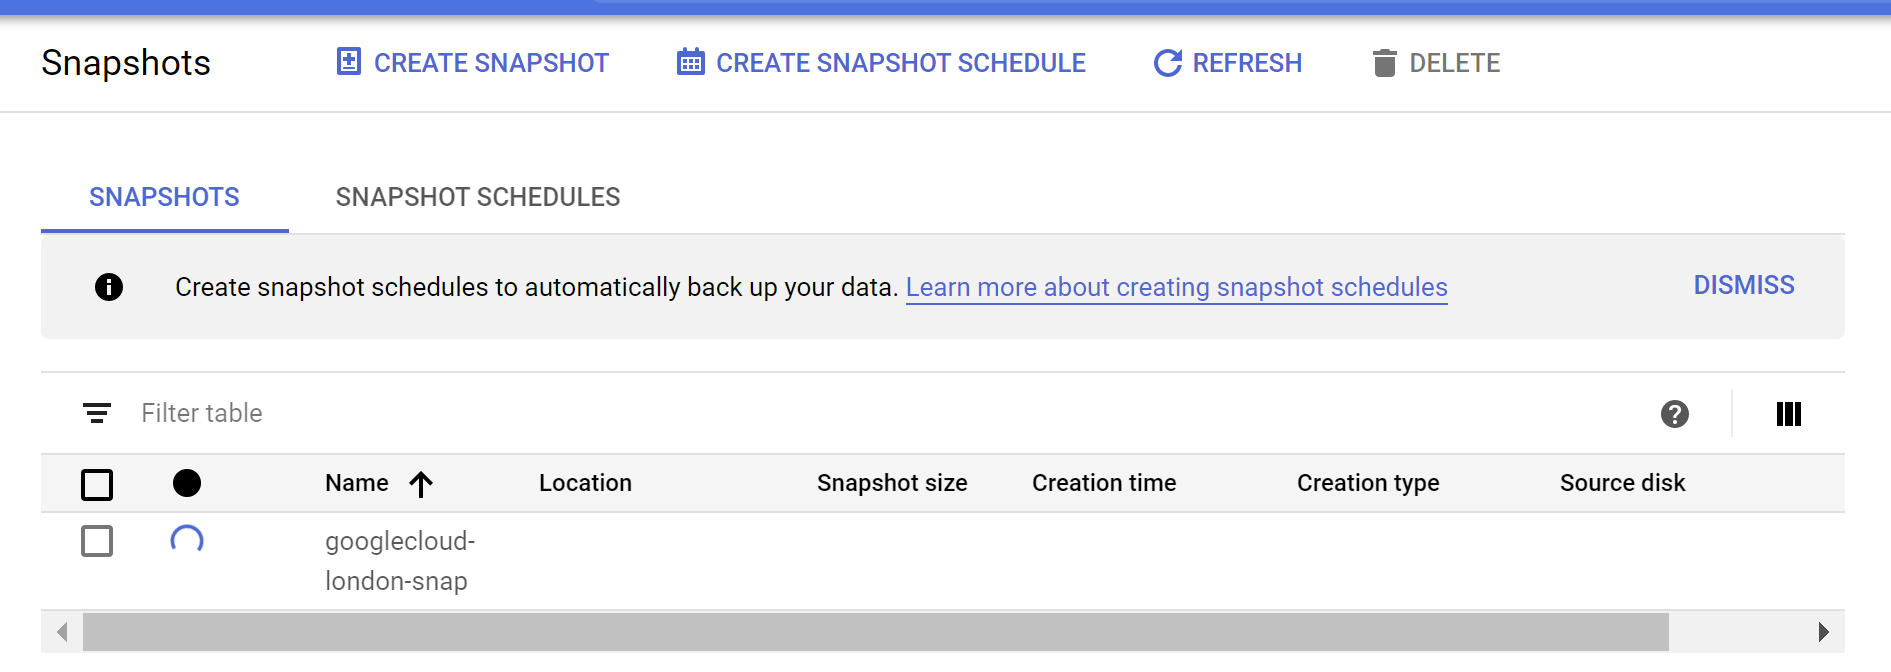
Completed:

Step 2. Increase Your Disk Space

Now that you have a Snapshot, navigate to Compute -> VM Instances.

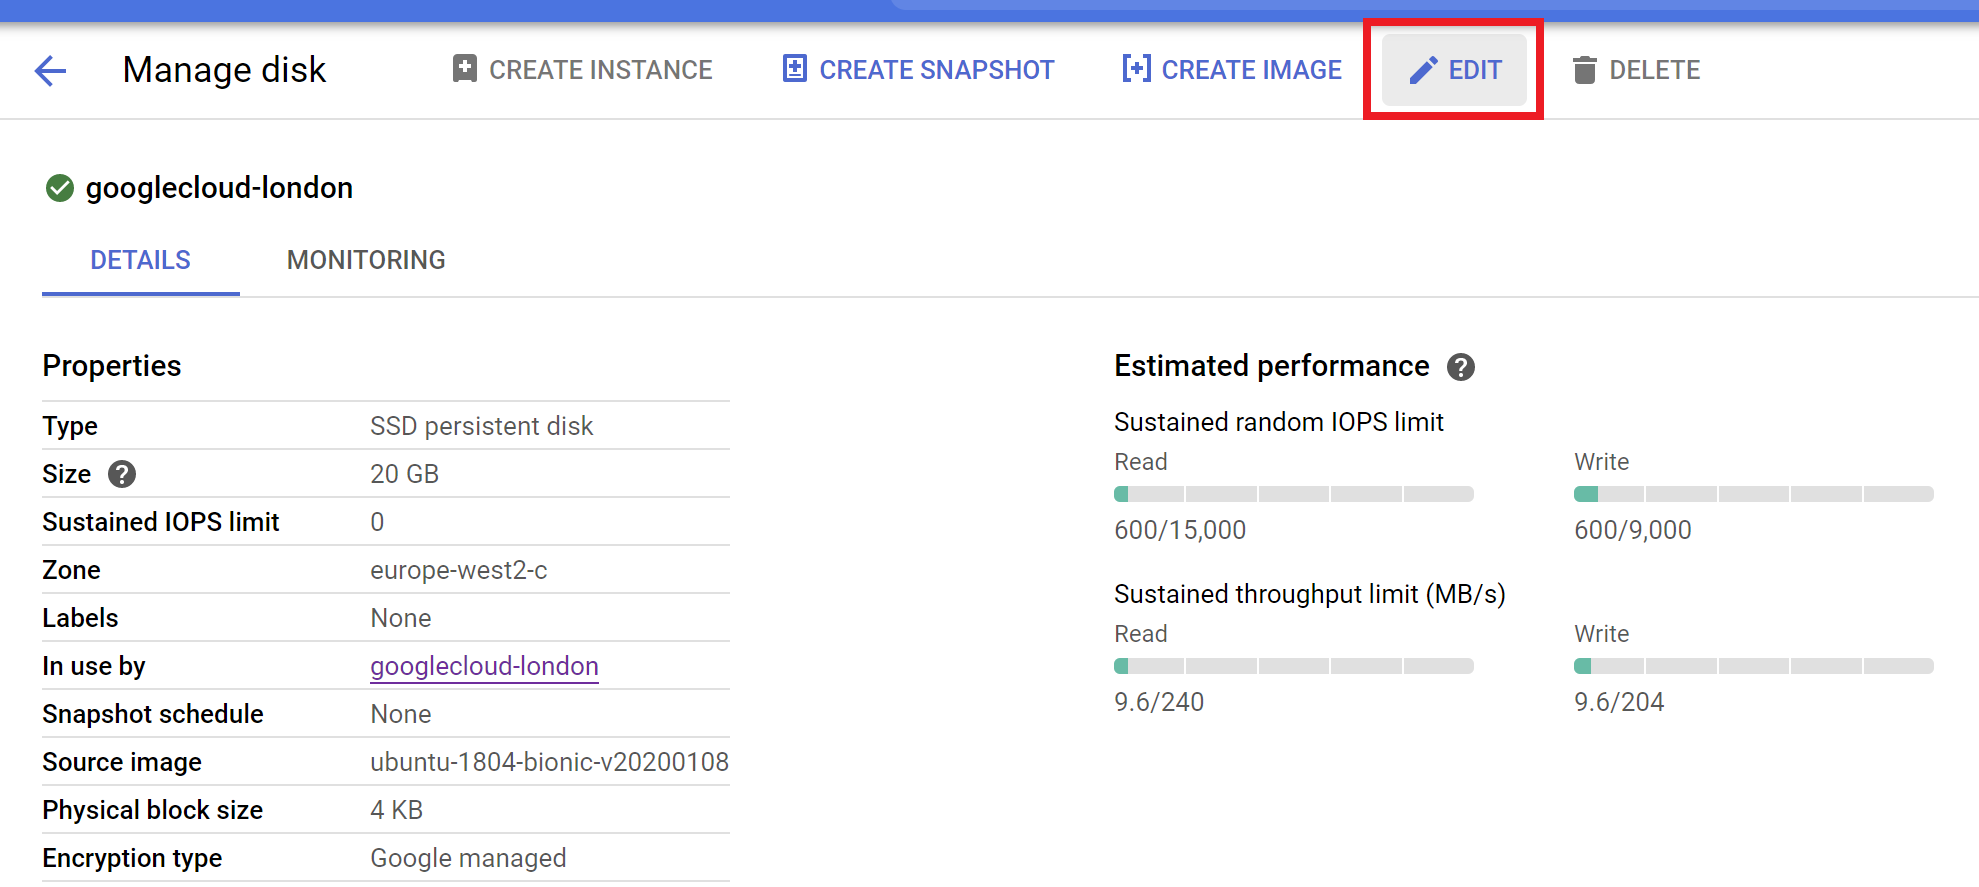
Click the name of your server and then scroll down to the “Boot disk” section and click on the disk name:

On the following page, click “Edit” in the menu at the top:

You now edit your disk space size. I’m resizing mine to 50GB. You can enter whatever is appropriate for you.

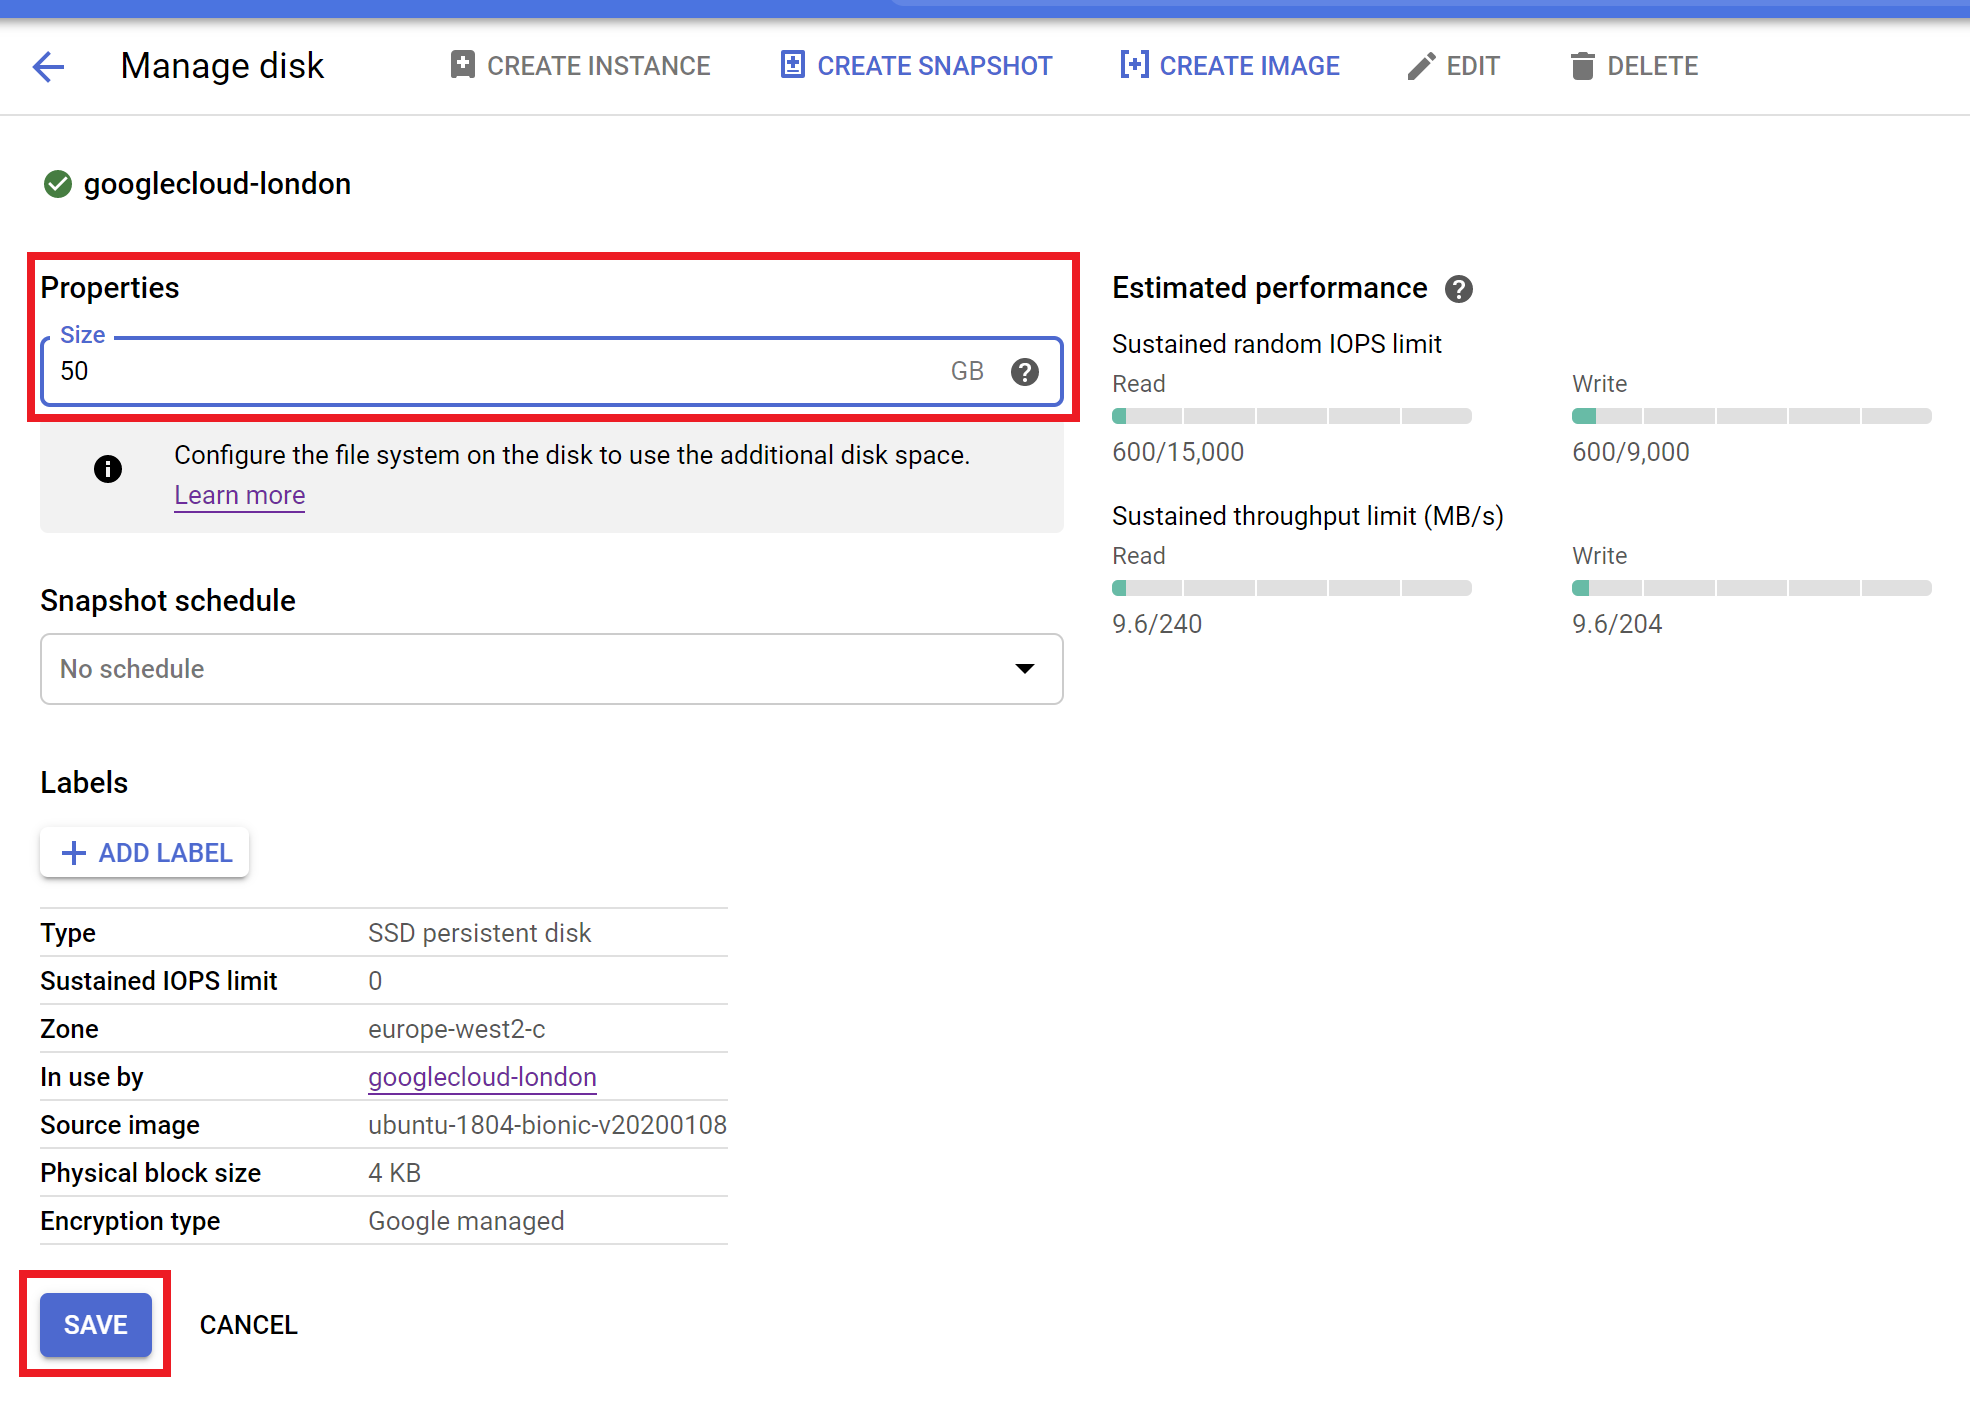
Click Save in the bottom to apply the changes.

Part 3. Resize the Partition

We’ve now increased our disk space, but there’s still a couple of steps before it will become available to use. 

You’ll now need to SSH into your server. Please see the links top of the article to get started.

Run the following command for a rundown of your servers disk space:

df -h

This will output a table containing the following line (but with your disk space):

/dev/sda1 20G 18G 1.9G 91% /

Note: The name of your disk will be sda1 in most cases, but it can vary depending on your provider. For example, on AWS the disk is named “xvda1”.

Next, run the following ( make sure you use the correct disk name as seen in the output of the command above ):

growpart /dev/sda 1

The output will look as follows:

root@googlecloud-london:~# growpart /dev/sda 1
CHANGED: partition=1 start=227328 old: size=41715679 end=41943007 new: size=62687199,end=62914527
root@googlecloud-london:~#

We’ve now resized our partition. 

Part 4. Resize the Filesystem

Finally, we need to resize our filesystem. Run the following command:

resize2fs /dev/sda1

The output will look as follows:

root@googlecloud-london:~# resize2fs /dev/sda1
resize2fs 1.44.1 (24-Mar-2018)
Filesystem at /dev/sda1 is mounted on /; on-line resizing required
old_desc_blocks = 3, new_desc_blocks = 4
The filesystem on /dev/sda1 is now 7835899 (4k) blocks long.

Our filesystem has now been resized, and our server can now use the additional disk space we set up.

CHECK YOUR WORK

To confirm that our new disk space is available, run the following command again:

df -h

You’ll now see the new amount on this line of the output:

/dev/sda1 49G 18G 32G 37% /

Congratulations! You’ve resized your servers disk space with zero downtime 🙂

Now run the following to reload Monit:

monit reload 

Search the Knowledge Base

New to vCanopy?

Get started with our FREE Core plan today! We bring the software, you bring the hardware.