


Granting SUPER Permissions directly on the Server
Step 1. Log into your terminal and connect to your server.
Please see the following articles to get started:
Step 1. Generate your SSH Key
Step 2. Add your SSH Key to vCanopy (also see Add default SSH Keys)
Step 3. Connect to your server by SSH as Root user (we like and use Termius)
Step 2. Open MySQL interactive shell:
gp mysql login root
Step 3. Now you’ll need to grant super privilege to your staging site and your production site. You will need to look up your database user and password inside your wp-config.php file for both your staging site and live site. You can find the user and database password from your wp-config.php files inside your vCanopy account by heading to the Sites page and clicking on your websites name to open up the configuration modal:
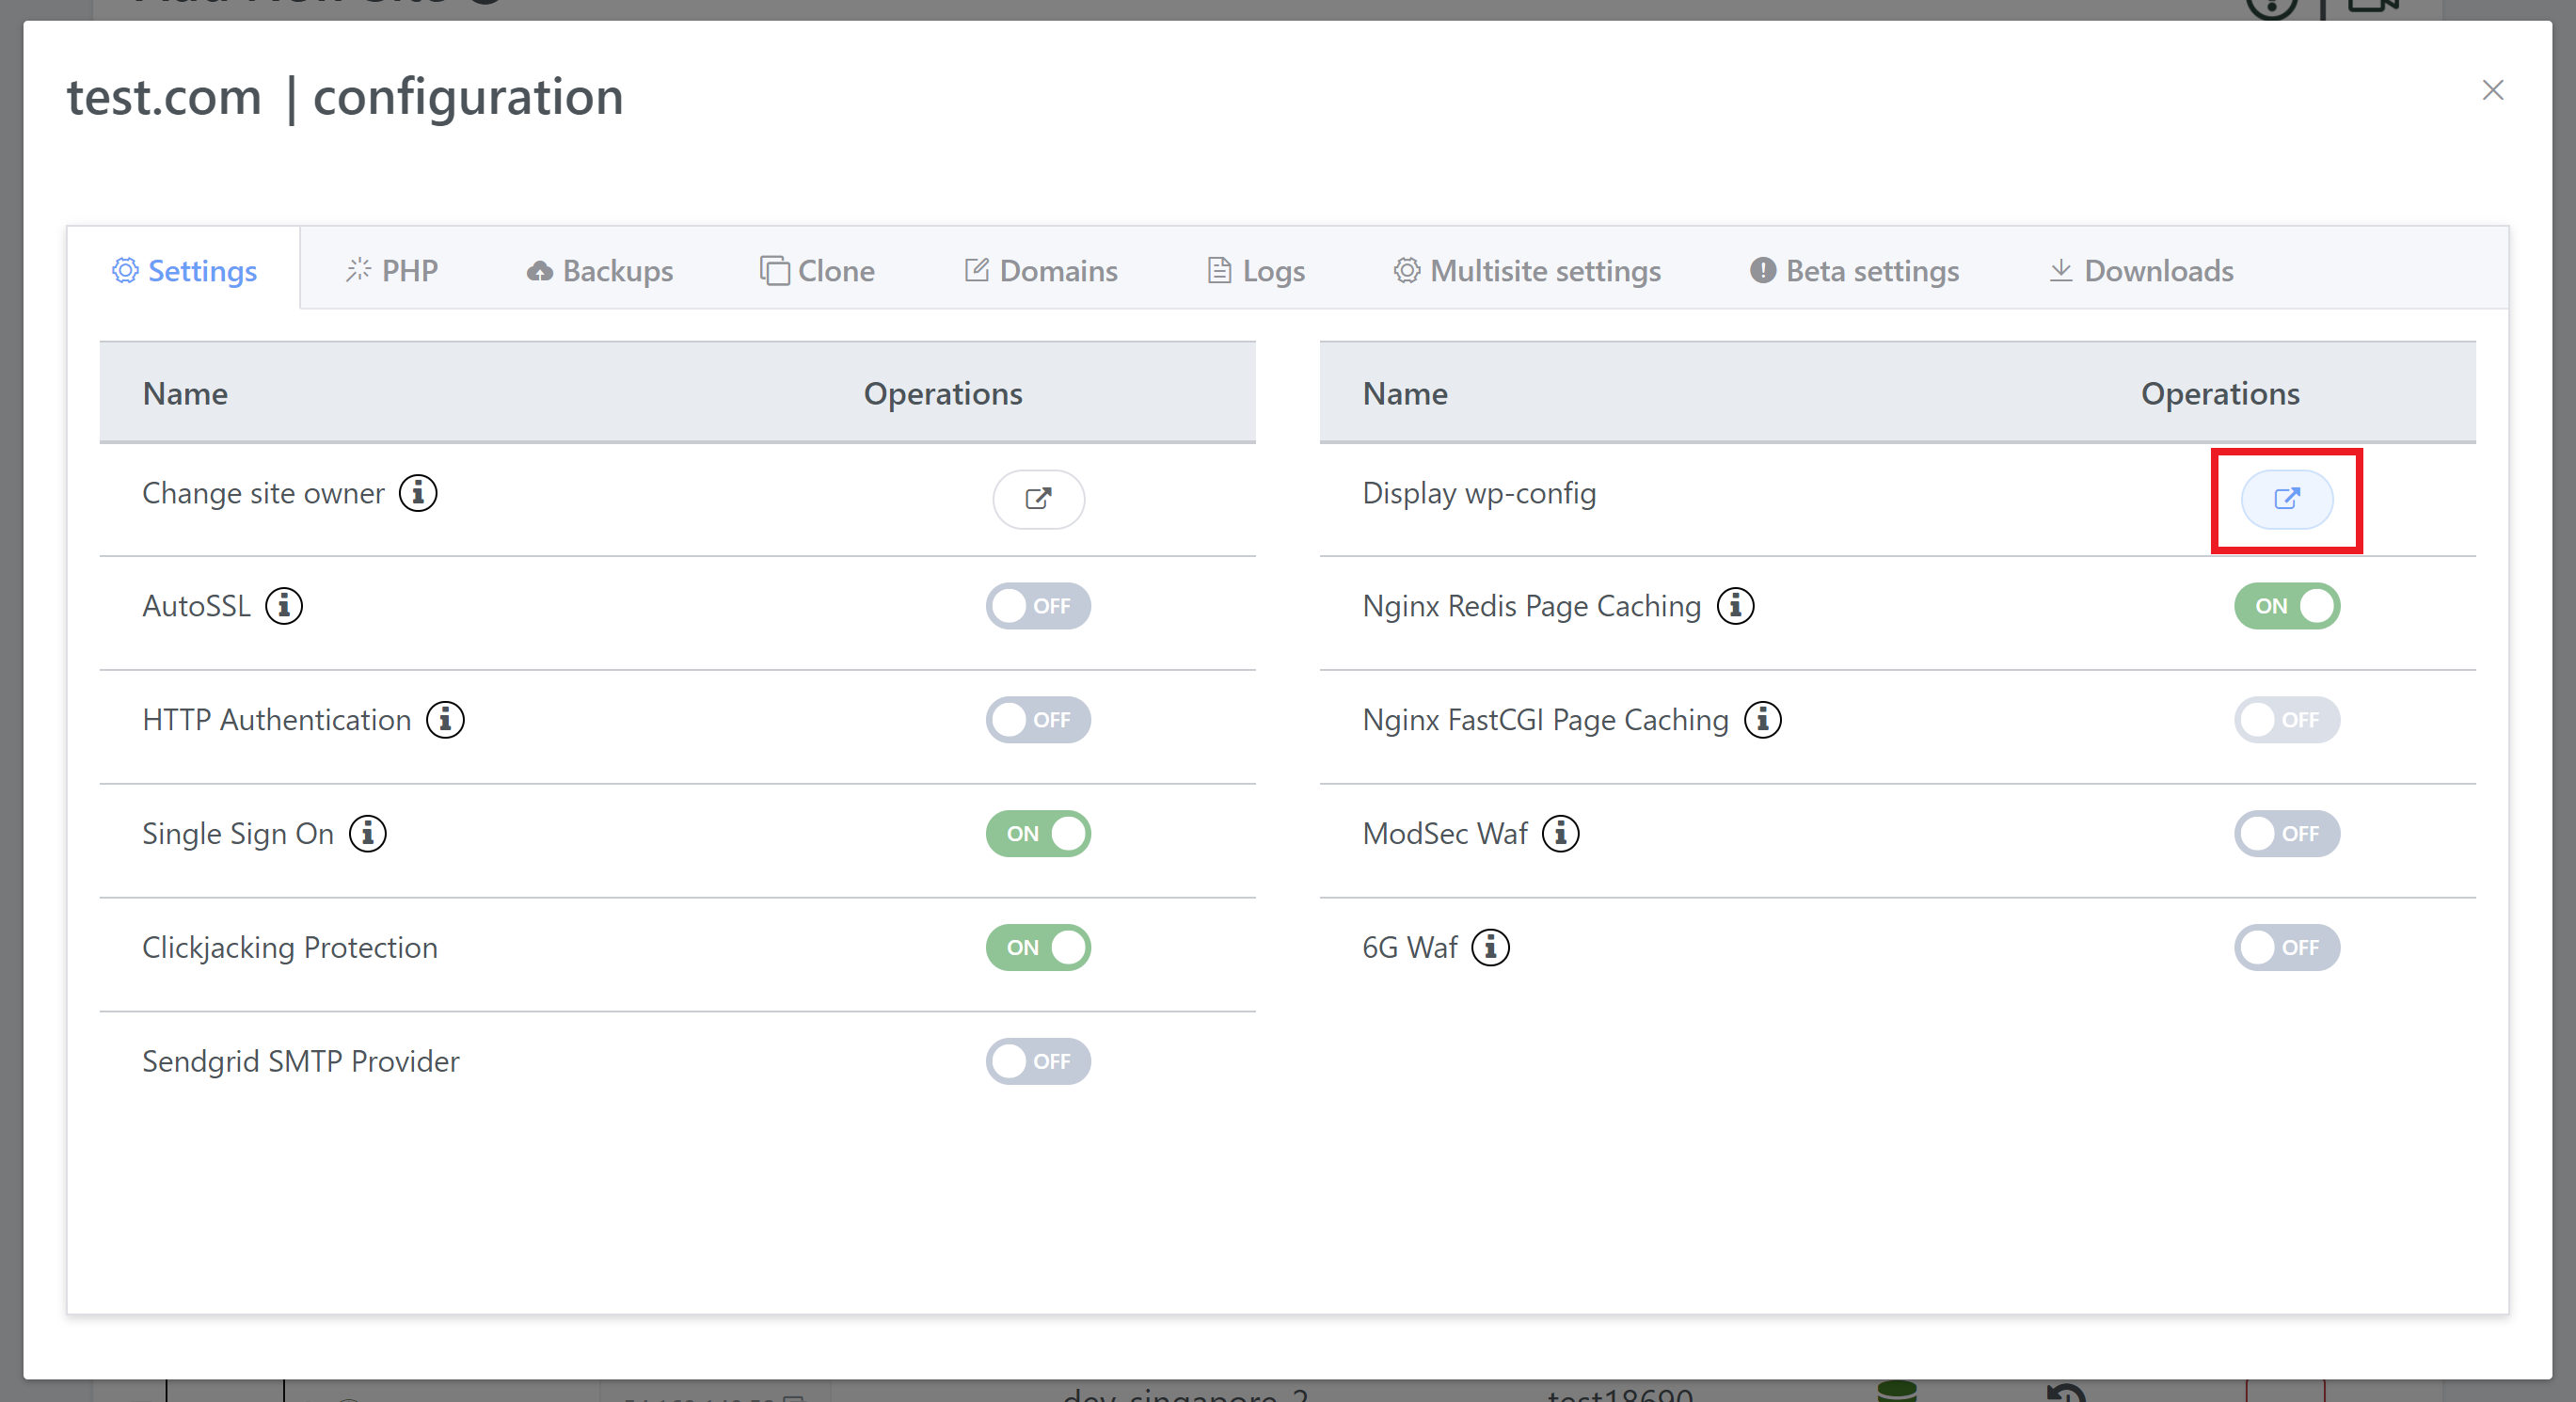
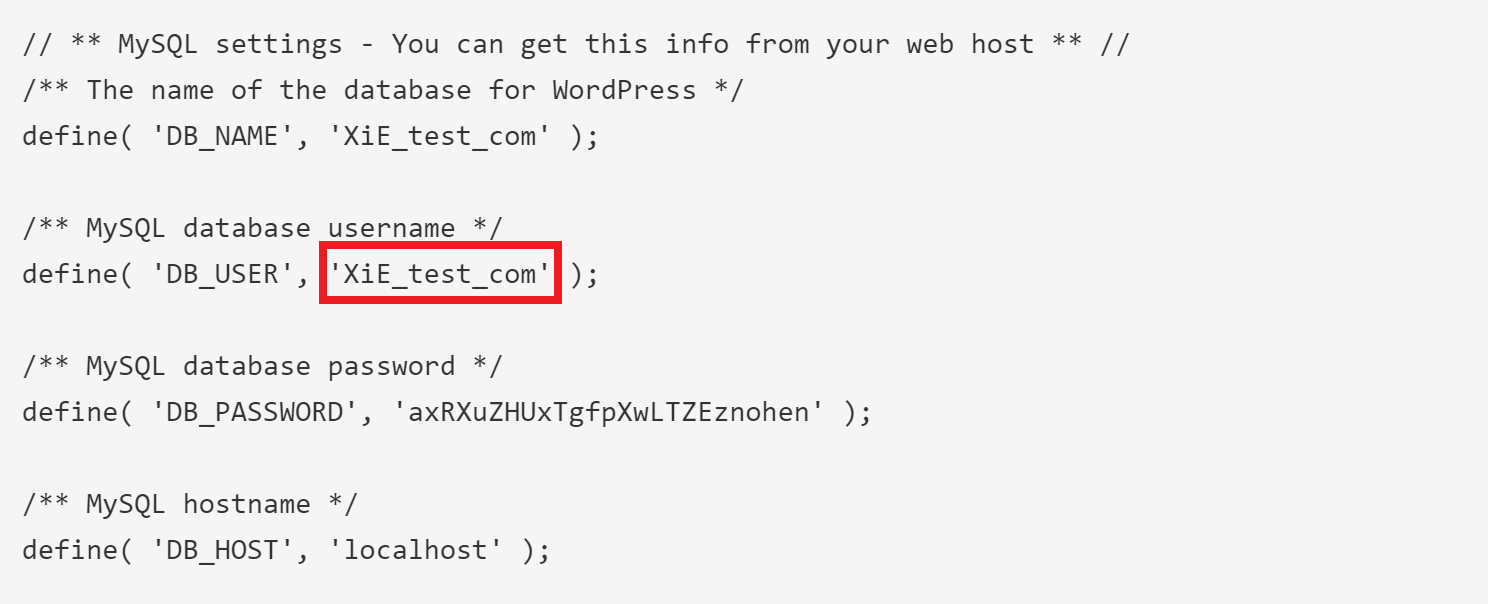
Click the button as highlighted above to display your wp-config.php. The information you’re looking for is as follows:
These are the SQL Commands:
GRANT SUPER ON *.* TO db_user_from_staging_wp_config@localhost;
GRANT SUPER ON *.* TO db_user_from_wp_config@localhost;
FLUSH PRIVILEGES;
exit
Real World Example Here’s an example using vCanopy.com as the website we want to grant permissions to:
GRANT SUPER ON *.* TO XiE_staging_vCanopy_com@localhost;
GRANT SUPER ON *.* TO LmC_vCanopy_com@localhost;
FLUSH PRIVILEGES;
Check Your Work
Before exiting, you can check your work with:
SHOW GRANTS FOR your_user_name@localhost;
The output should look as follows:
mysql> SHOW GRANTS FOR your_user_name@localhost;
+----------------------------------------------------------------------+
| Grants for your_user_name@localhost |
+----------------------------------------------------------------------+
| GRANT SUPER ON *.* TO `your_user_name`@`localhost` |
| GRANT ALL PRIVILEGES ON `your_user_name`.* TO `your_user_name`@`localhost` |
+----------------------------------------------------------------------+
2 rows in set (0.00 sec)
mysql>
You can then exit MySQL with:
exit
CREATING A USER AND GRANTING SUPER PERMISSIONS
If for any reason you need to create/re-create a user and grant SUPER permissions, this requires a slightly different approach to what’s laid out above.
You’ll be able to find out if this is necessary by looking out for this error:
ERROR 1410 (42000): You are not allowed to create a user with GRANT
This means that the user you’re trying to grant permissions to does not exist – be sure to double-check you’ve used the correct user and for any spelling/syntax mistakes.
Starting with MySQL 8 you no longer can (implicitly) create a user using the GRANT command, so you need to use either the CREATE or ALTER command before using GRANT.
Step 1. Check your wp-config.php as outlined above for your database user and password.
Step 2. Using this information run the following command, switching out your details as indicated:
ALTER USER 'db_user_from_wp_config'@'localhost' IDENTIFIED BY 'db_password_from_wp_config'; GRANT SUPER ON *.* TO 'db_user_from_wp_config'@'localhost';
If we take this test sites wp-config.php info as an example:
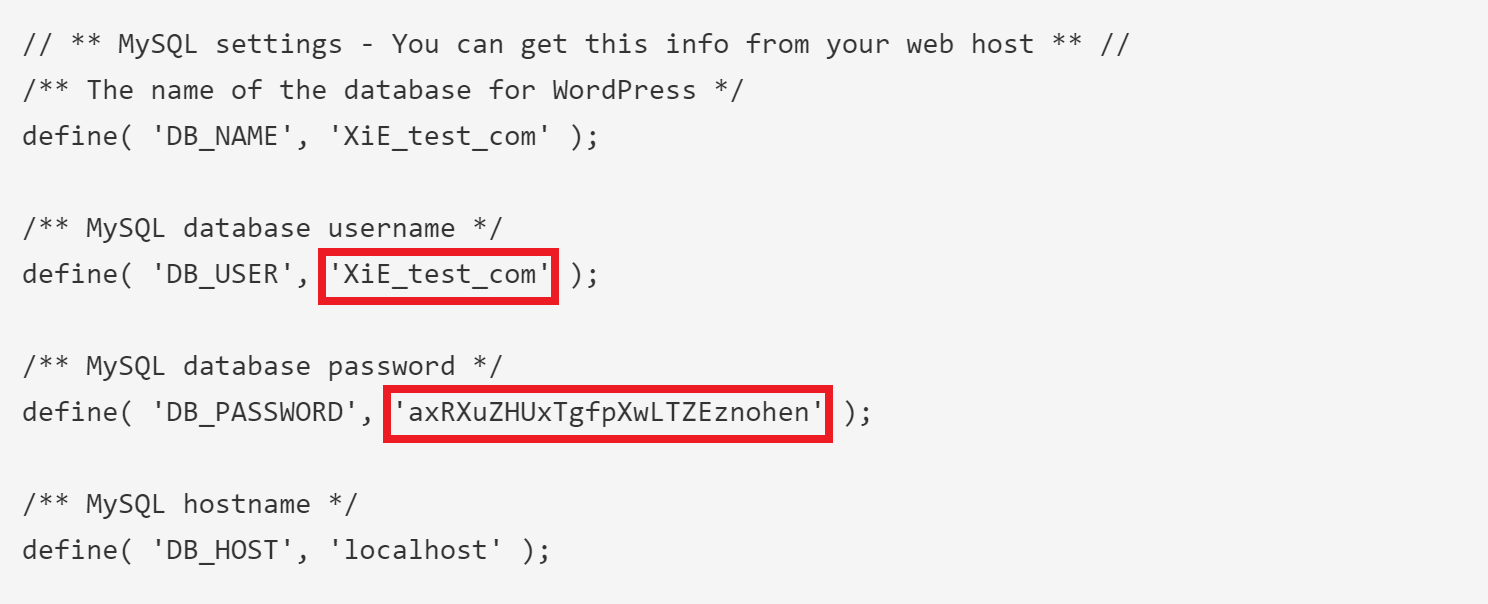
The command would look as follows:
ALTER USER 'XiE_test_com'@'localhost' IDENTIFIED BY 'axRXuZHUxTgfpXwLTZEznohen'; GRANT SUPER
Granting SUPER Permissions via MySQL Workbench
You can also grant SUPER permissions using MySQL Workbench. Here’s a quick rundown of how to do this. Please also note that here you will again need your MySQL root password.
Step 1. Log into your terminal and connect to your server
Step 2. Get your MySQL root password
gp mysql -get-pass root
You will need this when you connect to Workbench.
Step 3. If you don’t already have Workbench installed, you can download it here:
https://www.mysql.com/products/workbench/
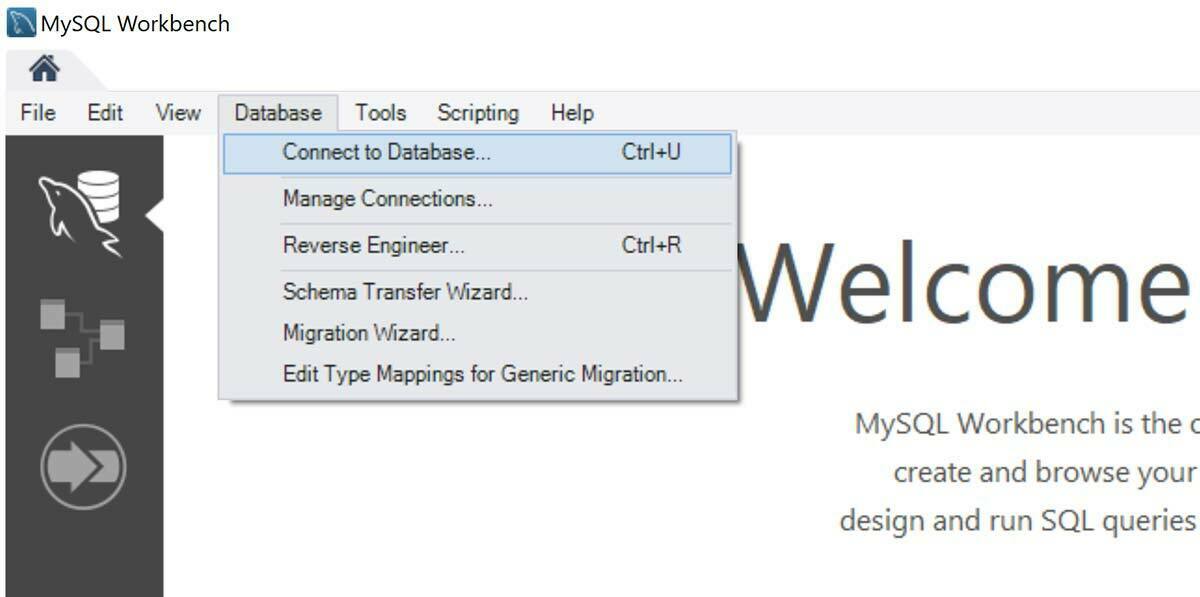
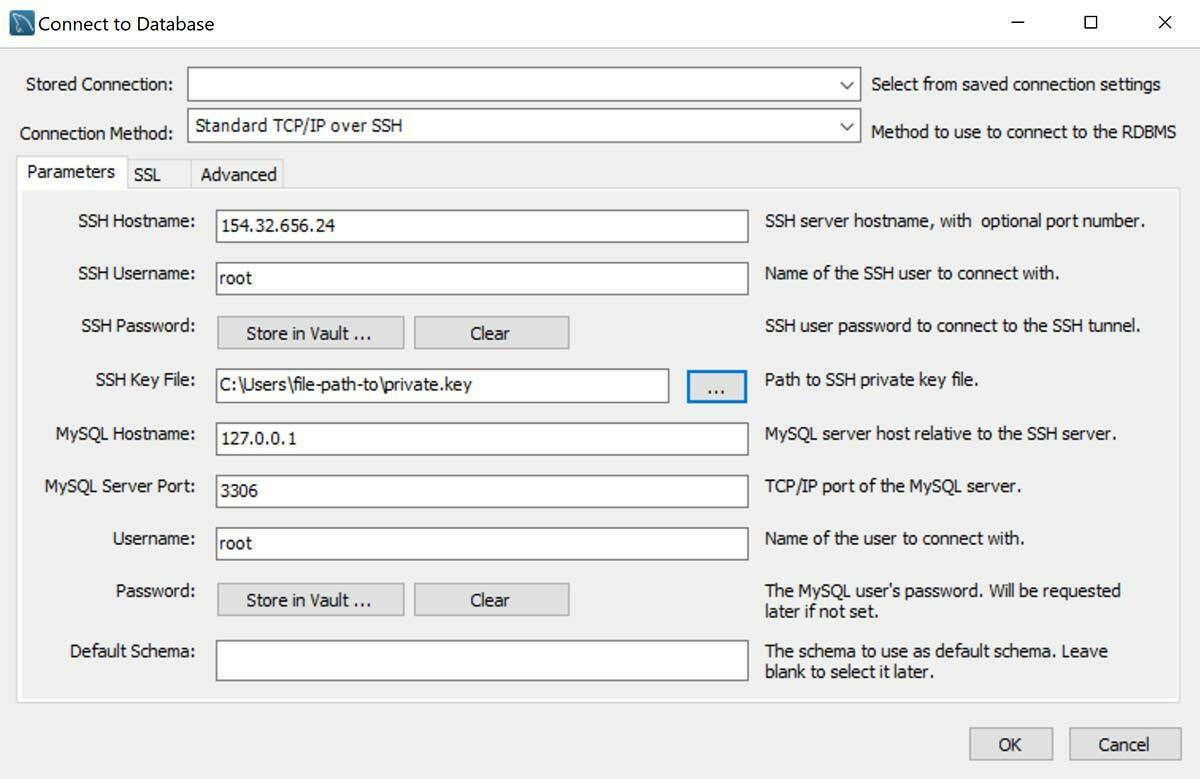
Open Workbench up and select Database > Connect to database.
From the Connection Method dropdown select “Standard TCP/IP over SSH”
SSH Hostname: = Your server IP
SSH Username: = root
SSH Key File: = locate and select your SSH private key file
Leave all the rest of the settings as default. It will look like the following:
Click OK. You may see a message that says “Could not connect to SSH tunnel”. Click OK again.
Next you will now be prompted for your MySQL root password from step 2. Enter and click OK.
Step 4. Once connected, click on Users and Privileges on the left side.

Step 5. Select the user (website) you wish to edit (edit both the main domain and the staging domain), and then select the Administrative Roles tab.
On the right side under Global Privileges, check SUPER and then click Apply on the bottom.
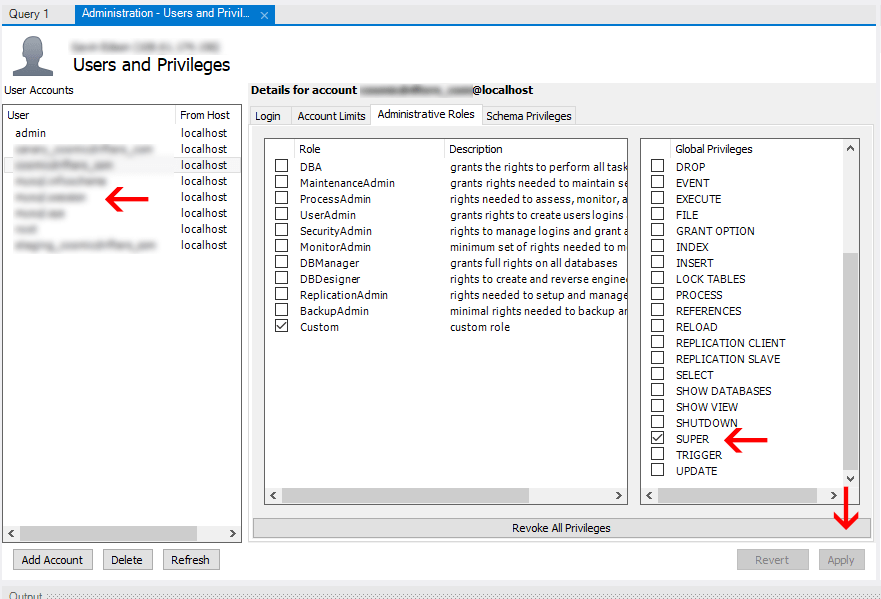
Once both users (websites) have been given SUPER you’re all set!