Introduction
Adding your own custom headers to your WordPress websites on OpenLiteSpeed (OLS) servers is quick and simple. Each of your websites has the following directory:
/var/www/site.url/ols/
Here you’ll find the headers.conf file, which is where you’ll find your website’s default security headers, and where you can add your own custom headers as well.
You don’t need to worry about the headers you add here getting overwritten, and if any of the default headers don’t fit your needs, you can remove them or comment them out using a hashtag at the beginning of the line.
LIMITATION VS NGINX
One limitation with OpenLiteSpeed compared to Nginx is that you can’t add a server-wide custom header on OLS. Each site needs to be edited individually.
Fortunately though, the use case for this is quite rare, and adding headers is easy.
Formatting
The default headers.conf contains the following:
# Custom User Headers
# Usage: one line per entry
# Included in /usr/local/lsws/conf/vhosts/site.url/vhconf.conf
Referrer-Policy strict-origin-when-cross-origin
Strict-Transport-Security: max-age=31536000
X-Content-Type-Options nosniff
X-Frame-Options SAMEORIGIN
X-XSS-Protection 1; mode=block
Each header you add must be on its own line.
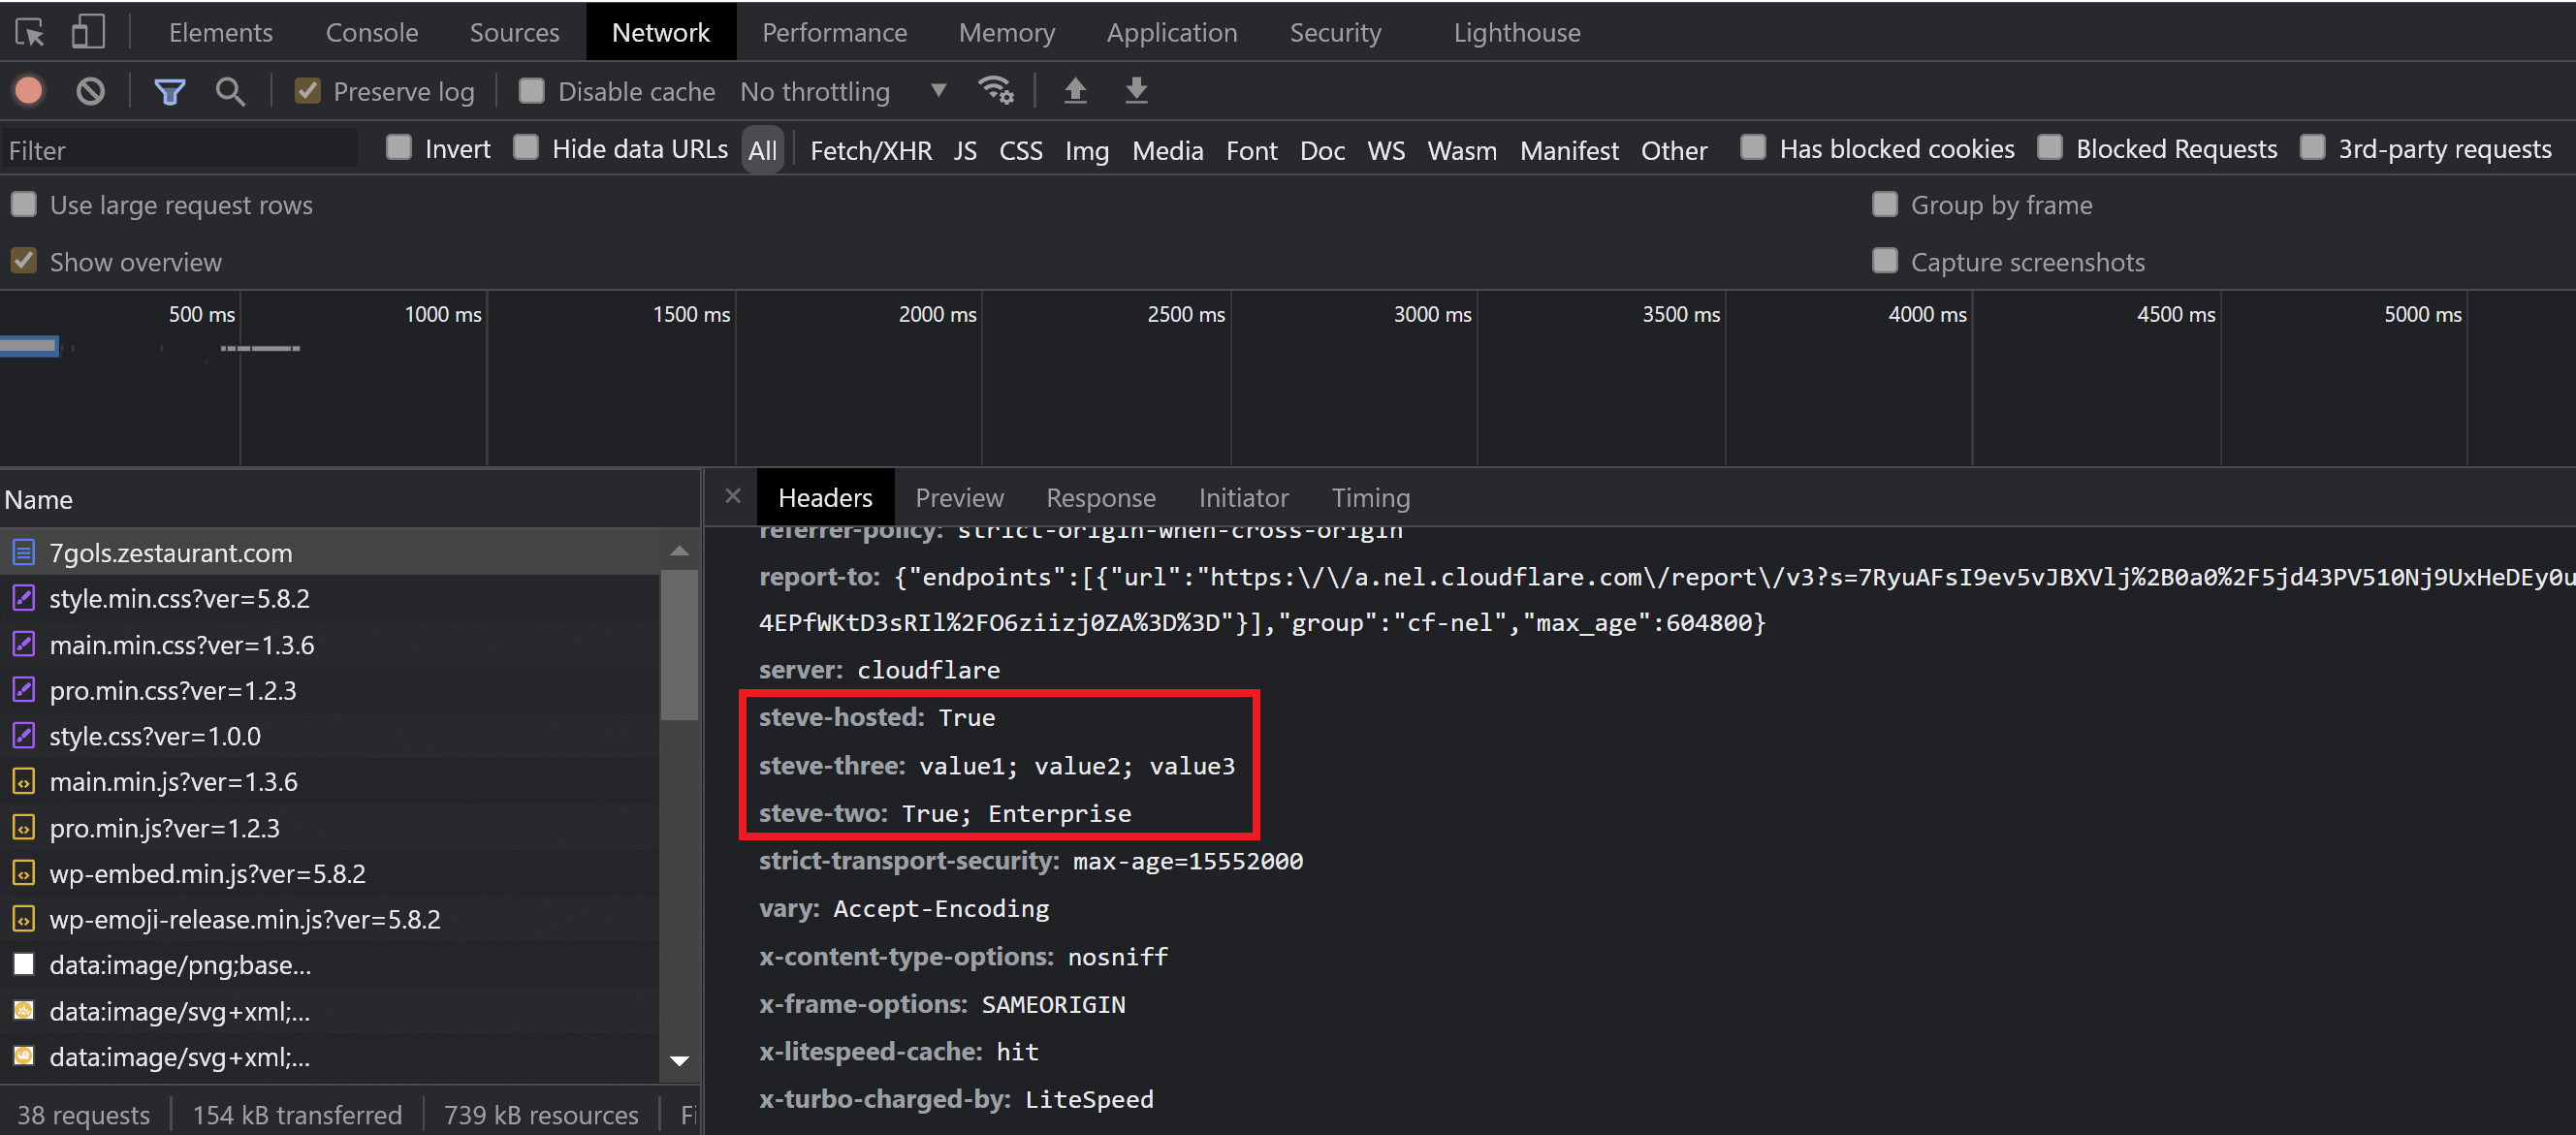
The header name should contain no spaces, and there should be a space between the name and the value. For example:
Steve-Hosted True
For more than value, separate them with a semi-colon like so:
Steve-Hosted True; Package-Name
You can also wrap multiple values in quotes as well:
Steve-Hosted "True; Package-Name"
Here’s an example of what some custom headers (a bunch of nonsense) I’ve added to a test website look like: