


1. Add a Repo and Branches
Inside your vCanopy dashboard, navigate to the Git page. Here you can add your Git repositories and branches (you will need to add at least one branch in the beginning, but you can easily add more in the future).
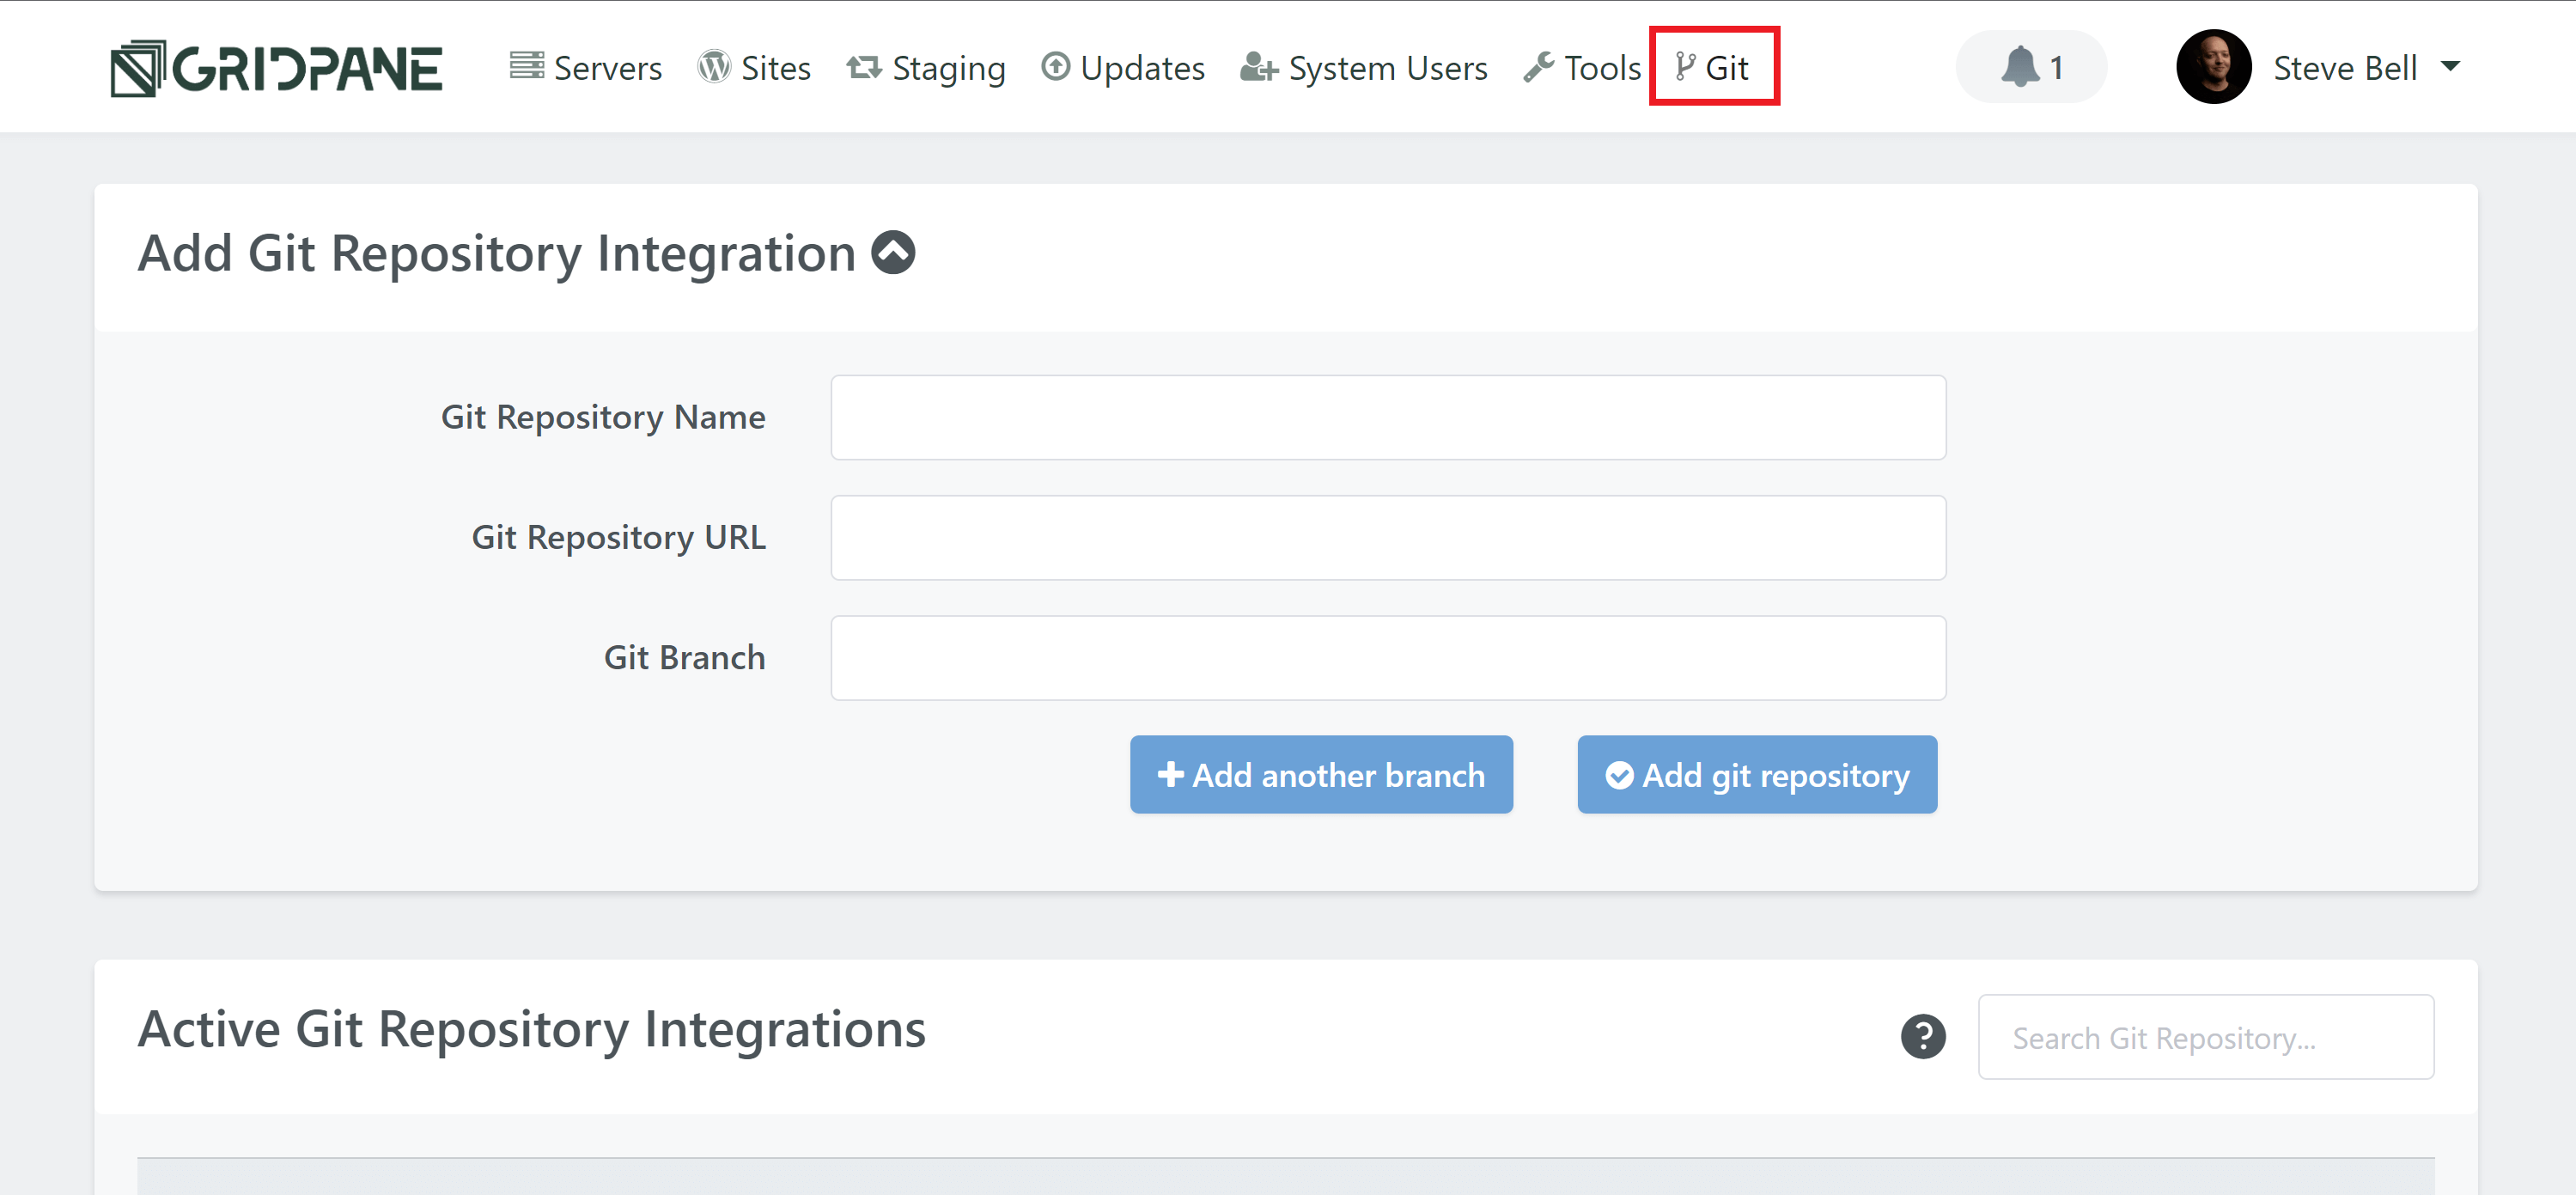
Next, add your repo. Please note that:
- Your repo names need to be unique and can’t contain spaces
- URLs need to be unique
Fill in your repository name, repository URL, and Git branch name, for example:
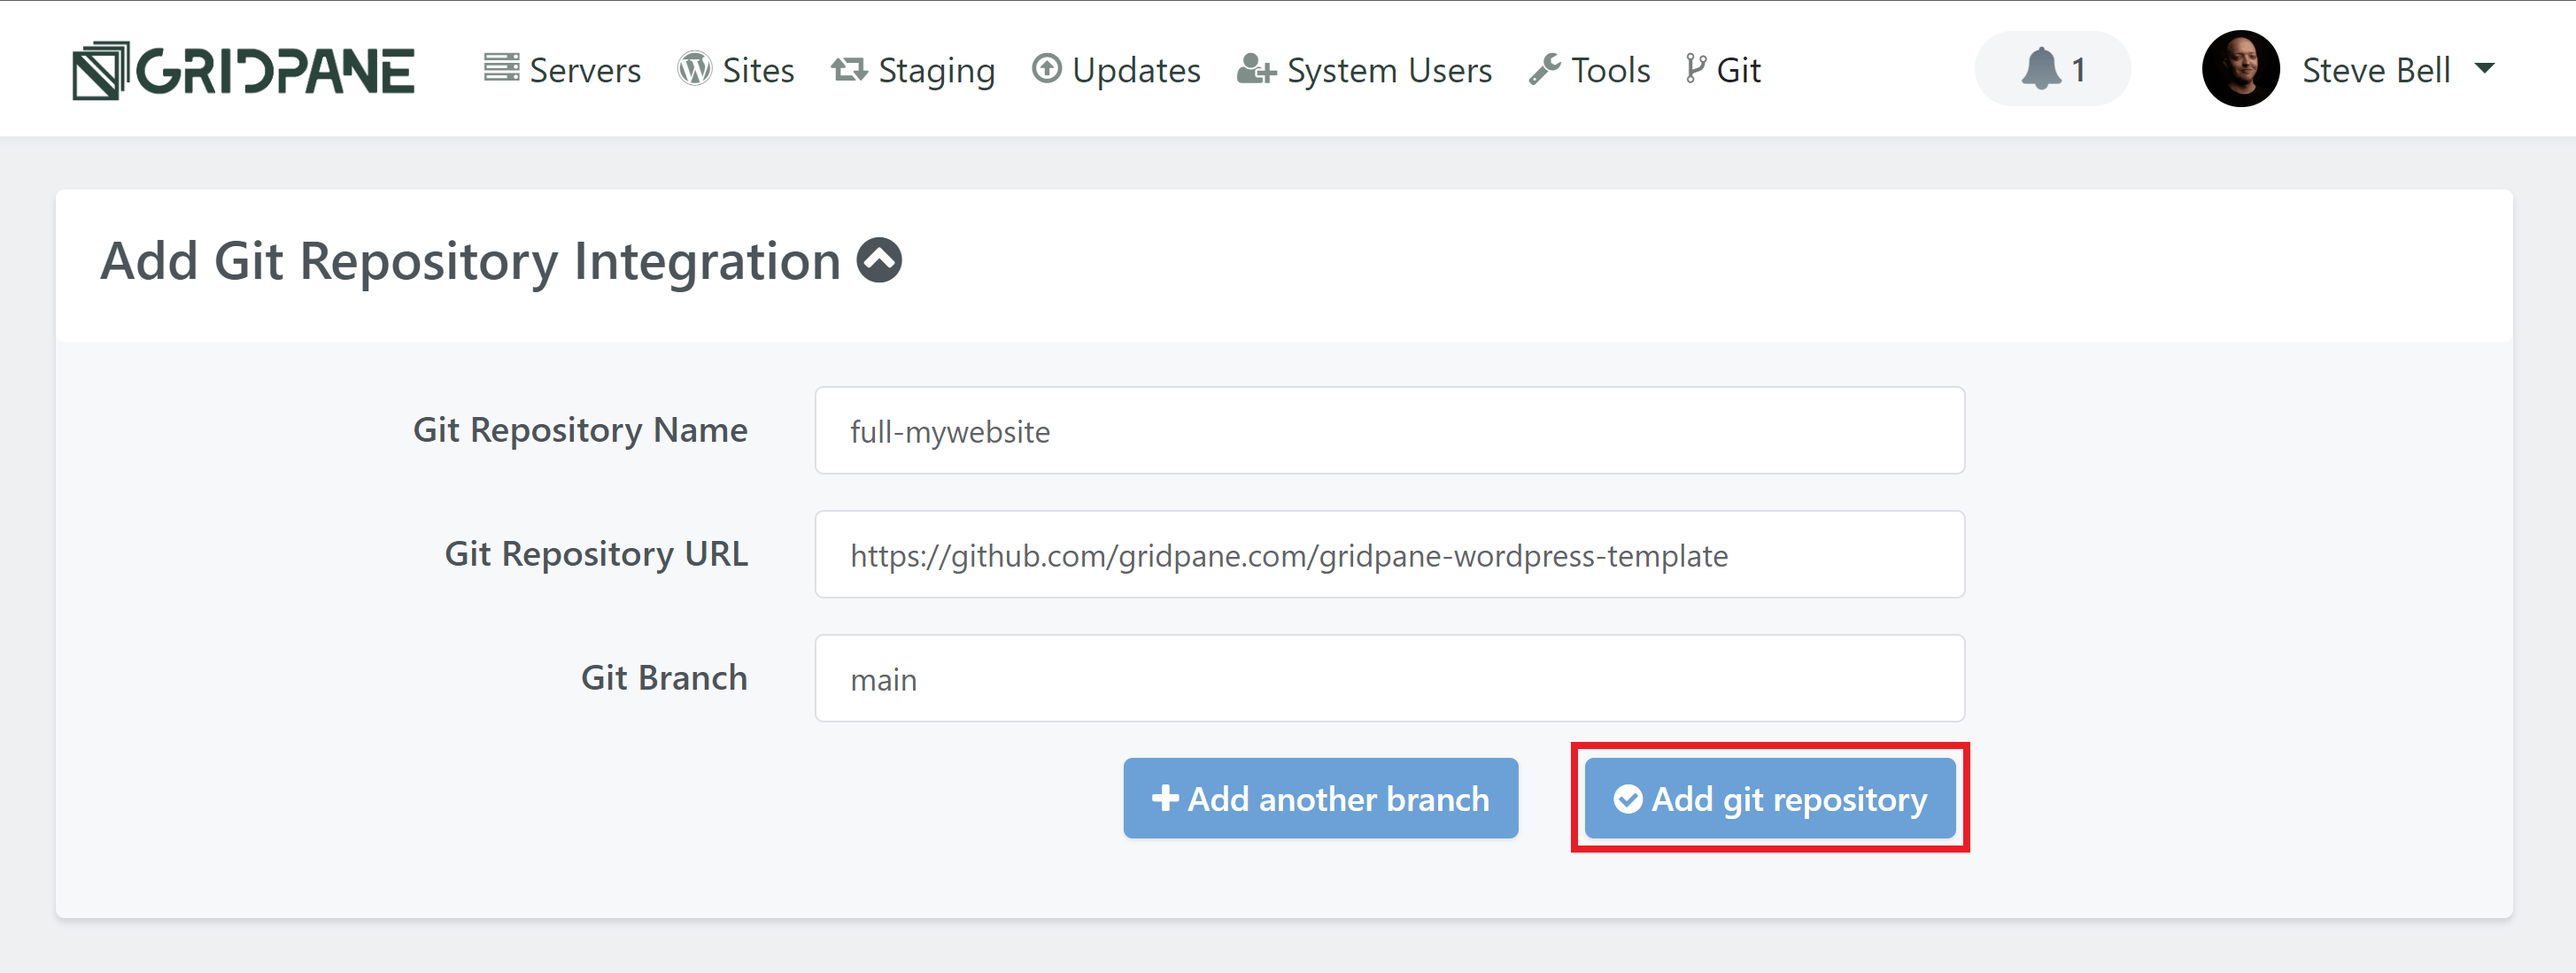
If you would like to add additional branches, click the Add another branch button. Once you’ve entered all your details, click the Add Git repository button.
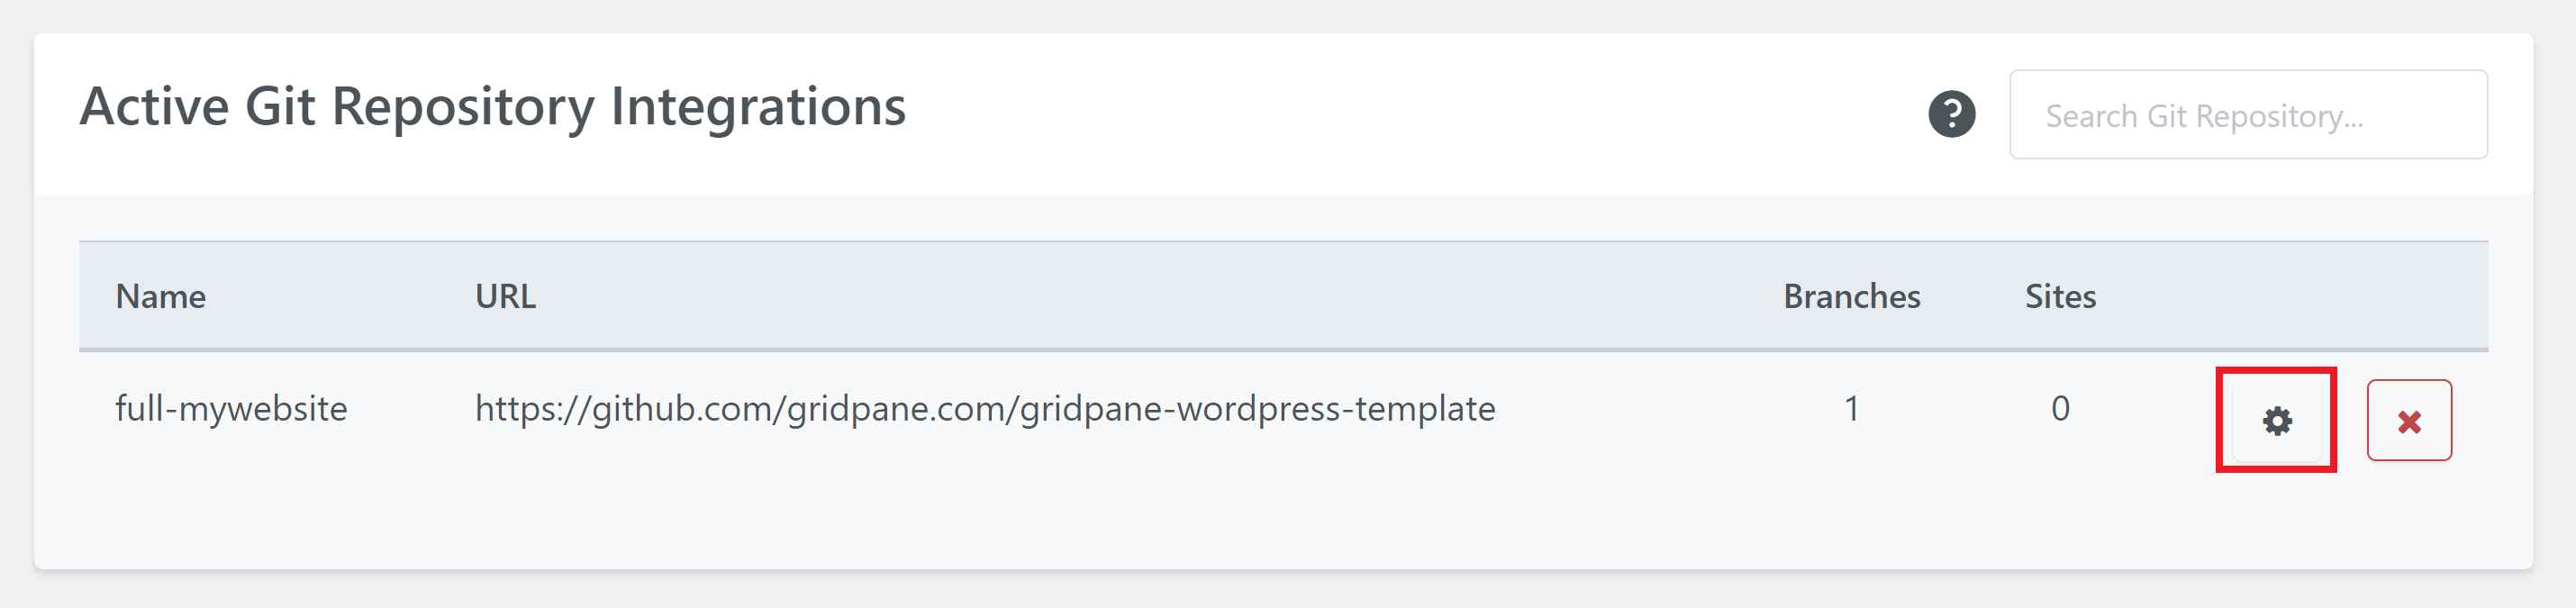
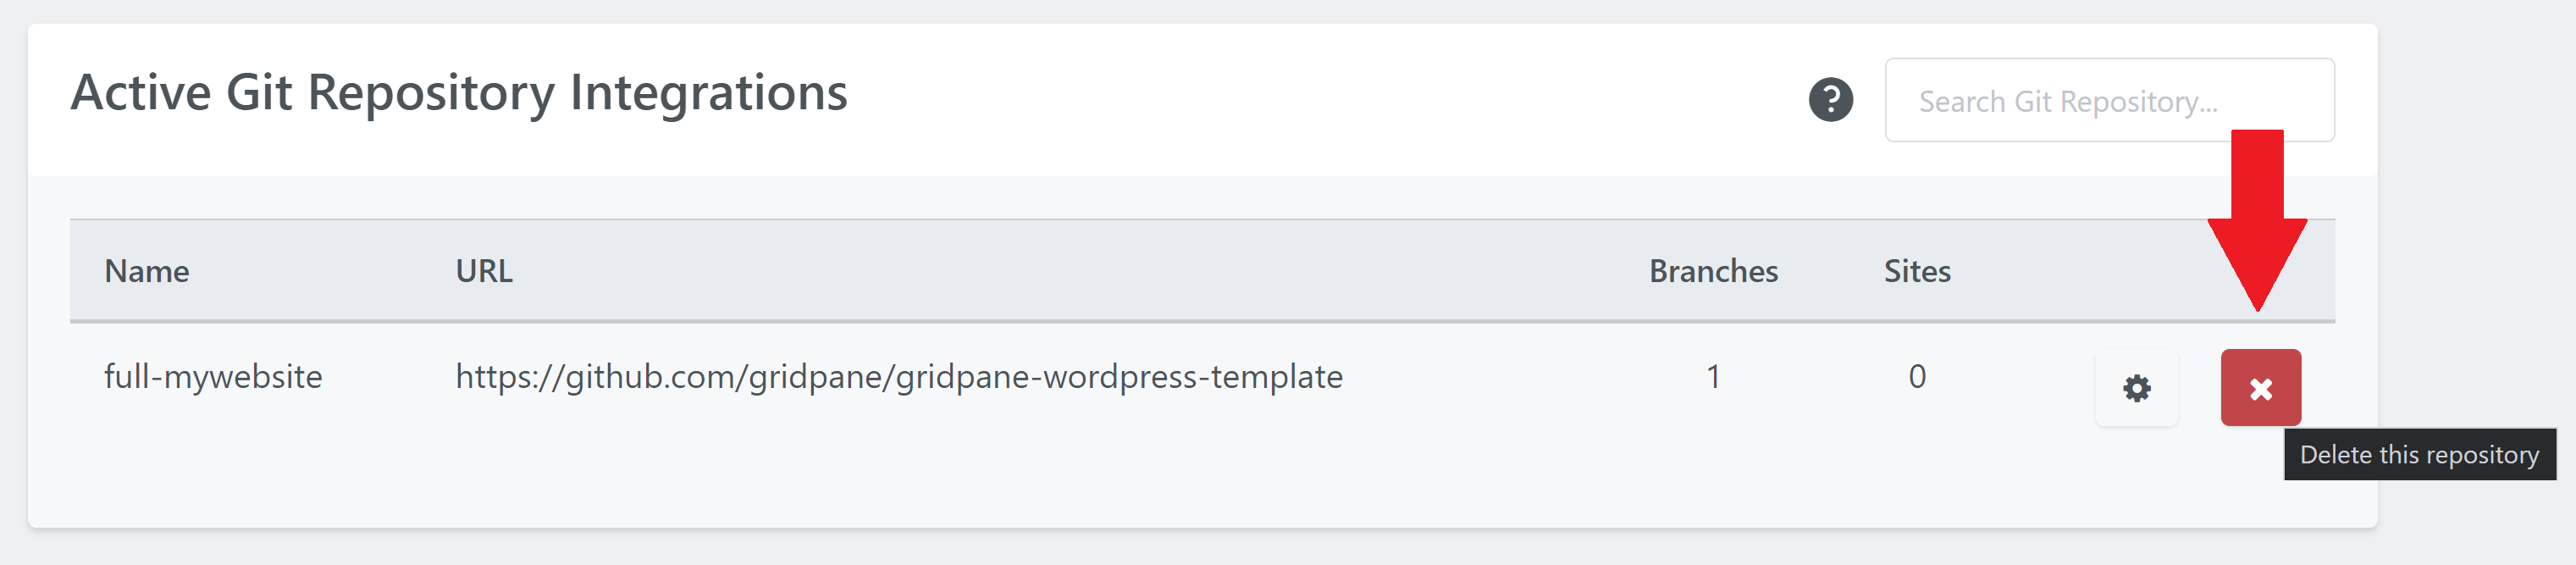
Once added, you can see and manage your different branches in the Active Git Repository Integrations section below.
2. The Git Integration Manager
On the Git page in your account, click the cog to open the manager:
It looks as follows:
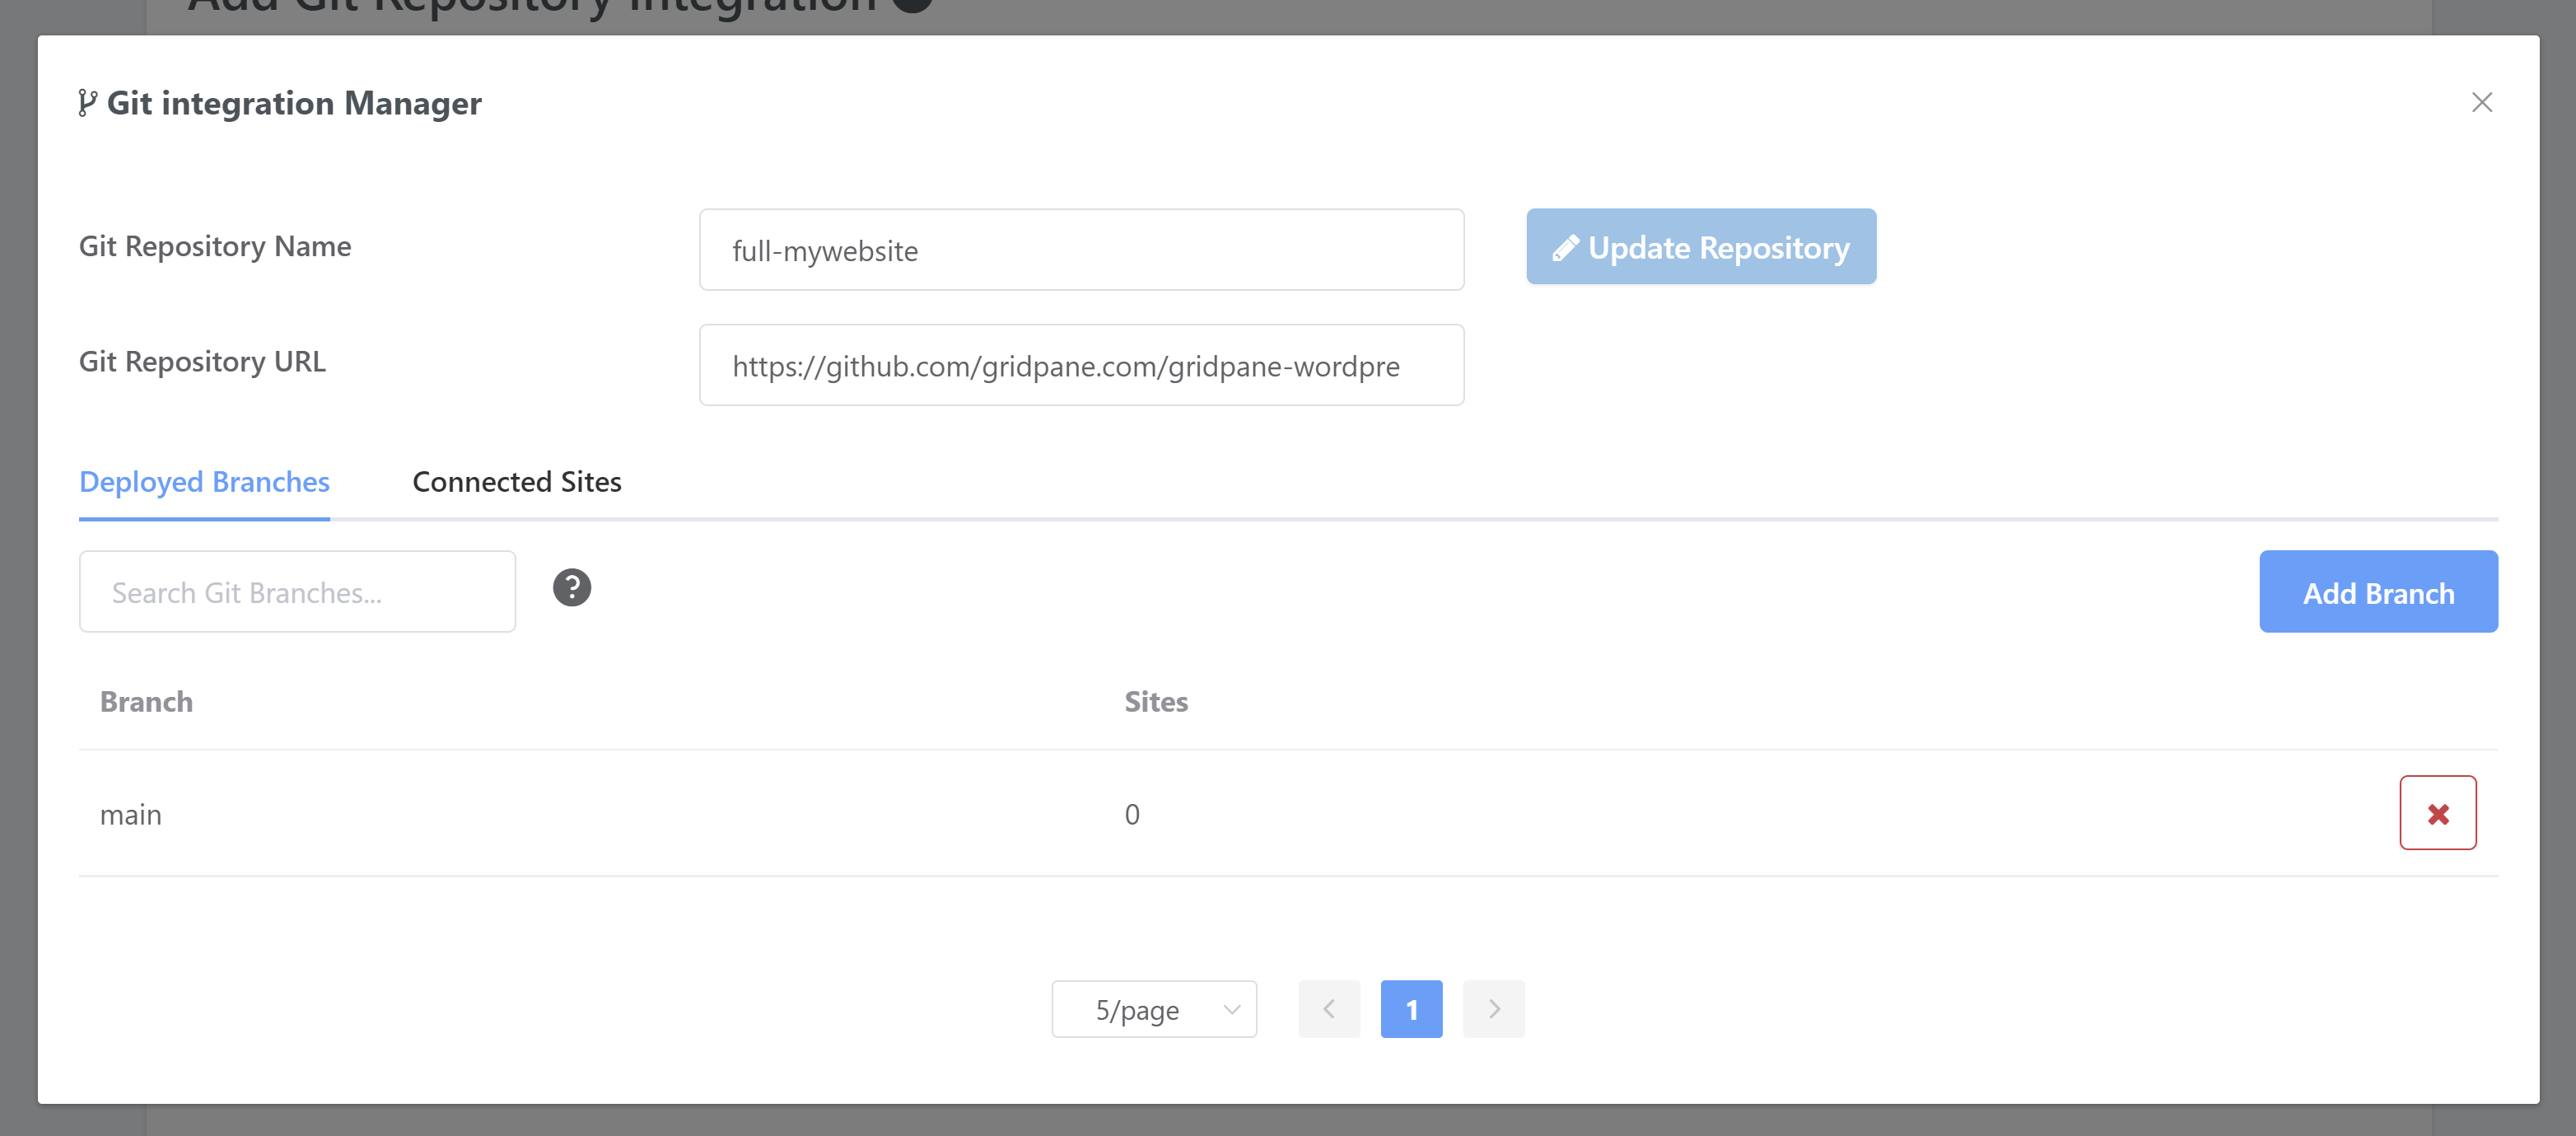
Here you can update the integration name, and if no sites have been connected to the repository yet you can also update the URL.
On the Deployed Branches tab, you can manage the branches associated with the repo.
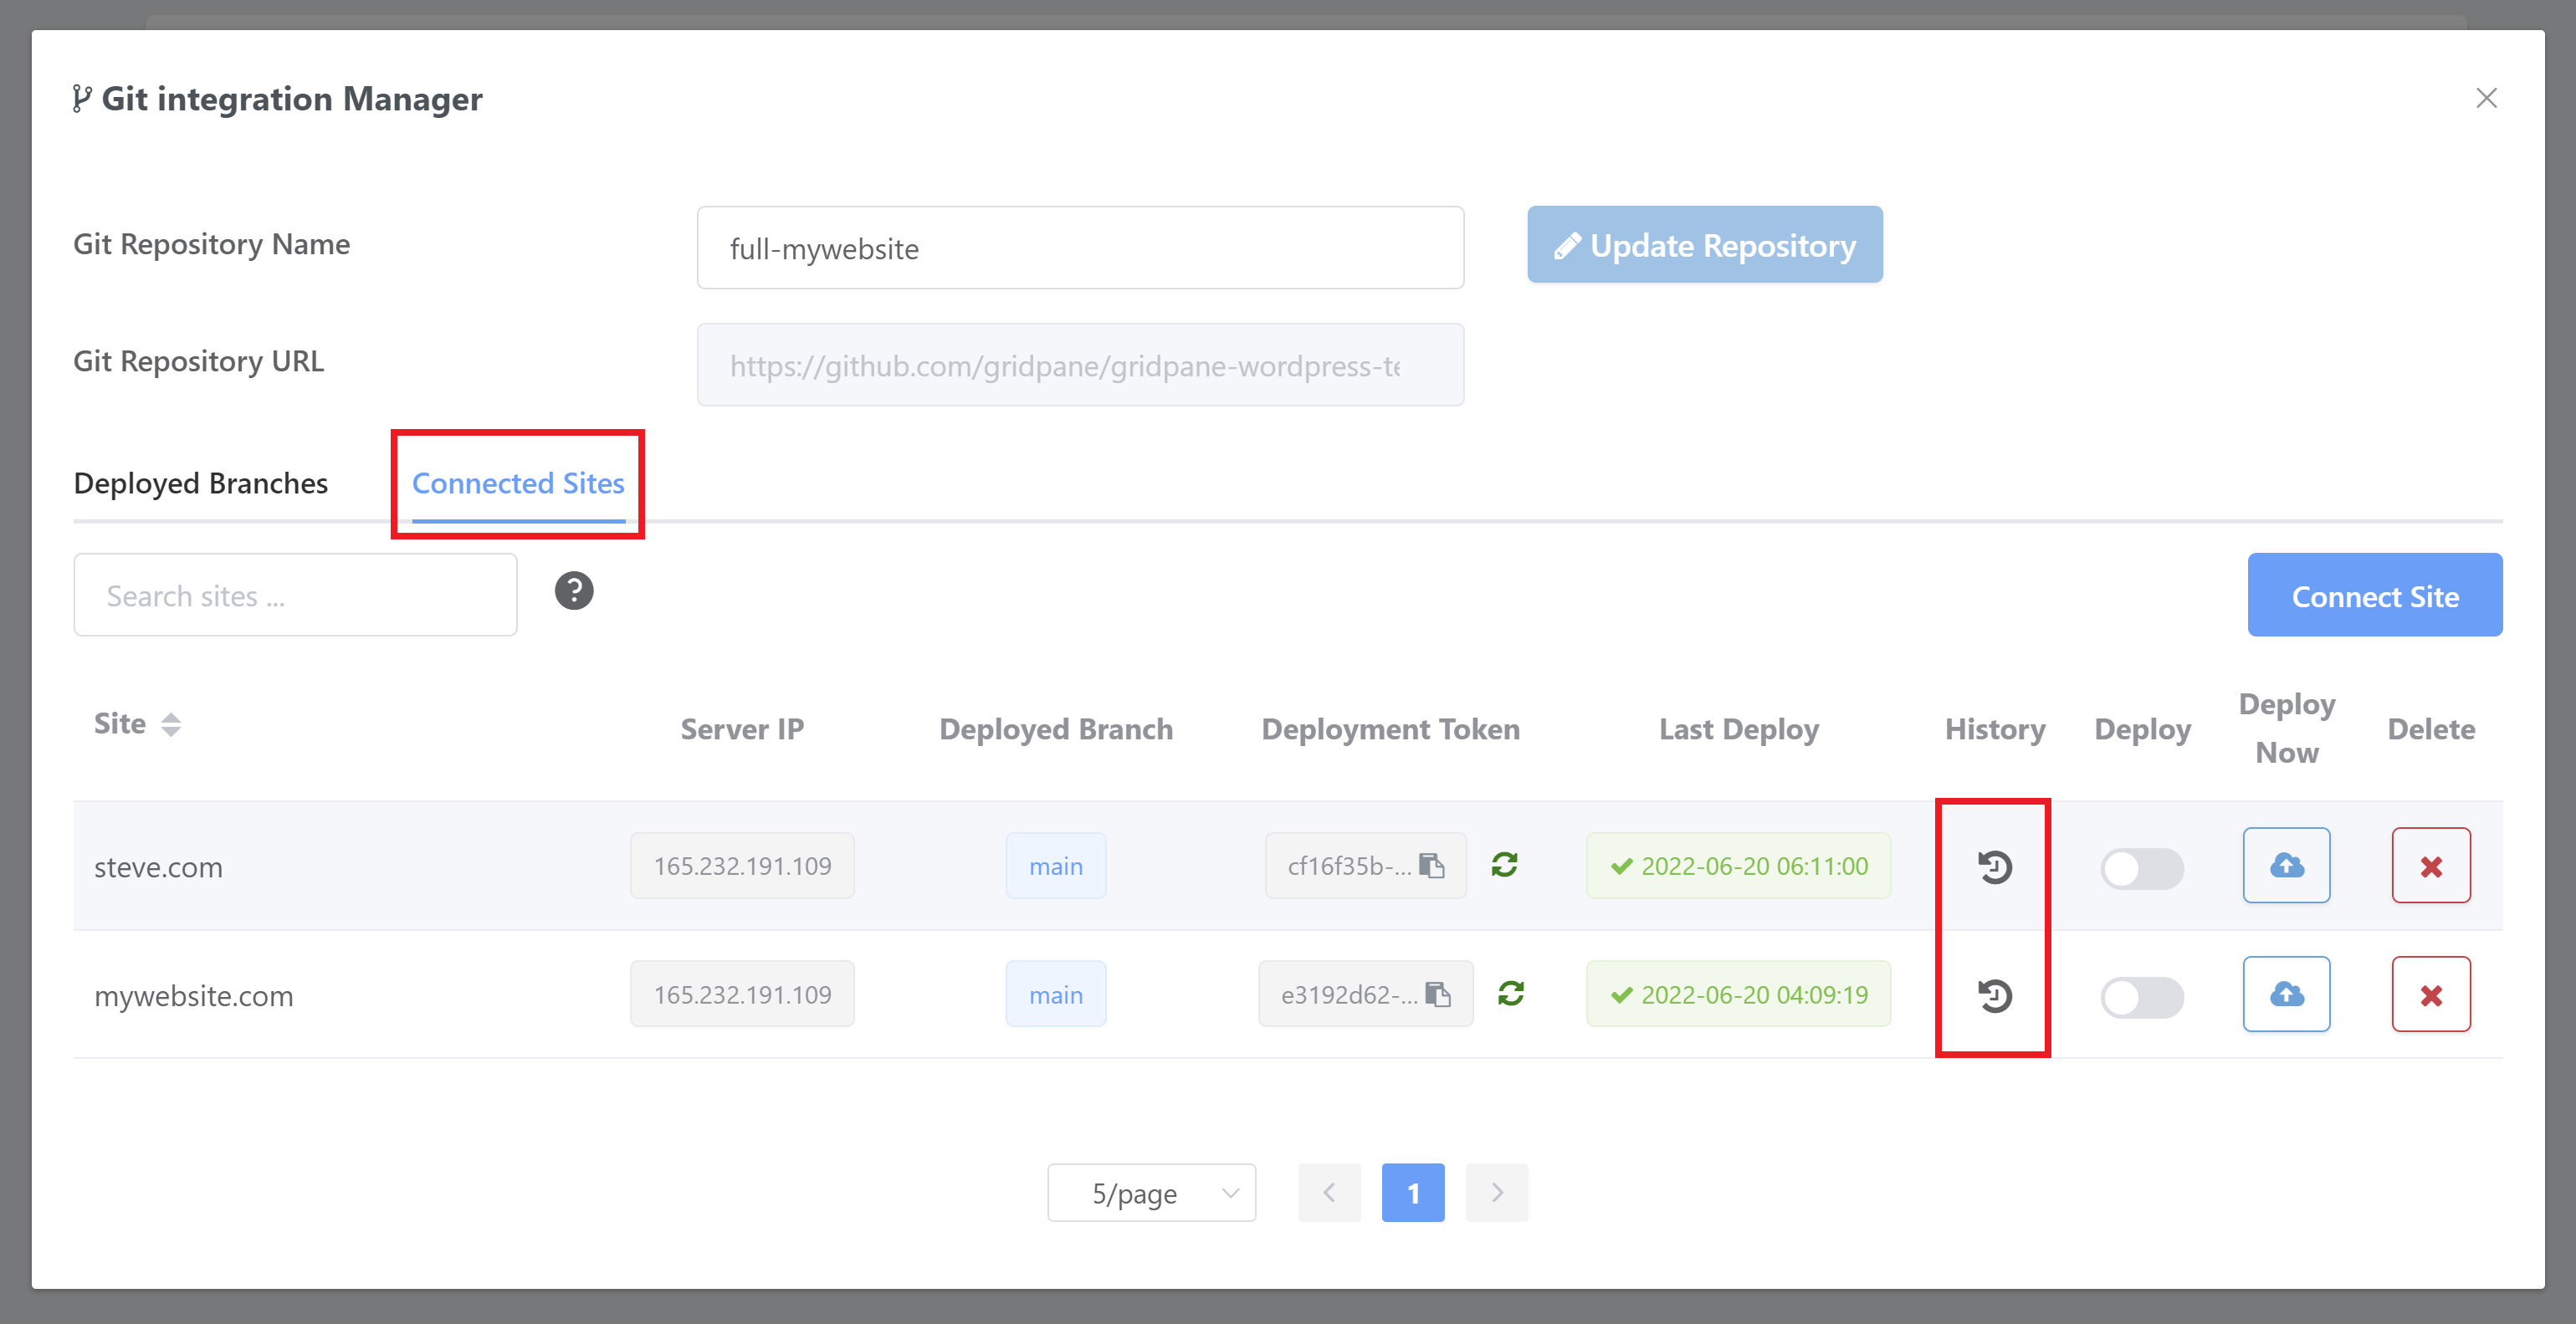
On the Connected Sites tab, you can connect sites and manage their deployments.
This means you can manage all sites connected to a repo across the entire dev workflow that repo represents from one place. More details on deployments can be found in part 3 below.
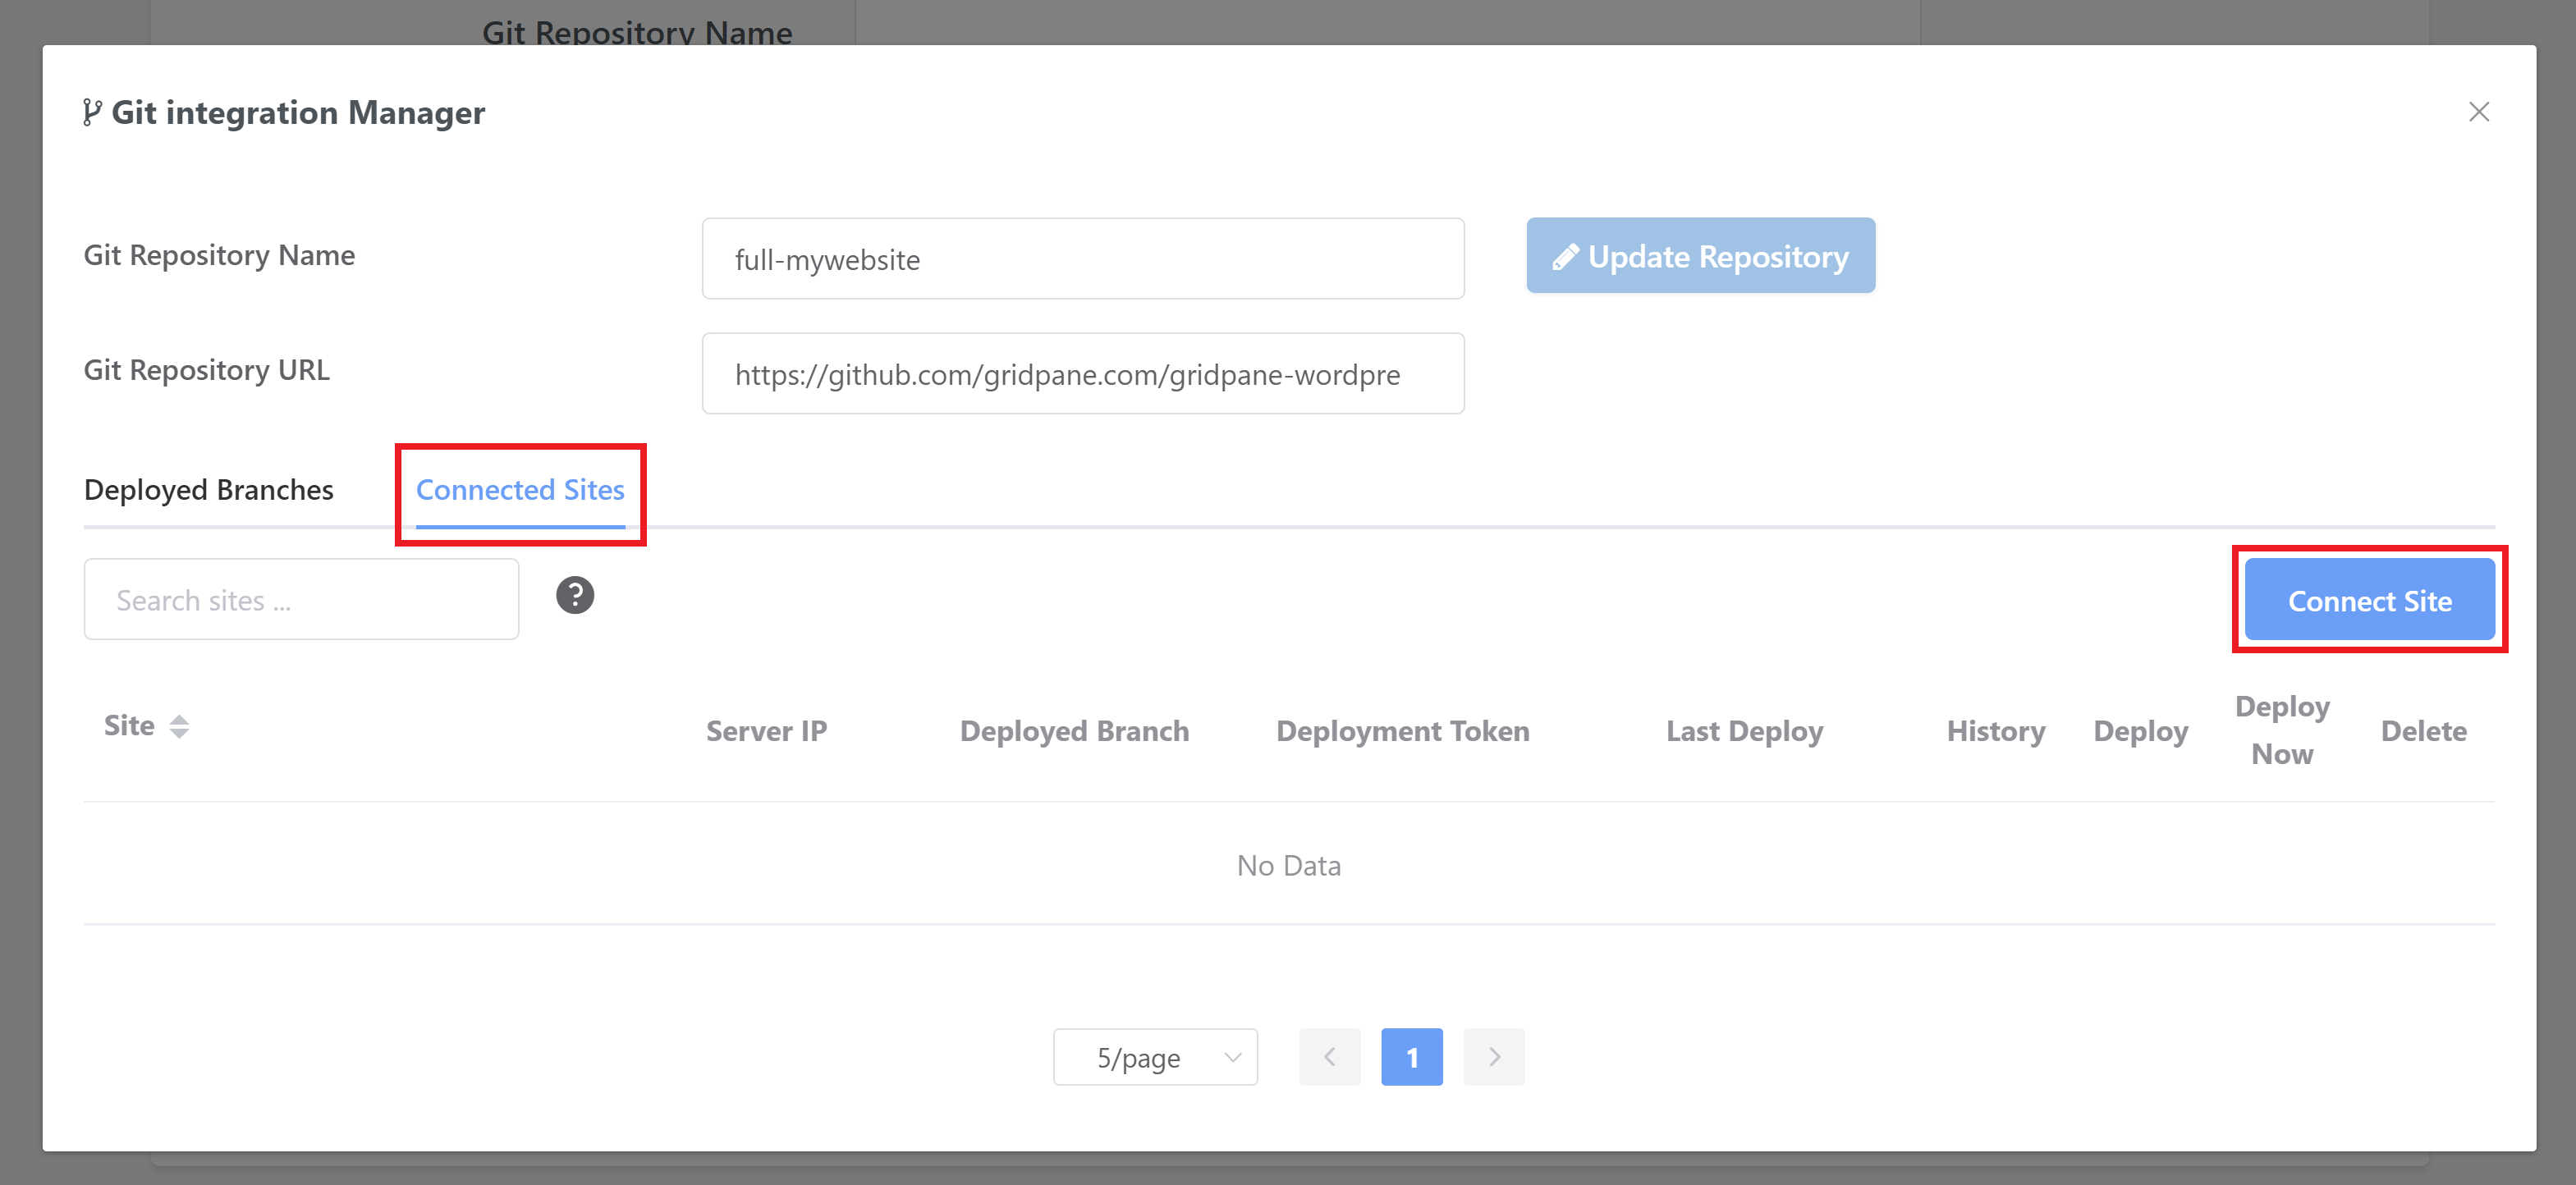
CONNECT SITE USING THE GIT INTEGRATION MANAGER
As illustrated in the previous section, open up the Git Integration Manager for your repo, and then open the Connected Sites tab.
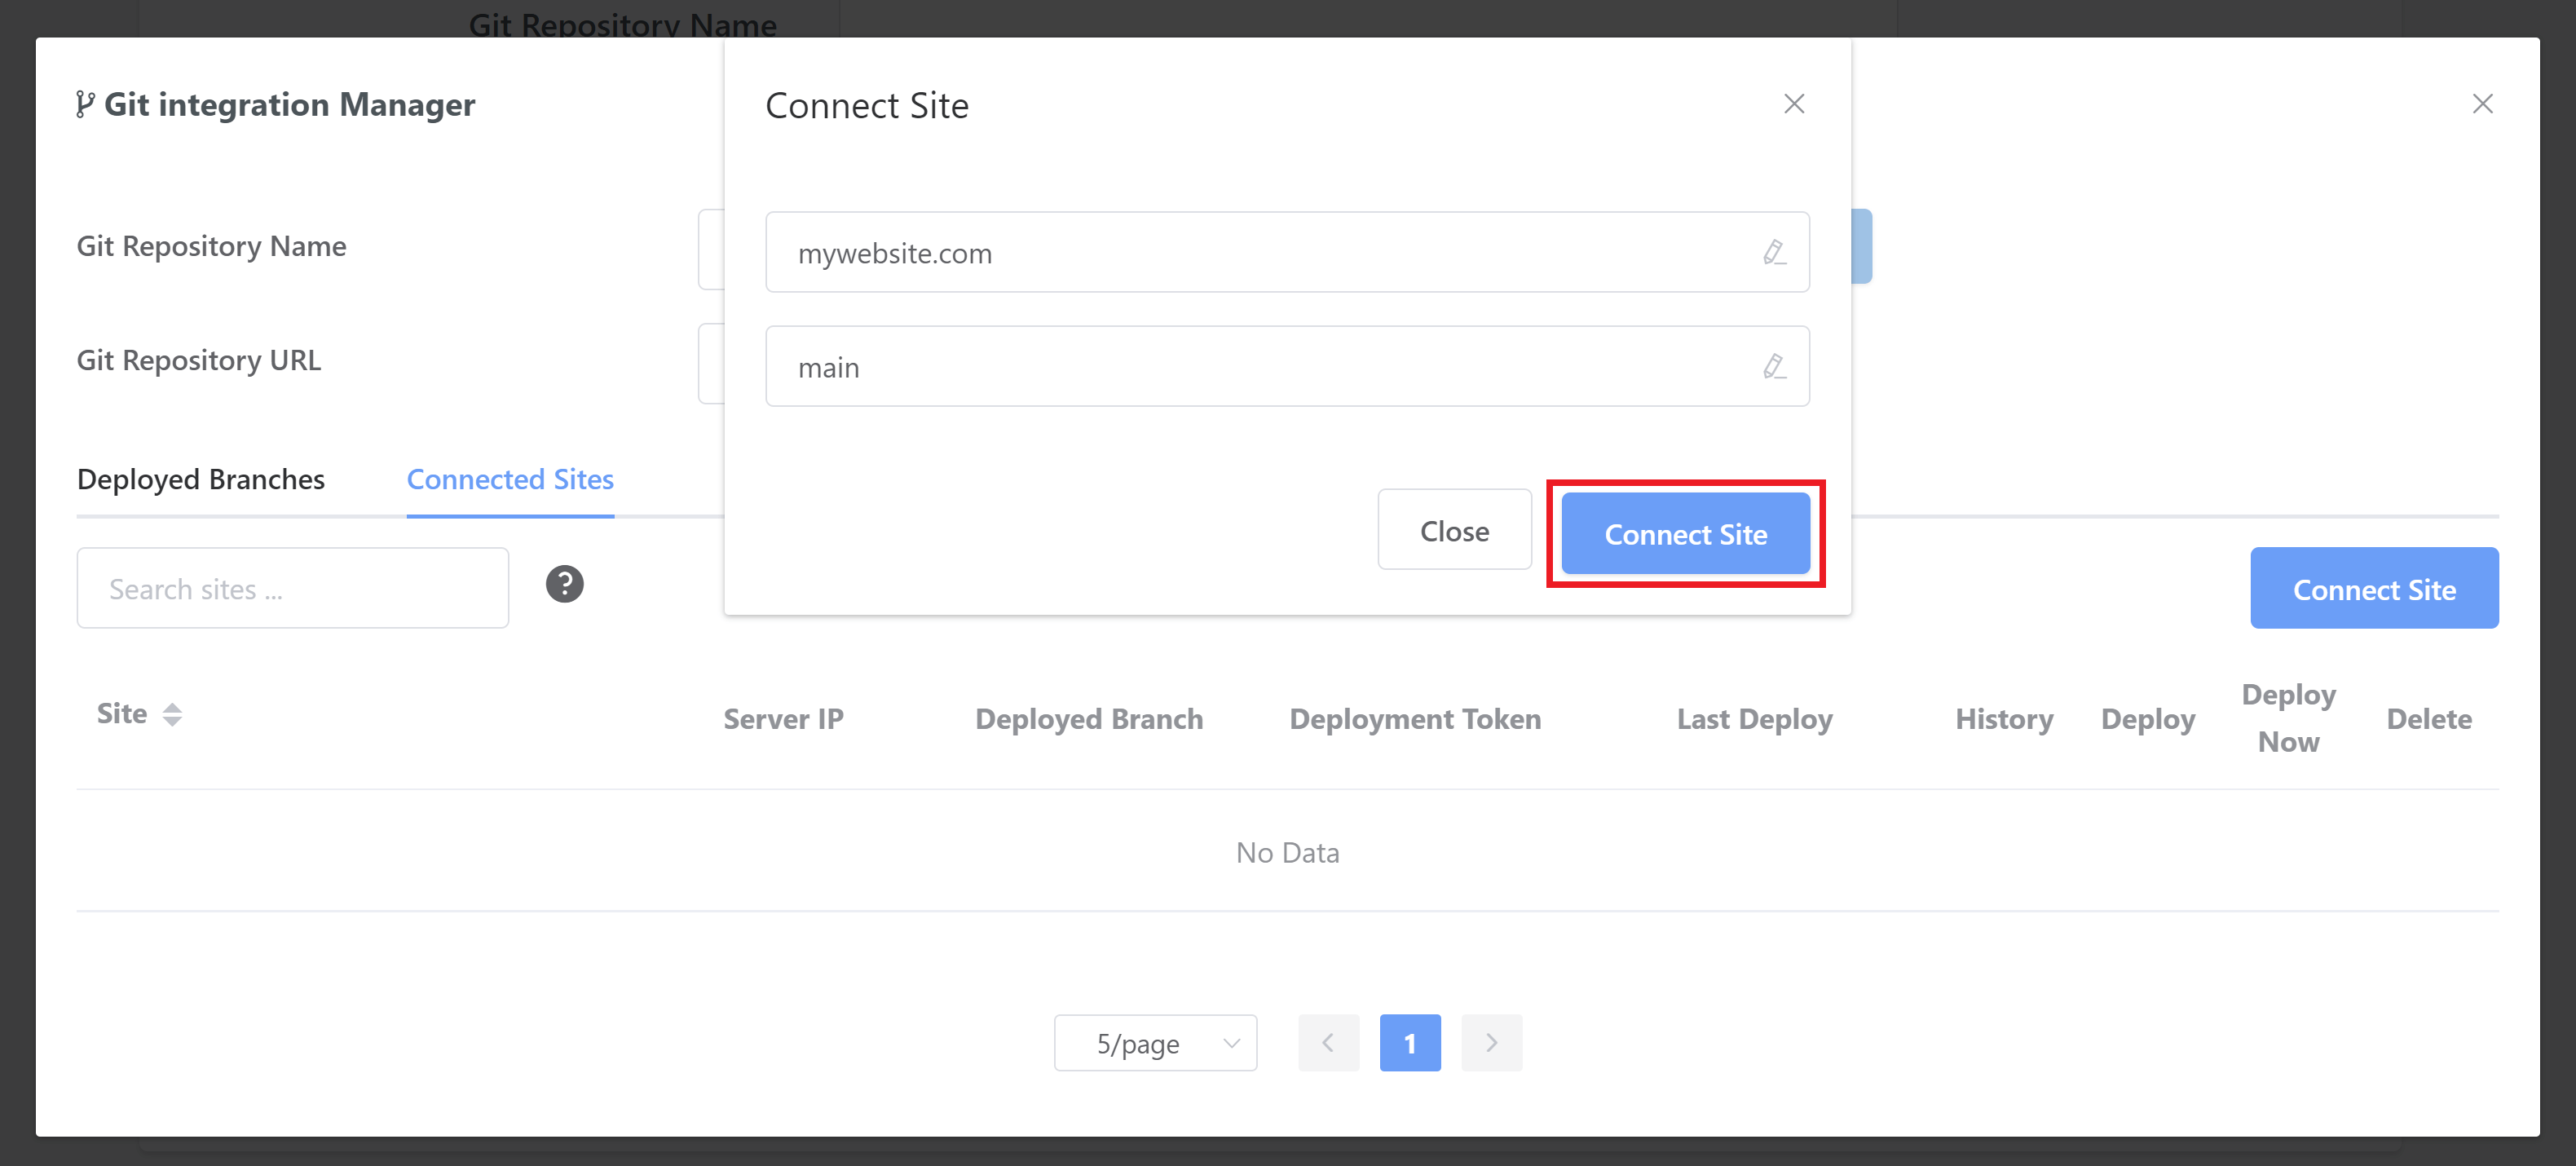
Here, click the Connect Site button and select the site and the branch you want to use.
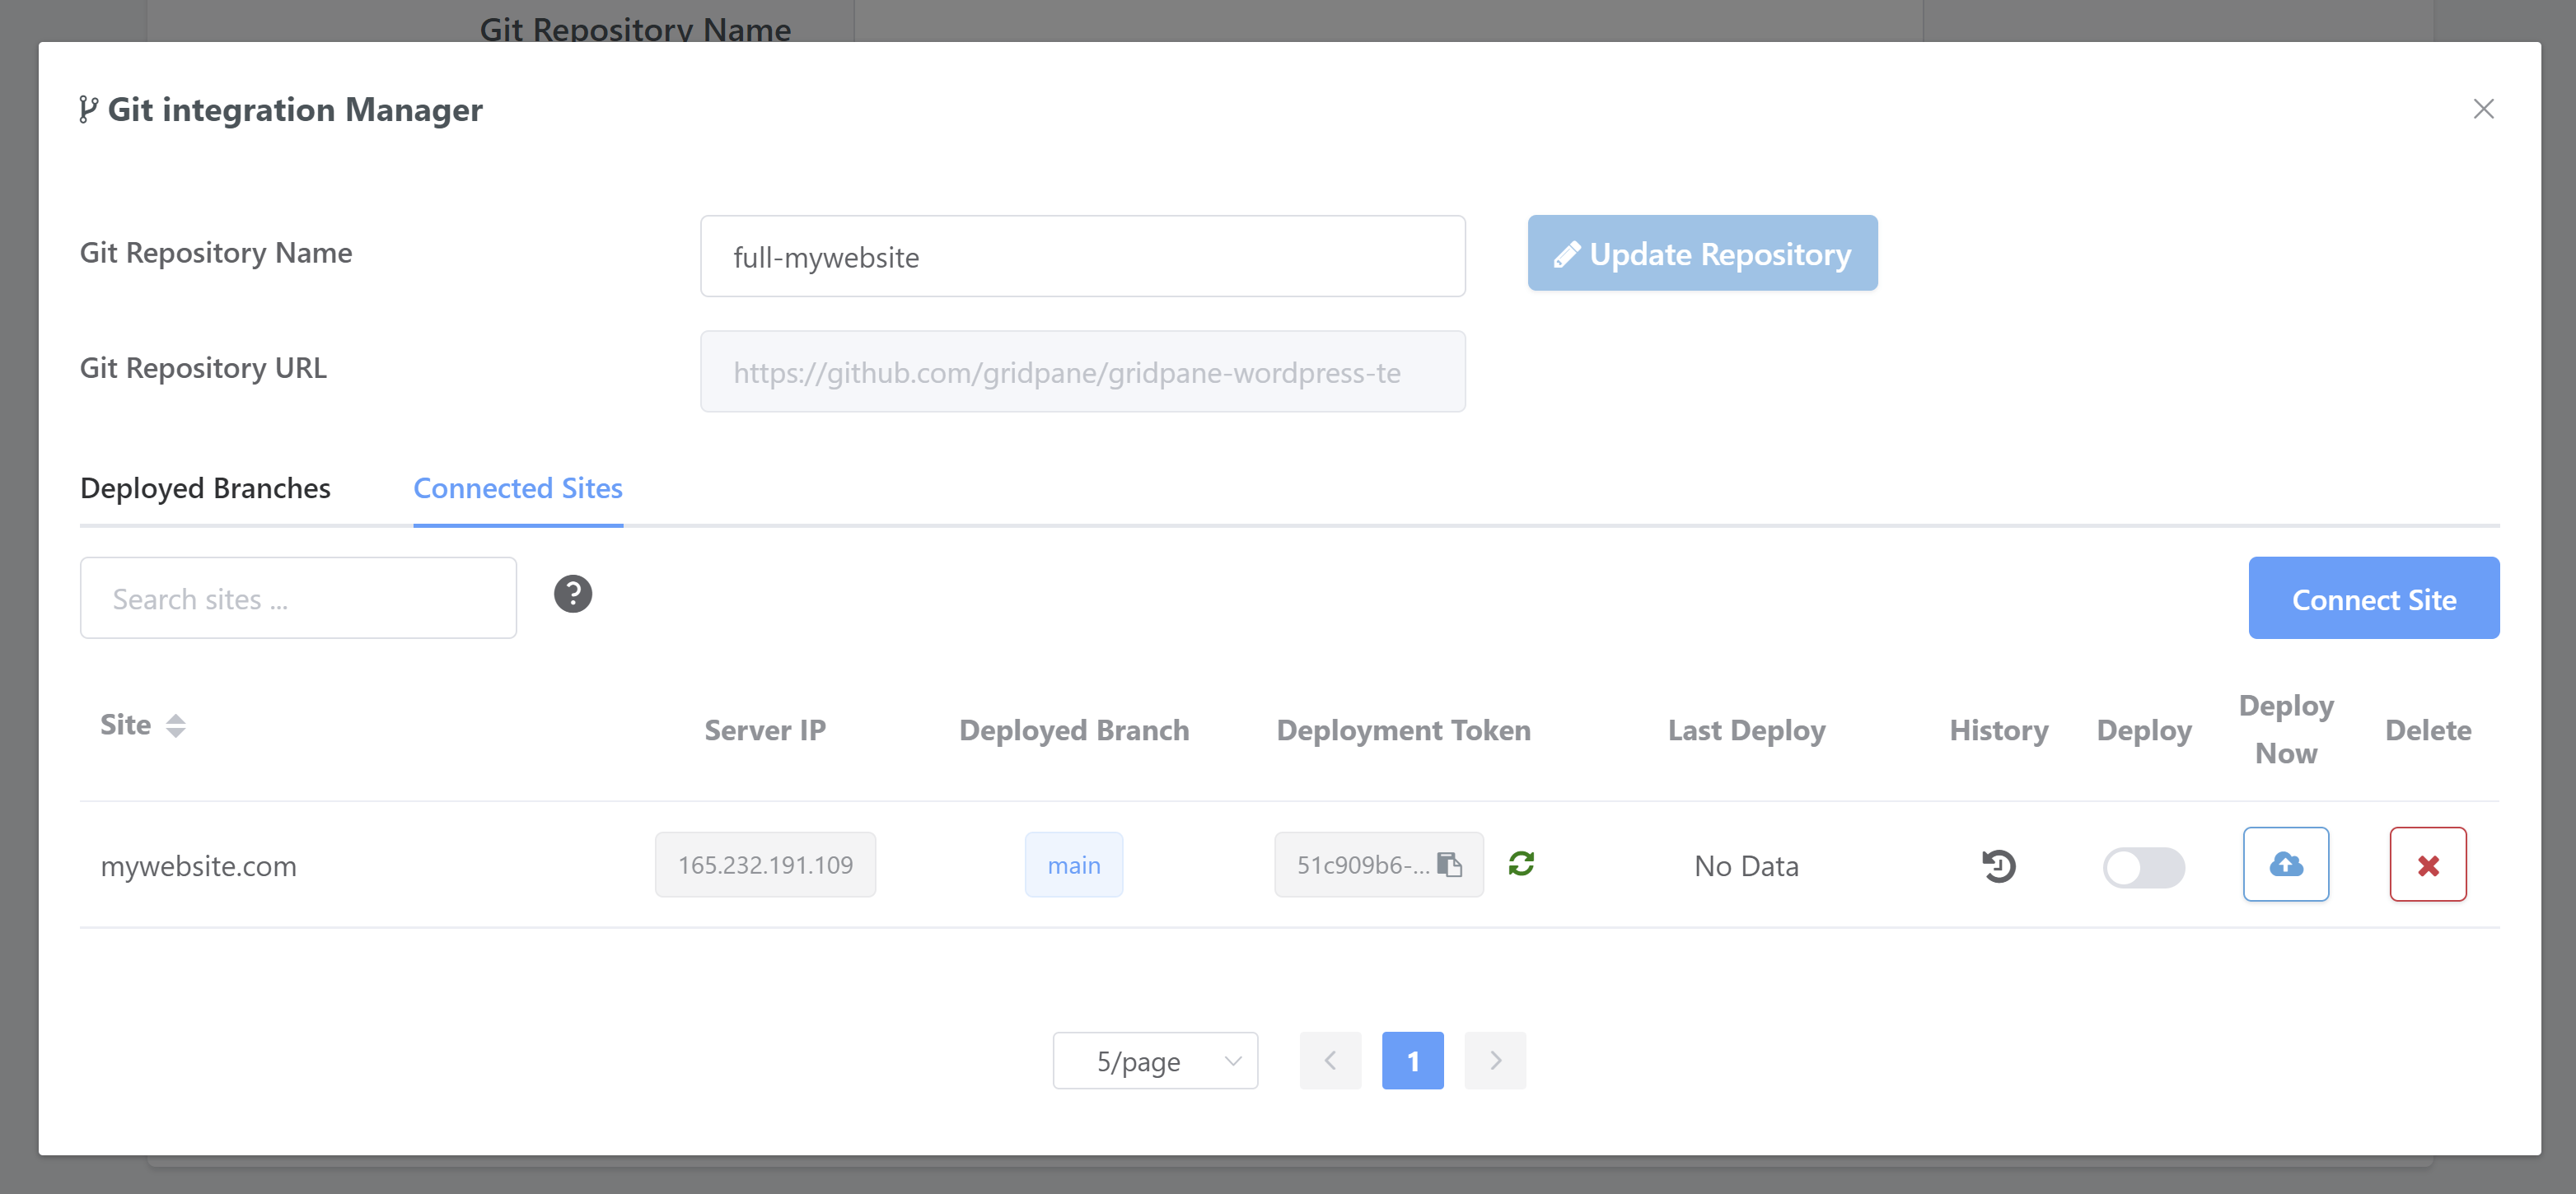
Once you’ve connected a website you will see the UI update with the following details:
- Your website URL
- Your Server IP (and hostname on hover)
- The deployed branch name (this might be cut short but you can hover over it for the full branch name)
- The deployment token
The Deployment Token
Copy the Deployment Token to get the webhook for automated deployments.
If you ever need to, you can click the regenerate button to create new token and new webhook (though note that this will stop old webhook from working).
Deployment Information
You’ll also see the following:
- The last deploy details
- The history (click the icon to open a modal with deployment history)
- The deploy toggle (this enables the site for automated deploys using webhooks)
- The deploy now button (once you click the Deploy now button this runs a deploy immediately)
- Delete (this removes the Git site integration and returns the website to a standard configuration)
This information can also been inside your website customizer in the Git tab – details below.
CONNECT SITE FROM THE WEBSITE CUSTOMIZER
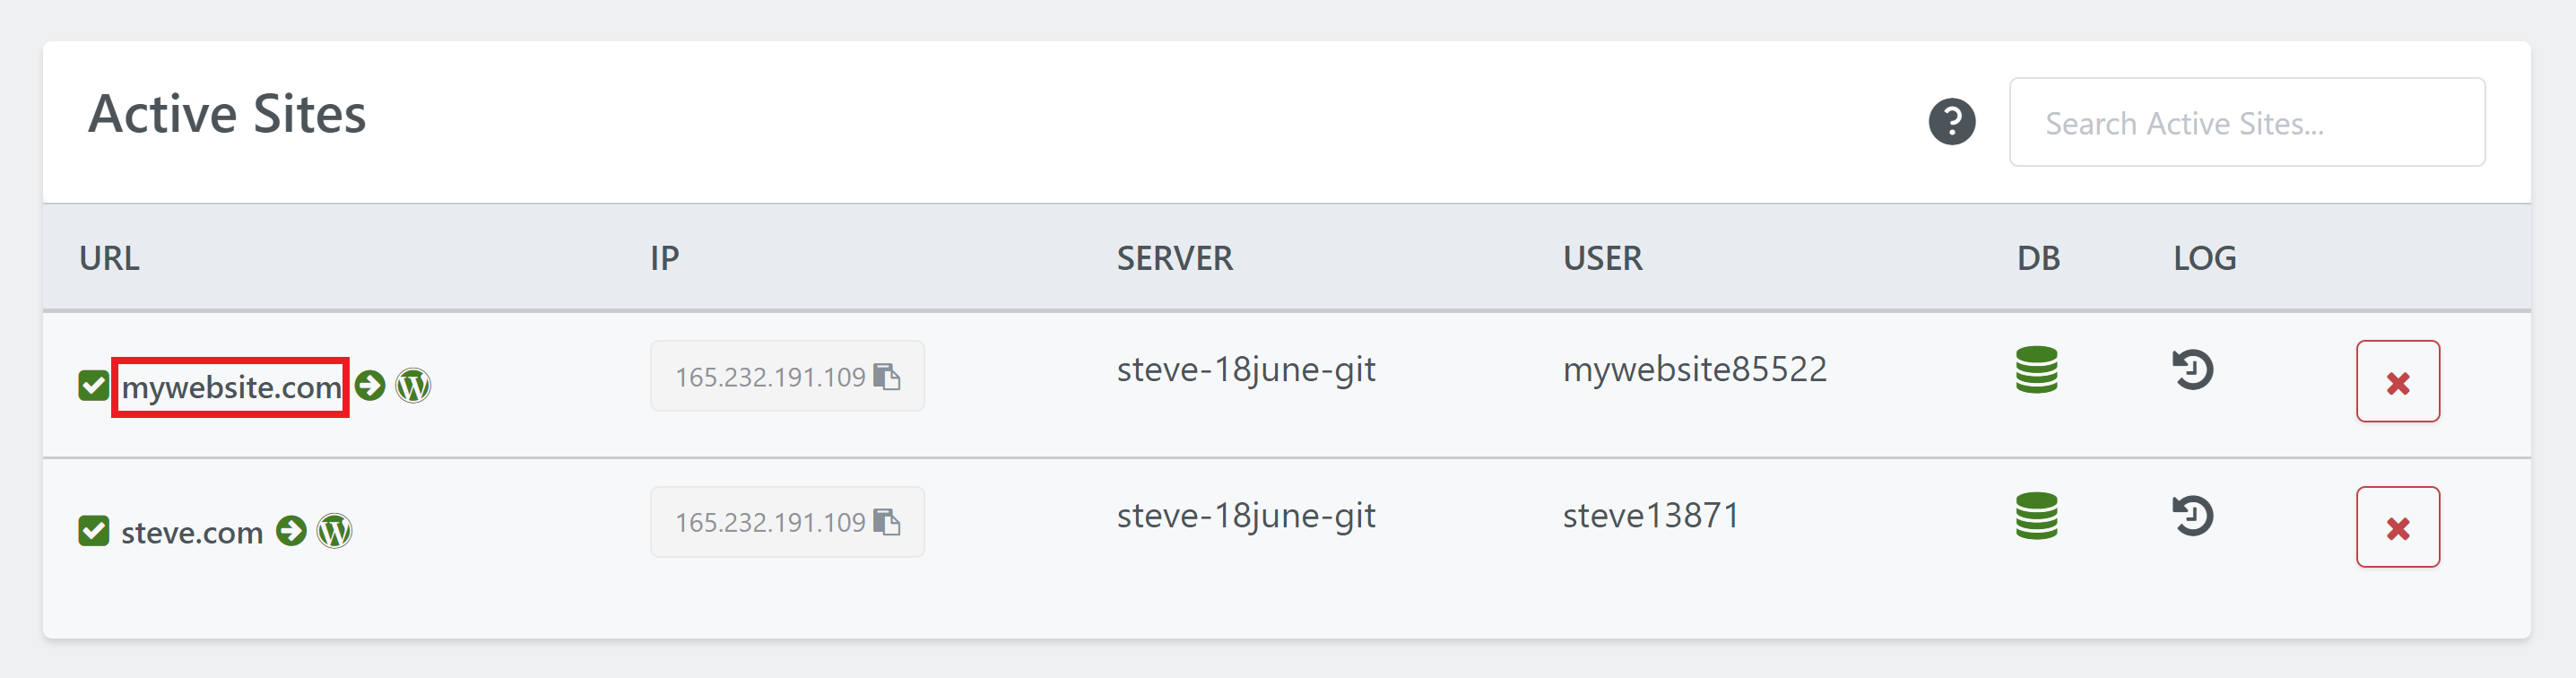
To get started, head over to the Sites page inside your vCanopy account, and the click on the website to open up the website customizer:
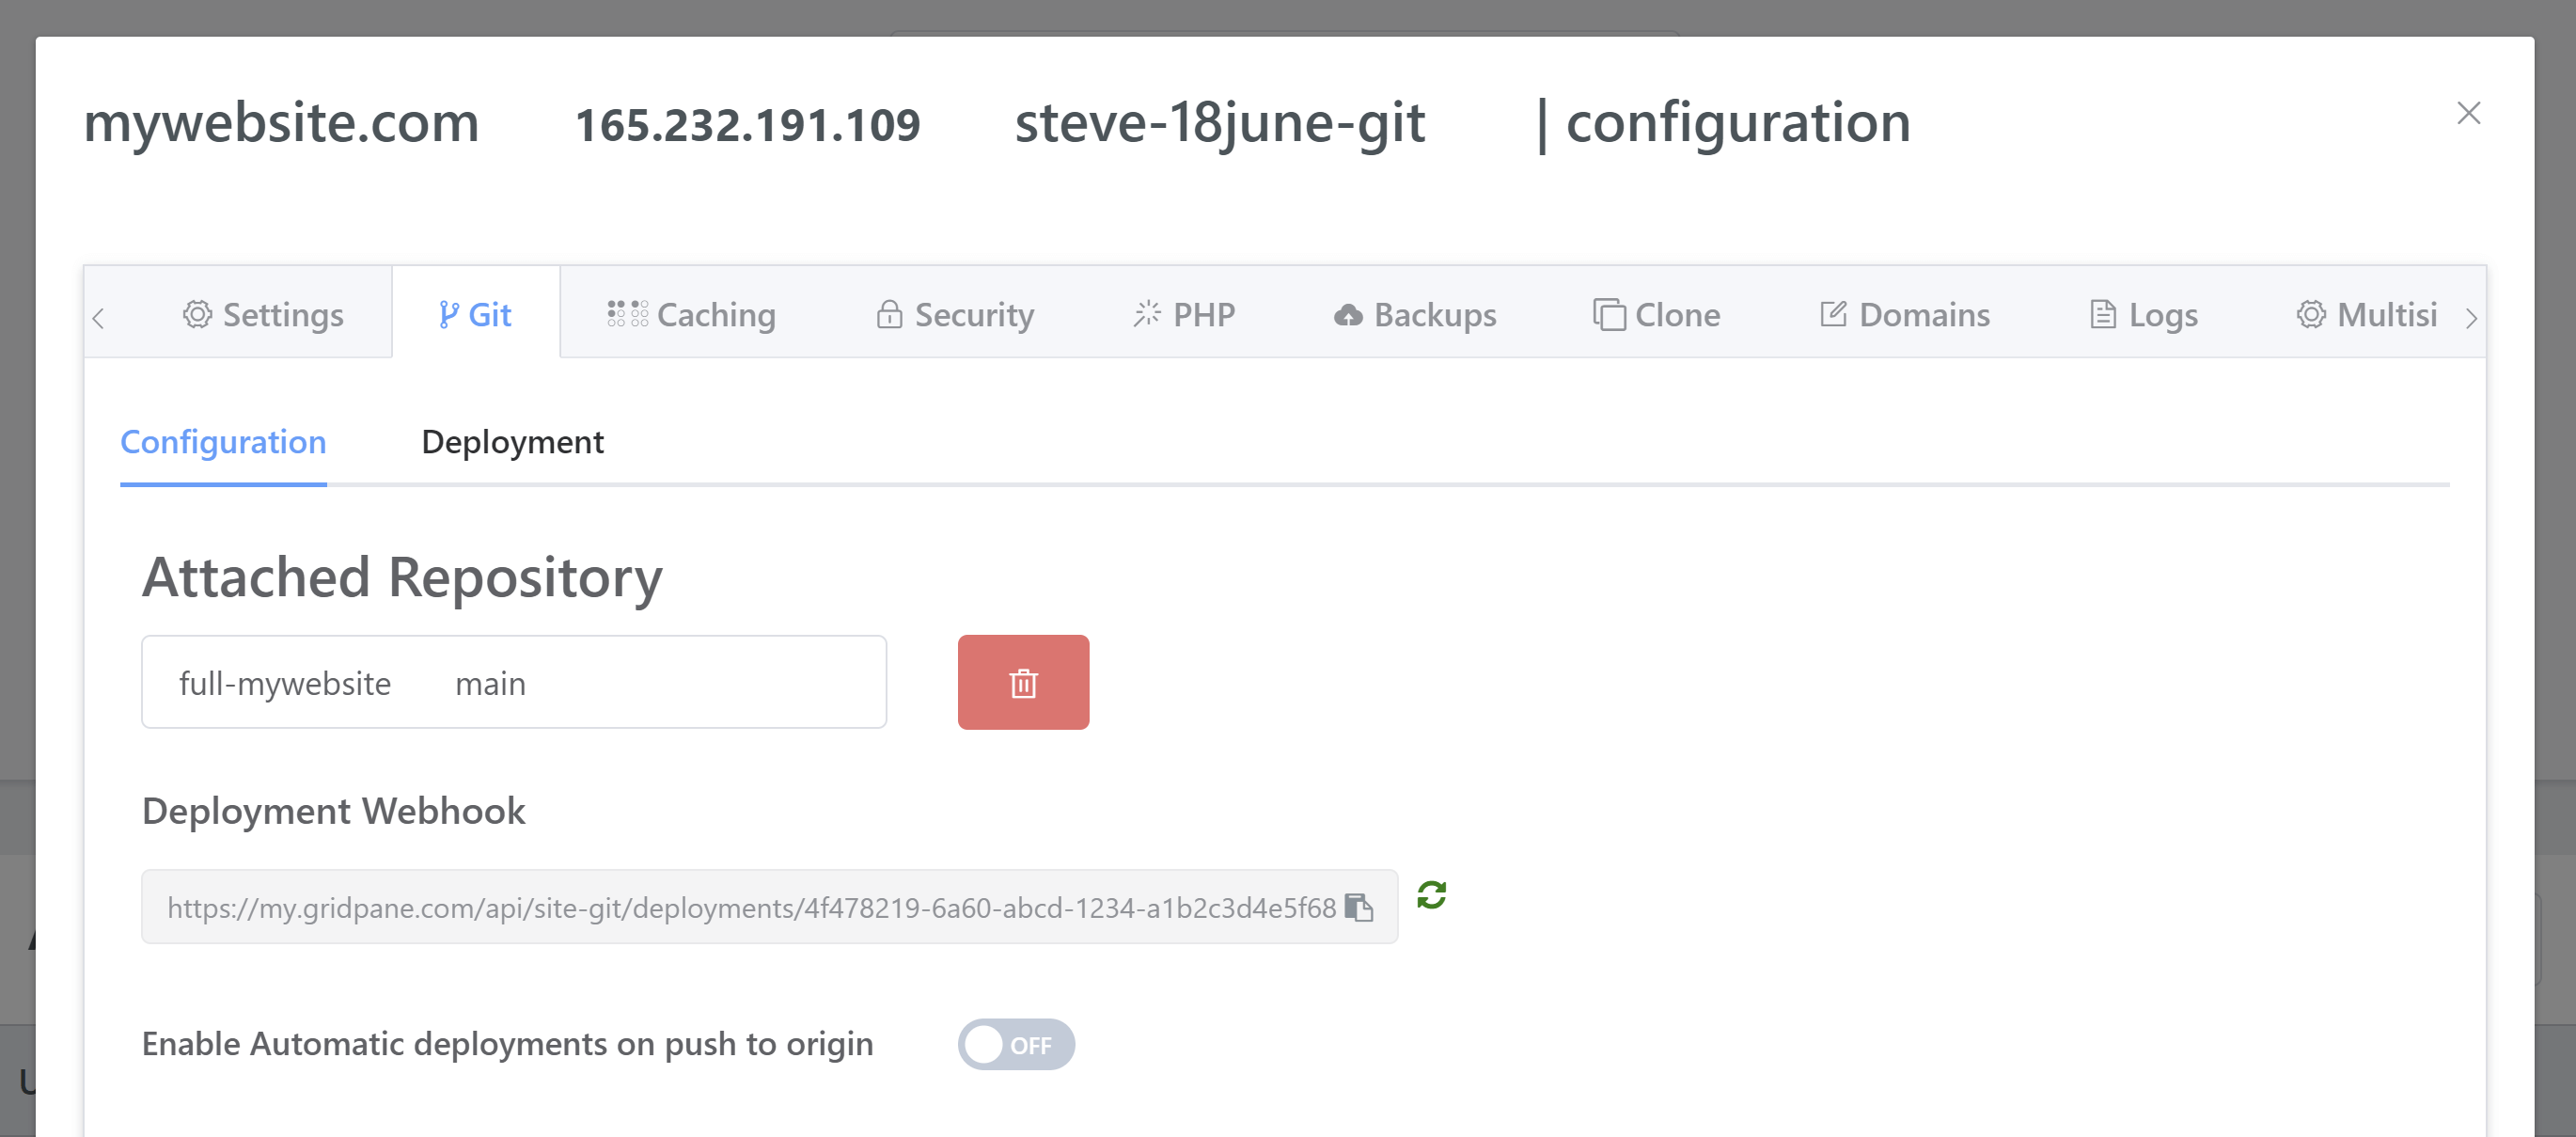
Inside the Configuration tab you can select the branch from the dropdown and then click the Attach Repository button.

Once you have connected your site to your repo you will see:
- The attached repository and branch (with button to detach)
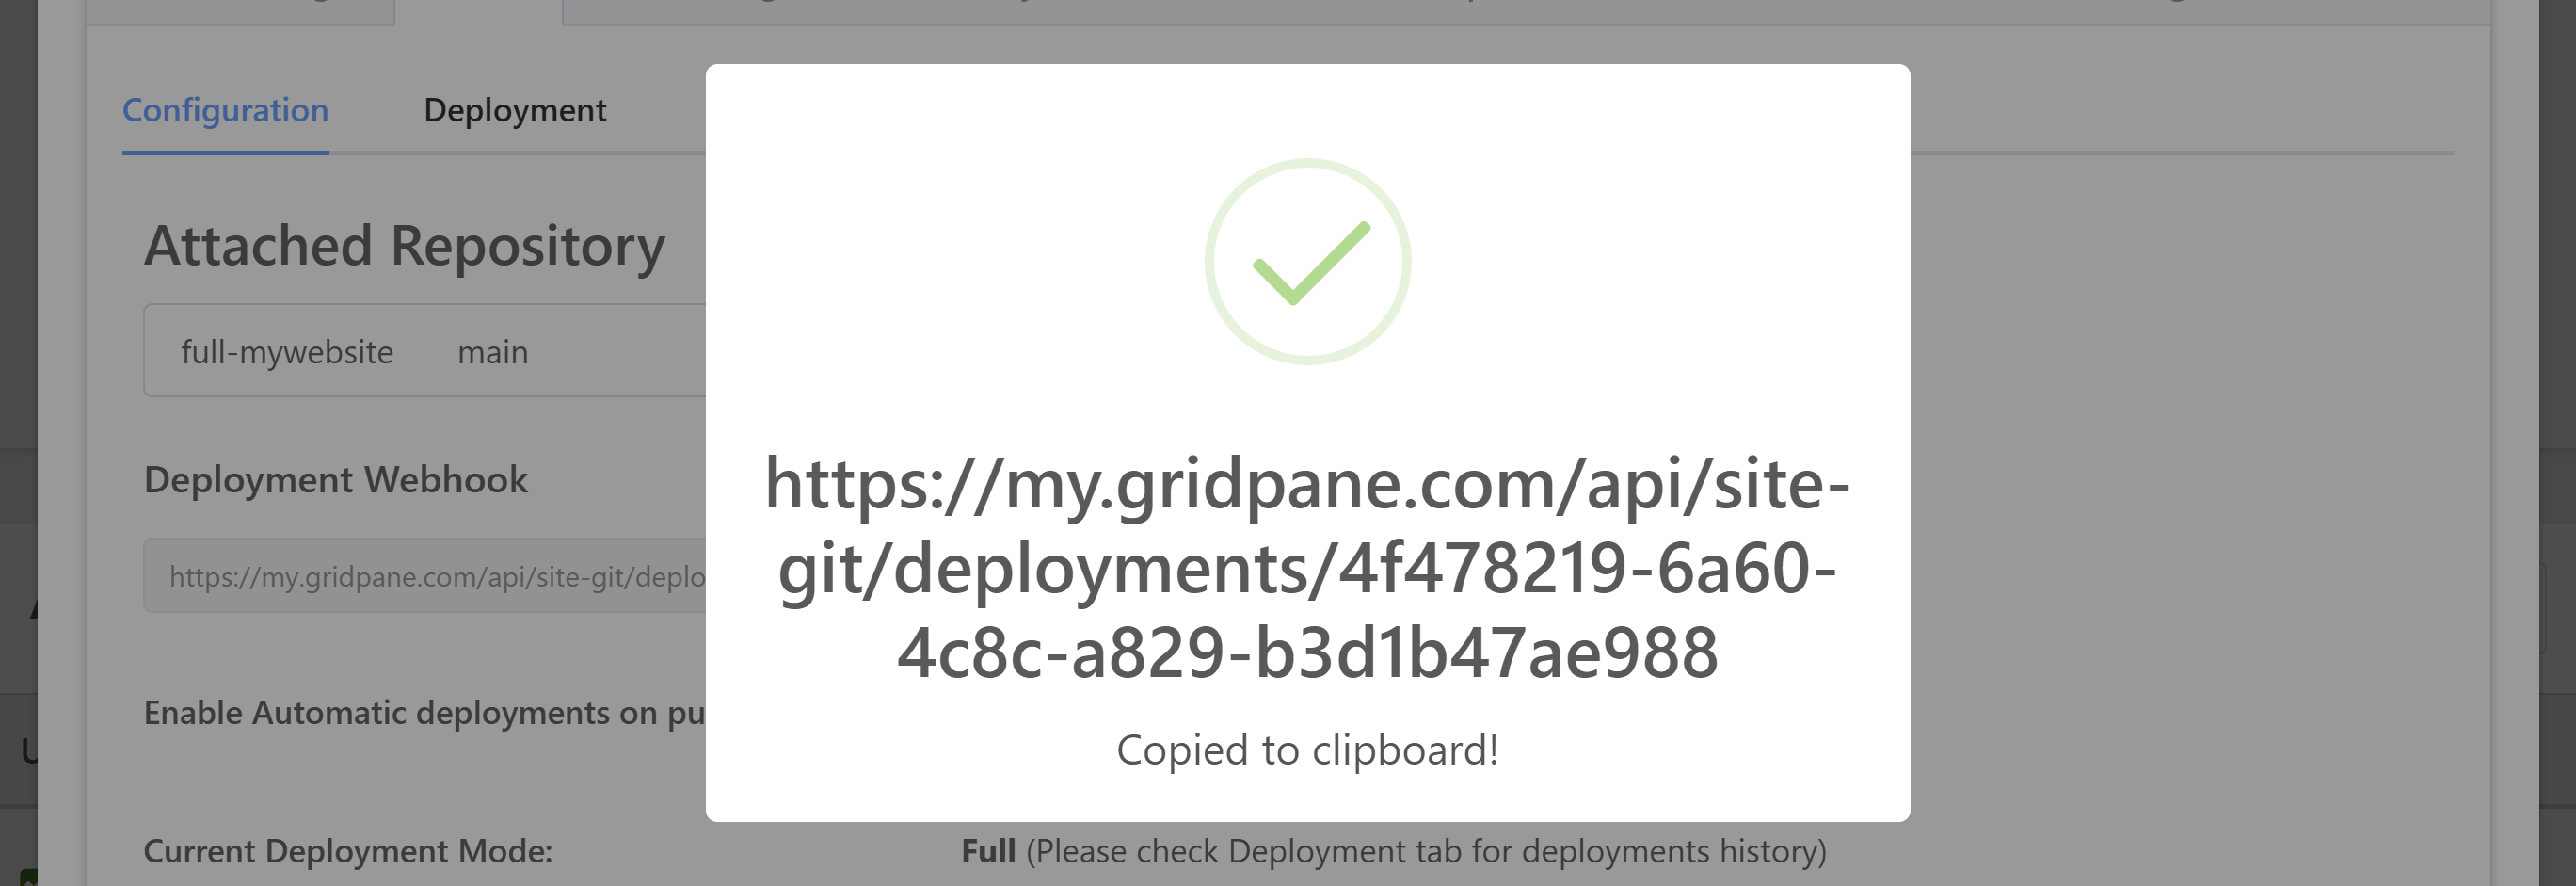
- Deployment webhook (copy this to get the webhook for automated deployments)
- Regenerate button
- Deploy toggle (enables the site for automated deploys using webhooks)
These settings will match up inside the Git Integration Manager row for the site (see the previous section above).
The Deployment Webhook
Copy the Deployment webhook for automated deployments.
If you ever need to, you can click the regenerate button to create new token and new webhook (though note that this will stop old webhook from working).
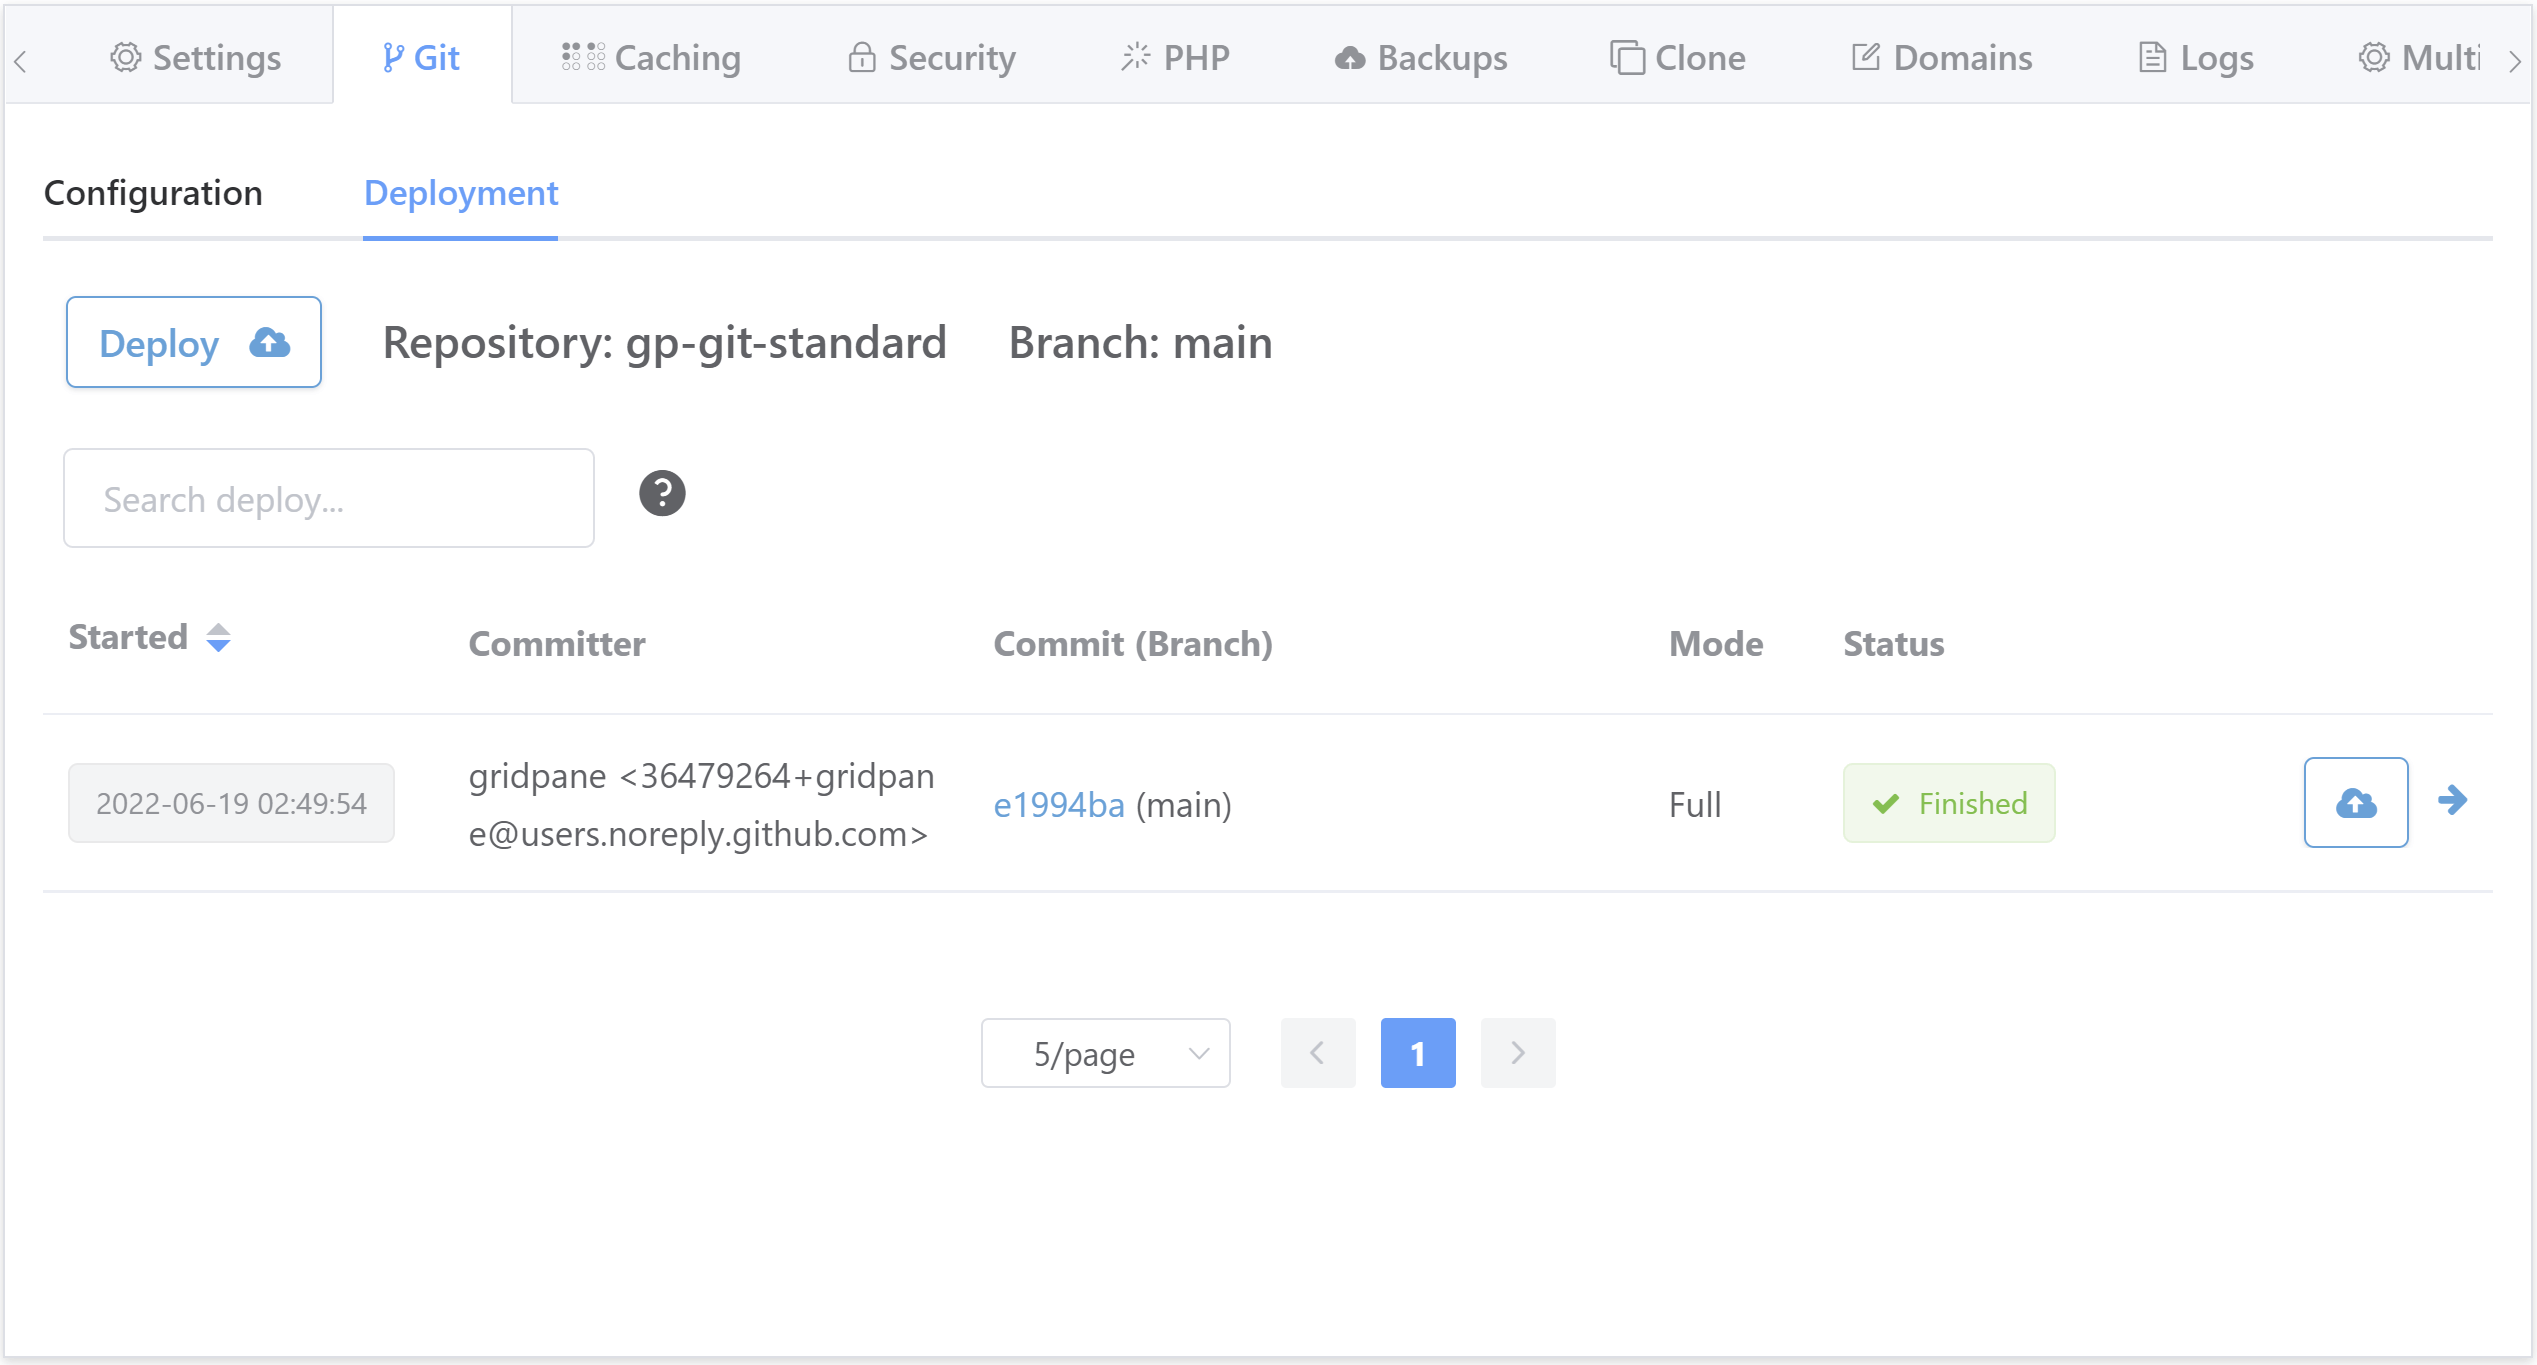
The Deployments Tab
You will also see a deployments tab which will be empty of entries initially. Entries will include:
- Rows of past deployments
- The search bar
- Git repo info
- Deploy now button
This tab will contain the entire history of deploys for a site once it has been configured for Git.
The deployment history is also available from the Git integration manager row for the site.
Here’s an example preview:
4. Disconnecting a Website from Git and/or Removing a Repo
If you would like to disconnect a website from Git or remove a repository from your account, this is a simple process.
DISCONNECTING A WEBSITE FROM GIT
If you would to remove a website from an integration you can click the disconnect icons present in both the website customizer:
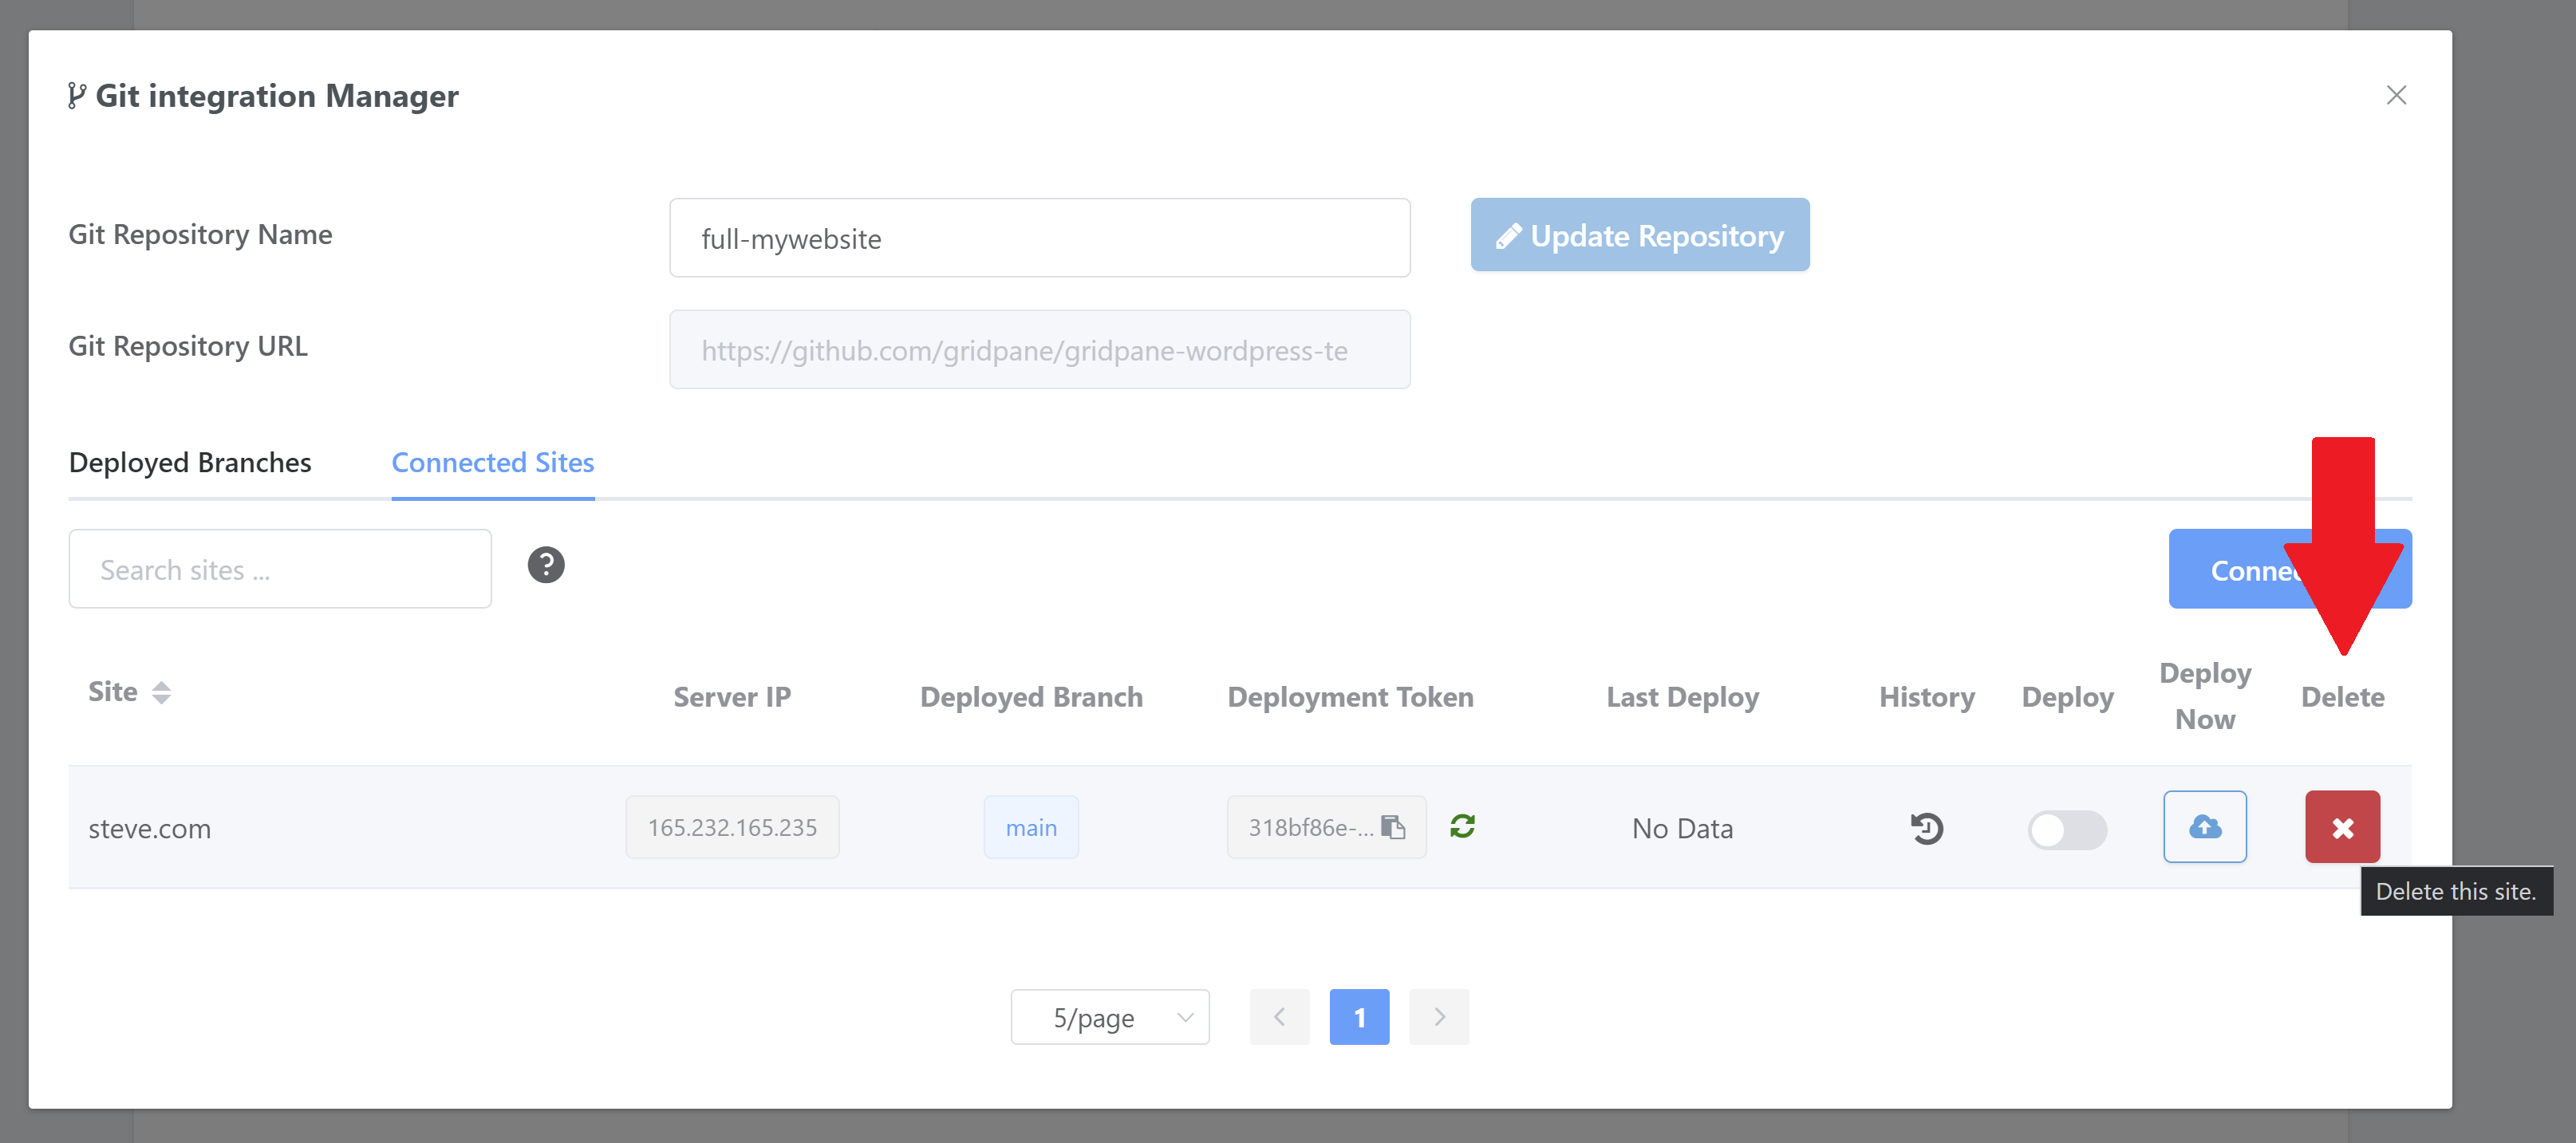
Or the Git Integration Manager, inside the Connected Sites tab:
REMOVING A BRANCH OR REPOSITORY
You can only remove branches and repos if there are no websites connected to them. This option will remain locked until the connections to sites are removed.
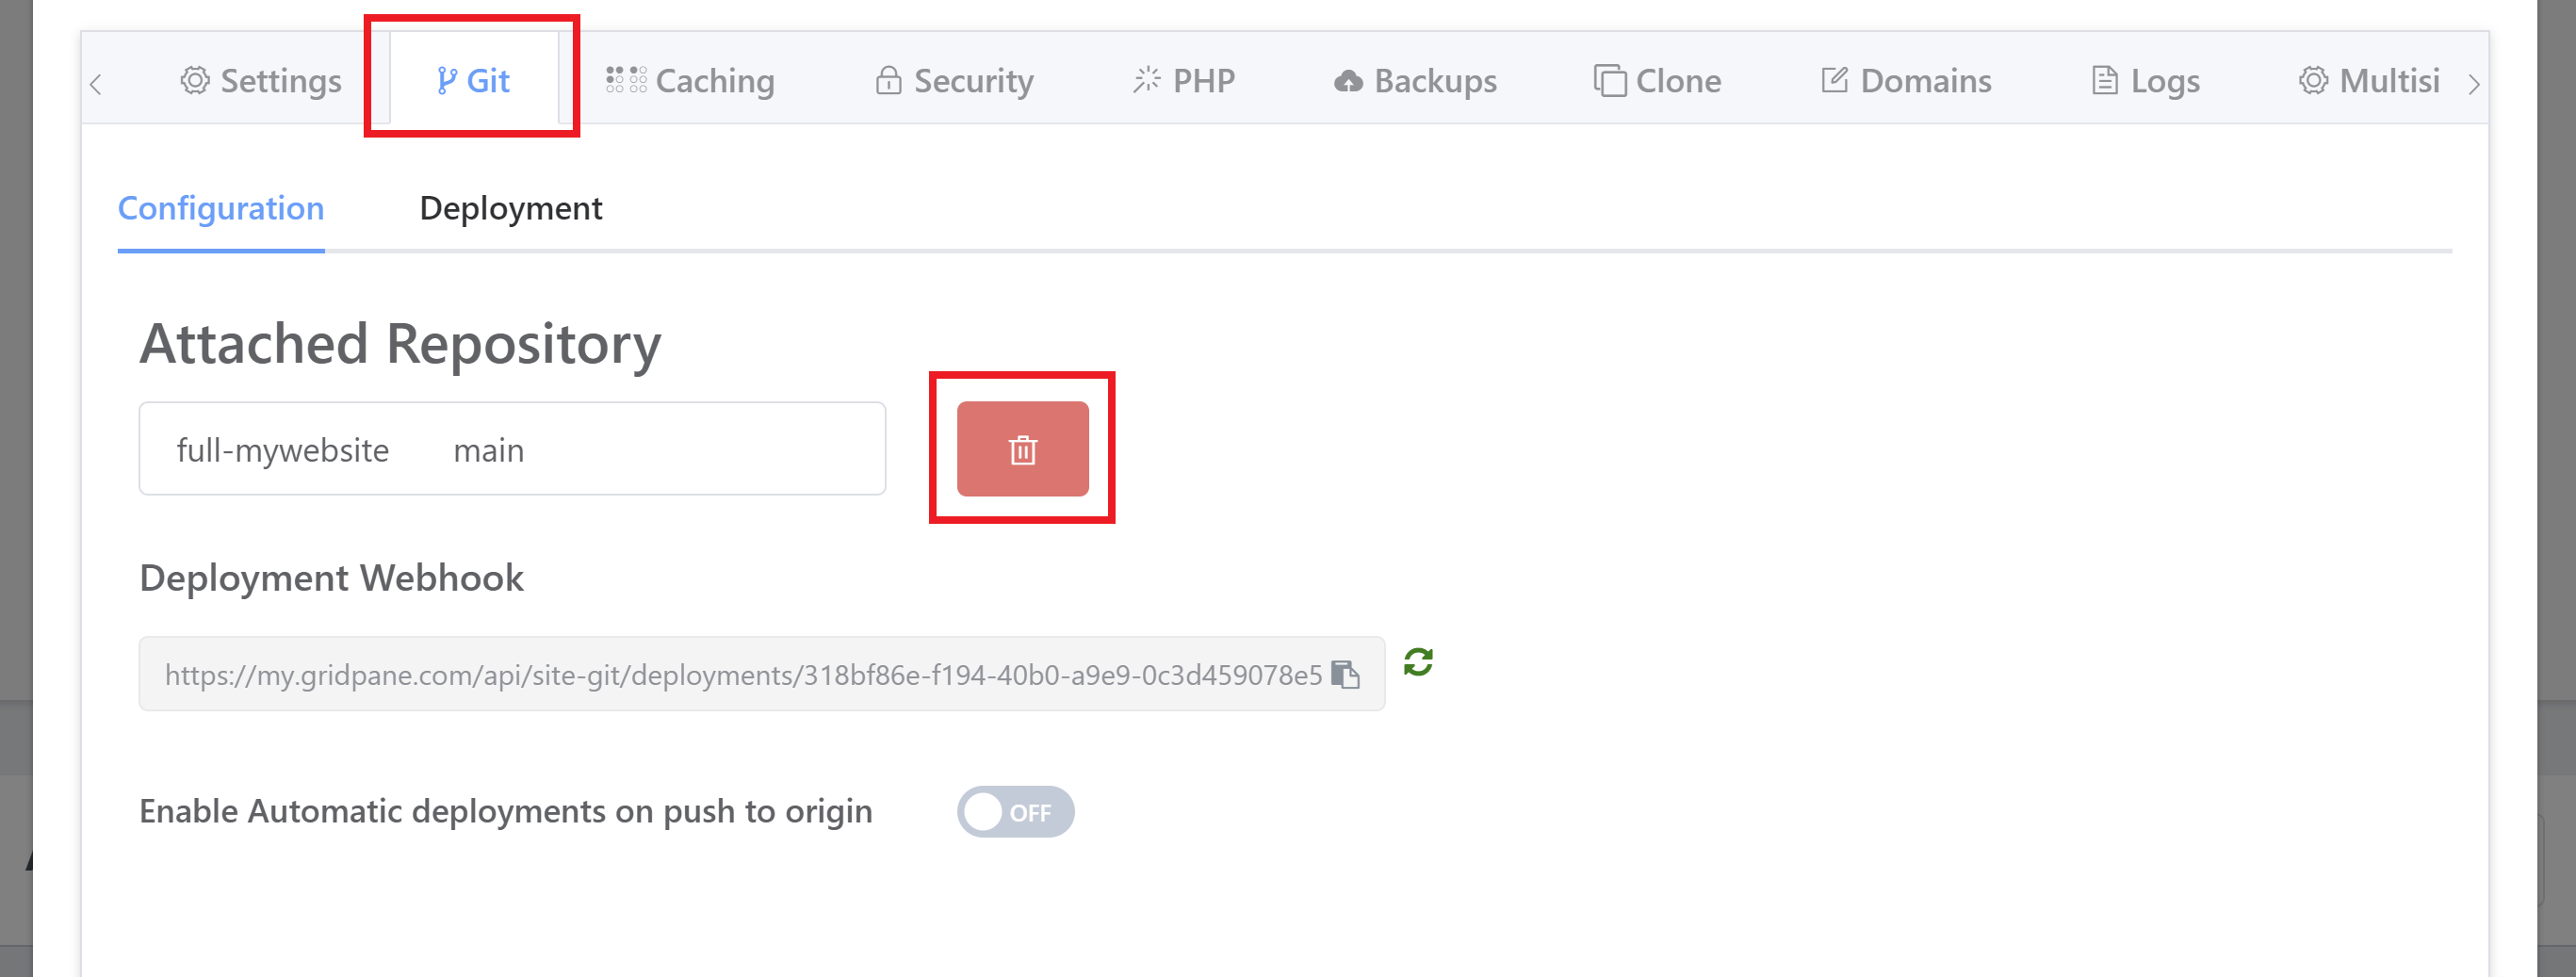
To remove a repo, head over to the Git page inside your account, locate the name of the branch you wish to delete (you can use the search box if you have a lot of repo’s attached), and then click the delete icon:
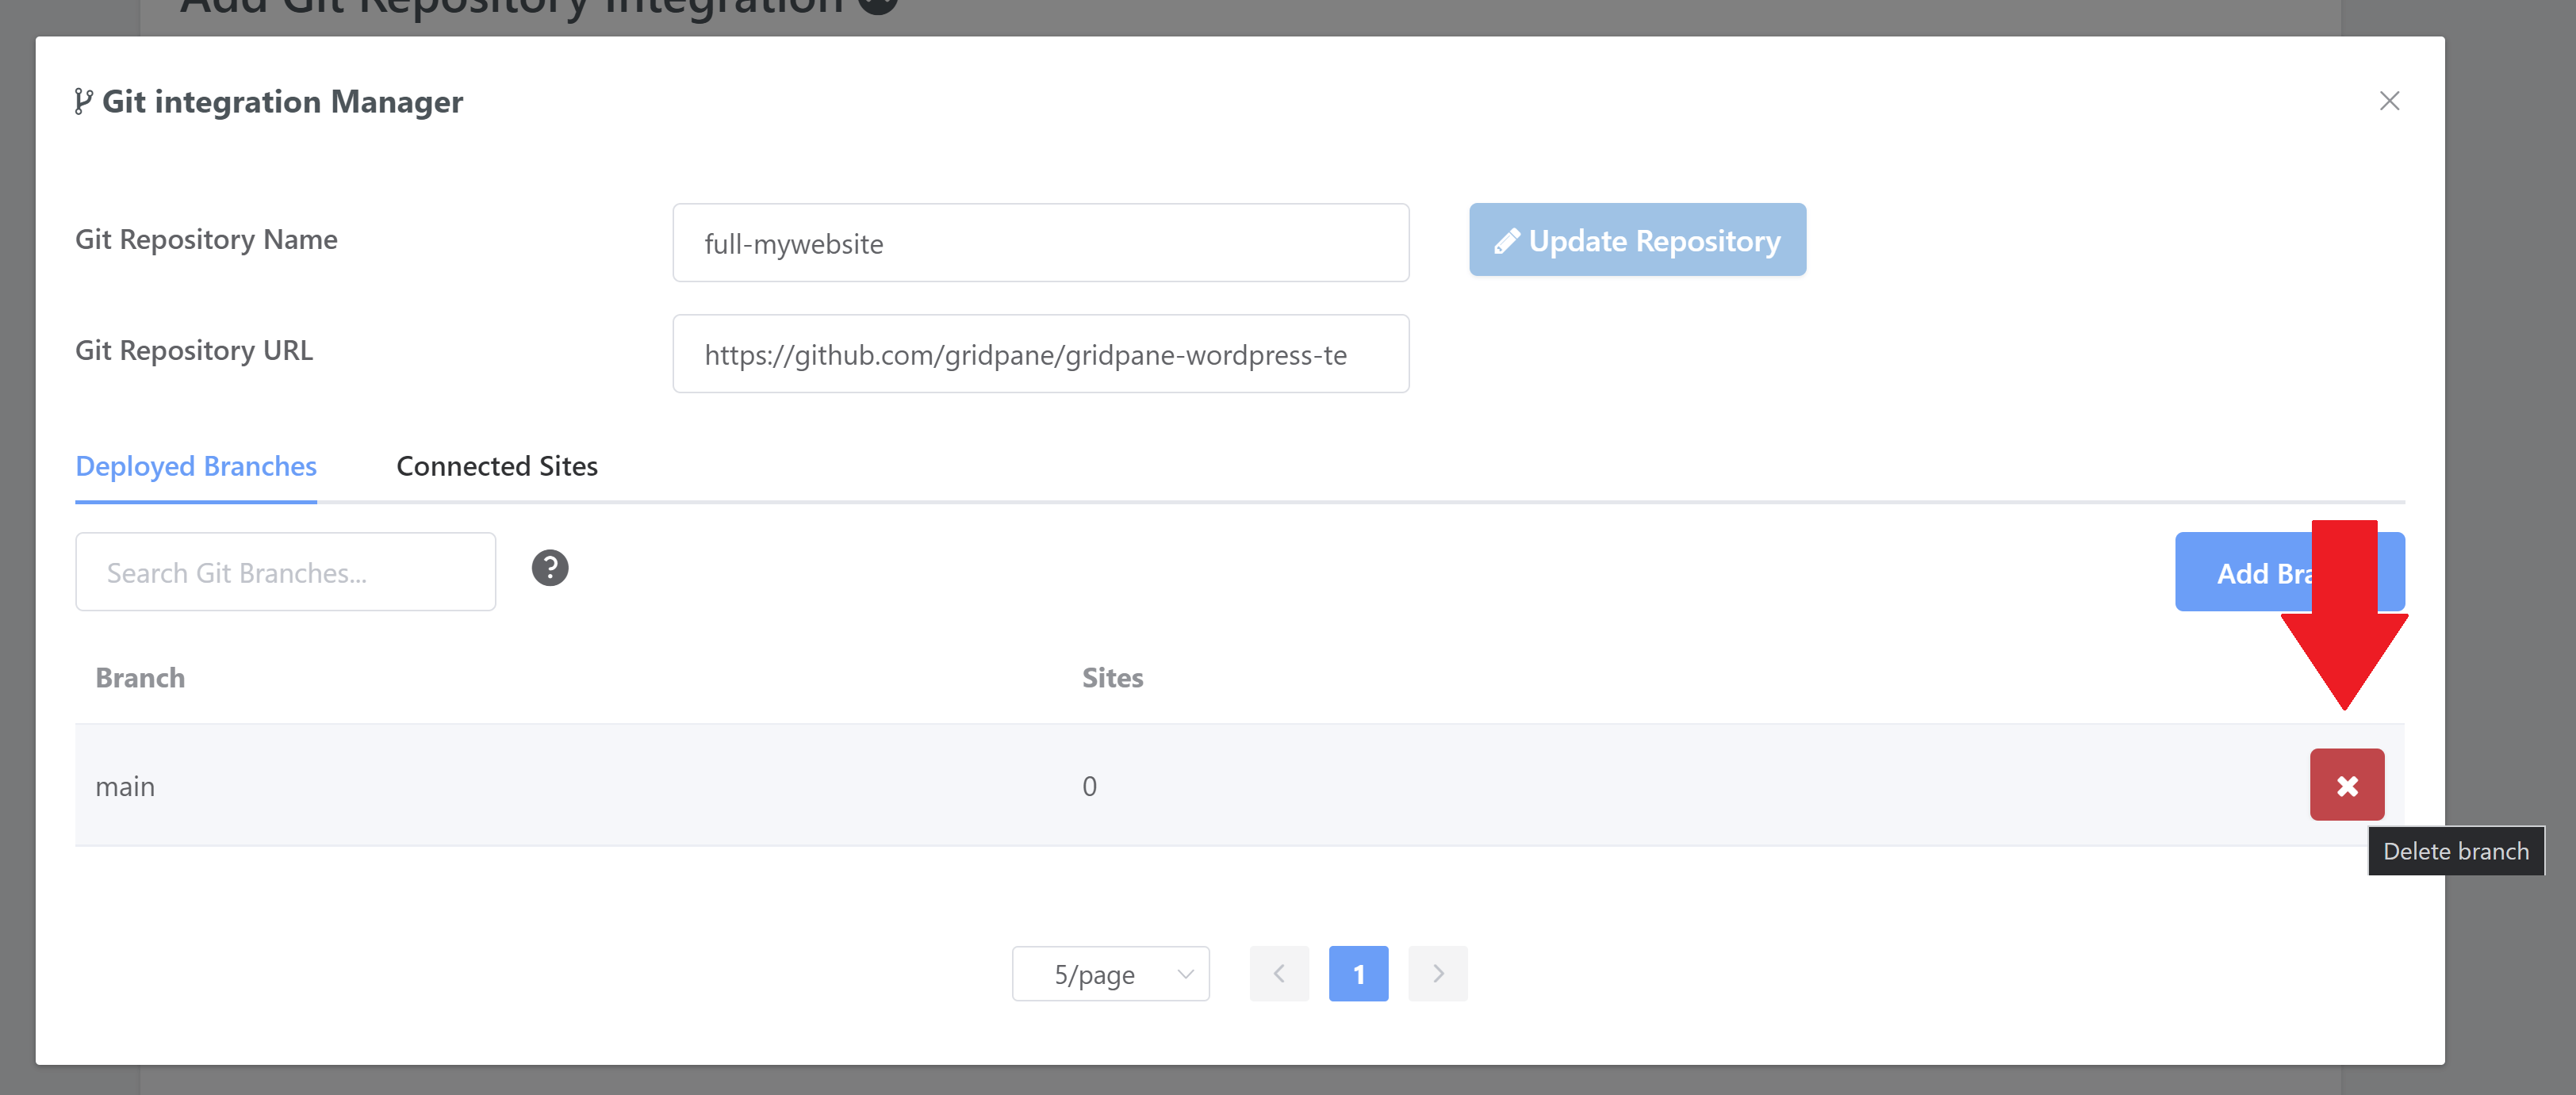
To remove a branch, open up the Git Integration Manager and you’ll see a delete icon on the right hand side next to each of your branches – click it to remove the specific branch:
RUN A MANUAL DEPLOY FROM THE GIT INTEGRATION MANAGER
On the Git page in your account, open the Git Integration Manager, locate the Deploy Now button and click it to start your deployment:

Once clicked, the button will turn into a spinning icon and the deployment will start running, and other data fields will update as the deploy calls back.
Once the deploy has completed you will see all the fields populated and the state of the last deploy. Assuming all went well and you will see a green timestamp.
If the deployment was unsuccessful for any reason you will see a notification and no changes will be made to your website.
RUN A MANUAL DEPLOY FROM THE SITE CUSTOMIZER GIT TAB
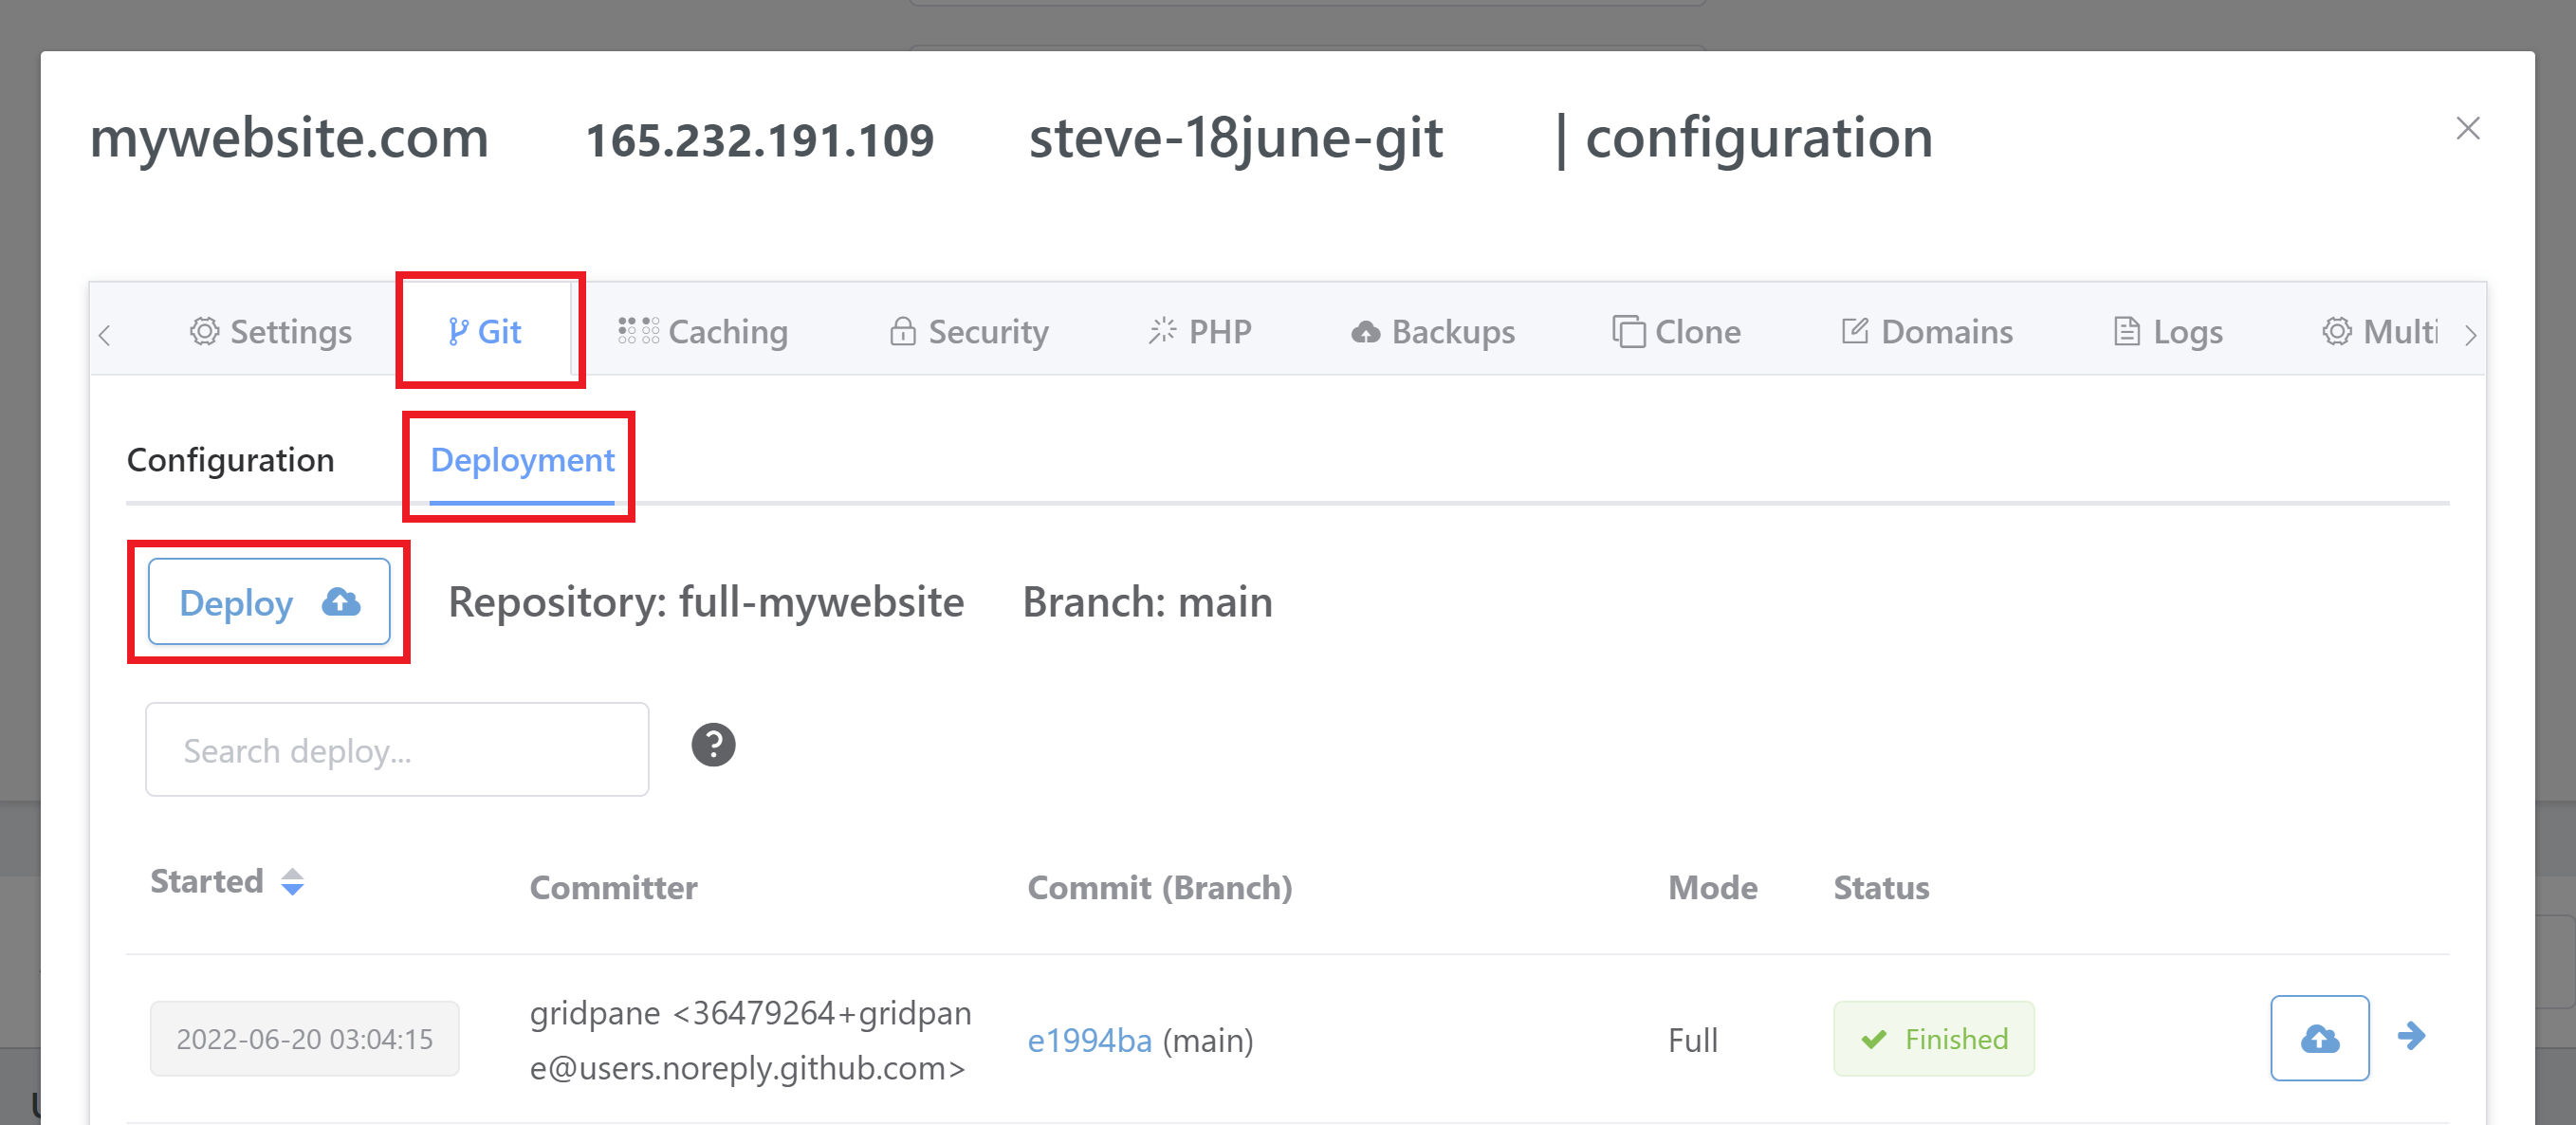
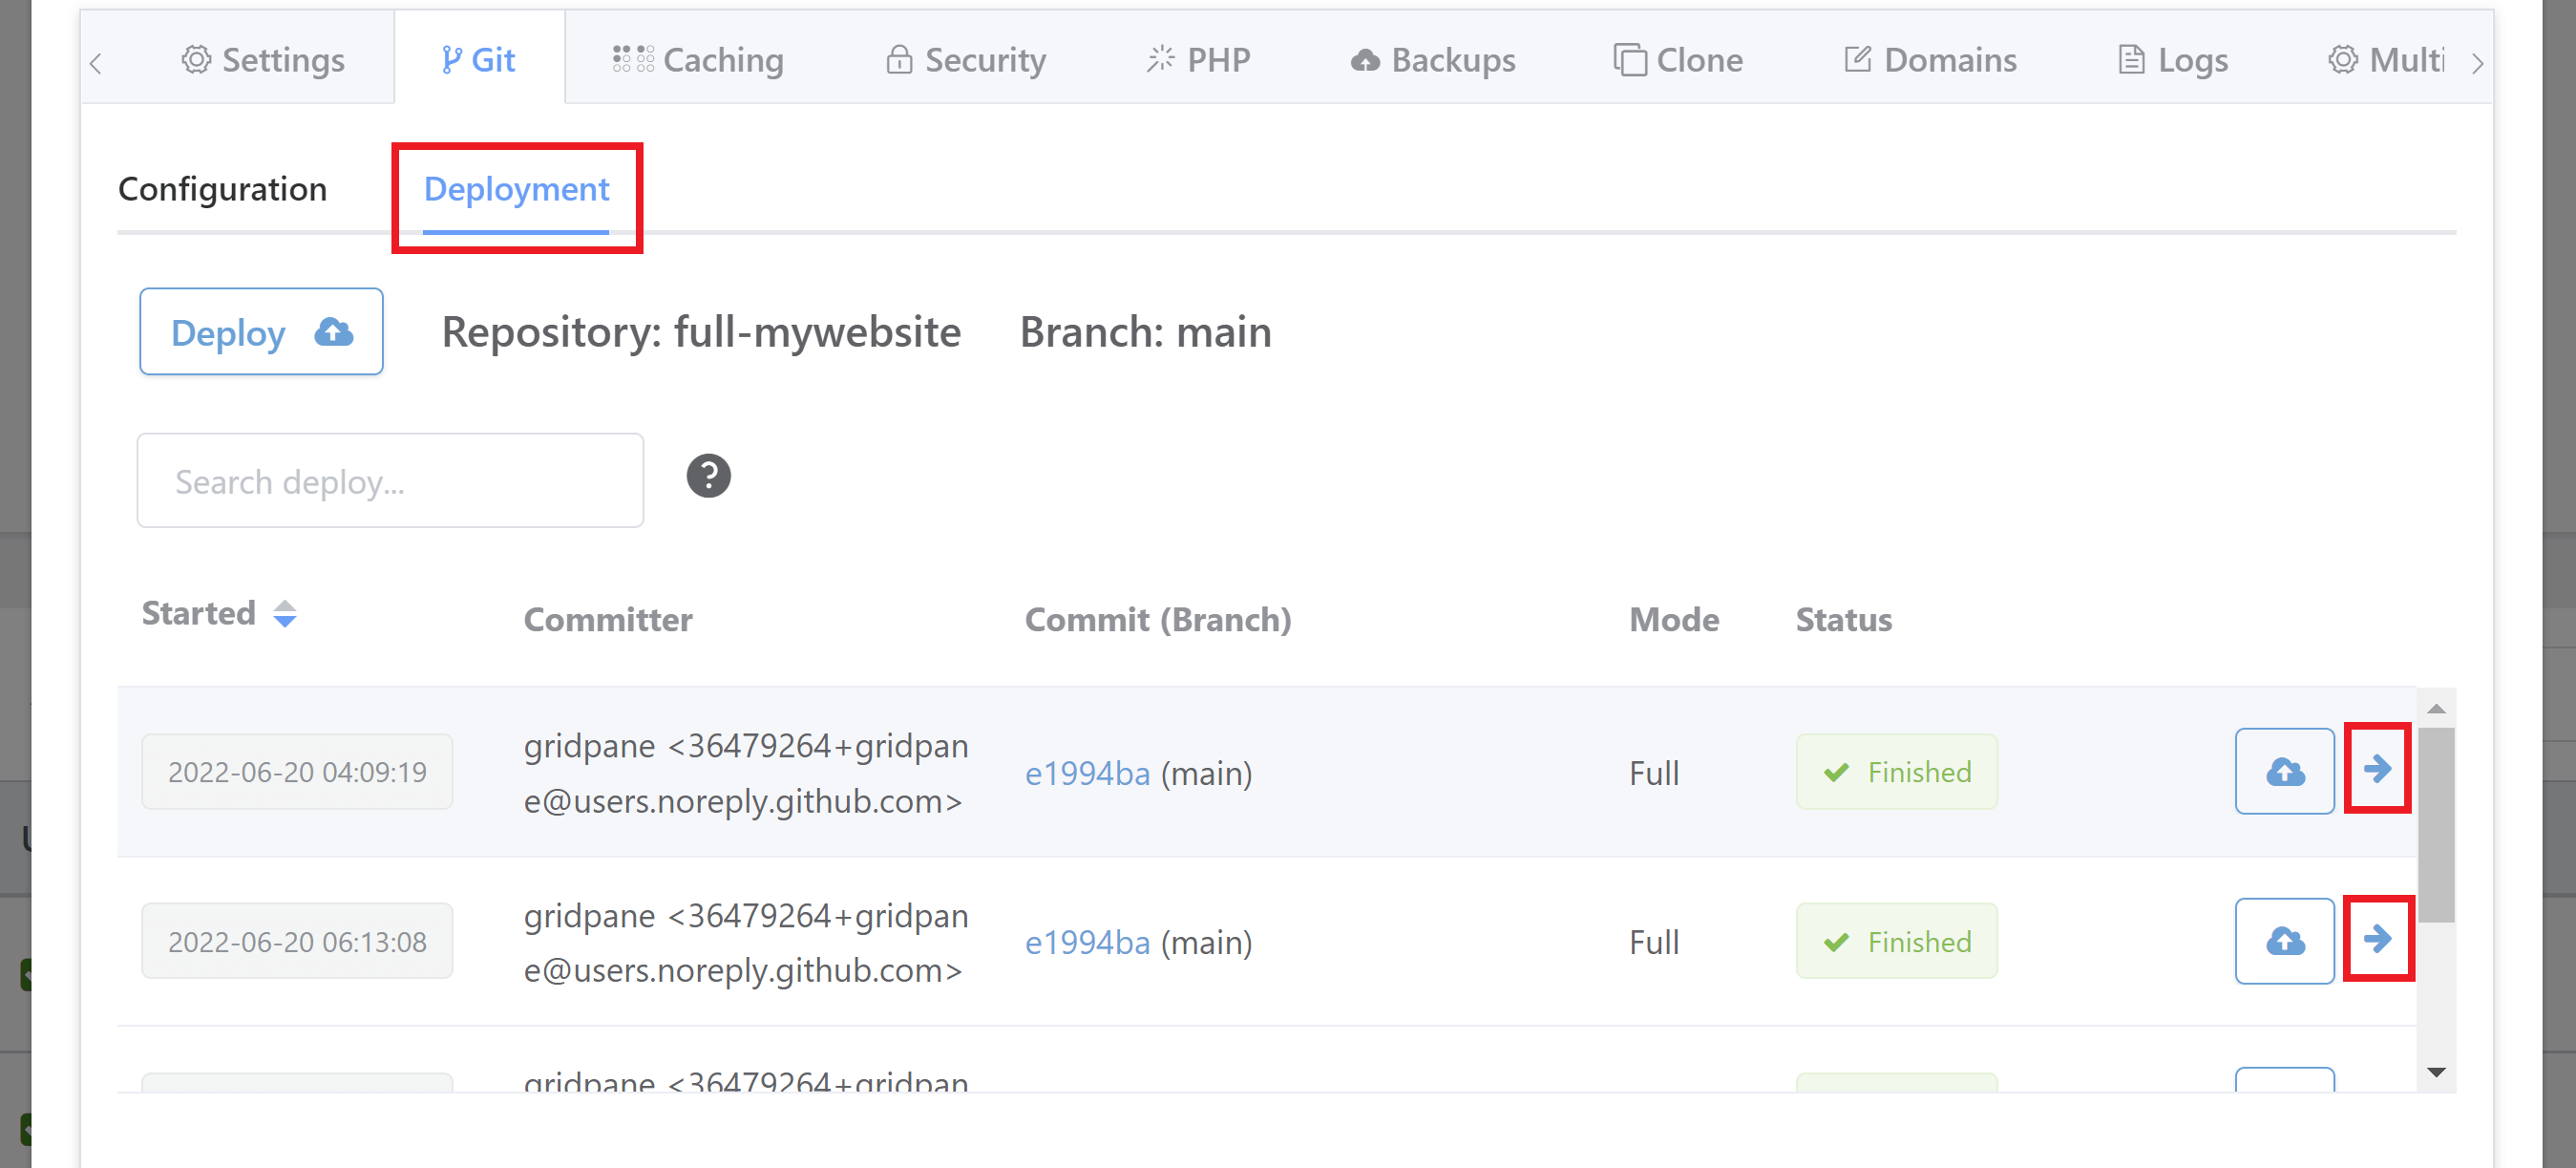
Over on your Sites page, click on your website to open up the site customizer and click through to the Git > Deployment tab, locate the Deploy Now button and click it to start your deployment:
Once running a new row will be created in the deployments table.
You can click the right facing arrow at the end of the row to open up the deployment log at anytime.
If you want to redeploy any previously deployed commit then you can click the redeploy now button (which is the cloud button with an upward arrow).
If the deployment was unsuccessful for any reason you will see a notification and no changes will be made to your website.
2. Run Automated Deployments – Push to Deploy
STEP 1. GET YOUR PUSH TO DEPLOY WEBHOOK
You can find your webhook over on the Git page Git Integration Manager, or the Sites page inside the website customizer > Git tab.
You will see the Git deployment hook with a copy/paste symbol. If you click on this it will copy your deployment webhook to your pasteboard, for example:
https://my.vCanopy.com/api/site-git/deployments/4f478219-1234-abcd-a82
STEP 2. ADD YOUR WEBHOOK TO YOUR GIT REPO
At your hosted Git provider there will be a section to configure the platform to hit a webhook whenever an event such as a push to your repo occurs.
For demonstration purposes, we will use Github as the example.
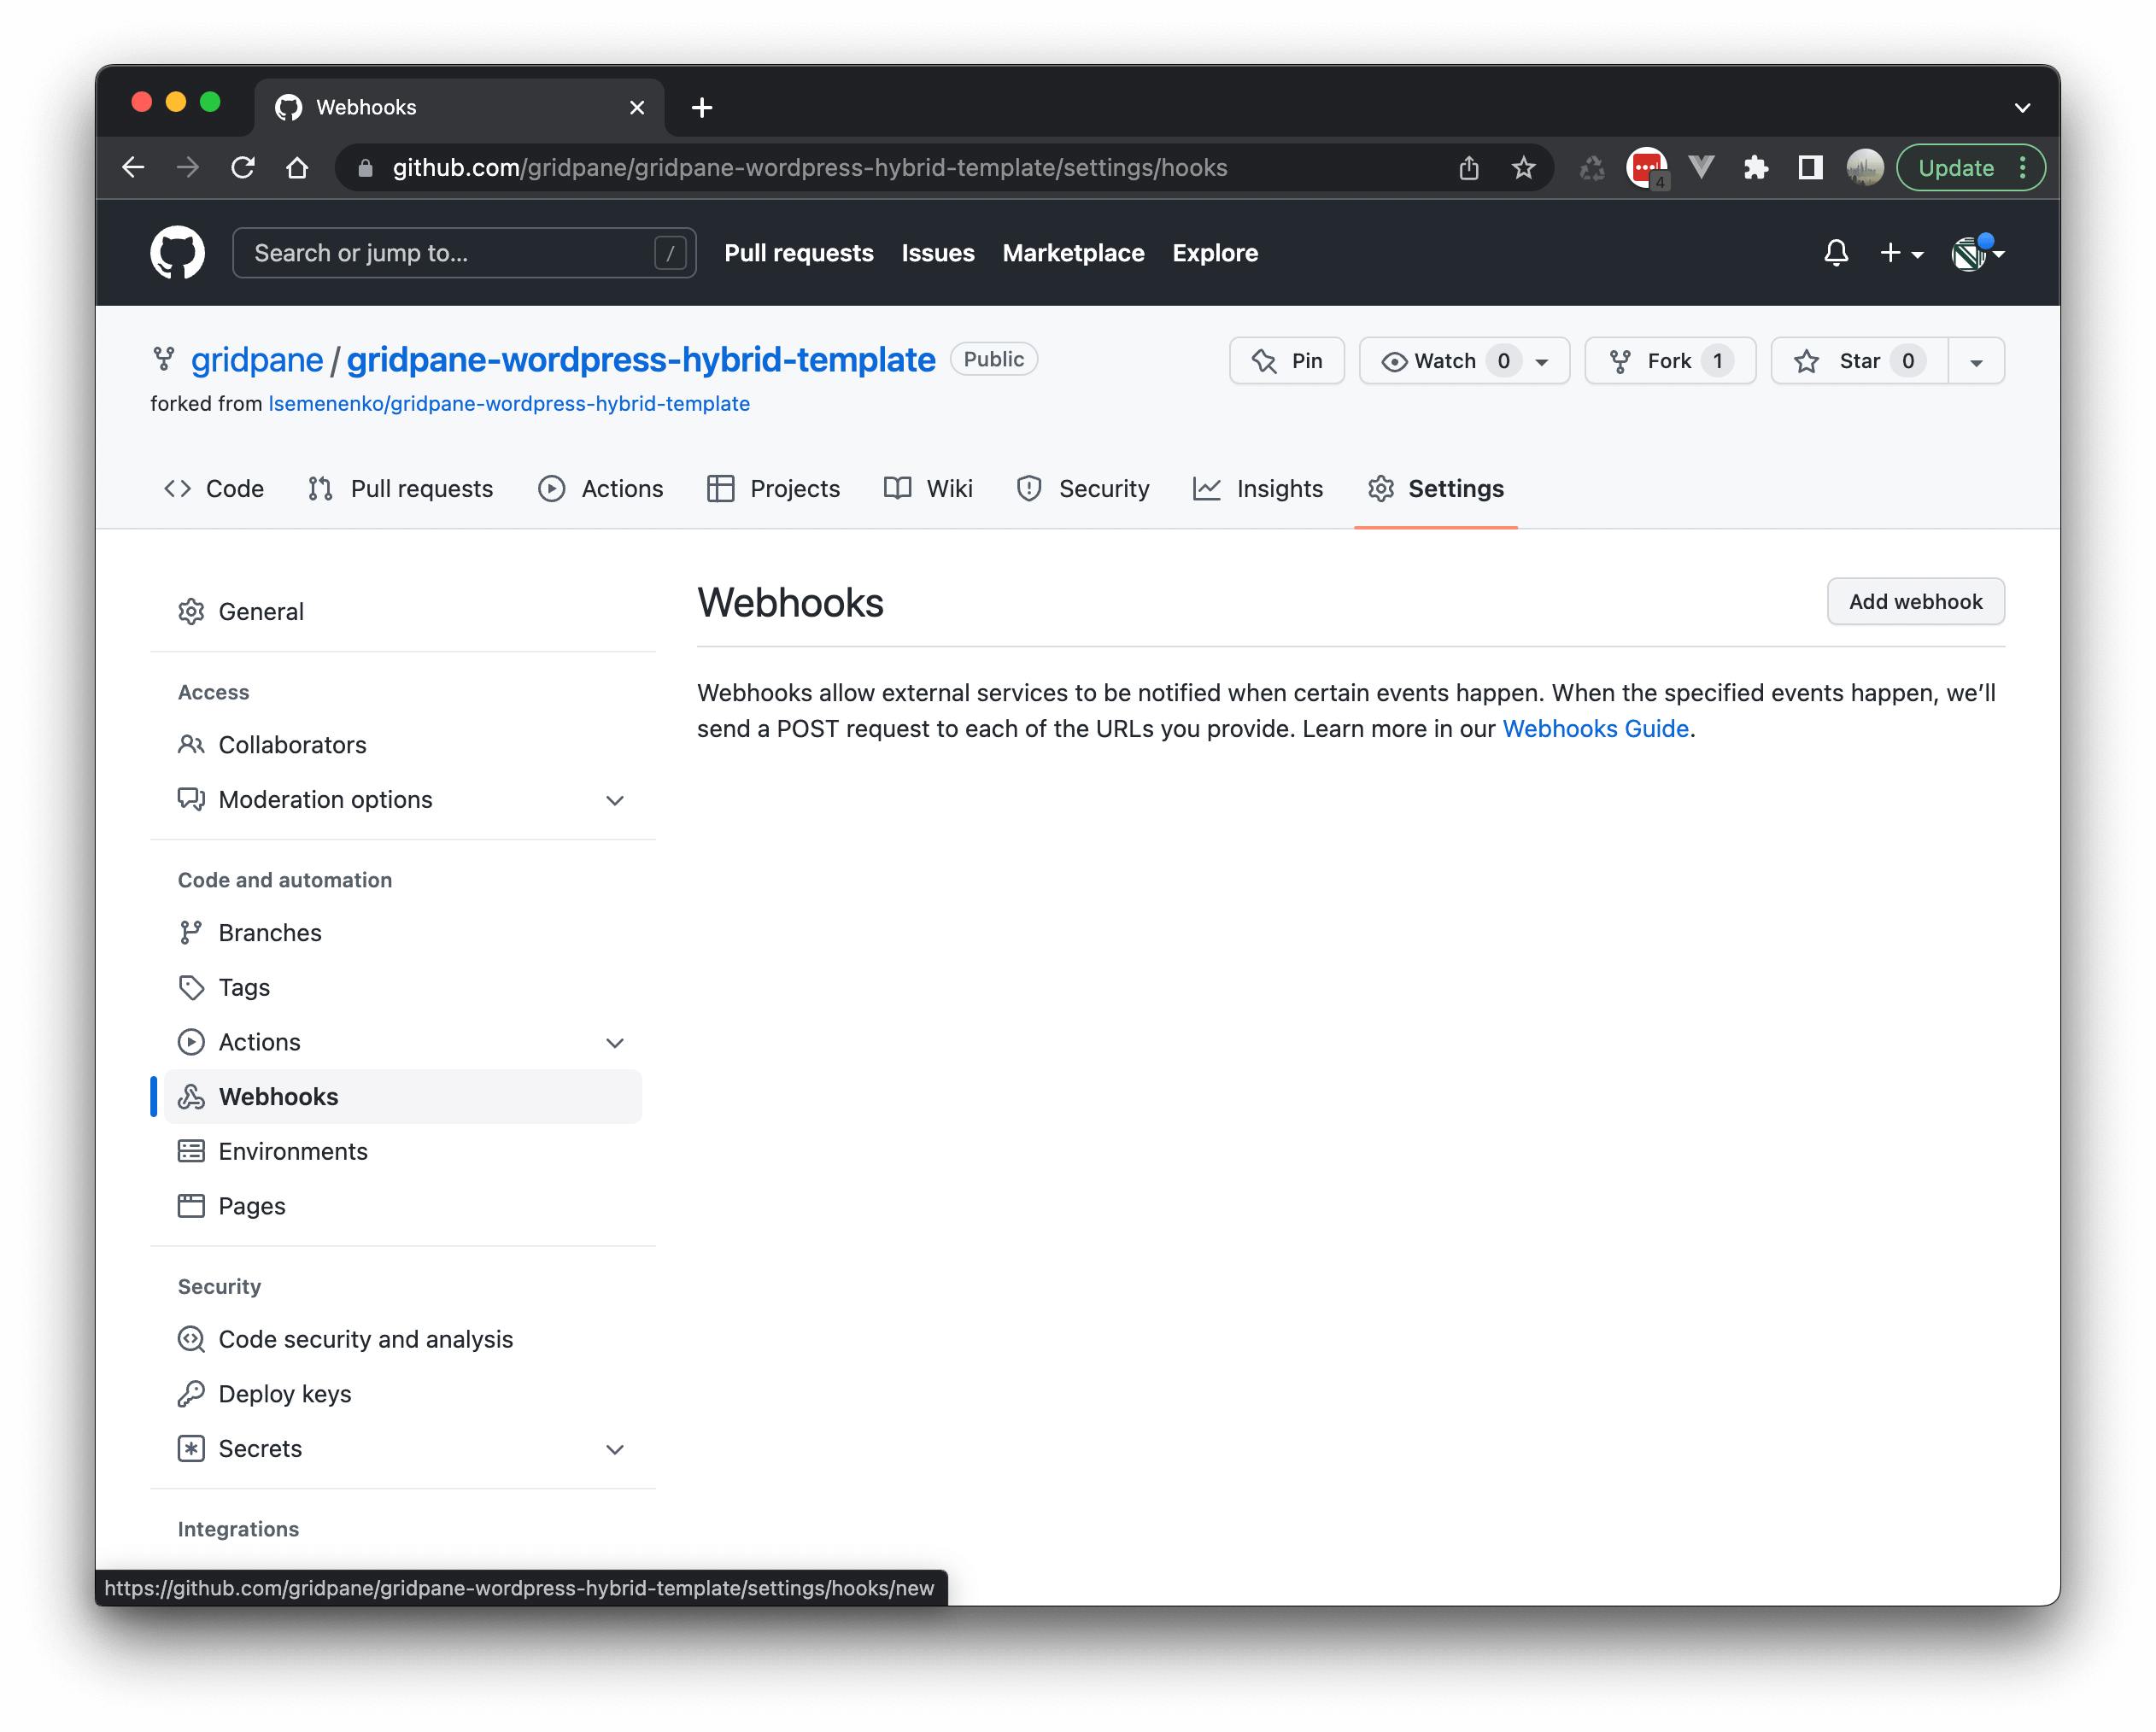
Go to your Repo > Settings > Webhooks and click add webhook:
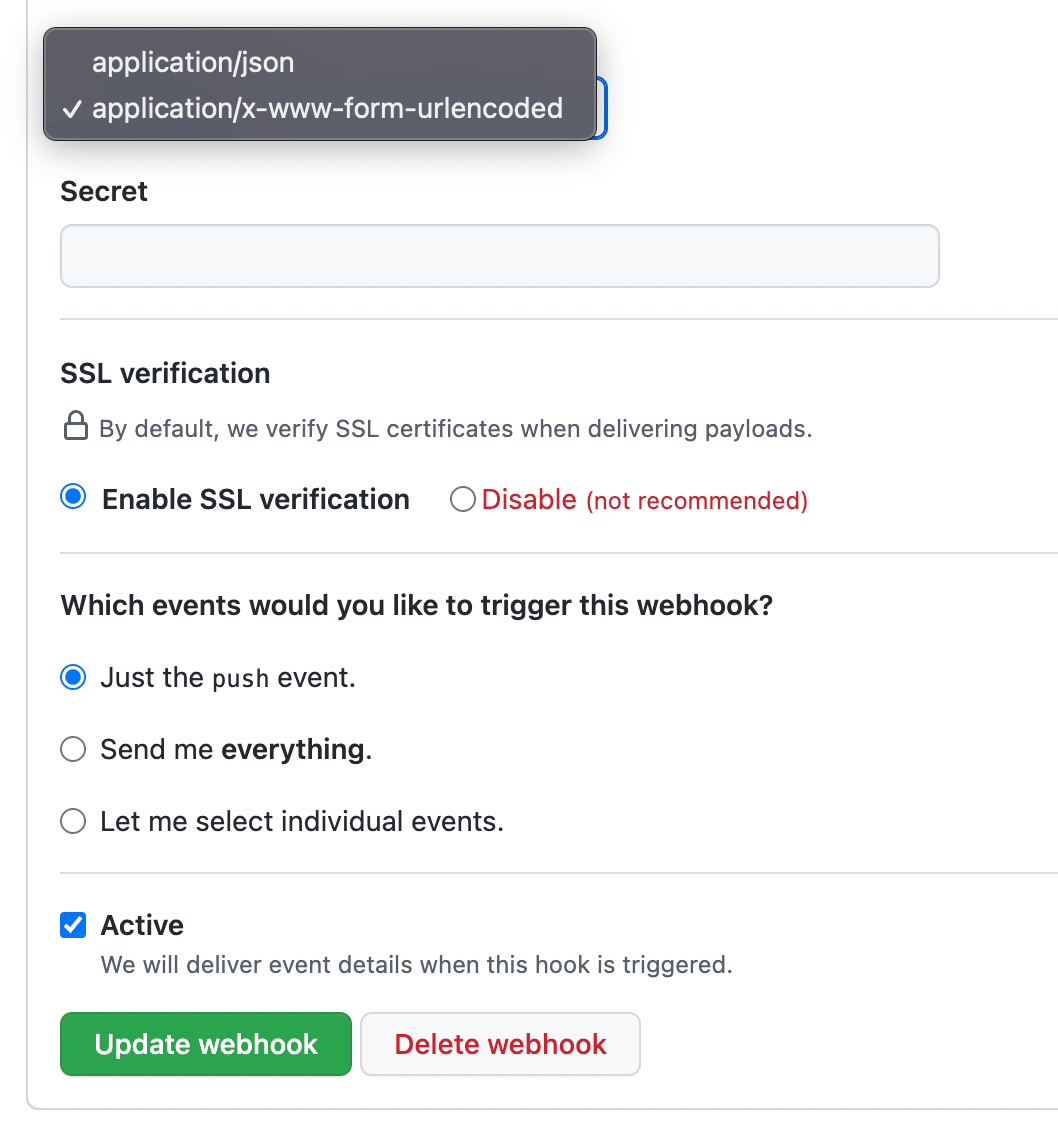
Add the webhook you copied and click add webhook:

You can have things set to json or URL encoded, and
all the default settings should be fine.
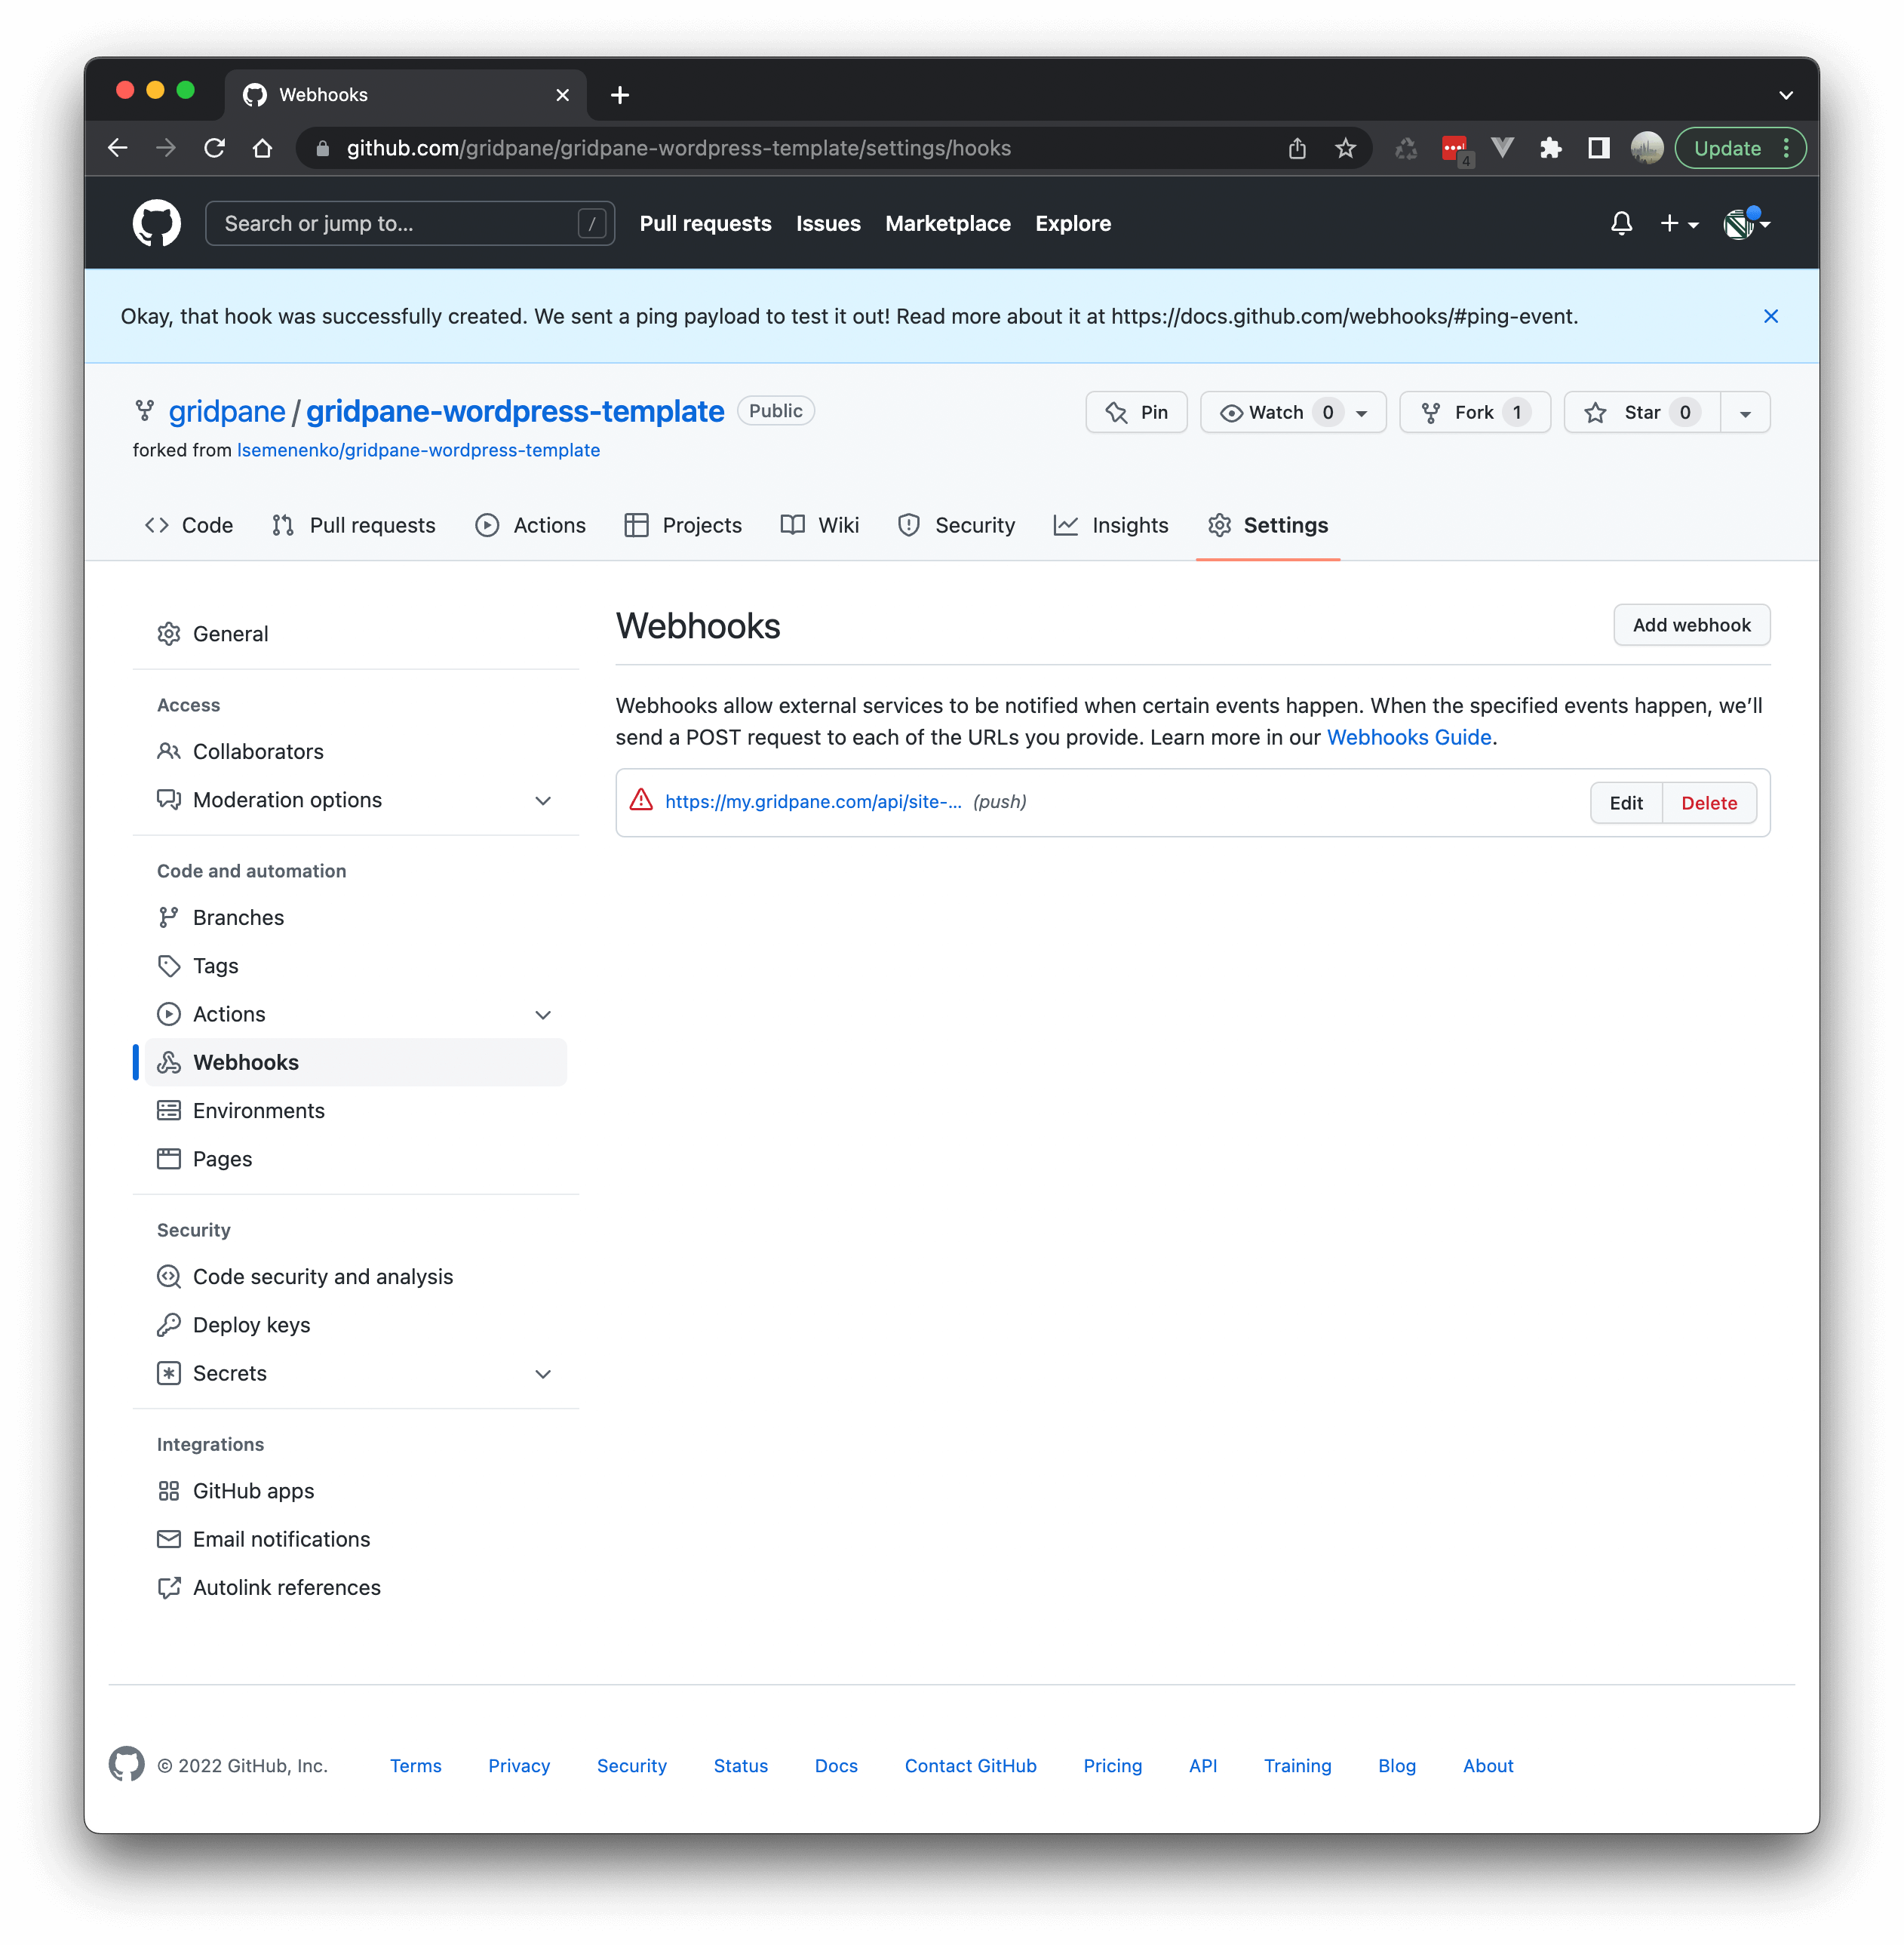
Once added you may see that the platform attempts to make a call to the webhook and is showing an error. Don’t worry, that is just because we haven’t enabled the deploy webhook at vCanopy yet.
STEP 3. ENABLE PUSH TO DEPLOY AT vCanopy
You can enable push to deploy in either the Git Integration Manager > Connected sites tab > Deploy toggle:

Or the Site Customizer > Git tab > Configuration tab > Enable automatic deployments on push to origin toggle:
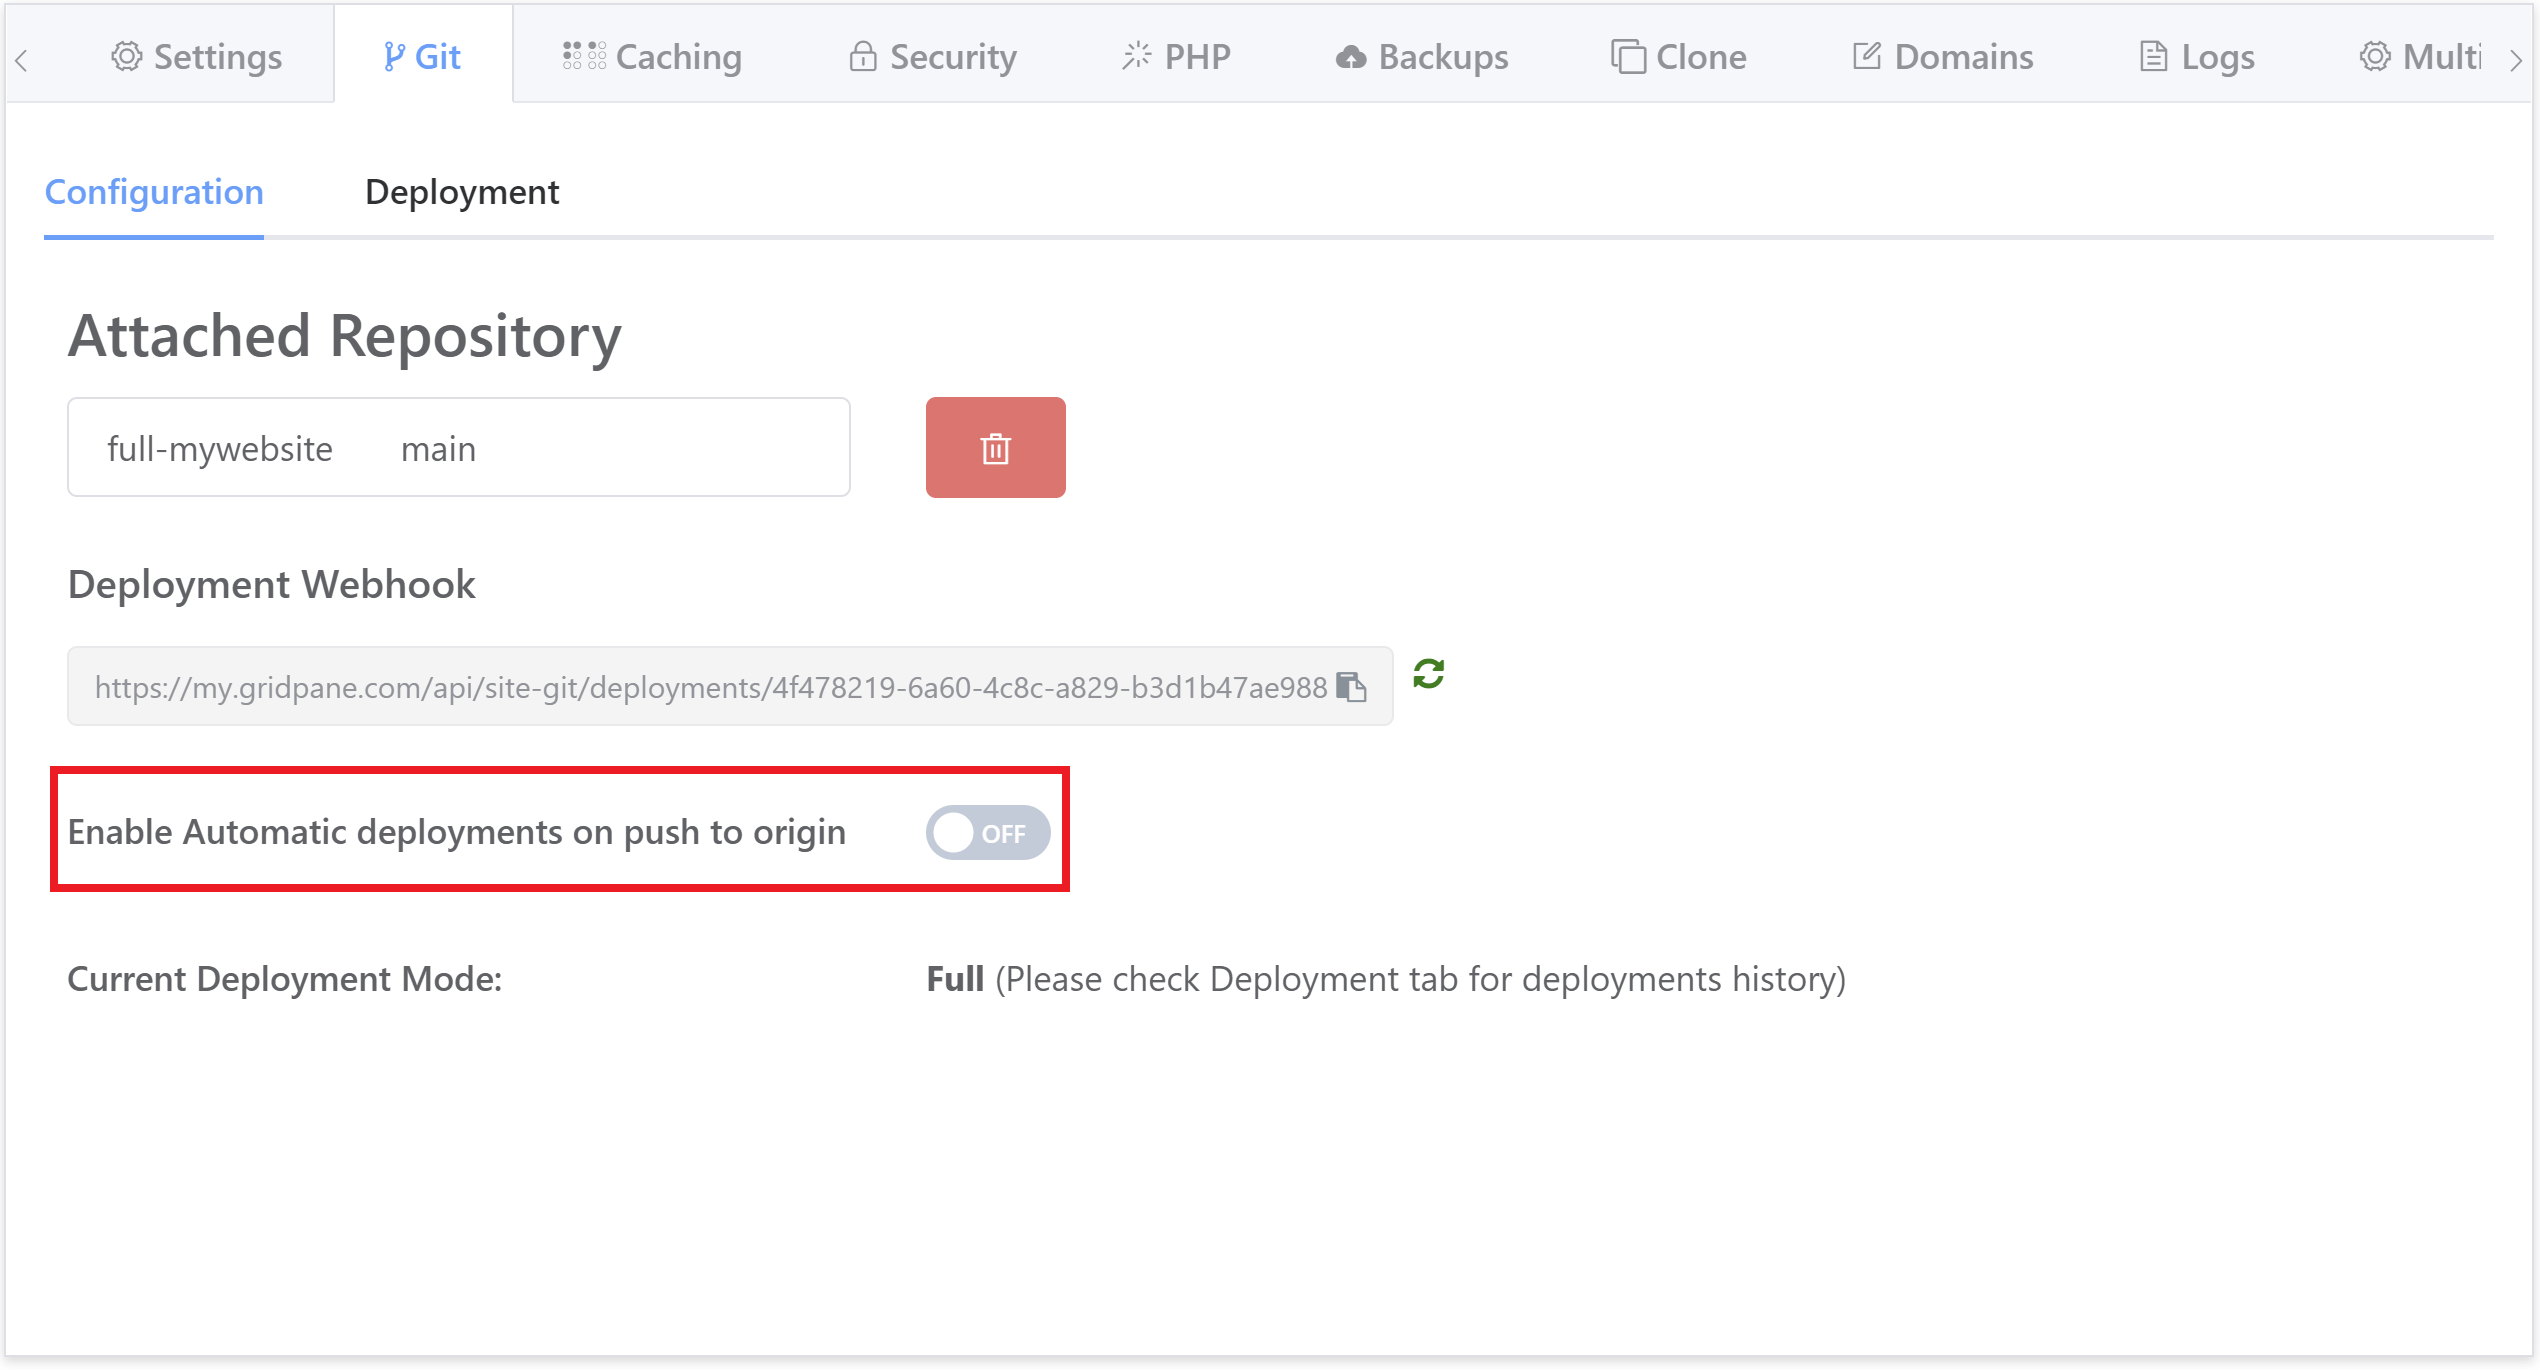
Toggle either of those on and you’ve successfully set up automatic Git deployments for your website.
Checking Your Deployments
As with the previous sections, you can check your deployments in both the Git Integration Manager and your website customizer. You can also see previous deployment history inside the integration manager.
CHECK YOUR DEPLOYMENT HISTORY AND LOG VIA THE GIT INTEGRATION MANAGER
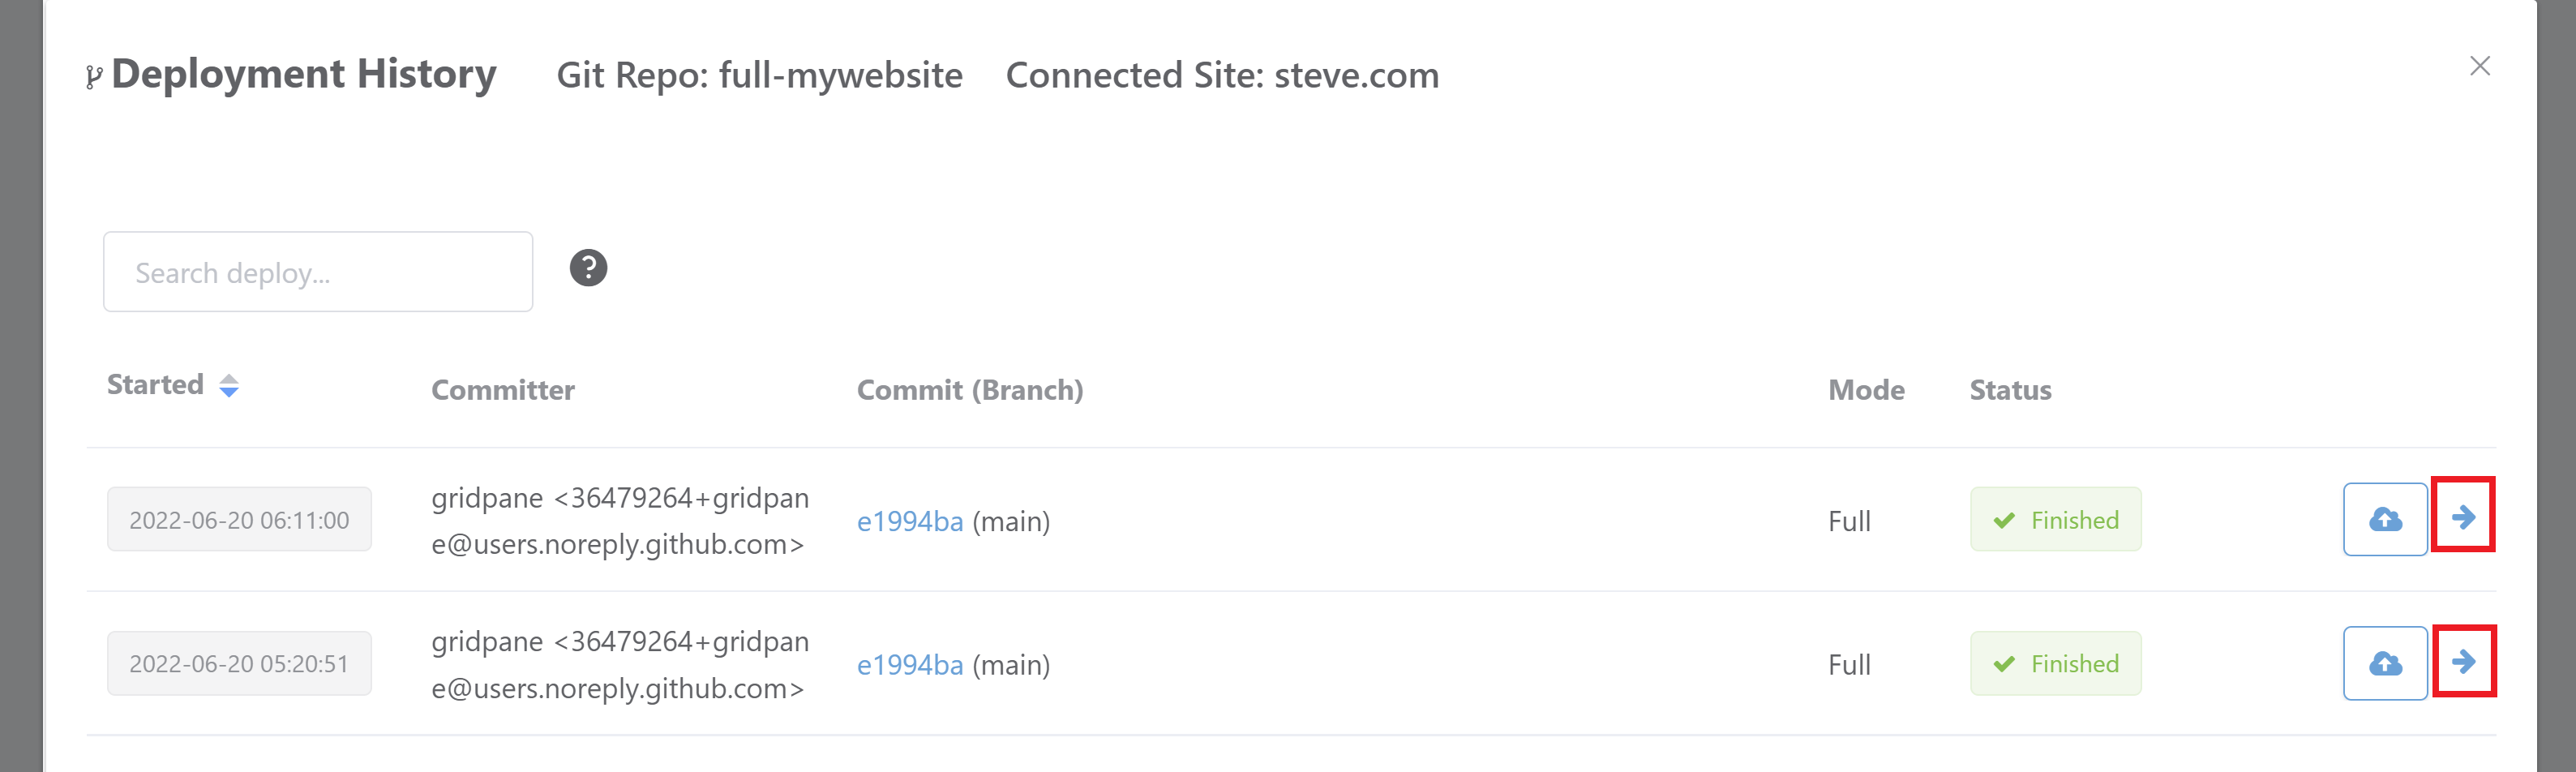
Over on the Git page open up the Git Integration Manager and then the Connected Sites tab. Here you will see the last deploy with a timestamp, and next to that is the history column. Click on the icon next to the site you want to check to open up the history modal:
This will display your previous deployment history for the site. Over on the right hand side you can also open up the deploy log by clicking on the arrow icon:
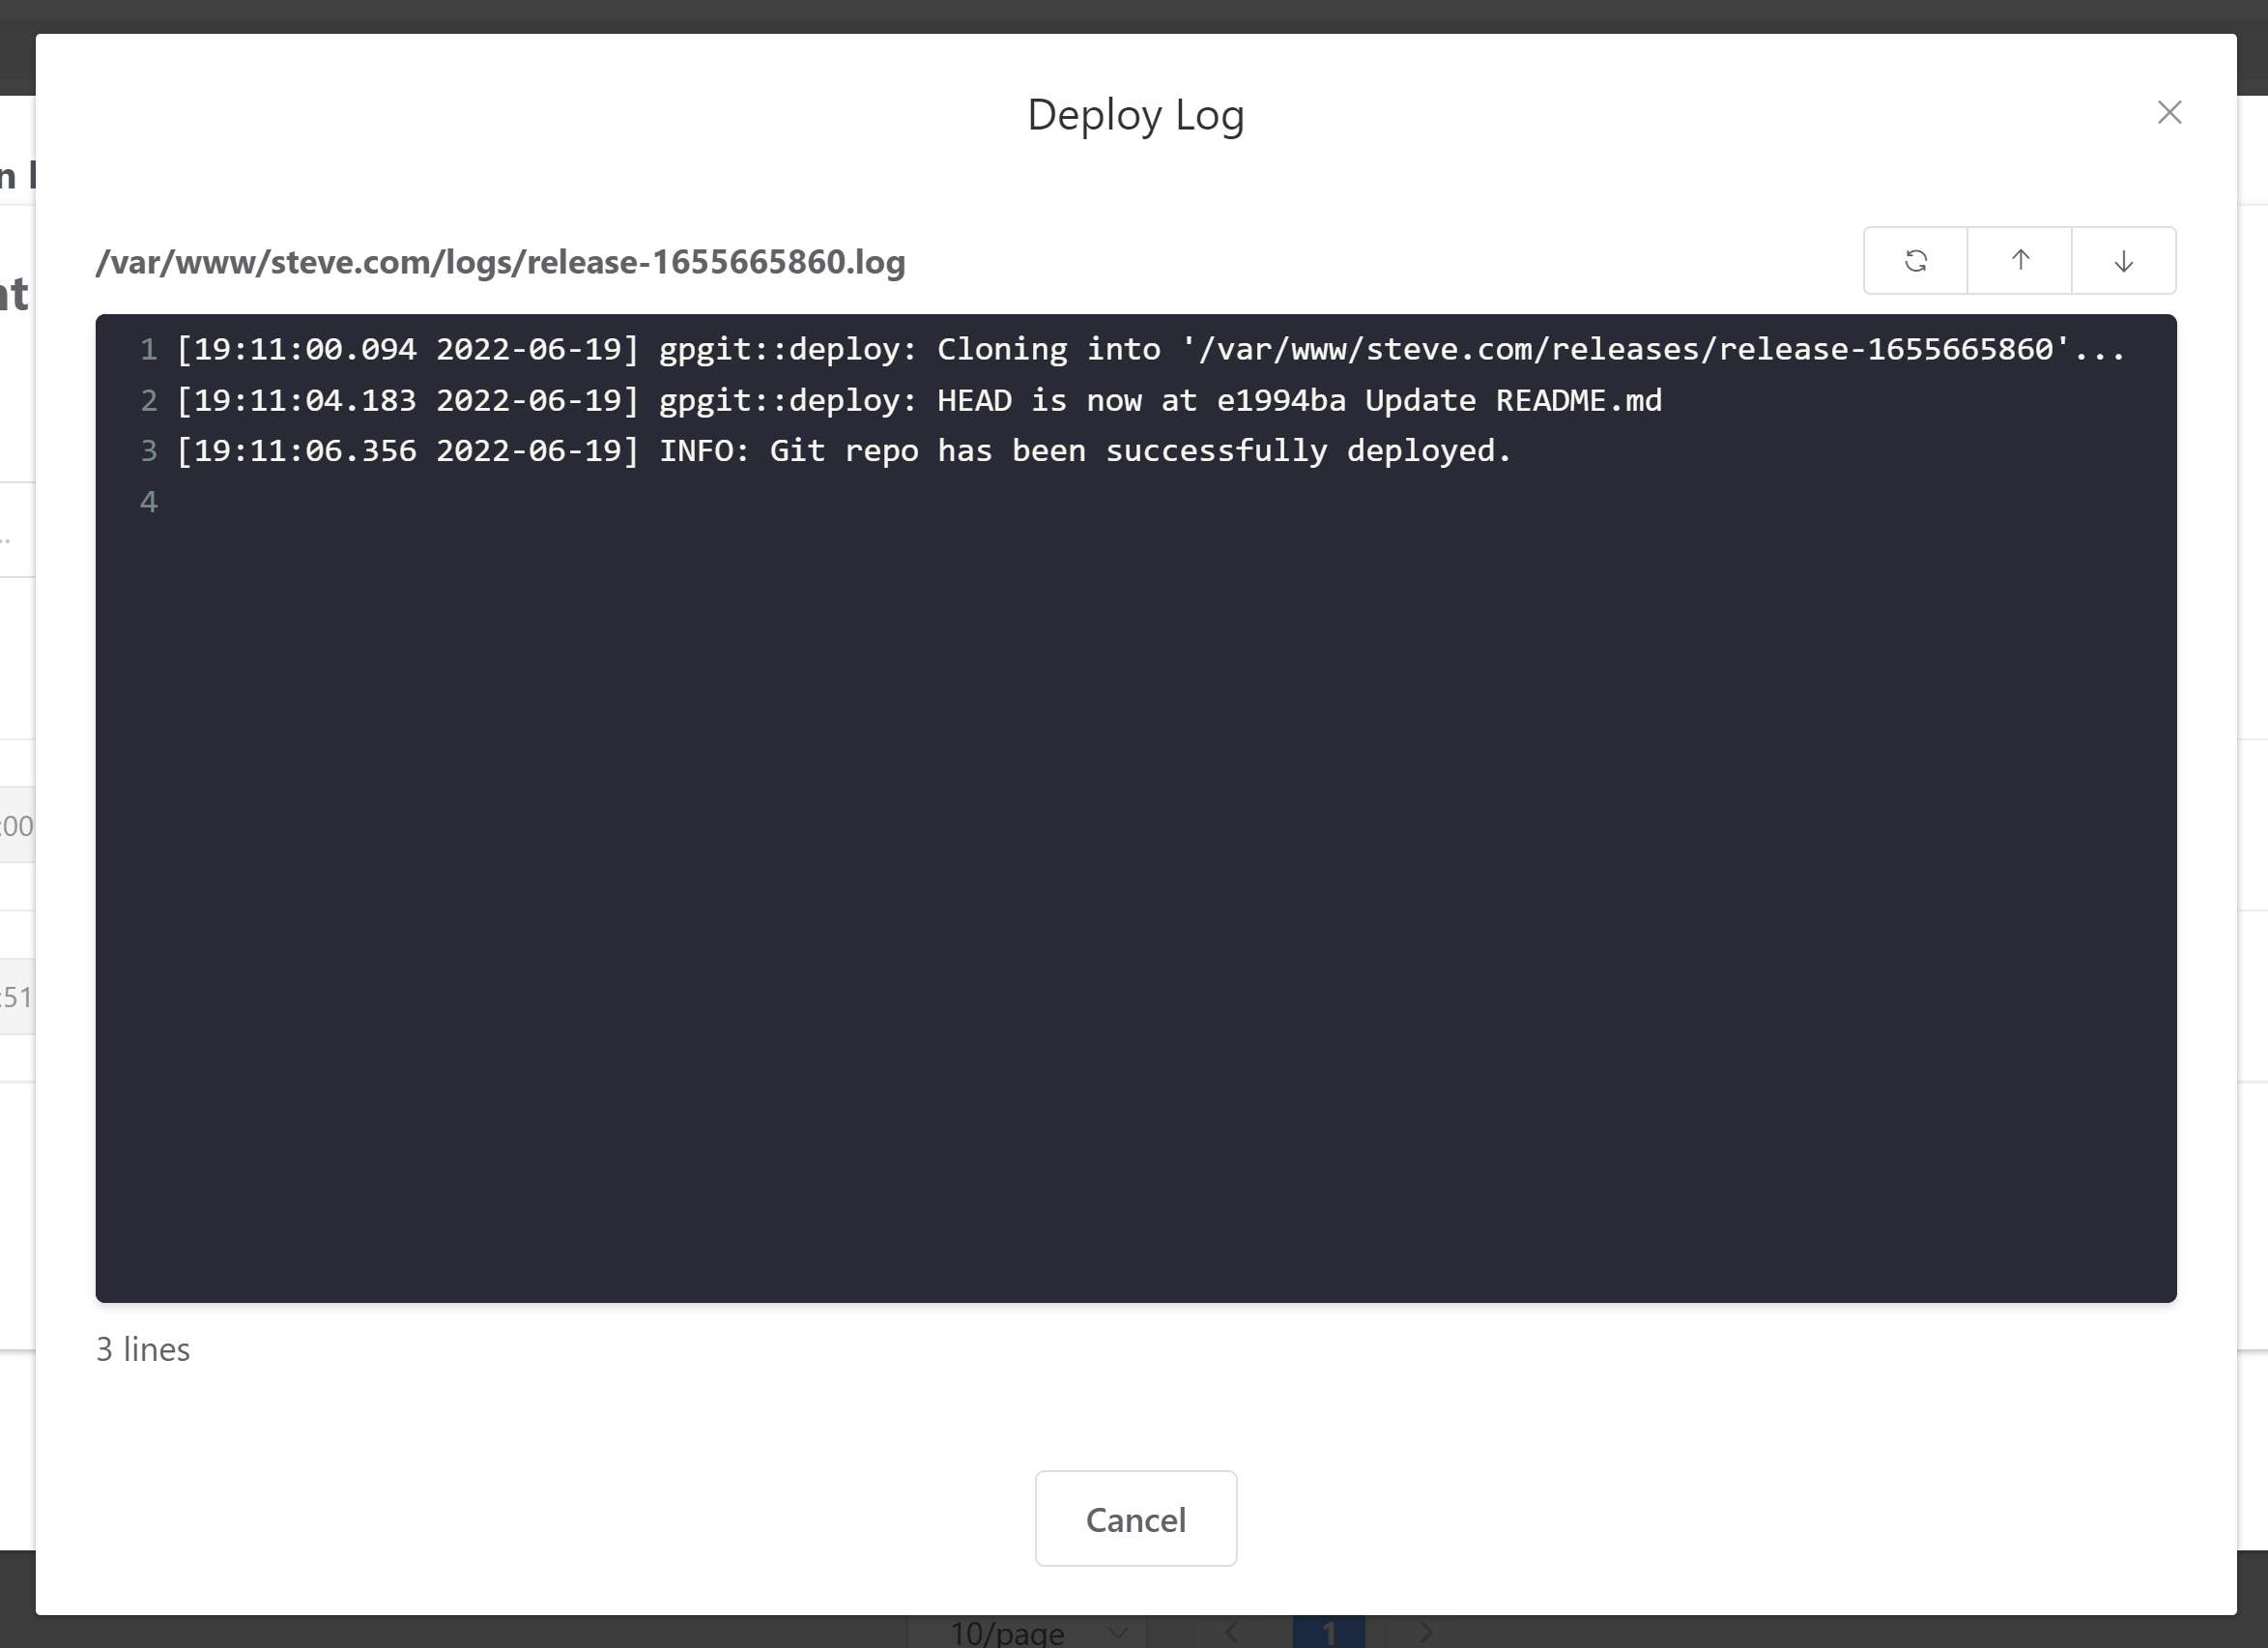
The log will then display in its own modal:
CHECK YOUR DEPLOYMENT LOG VIA THE WEBSITE CUSTOMIZER
Over on the Sites page, open up your Website Customizer > Git Tab > Deployments.
Here you will see the last deploy with a timestamp, and an arrow over on the right hand side. Click on the arrow to open the last deploy log (see image above).