


NOTE: Errors and Server Availability
Vultr High Frequency servers are in very high demand and frequently sell out. If their API is up-to-date with the current server stock, then those specific servers will not be available to select within your vCanopy account when you go to provision a server.
If you see an error such as this:
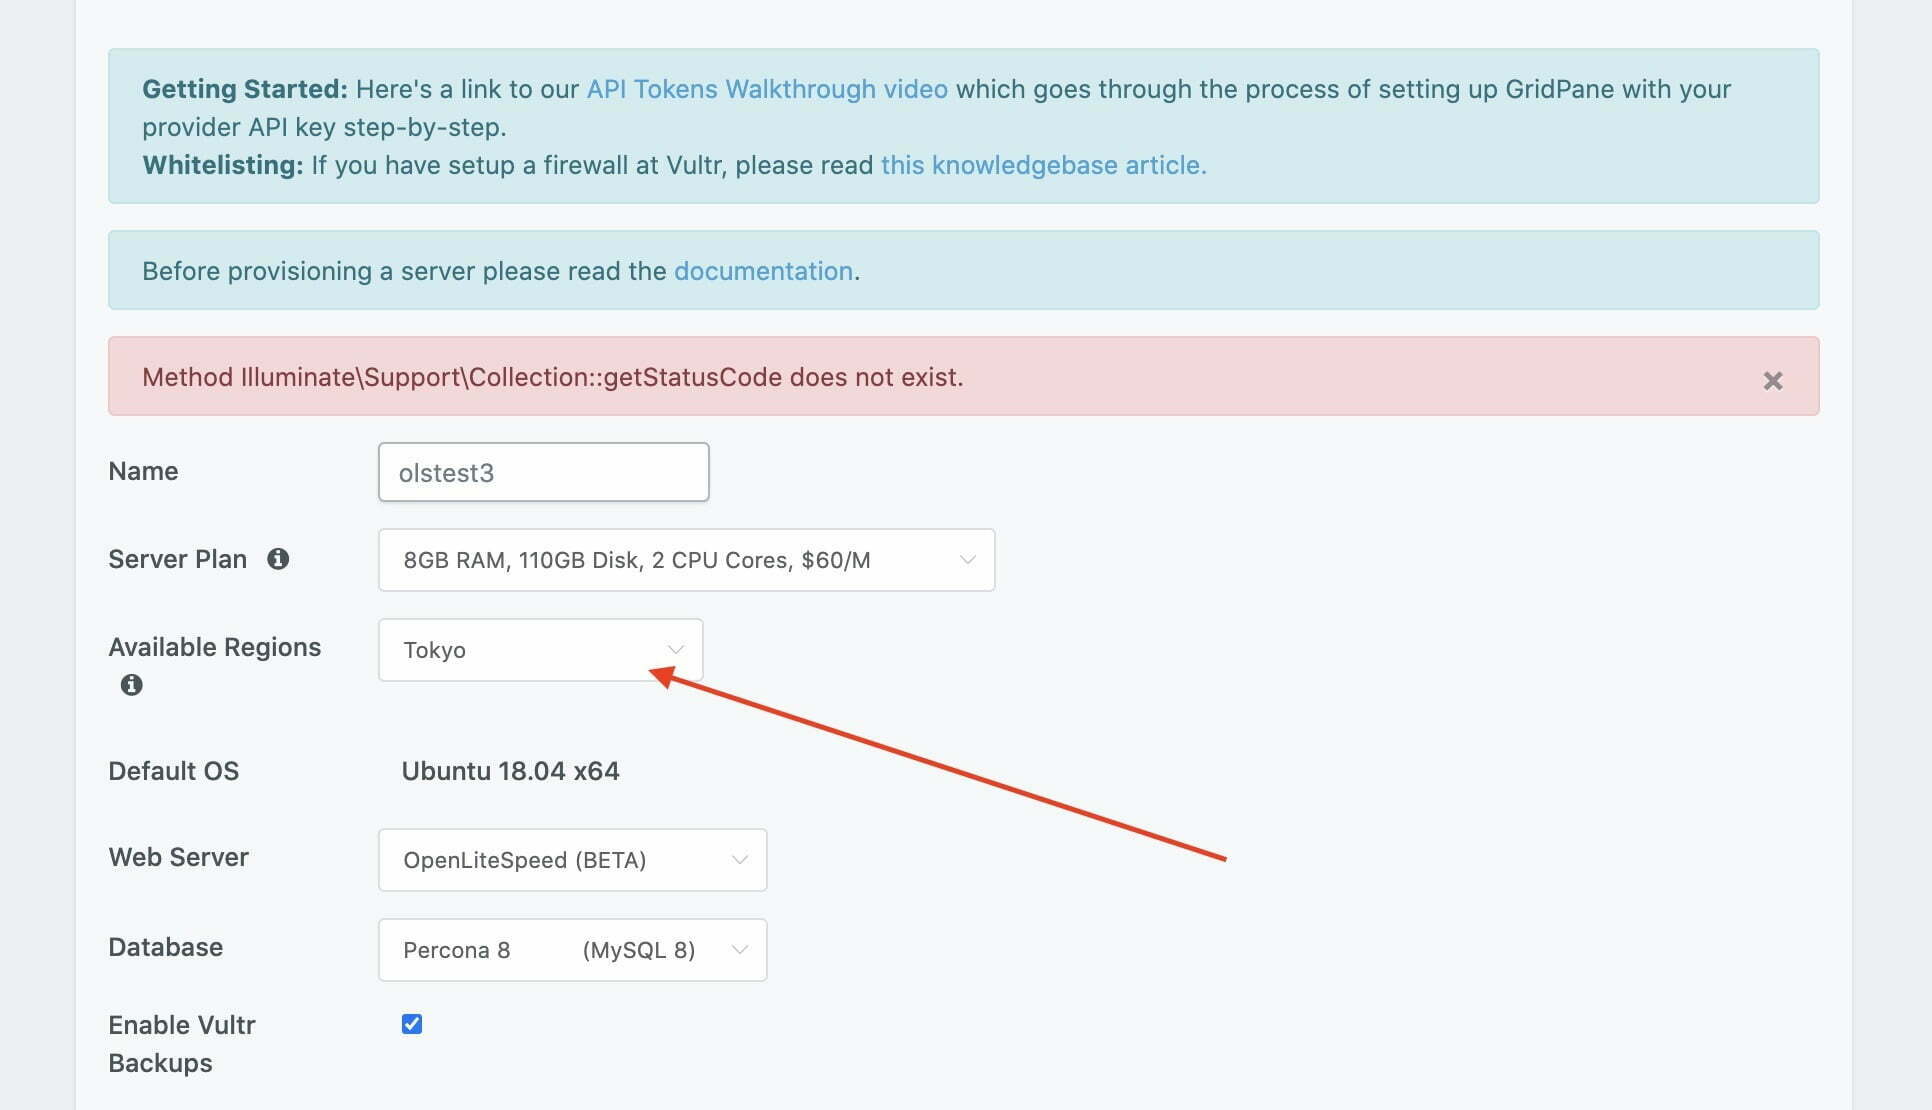
This means that this server is unavailable, but their API is still sending it to us.
If you’re unsure or want to double-check, if you head to over the server options directly inside your Vultr account, it will show you the current options available as you choose your datacentre and server type.
SERVER STOCK
Vultr are adding more servers all the time, and it’s likely that your preferred size/datacentre will become available again in the near future, but they sell out fast, so you may want to check frequently.
Step 1. Login to Vultr account and navigate to the API Panel
Login to your Vultr Account and click on the Account menu item in the left vertical main menu.
Then Select the API tab from the Account page menu

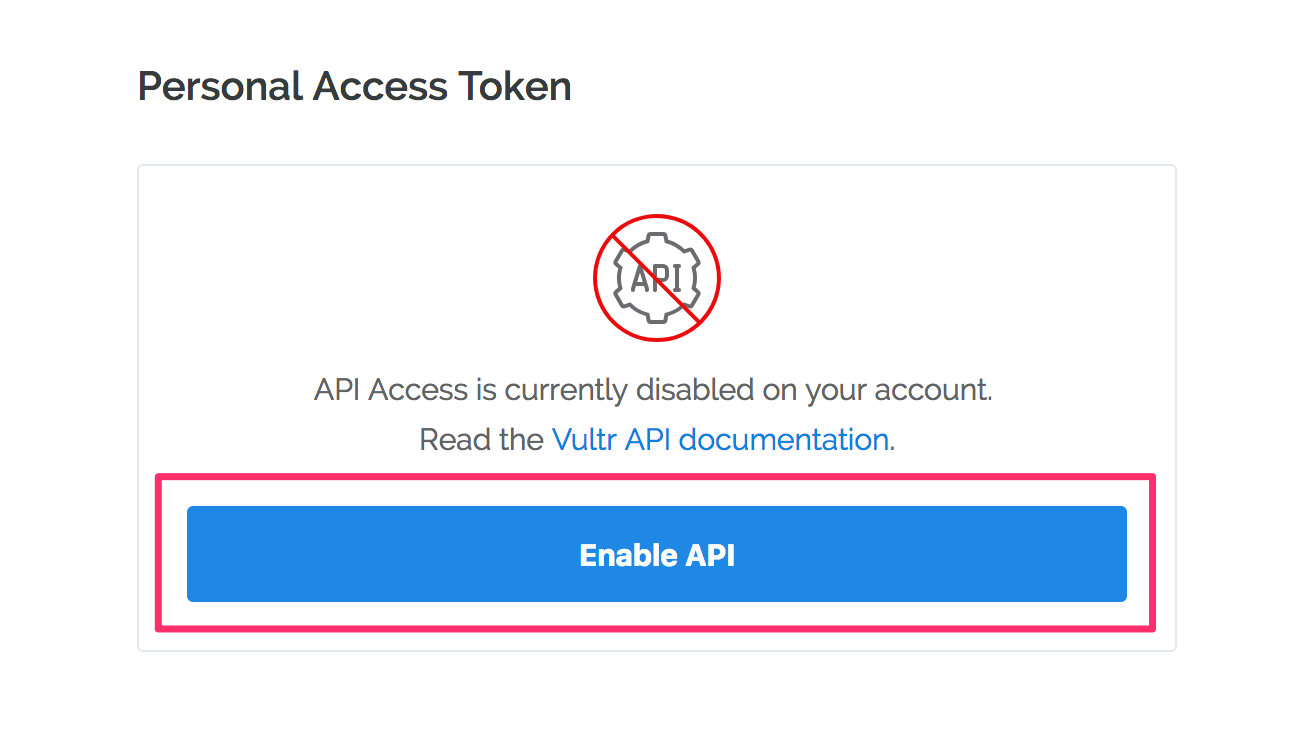
Step 2. Enable the Vultr API
In the Personal Access Token panel you will need to enable the API by clicking the large blue Enable API button
Step 3. Whitelist the vCanopy Server IP addresses
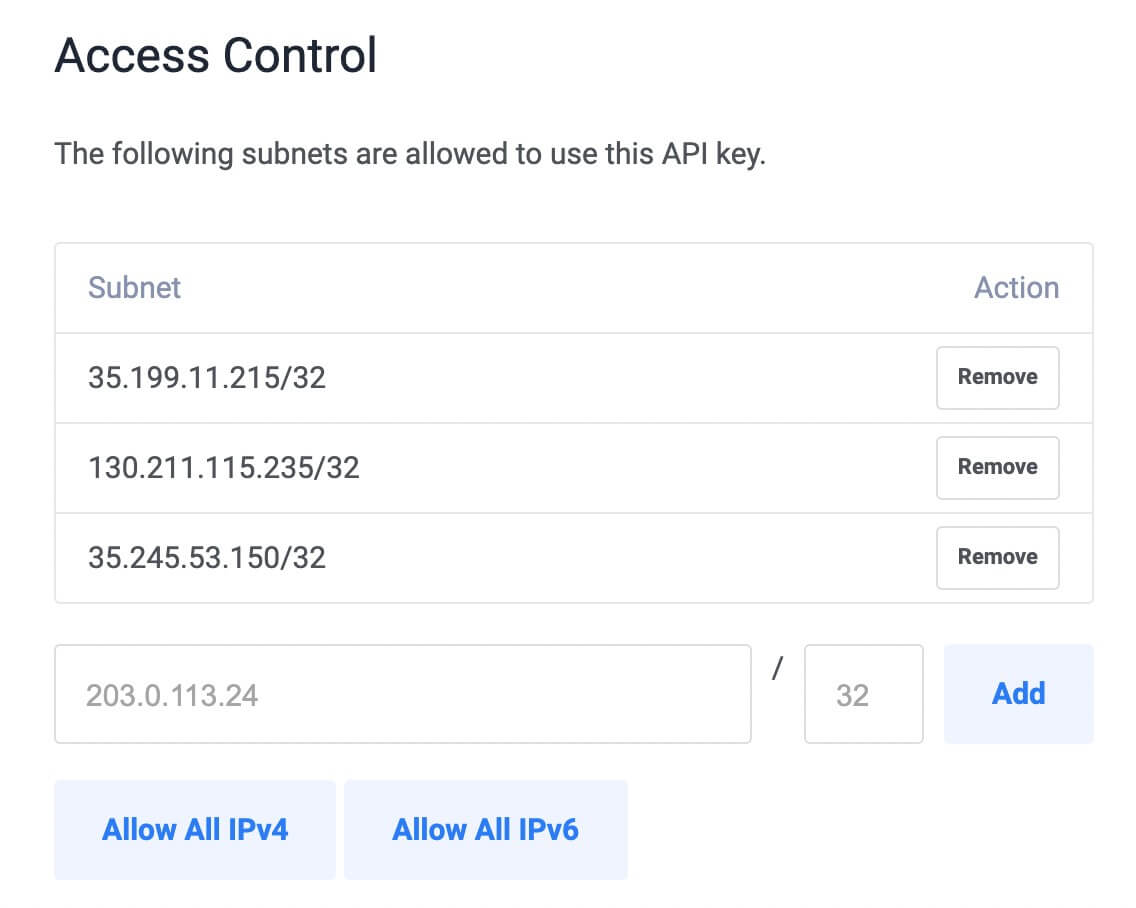
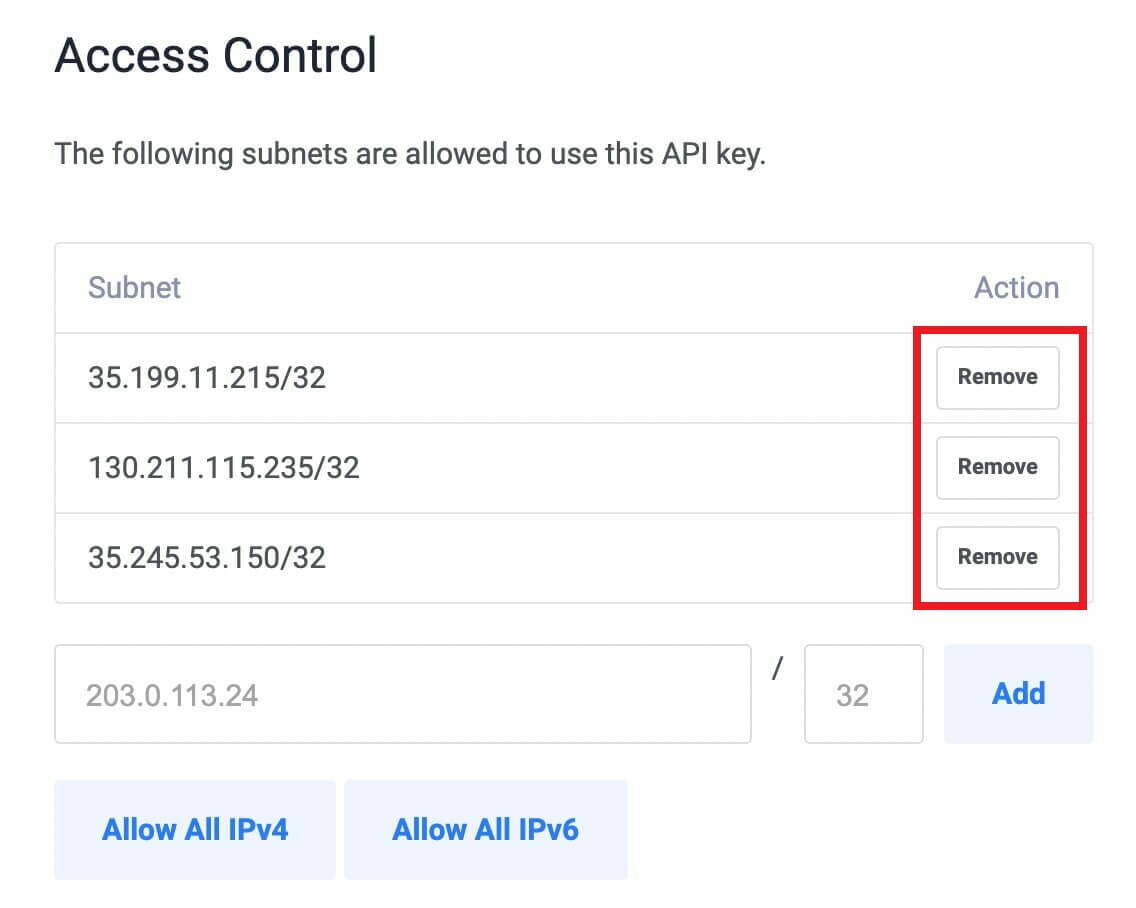
Once the Vultr API has been enabled, locate the Access Control Area (Account → API) to whitelist the vCanopy server IP addresses. This will allow the vCanopy servers to connect to your Vultr account.
vCanopy has three IP addresses that need to be whitelisted:
- 35.199.11.215
- 130.211.115.235
- 35.245.53.150
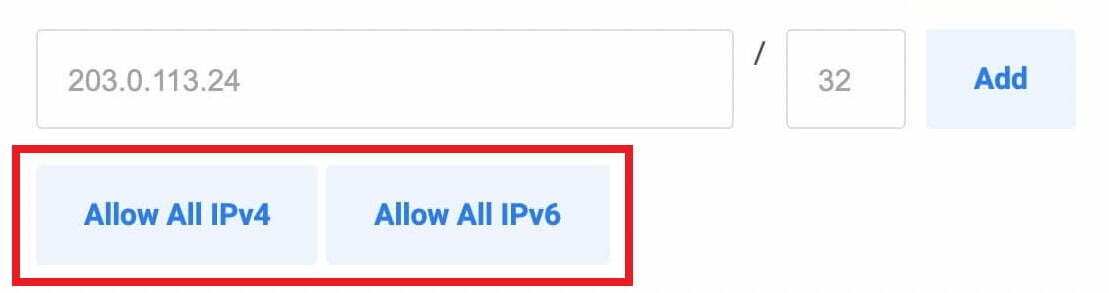
You can whitelist only these IP addresses by adding them individually if you like:
Alternatively, you can whitelist all IP addresses.
Whitelisting all IP addresses is less secure, if you choose this option then please ensure you take adequate precautions and keep your API Personal Access Token safe.
If you wish to remove any whitelisted IP address at a later date, just click the large Remove button next to the IP addresses/range you wish to remove.
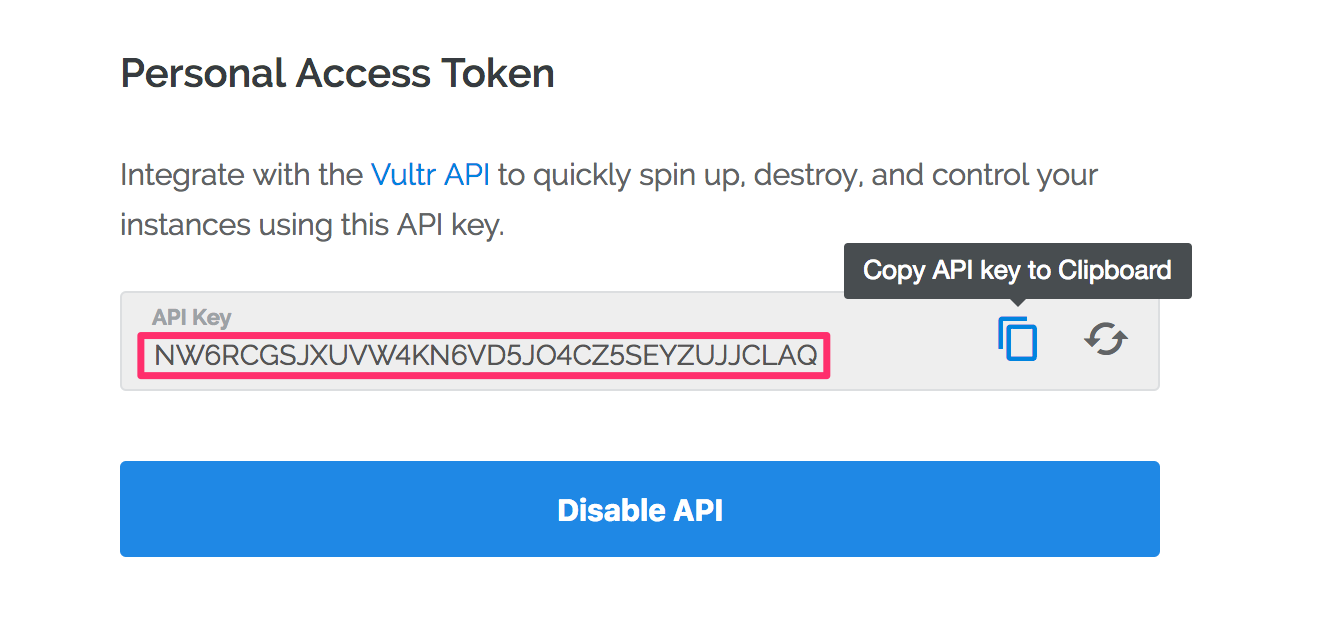
Step 4. Copy your Personal Access Token
Your Personal Access Token is available at any time from the API page in your Vultr account area. Copy your token to enter into your vCanopy settings in the next step. Remember to keep your token safe and secure.
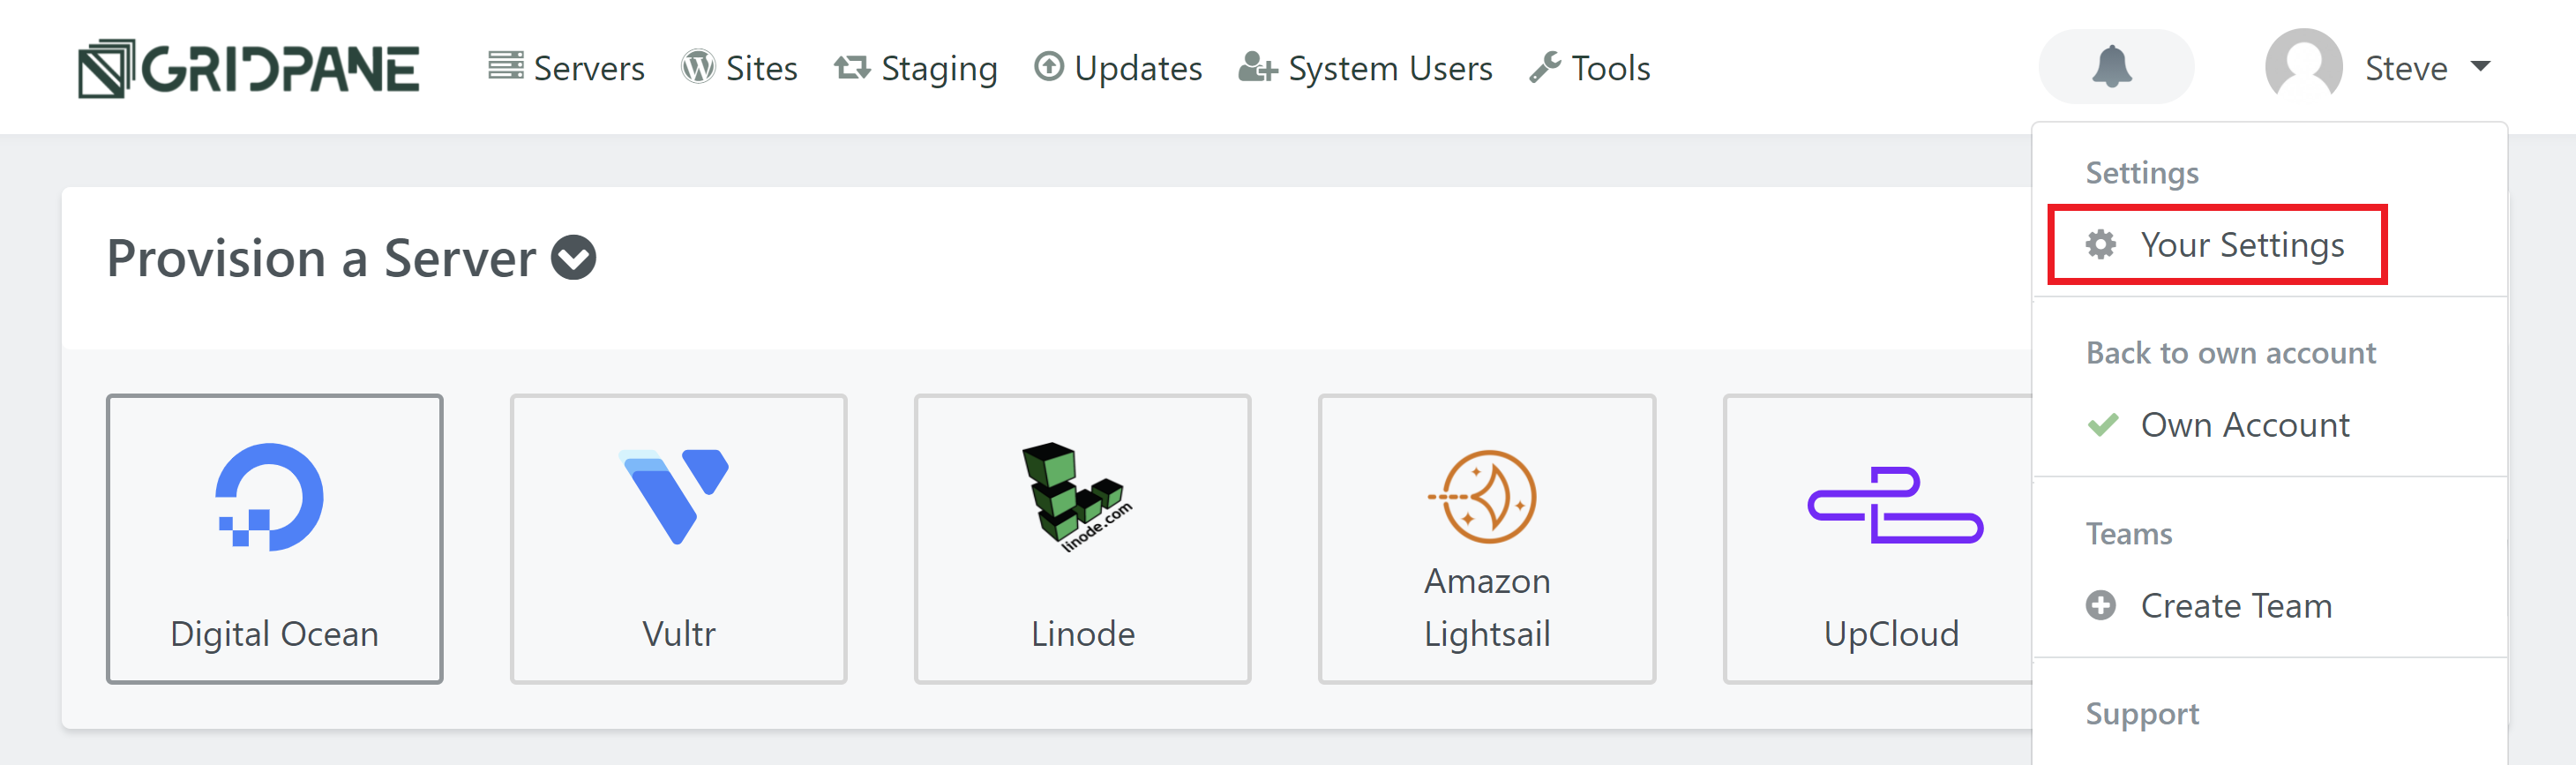
Step 5. Go to your vCanopy Settings
Login to your vCanopy account and click the Your Settings menu item in the dropdown menu accessible by clicking on your username and icon.
Step 6. Enter your Vultr Personal Access Token in to vCanopy
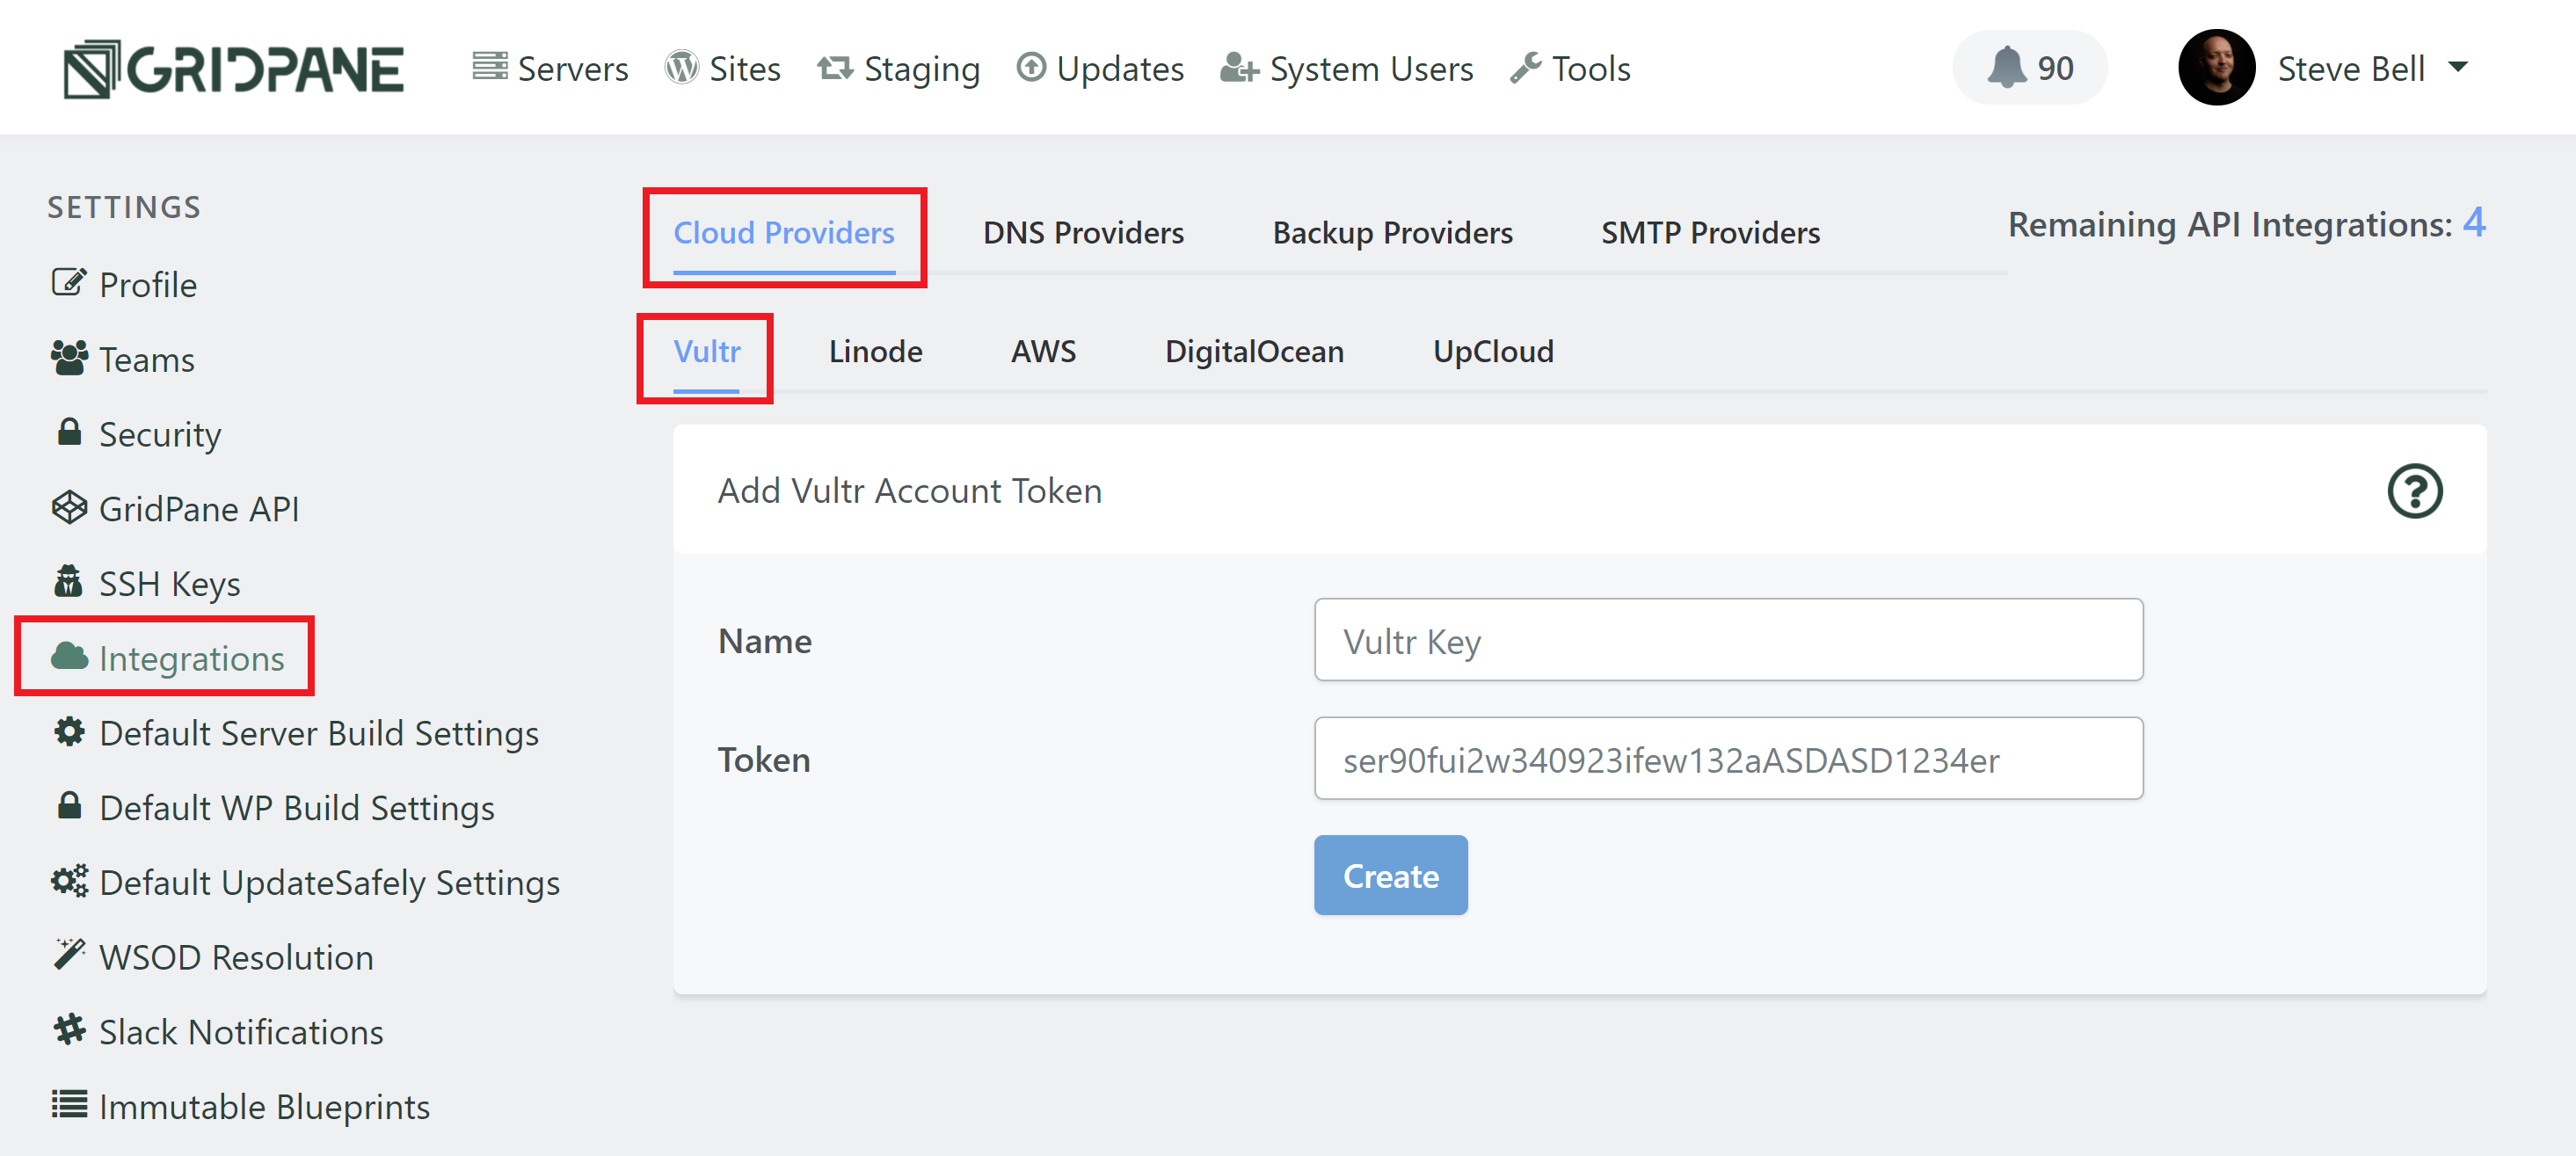
Locate and click the Integrations option in the left horizontal menu, and then within Cloud Providers select Vultr, and then enter your Personal Access Token you copied in Step.4 above into the Token input field, give your key a name, and then click Create.
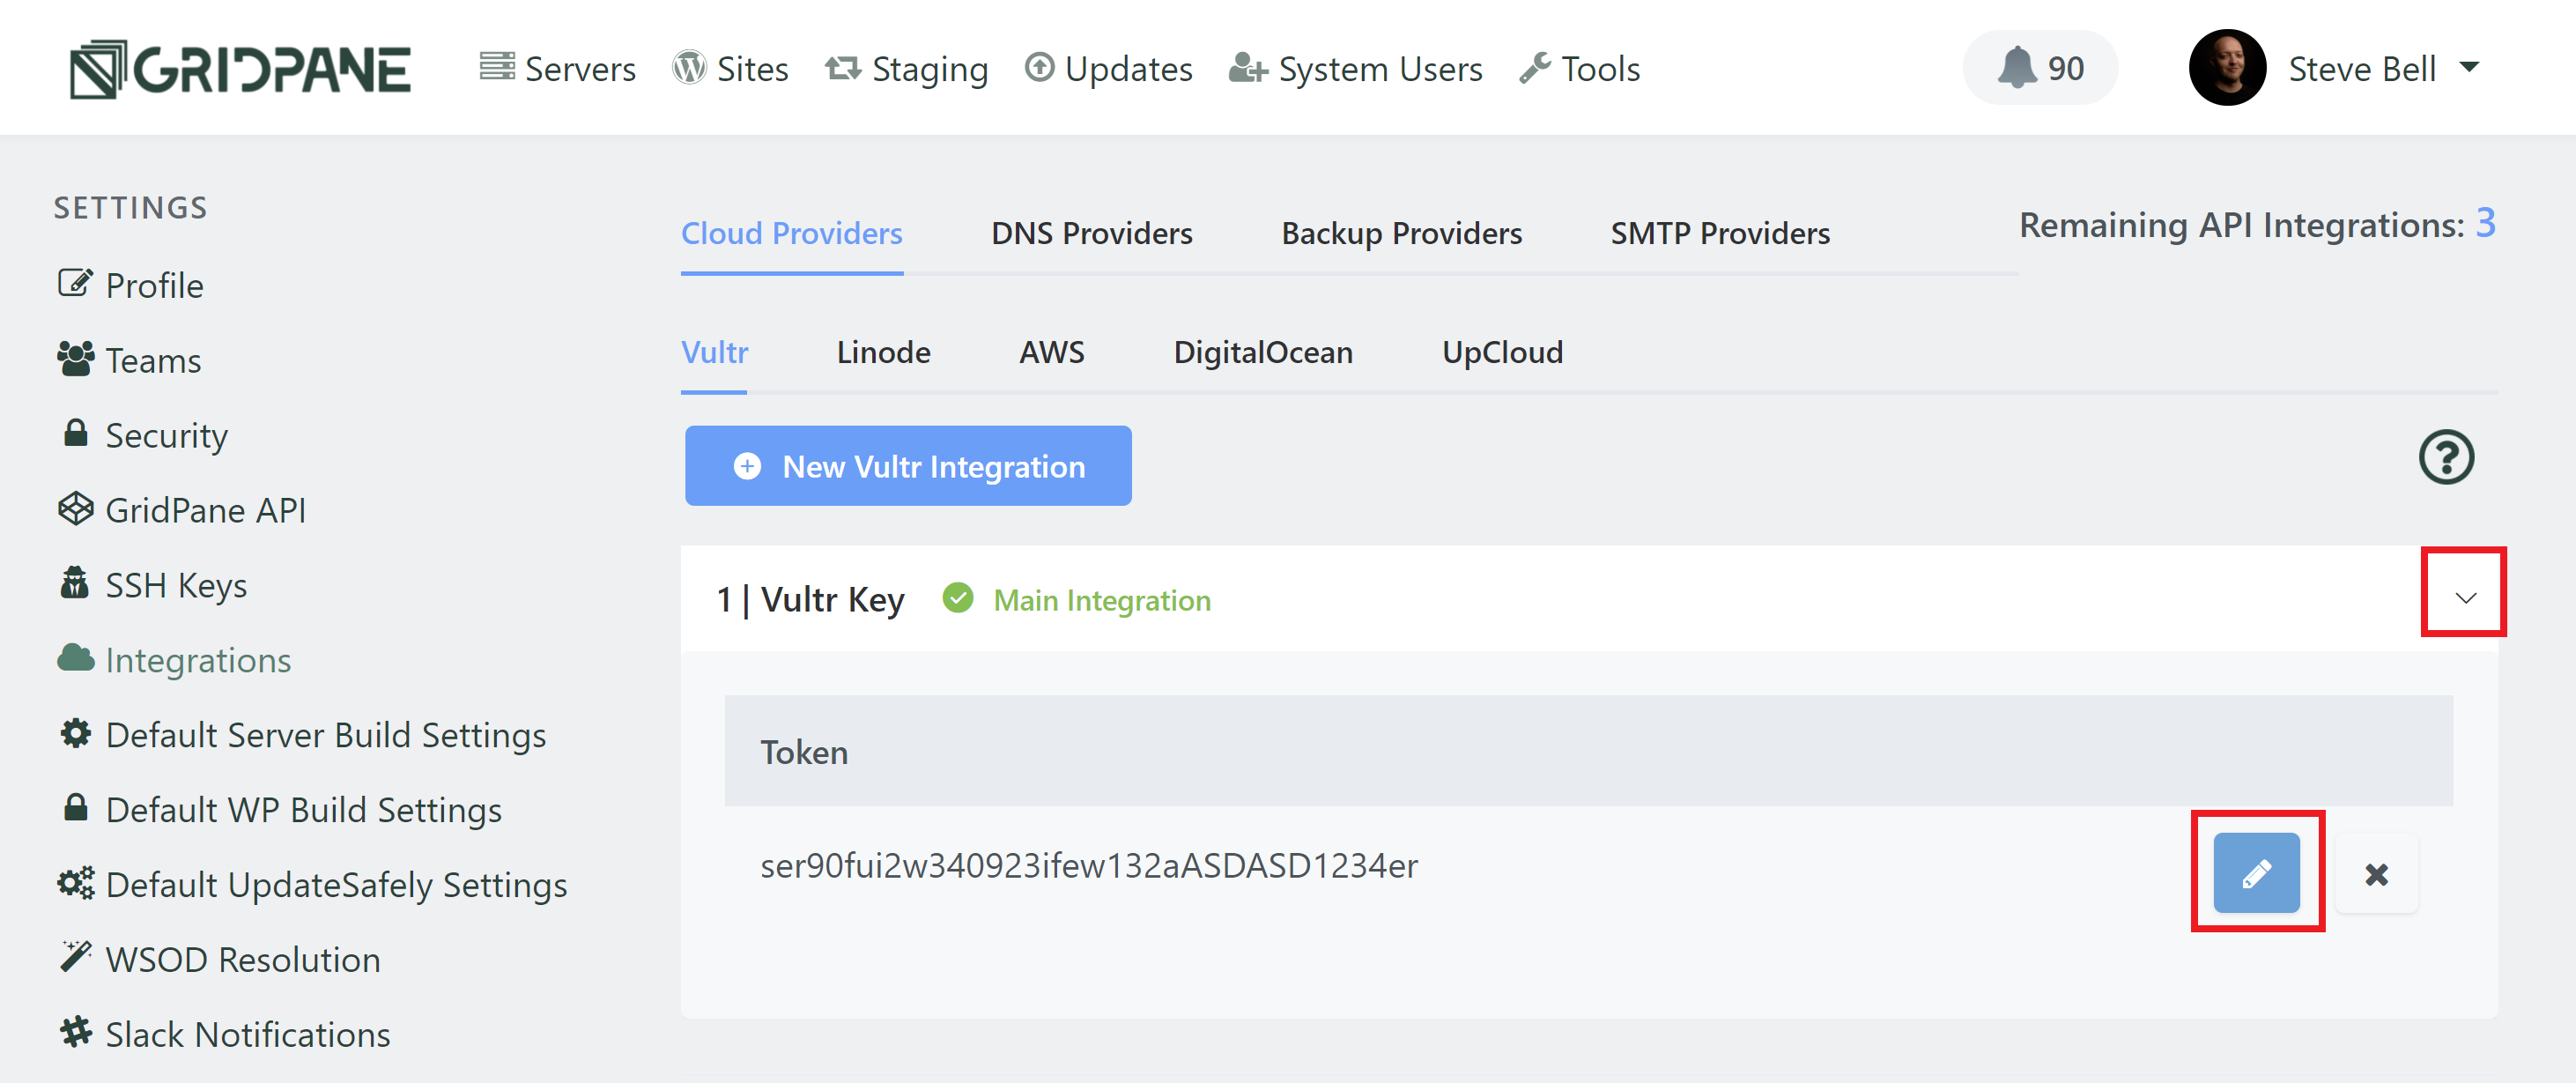
Step 7. View/Edit your Vultr API Token
Your Vultr API Token will now be available from this settings panel. If you wish to edit or change your API Token, you may do this by clicking the down arrow followed by edit button with the blue pencil icon.
A popup modal will appear and you can easily change your Vultr Token and click Update.
Step 8. Go to the vCanopy Home to provision an Instance
Now we have our Vultr Personal Access Token saved in our vCanopy settings we are able to provision Instances from within vCanopy. To do this, first click Home from the vCanopy main menu to access the server provisioning tool.

Step 9. Configure your Vultr Instance
Select Vultr from the choice of Cloud VPS providers and a configuration panel will open.
Enter an appropriate name for your Instance, and then choose a server plan and region from the dropdown selectors, before choosing whether or not you wish for Vultr Backups to be enabled. Currently all Instances are provisioned with Ubuntu 18.04 LTS as the default OS.
CHOOSE YOUR DATABASE
If you’re on the developer plan you’ll have the option to choose between Percona and MariaDB for your database.
Percona is based off the new MySQL 8. It has removed query caching (which was deprecated in 5.7 but was still available), and it has more advanced aspects for things like storing and managing json as a storage format. It will likely use more RAM than MariaDB.
MariaDB is still based on MySQL 5.7, which could mean fewer issues importing old WordPress websites from low-quality hosting environments. It will likely use less RAM than Percona.
Both are excellent options.
PROVIDER BACKUPS
We highly recommend that you enable provider backups. It’s a small price to pay for the extra insurance they offer.
CREATE YOUR SERVER
Click the Create Server button when you are happy with your configuration choices.

Step 10. Wait patiently while vCanopy provisions your Instance
vCanopy will begin provisioning your instance. You will now be able to see your instance in the Active Servers list.

The process of provisioning your server may take some time depending on the location of your Instance to the vCanopy servers. The process required to set up a highly optimized server stack for hosting Serious WordPress Sites is worth the wait, please be patient.
At any time during the provisioning process you may check what stage the process is at by rolling over the progress bar, a pop up window will display the current job being completed.

Once vCanopy has finished provisioning your Instance the progress bar will turn green and you will be able to deploy some Serious WordPress Sites on it.
Of course you may deploy multiple servers concurrently by clicking on a Cloud provider and repeating the above steps at any time during the provisioning process.

Step 11. Deploy your vCanopy WordPress Sites on a Vultr Instance
To deploy a site click on the Sites link in the vCanopy main menu to begin the process. We have a separate article that details the steps in detail for you.
