


Step 1. Navigate to the Sites page of your account
Click on the sites link in the vCanopy main menu to begin the process of deploying a Serious WordPress site.

Step 2. Configure your WordPress site
At the top of the Sites page you will see the Add New Site panel.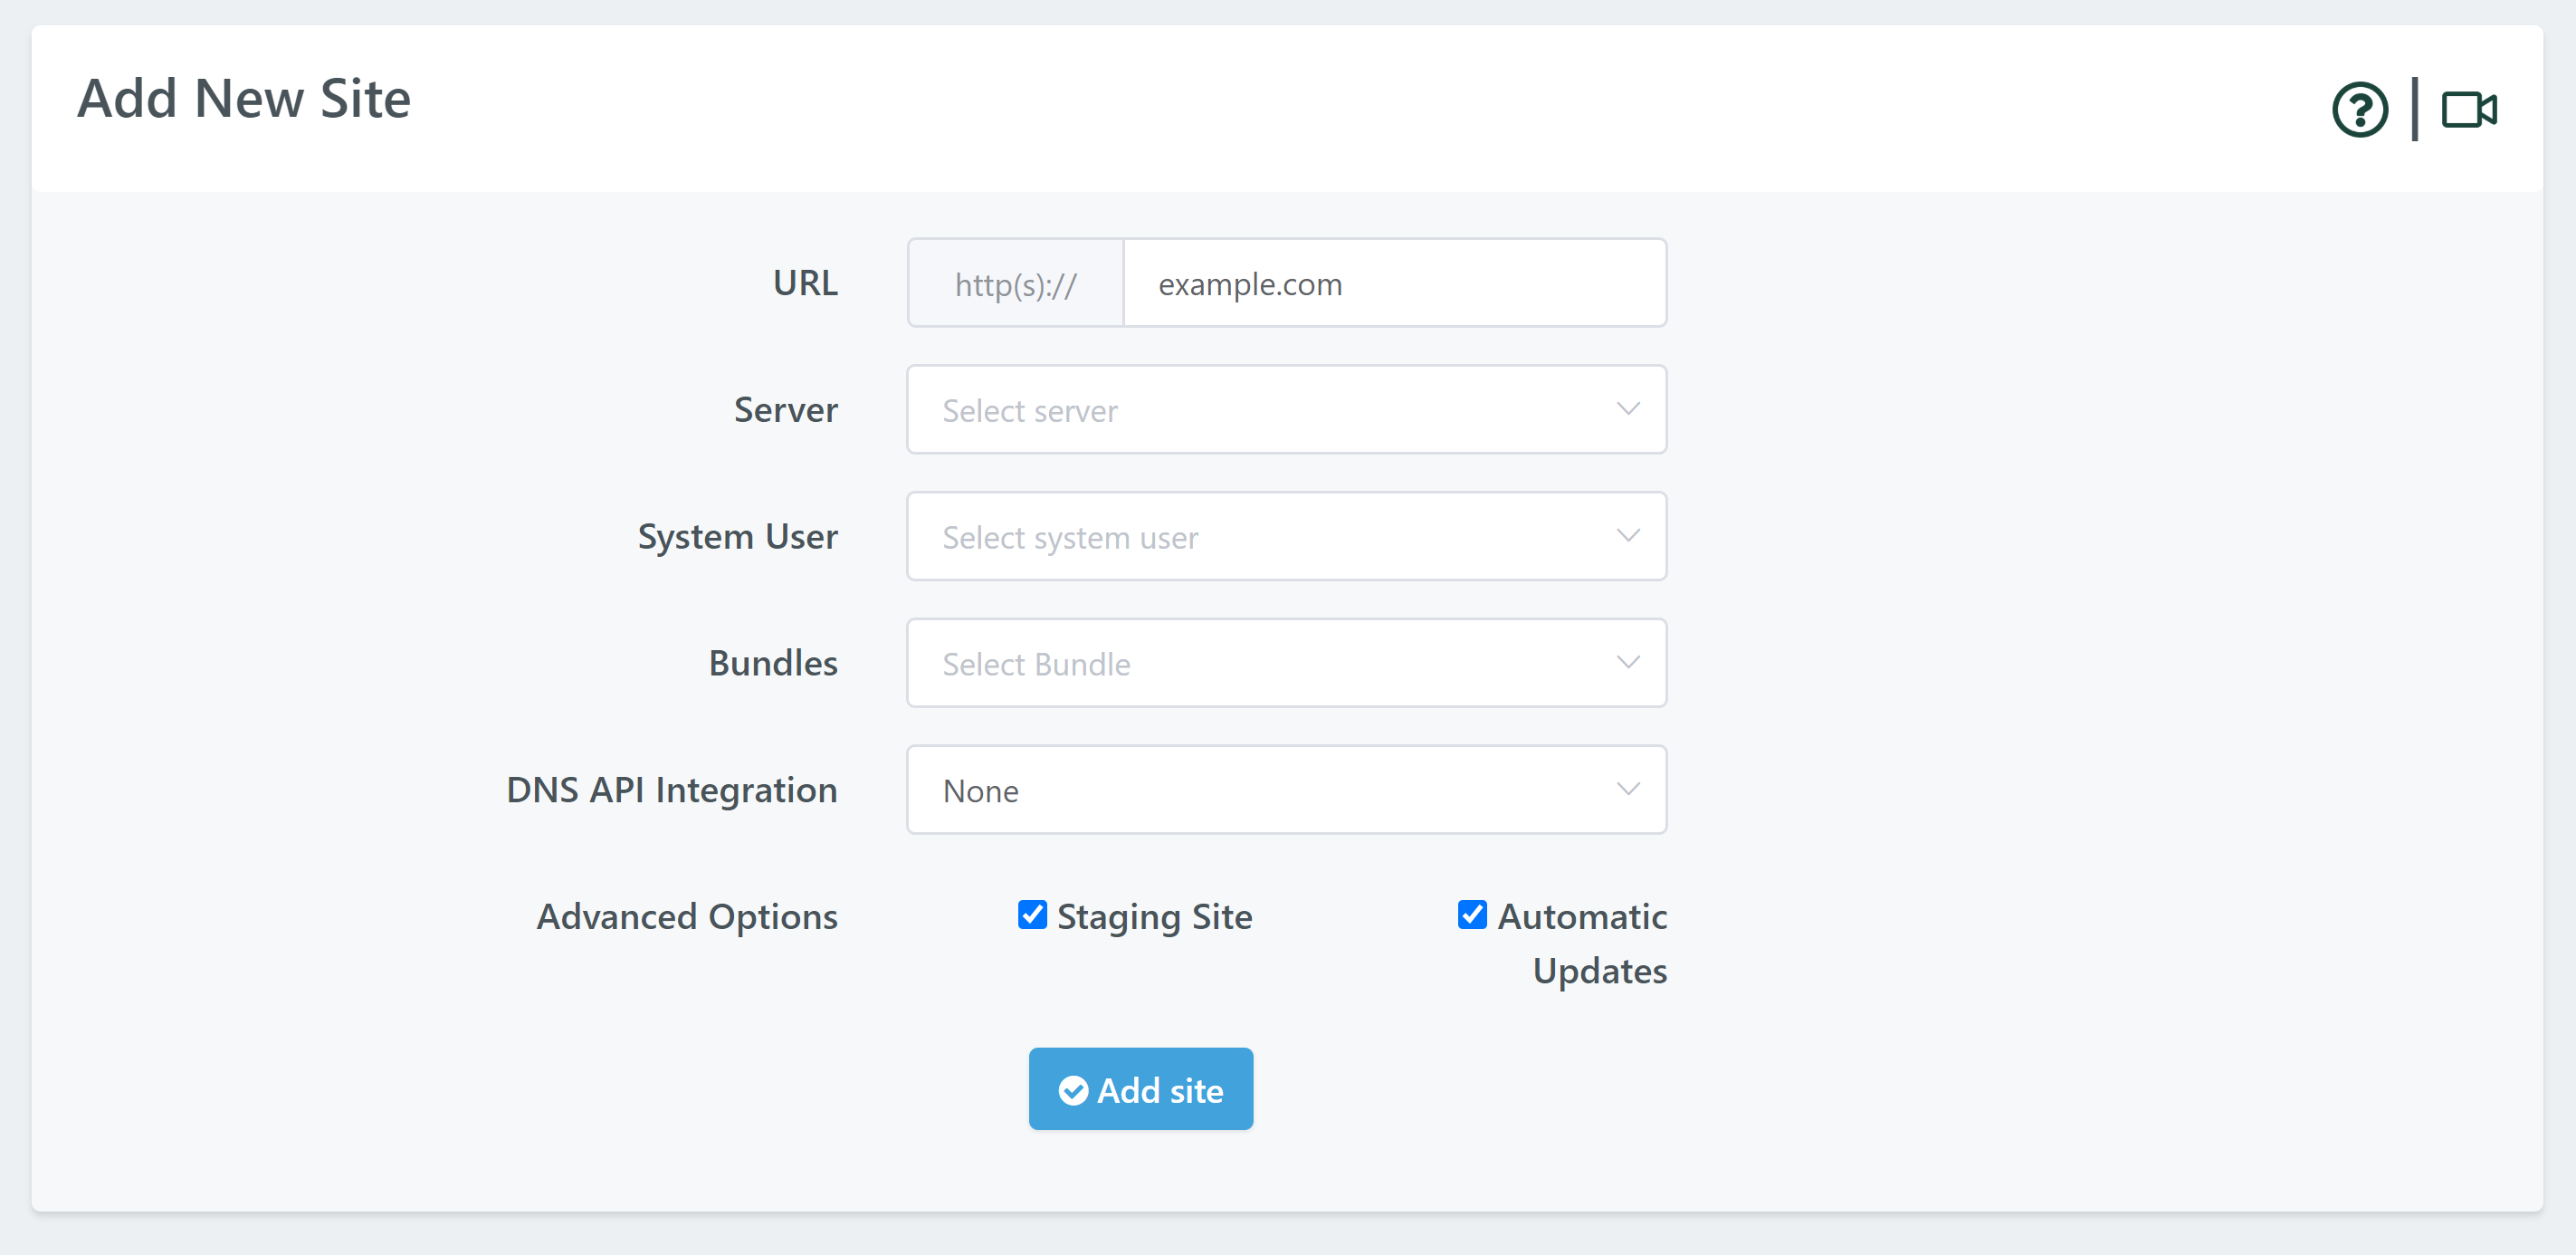 More stack specific options (Nginx/OpenLiteSpeed) will be shown once you select your server.
The following input fields will need to be completed:
More stack specific options (Nginx/OpenLiteSpeed) will be shown once you select your server.
The following input fields will need to be completed:
1. URL
First add your domain name in the URL input field. Do not enter your site URL with the www host prefix. All vCanopy sites are created with the correct Nginx configuration to serve both www.yoursite.com and yoursite.com.2. SERVER
Next, choose the server you wish to deploy to from the Server dropdown selector. We have easy to follow tutorials which provide step by step guides to provisioning server instance from several different infrastructure providers here.3. CREATE / ASSIGN A SYSTEM USER
After that, you can also choose which system user will own the site either by auto-creating a new user, or create a new custom user, or assigning the site to an existing user. Autocreate: Custom:
 It’s important to keep your sites isolated wherever it makes sense for security, and so you can accurately monitor system resources per website on the command line if you need to.
It’s also useful if you want to give different users SSH/SFTP access to different sites on the server.
It’s important to keep your sites isolated wherever it makes sense for security, and so you can accurately monitor system resources per website on the command line if you need to.
It’s also useful if you want to give different users SSH/SFTP access to different sites on the server.
4. SET YOUR WP USERS
Here you can set up WordPress users for your website. When creating new websites you have 3 options: –- Use the default settings we saw in the previous step
- Use the default setting and add up to 5 additional users
- Create a different primary admin and up to 5 additional users
 Inside your Settings page, you can set your Default WP Admin Username, Email, and Password settings. Learn more here:
Using Default WordPress Admin Settings to deploy vCanopy sites
Inside your Settings page, you can set your Default WP Admin Username, Email, and Password settings. Learn more here:
Using Default WordPress Admin Settings to deploy vCanopy sites
5. CHOOSE A vCanopy BUNDLE TO DEPLOY (OPTIONAL)
If you wish you may select a vCanopy Bundles to use to deploy a site preconfigured with your most commonly used themes and plugins.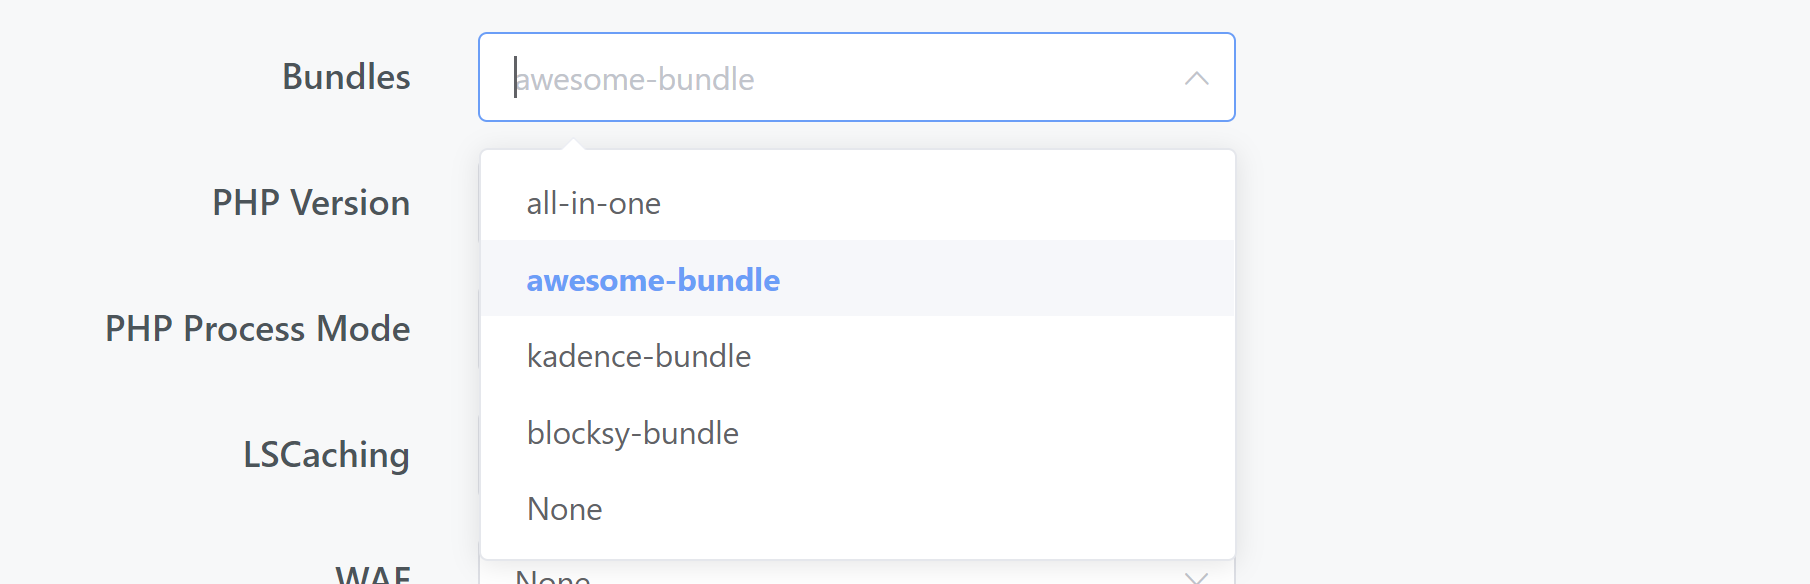 We have an easy to follow step-by-step guide to using vCanopy Bundles here.
6. PHP VERSION
Choose your preferred PHP version. If you’re not sure which one to choose, currently PHP 7.3 is the safest choice, but if you’re confident that your theme and plugins are all PHP 7.4 compatible then we recommend PHP 7.4.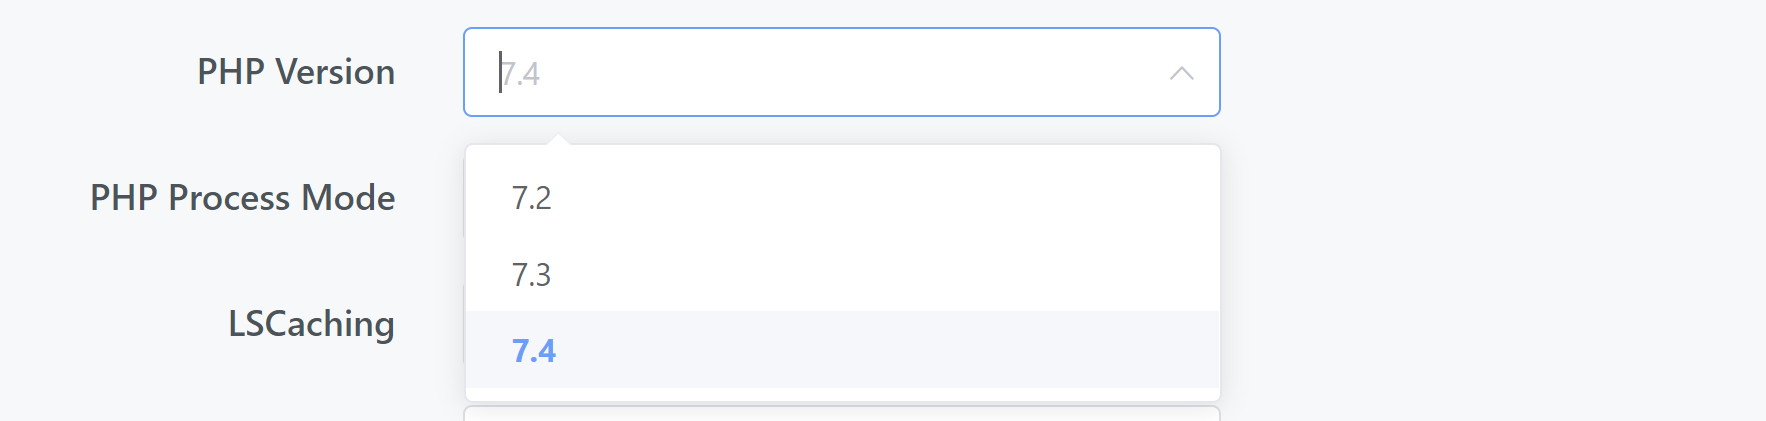 Occasionally, we see some strange behavior with plugins that are NOT 7.4 ready. Switching to 7.3 in these cases has resolved these issues.
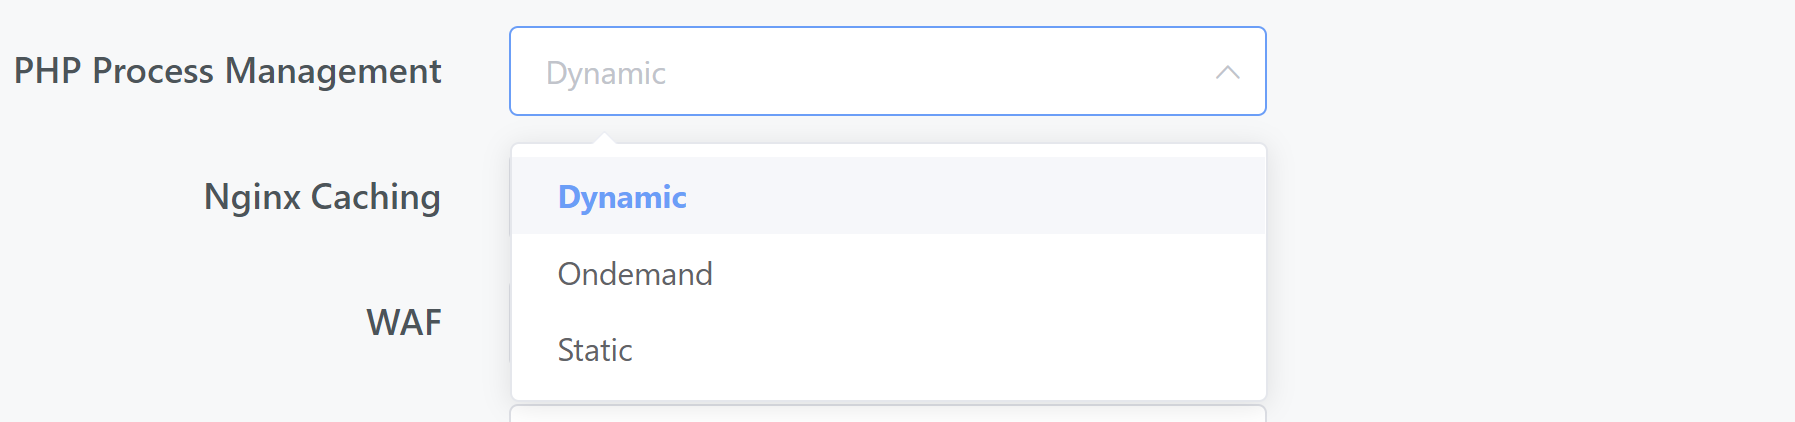
7. PHP WORKER SETTINGS
If you’re not sure which setting to choose, we highly recommend you stick with our default settings. These will serve you well for 95% of websites, and still pretty well for the other 5%. You can learn more PHP workers and our recommended settings for different types of websites in this blog post: PHP Workers and WordPress: A Guide for Better Performance If unsure, stick with the default Dynamic / ProcessGroup settings.Nginx:
OpenLiteSpeed:

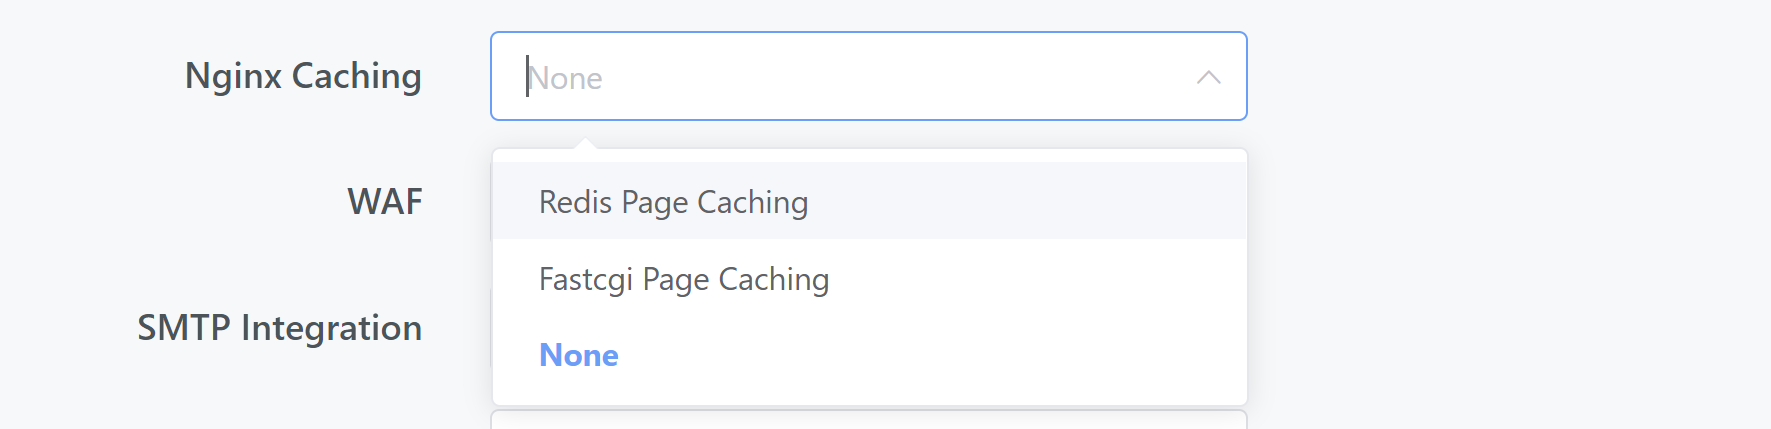
8. CACHING
In the beginning, you may want to leave caching turned off until you have imported your site in, or finished your development work. If not, here you can choose your preferred setting. You can also learn more about caching strategy in this article: What is the optimal caching strategy for vCanopy, should I run a plugin cache?Nginx:
OpenLiteSpeed:
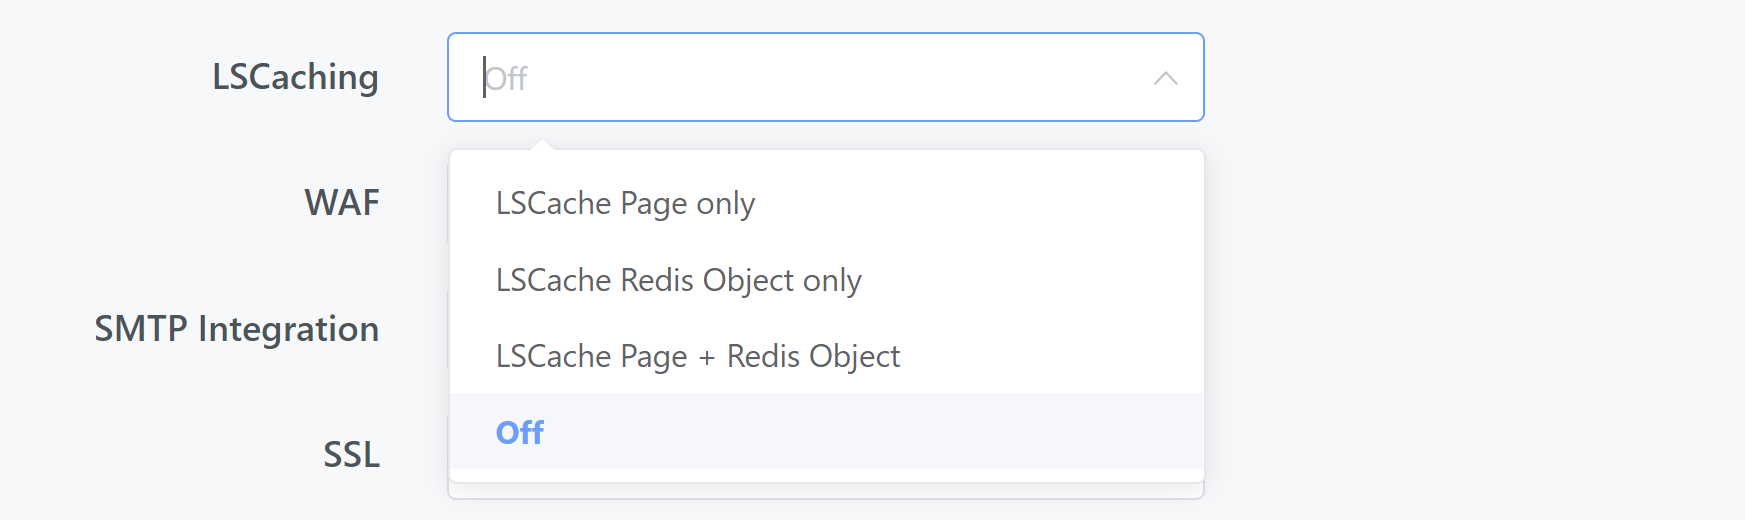
Our recommendations in a nutshell:
- For most websites on Nginx, we recommend Redis Nginx Page caching.
- Exceptions to the above are websites that receive super-high concurrent traffic, OR websites that regularly change such as news sites and blogs that regularly publish new content, or active forums where threads are publically visible. Here we recommend FastCGI.
- For OpenLiteSpeed, the LSCache is fantastic, we highly recommend you use it for all your OLS hosted websites.
- We recommend Redis Object Caching. On Nginx, this can be activated anytime within your website via the vCanopy Redis Object Caching plugin.
9. WAF
We recommend you set up your WAF right from the get-go. If you have a Pro account, you have the 6G WAF available. If you have a Developer account, you have the 7G WAF and ModSecurity (ModSec) available.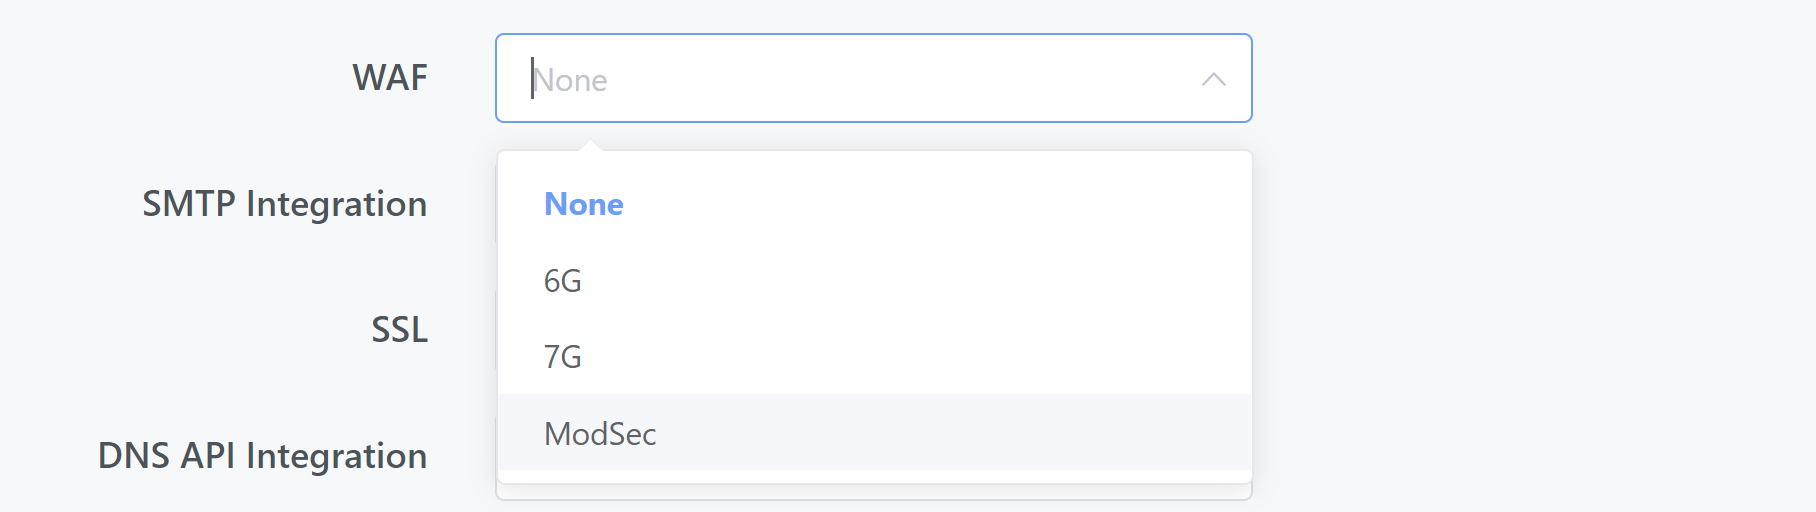 For most websites, we recommend the 7G WAF. ModSec is a great selling point for Enterprise level clients, but it’s also more resource hungry and more difficult to fine-tune. 7G is super lightweight and customizable and great for most websites.
10. SMTP
vCanopy does not come preconfigured with email functionality (which is highly unreliable when not using a reliable service with proper DNS records), but we do have a direct integration with SendGrid and more integrations are on the way. Using SendGrid SMTP for Transactional Emails
11. SSL CERTIFICATE
If you are using one of our DNS API integrations below, or have your DNS records already set up and pointing to your server, you can automatically provision an SSL certifcate. For this, select the Primary Domain SSL option.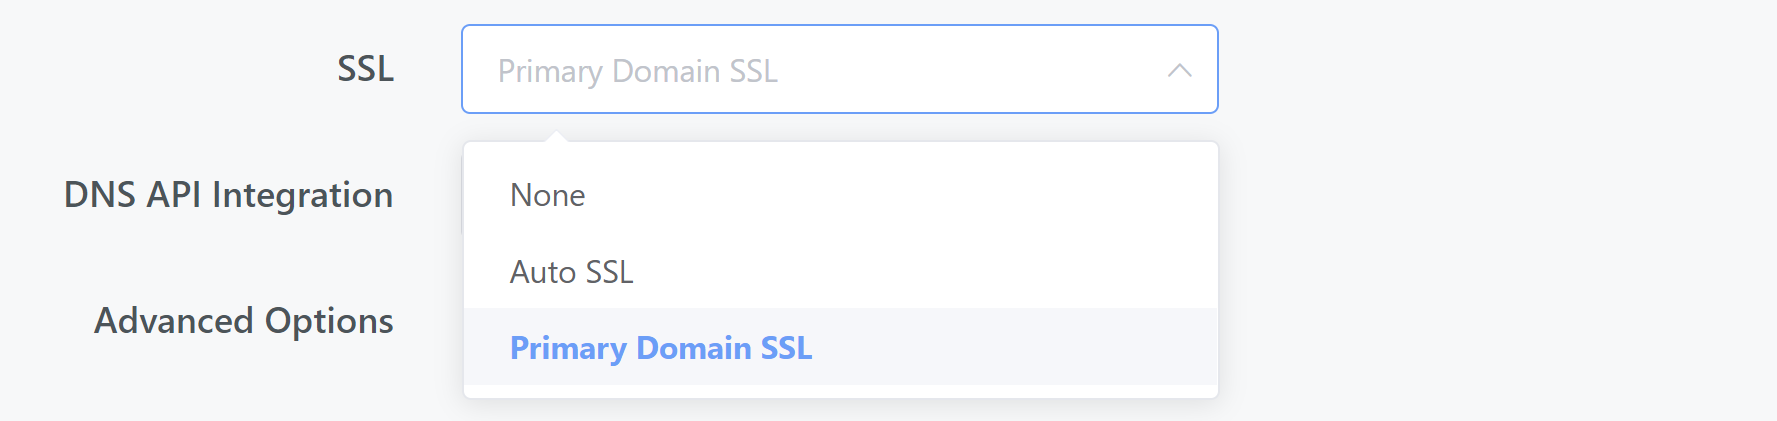 NOTE: AutoSSL is only necessary for WordPress multisites/WaaS networks where you want to automatically provision new SSL certificates for new addon domains.
12. DNS API INTEGRATION (IF APPLICABLE)
If you have added a DNS Made Easy API key or Cloudflare API key in your system settings, you have the option to launch your site with your integration set. If it’s a brand new site it will with no records this will automatically update your DNS. You can select your chosen provider from the dropdown.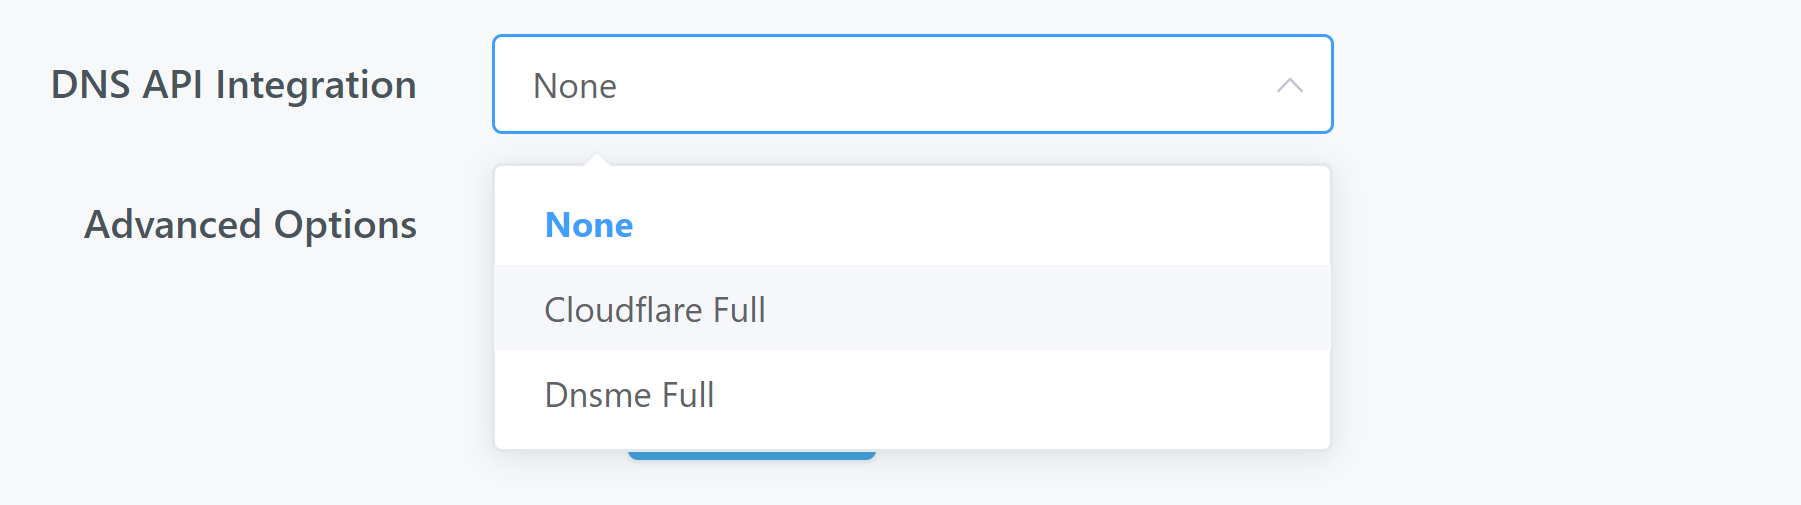
13. CONFIGURE ADVANCED OPTIONS (OPTIONAL)
The Advanced Options section has several preselected checkboxes that will configure a Staging Site and the vCanopy Automatic Updates feature. vCanopy Staging Sites allow you to push from your live production site to your staging site, or from your staging site to your live production site, at any time. Learn more about Staging here:
Using staging sites on vCanopy
The Automatic Updates use vCanopy UpdateSafely™ to utilize an automated visual comparison when updating your site’s plugins and themes to ensure site integrity is maintained. Learn more about UpdateSafely™ here:
UpdateSafely™ 2.0
vCanopy Staging Sites allow you to push from your live production site to your staging site, or from your staging site to your live production site, at any time. Learn more about Staging here:
Using staging sites on vCanopy
The Automatic Updates use vCanopy UpdateSafely™ to utilize an automated visual comparison when updating your site’s plugins and themes to ensure site integrity is maintained. Learn more about UpdateSafely™ here:
UpdateSafely™ 2.0
14. DEPLOY YOUR WORDPRESS WEBSITE
Once you have entered the appropriate configuration parameters to suit your needs click Add site to being deploying your Serious WordPress site on vCanopy.Step 3. Wait a few moments while vCanopy deploys your WordPress Site
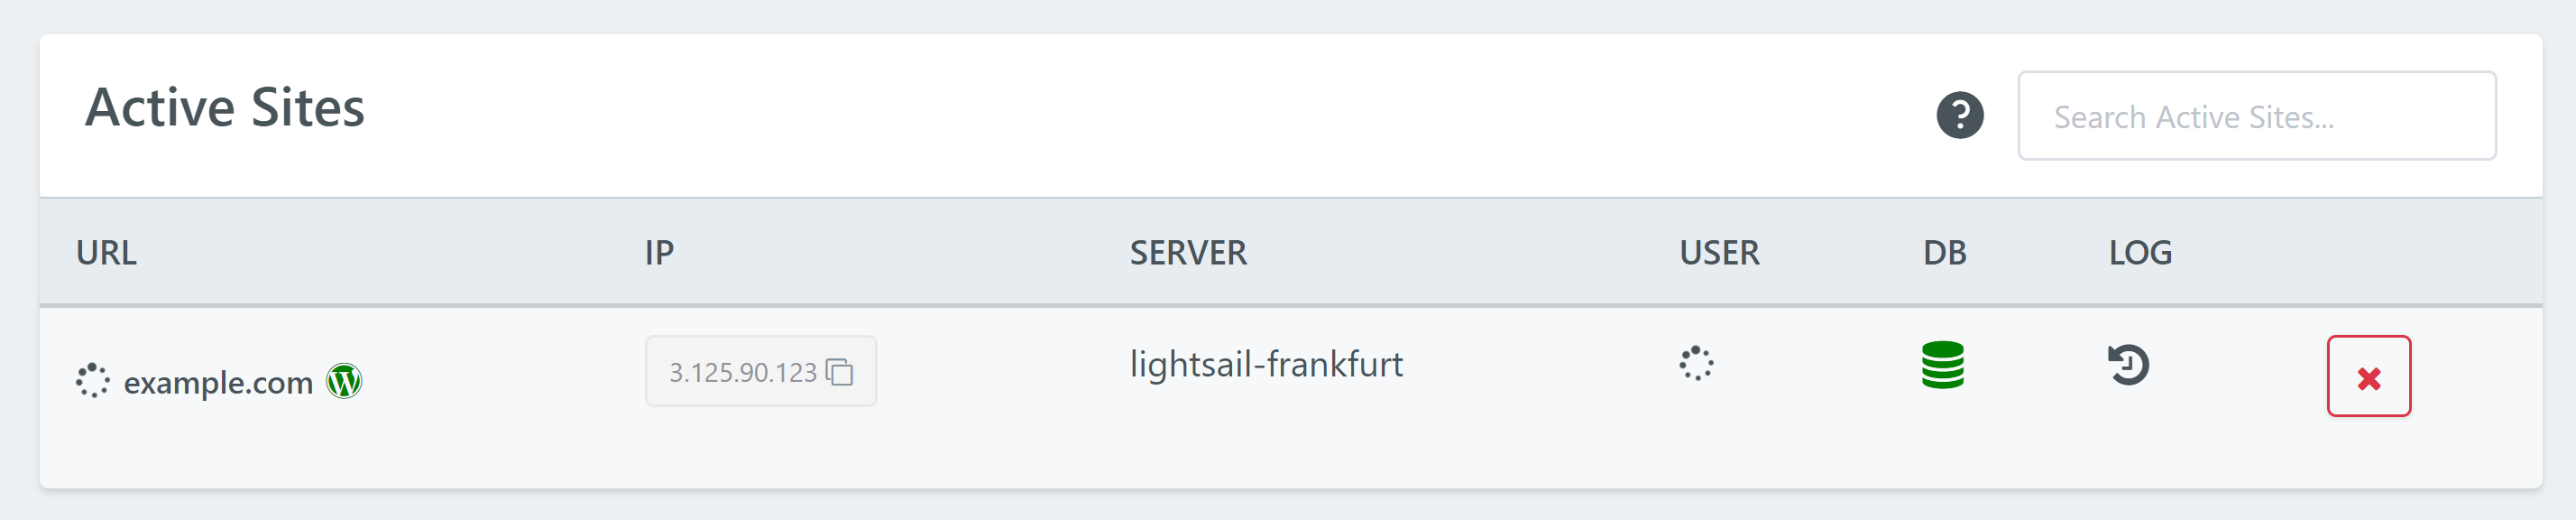
vCanopy will immediately begin deploying your Serious WordPress site. You will receive a green success notice banner and your site will now be displayed in the Active Sites list below the Add New Site panel.
While the deployment process is still ongoing you will see spinner icons for each of the aspects of the deployments progress.
Behind the scenes vCanopy is creating a database, installing WordPress with an Admin User, creating a staging site and configuring automatic updates and UpdateSafely™, installing the Nginx helper function, and configuring Nginx FastCGI caching and Redis Object caching for your site and more.
This is not your average WordPress site deployment! Please be patient while vCanopy is working its magic (it’s pretty quick).
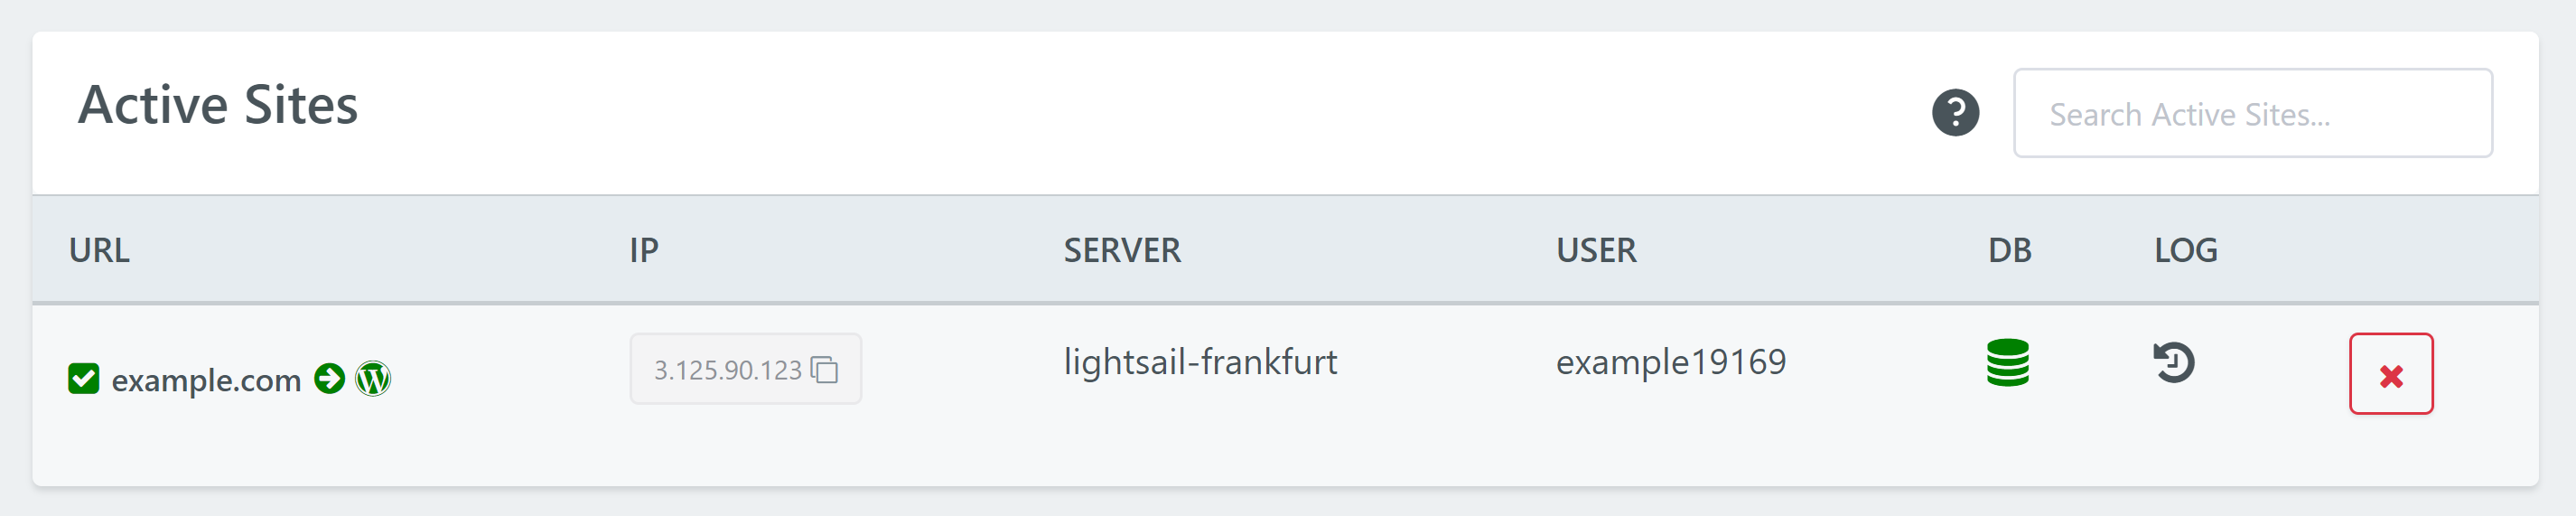
Once the deployment is complete the spinner progress notifications will be replaced by green ticked checkboxes and the DB icon will turn green.
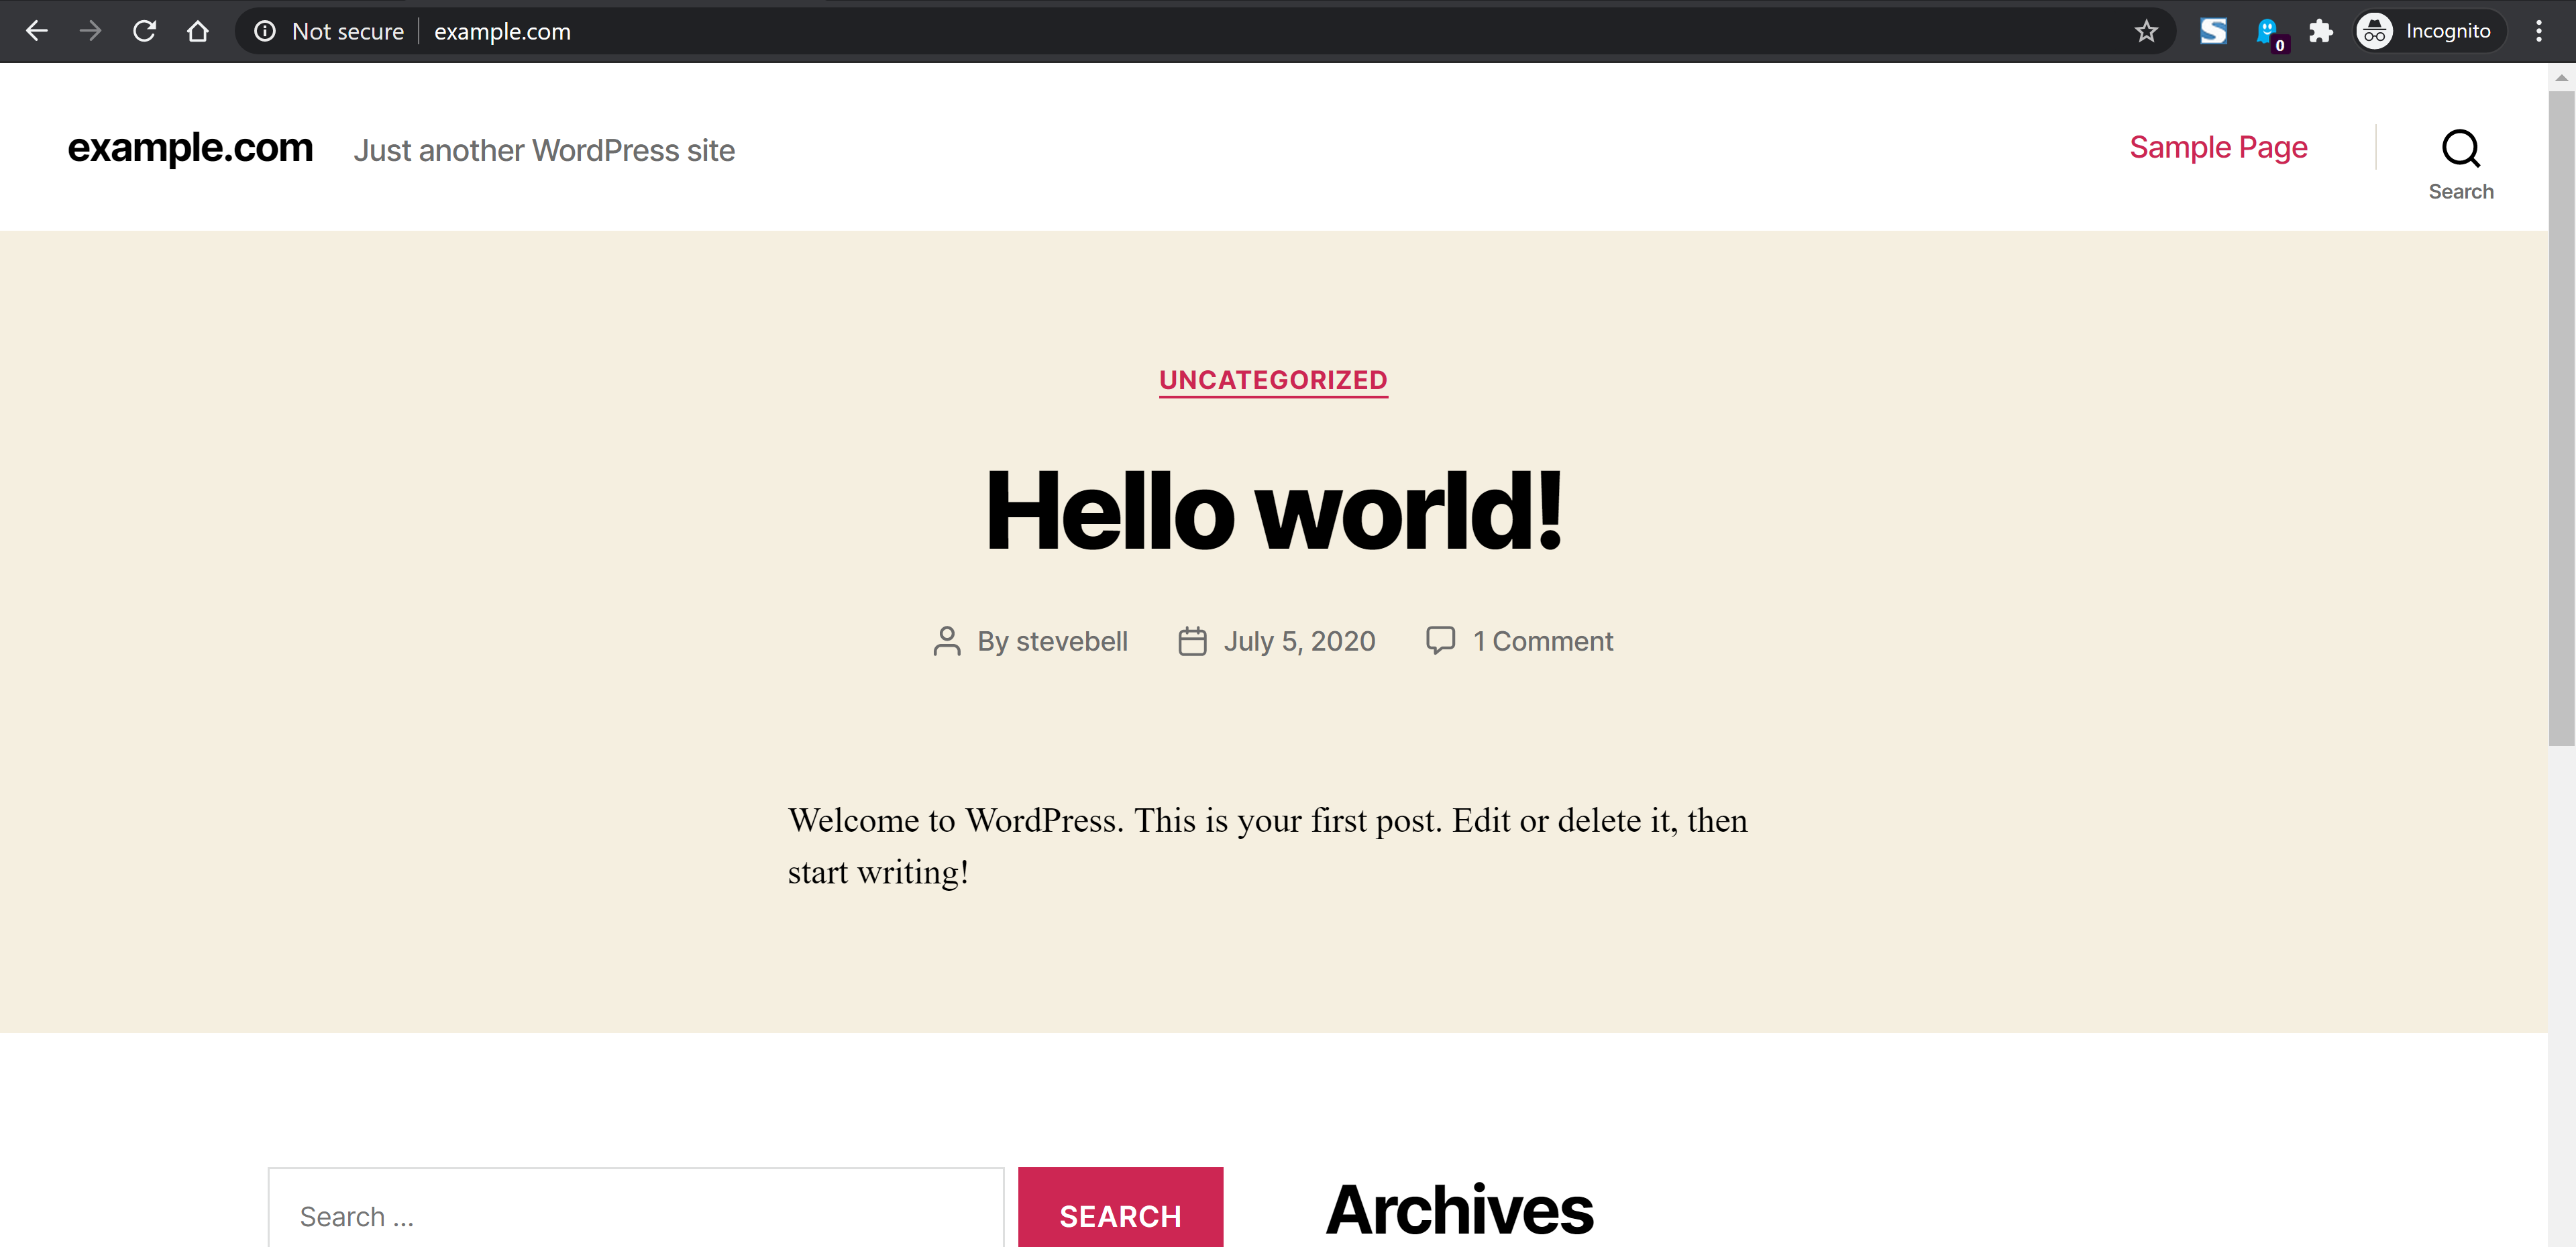
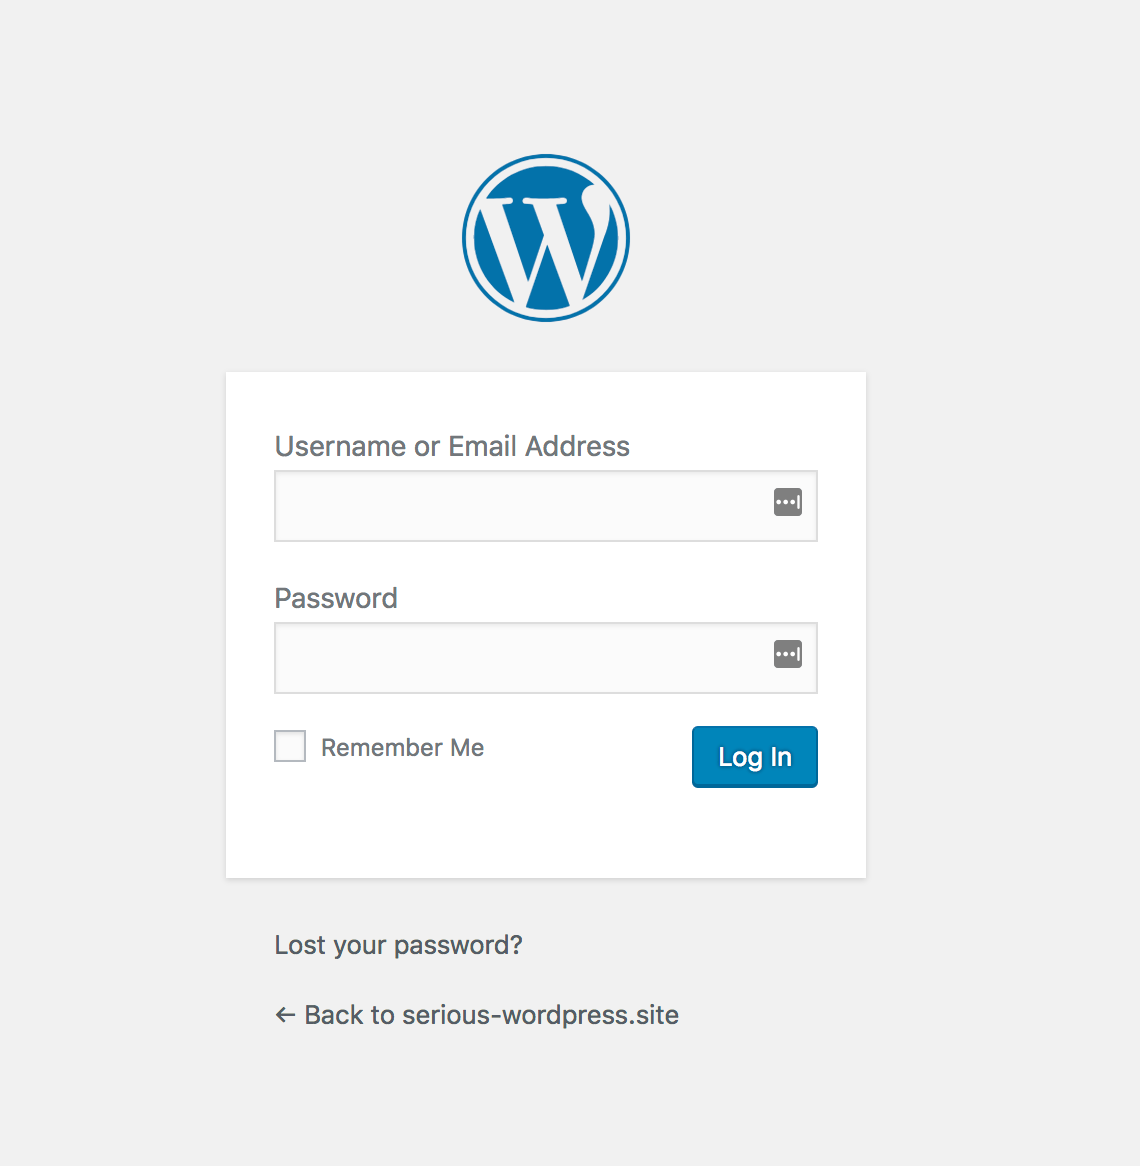
Step 4. Login to your WordPress site and do great things!
Your WordPress site is now ready for you to create your project.
Visit your site by going visiting the admin URL at either
http://your-site-domain.com/wp-admin
or
https://your-site-domain.com/wp-admin
Depending on whether you have enabled an SSL or not. You will be redirected to the WordPress login page.
You will need to enter either your Admin Username or Email Address and Password.
If you have set your Default WordPress Admin Settings, then you will use these credentials to login in.
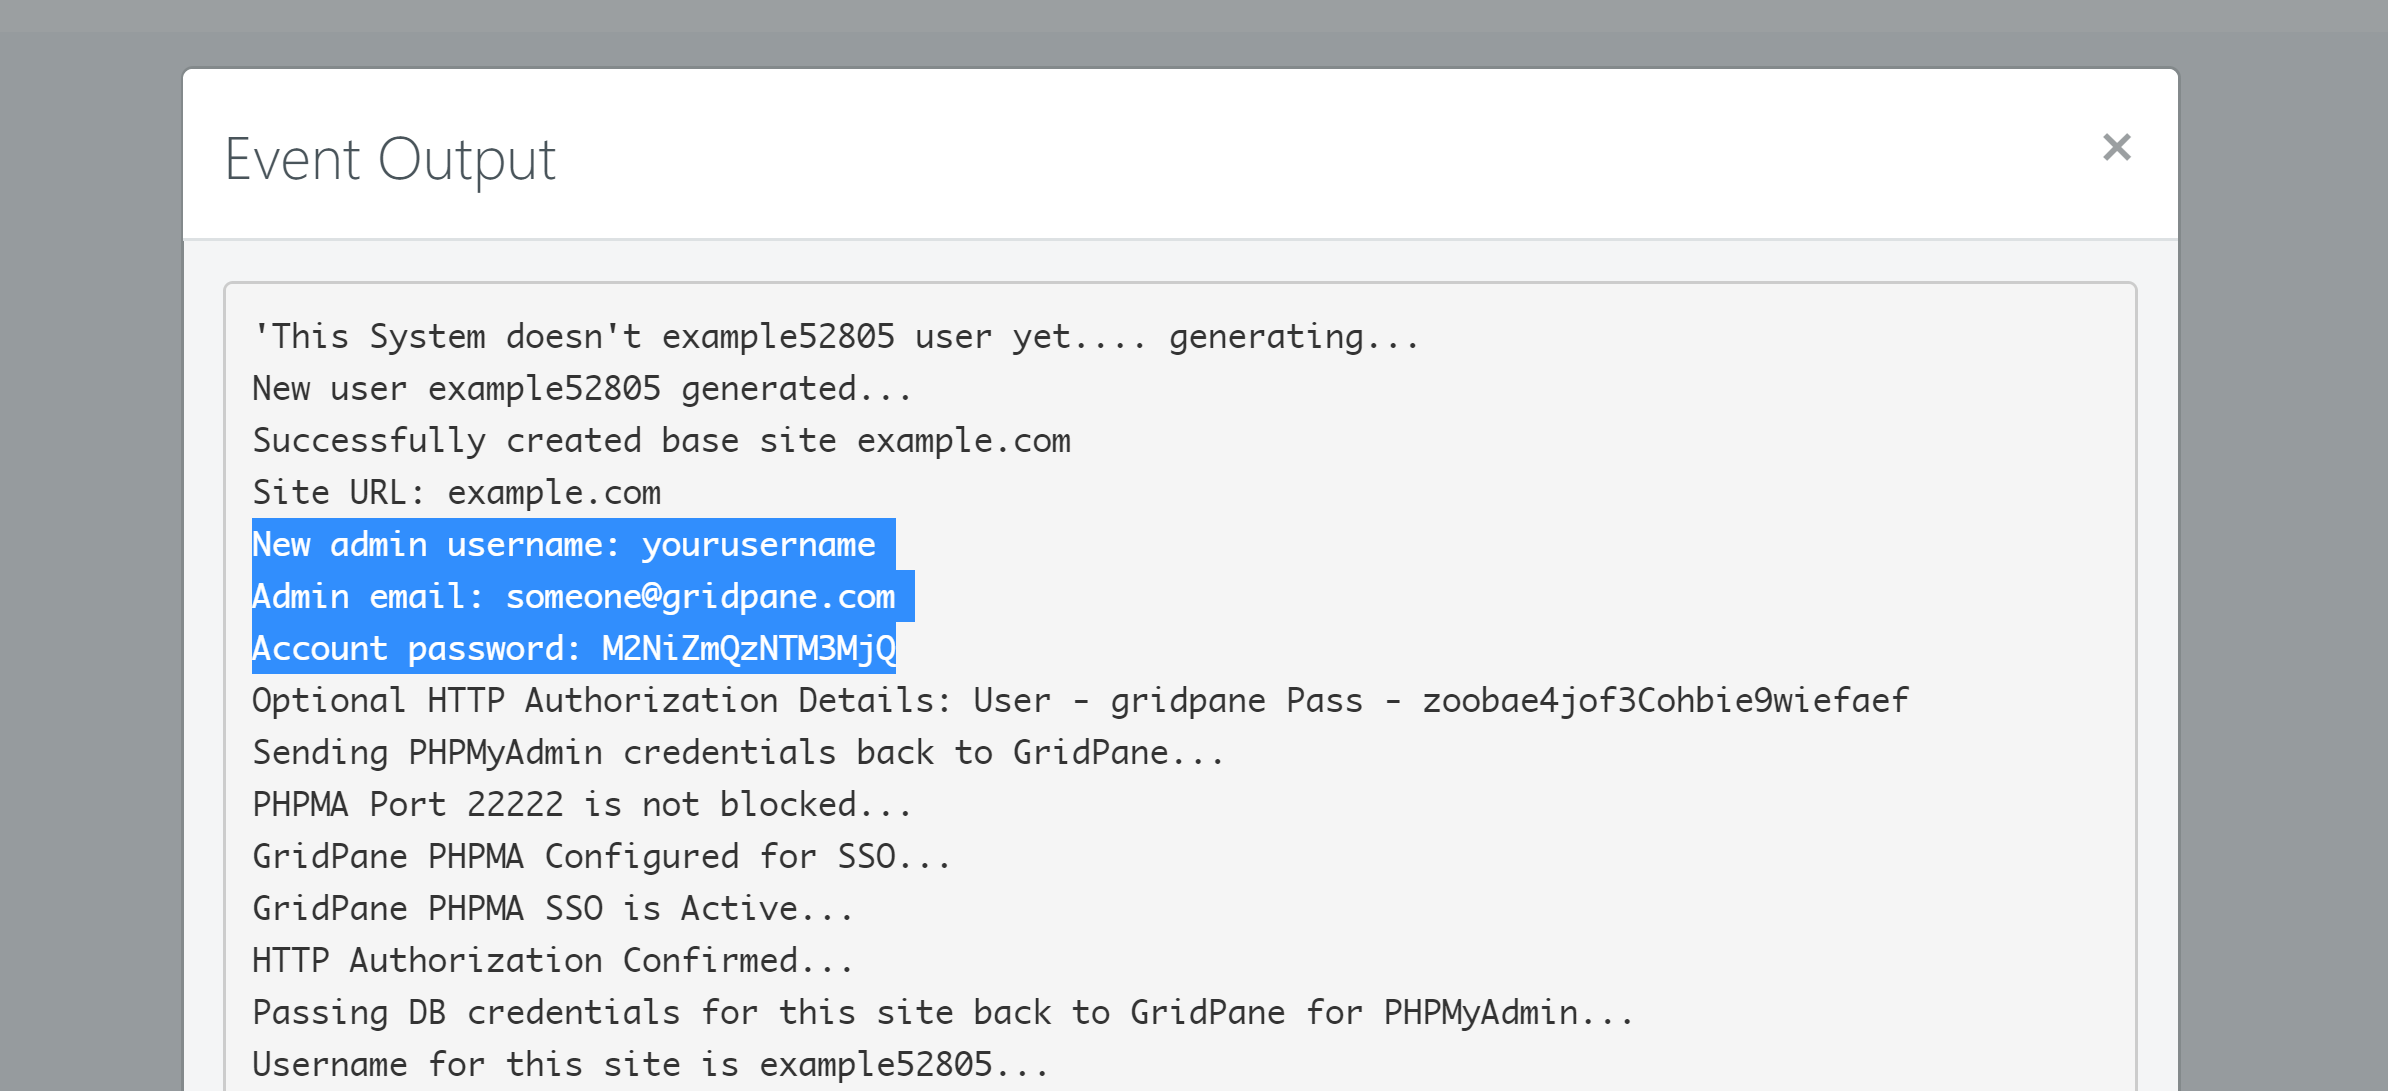
If you are not using a Default WordPress Admin User, then vCanopy will have set your Username and Email address using your vCanopy account user, and will have generated a strong password.
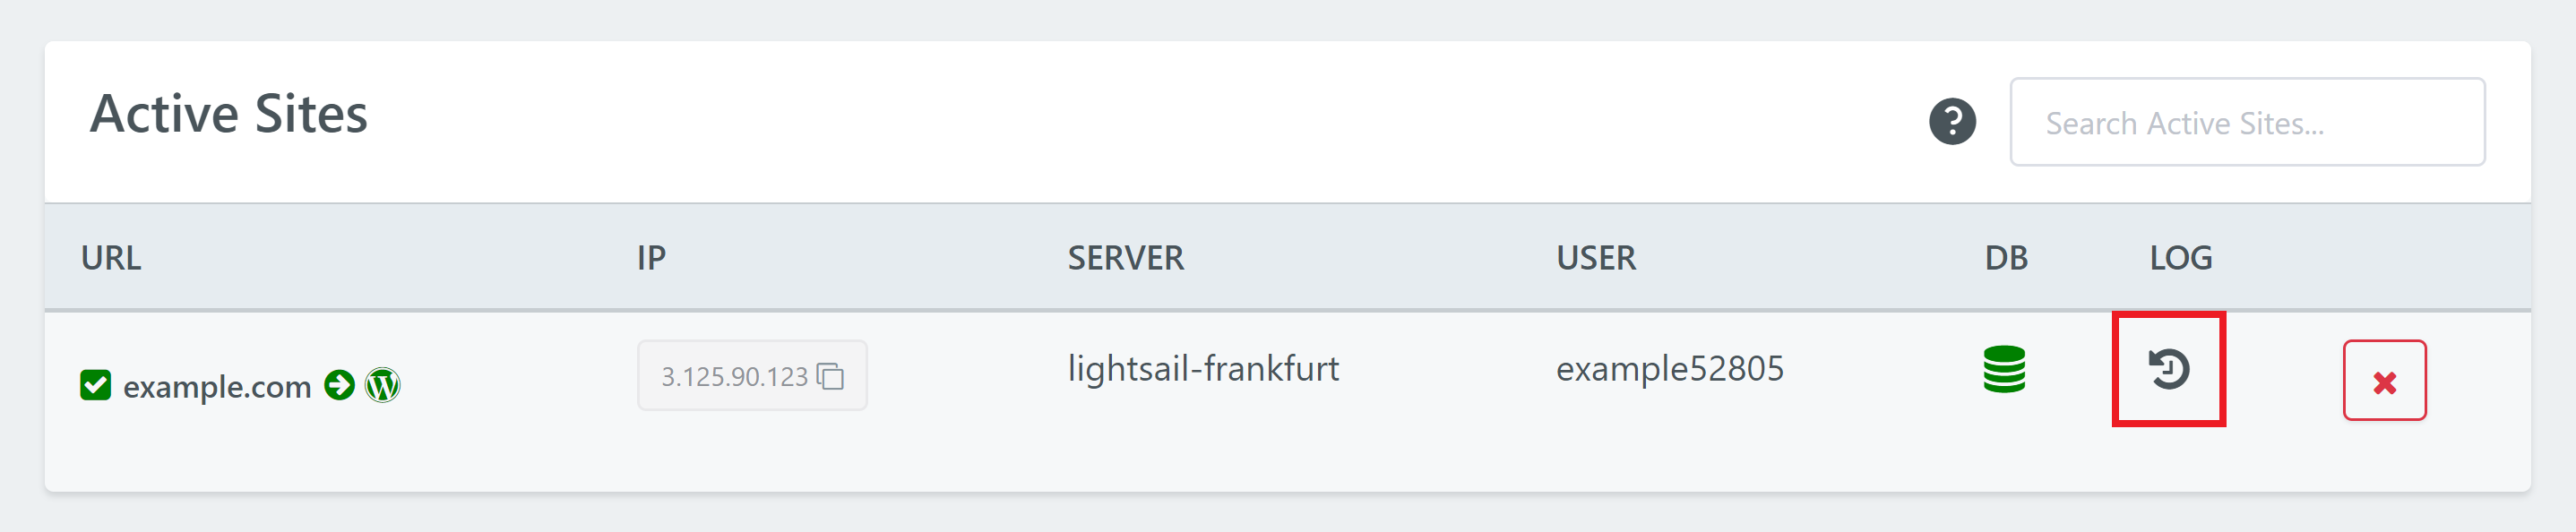
You can find these Admin User login details in your site log. Click on the log icon to open it up:
Enter your WP Admin User credentials and click log in.
You’re now all set to get started building your WordPress website!