


Step 1. Login to the Digital Ocean account and navigate to the API Panel
Login to Your Digital Ocean Account and Click on API in the top menu bar.

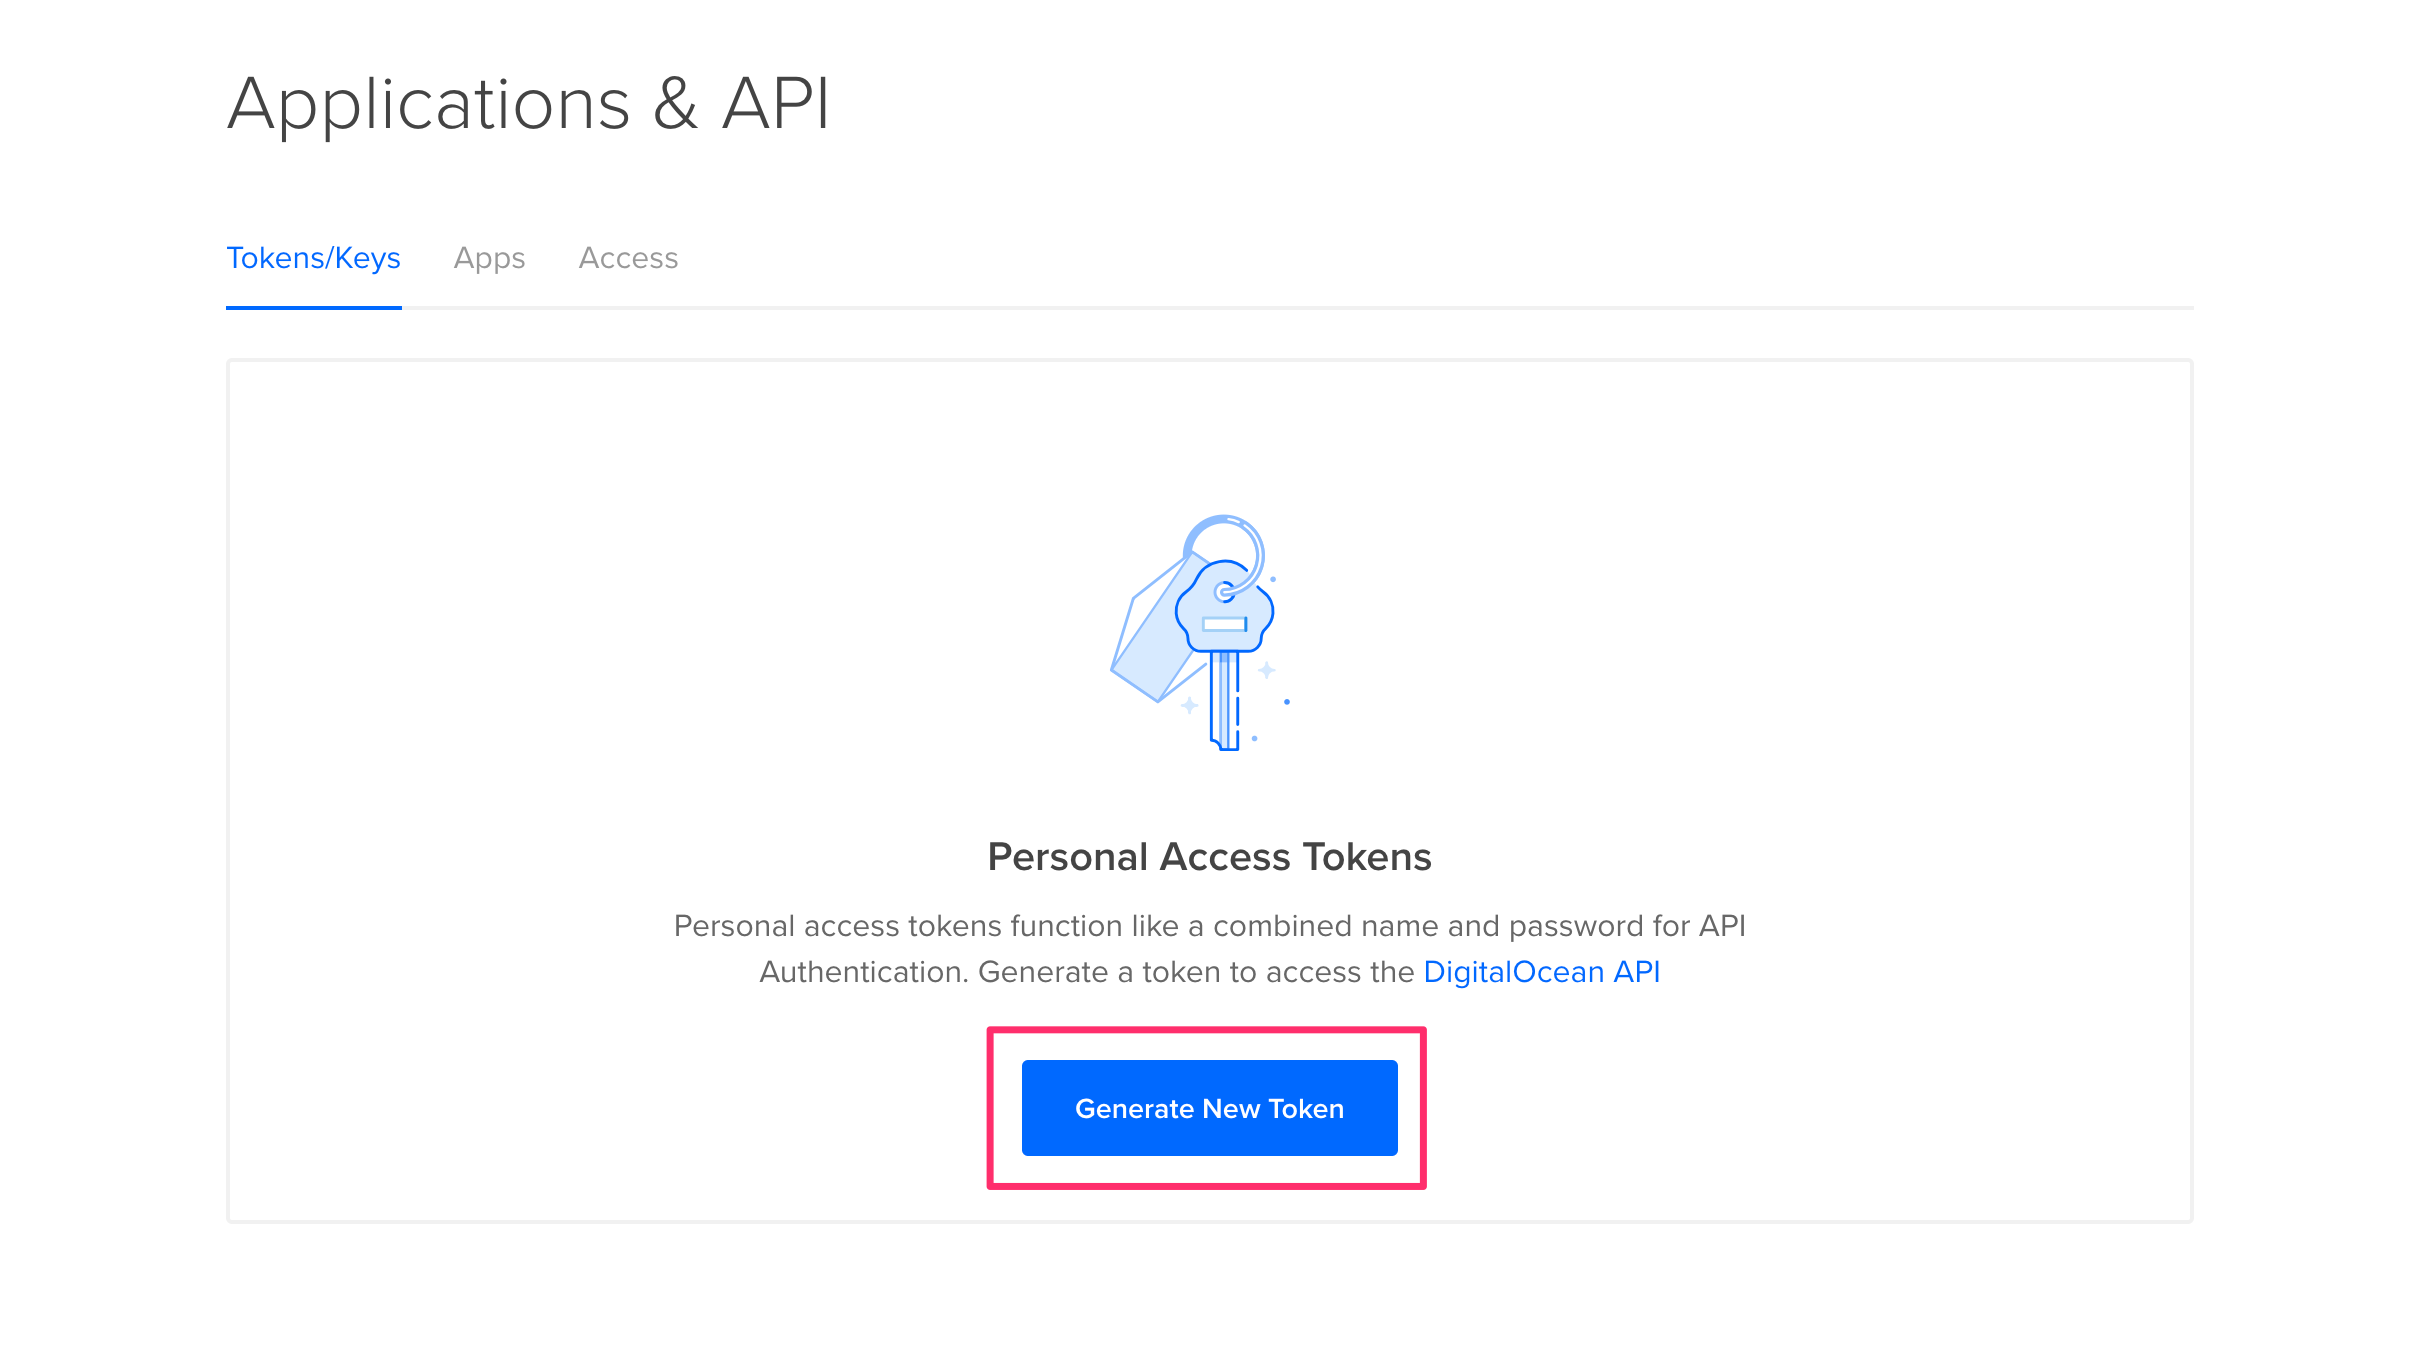
Step 2. Click the Generate New Token Button
In the Applications & API panel that opens up, click on the Generate New Token Button in the Tokens/Keys tab.
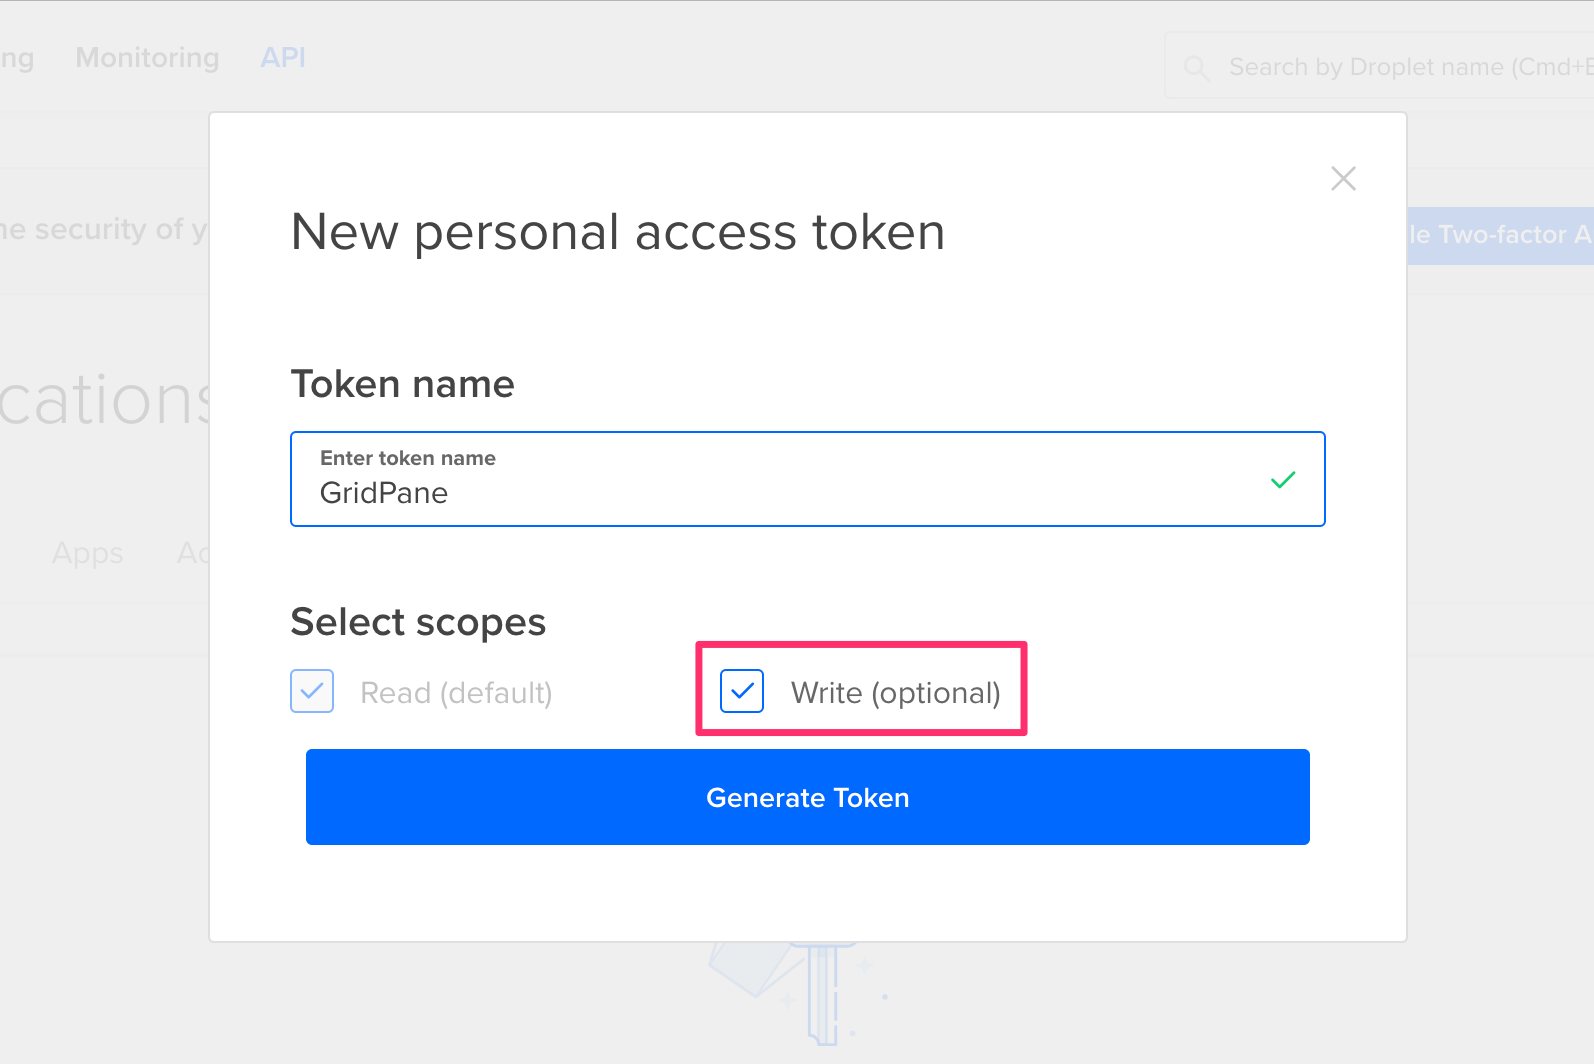
Step 3. Generate a Token with the correct scope
In the New personal access token popup modal, give your access token an appropriate name, such as vCanopy. Then make sure both Read and Write are selected in the scope, before clicking Generate Token.
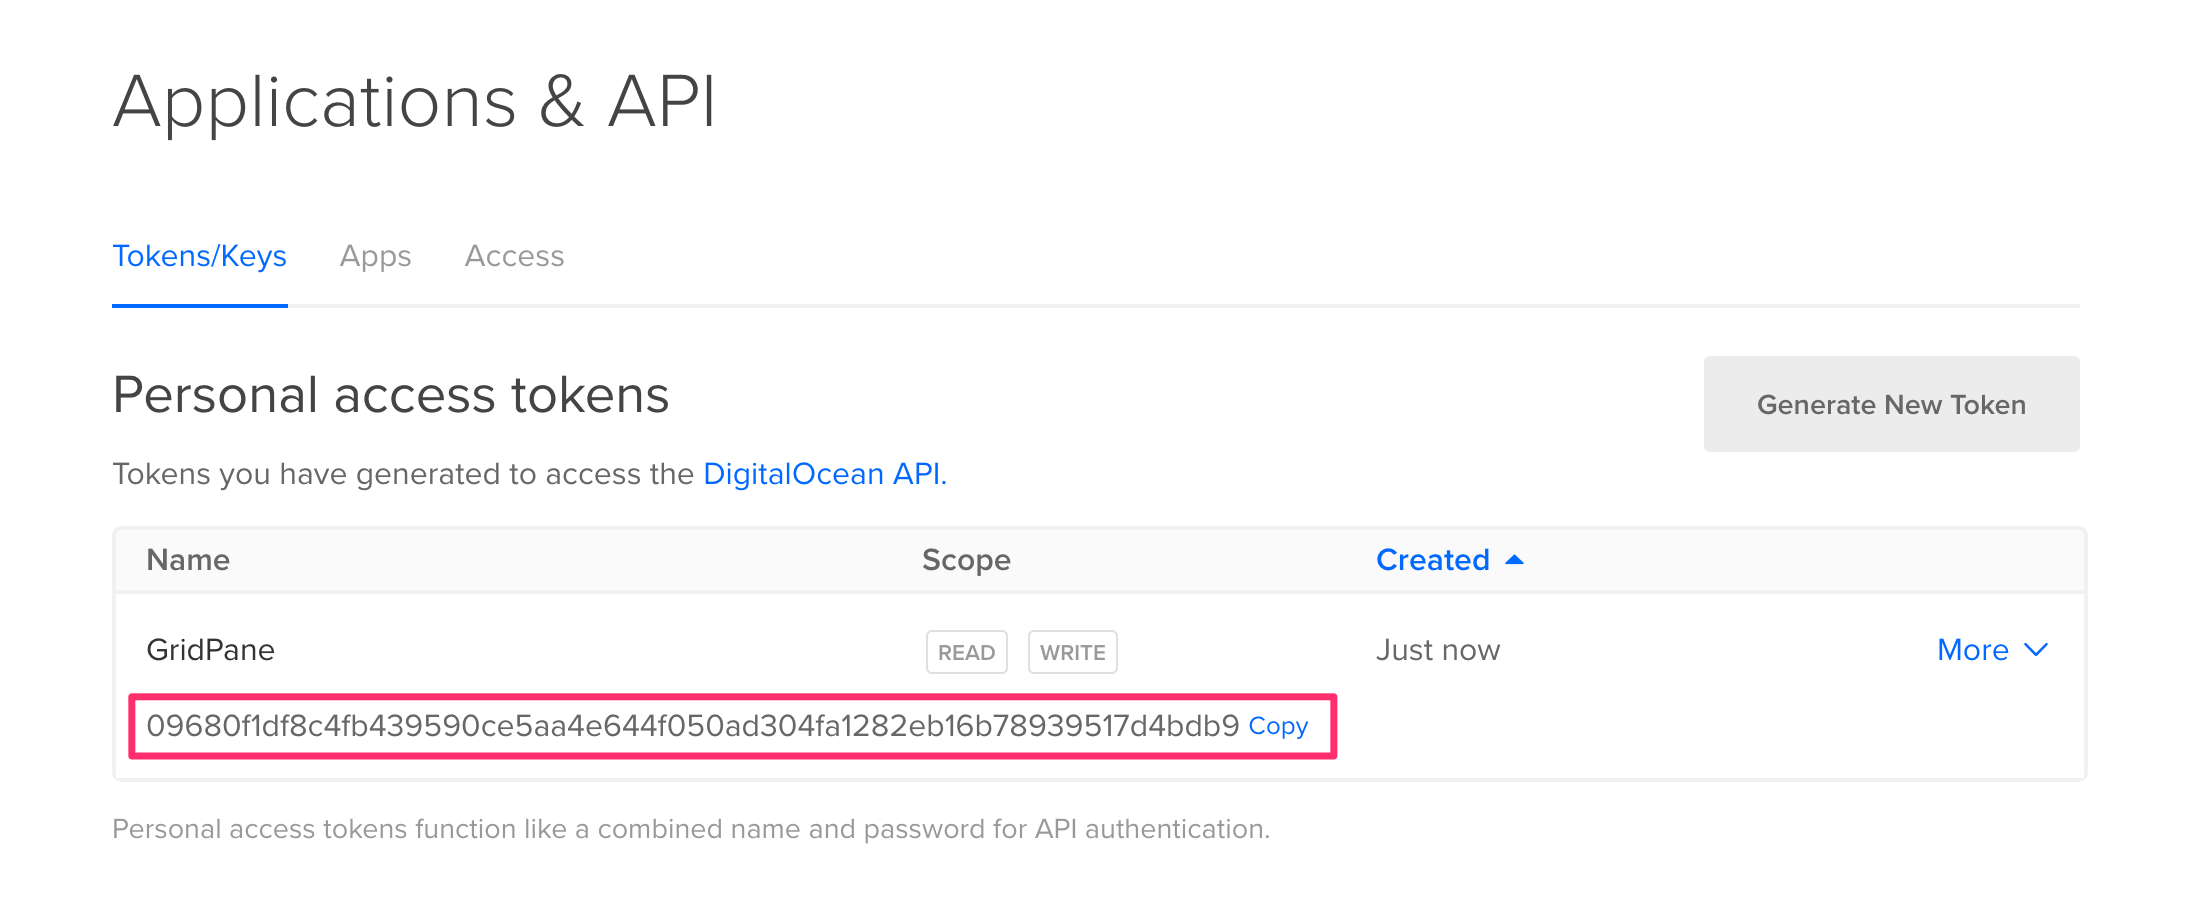
Step 4. Copy your Personal Access Token
Digital Ocean will now display your Personal Access Token. It will not be shown again for security purposes, so make sure you remember to copy it to enter in to your vCanopy settings in the next step. Remember to keep this access token safe and secure.
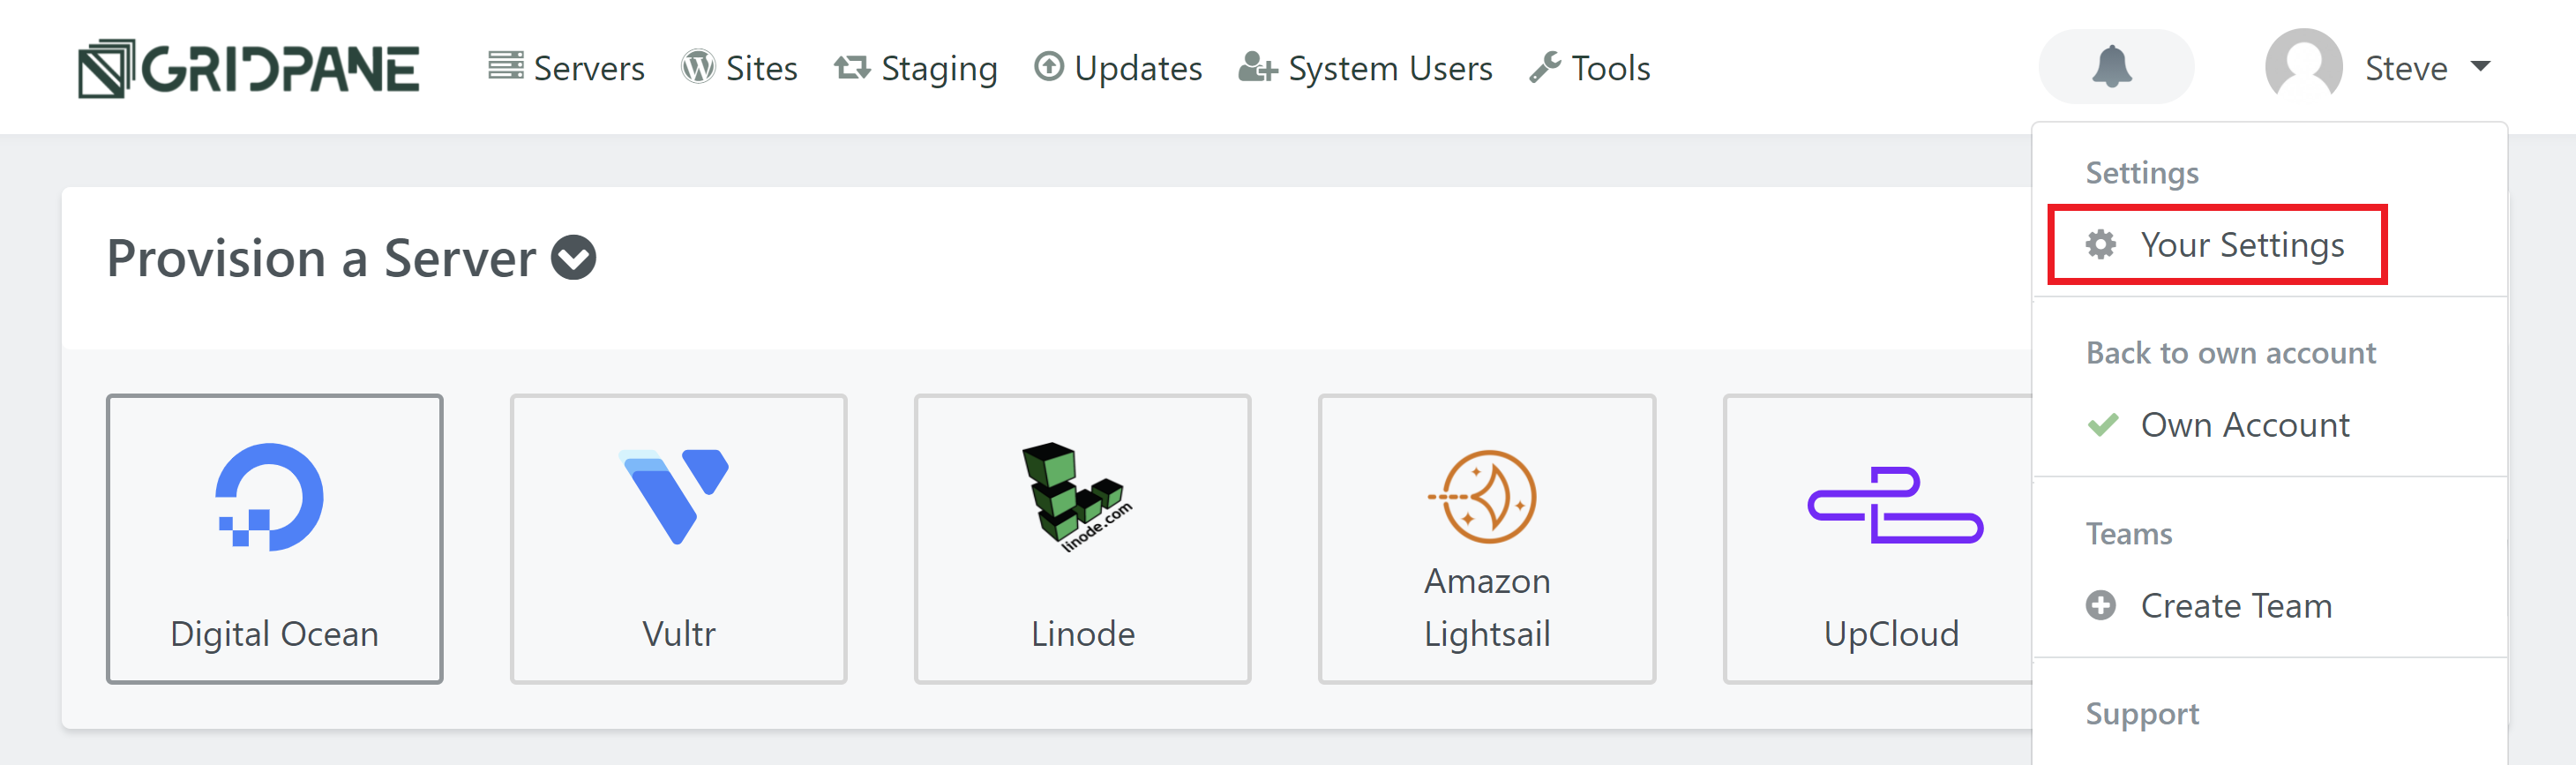
Step 5. Go to Your vCanopy Settings
Login to your vCanopy account and click the Your Settings link in the dropdown menu accessible by clicking on your username and icon.
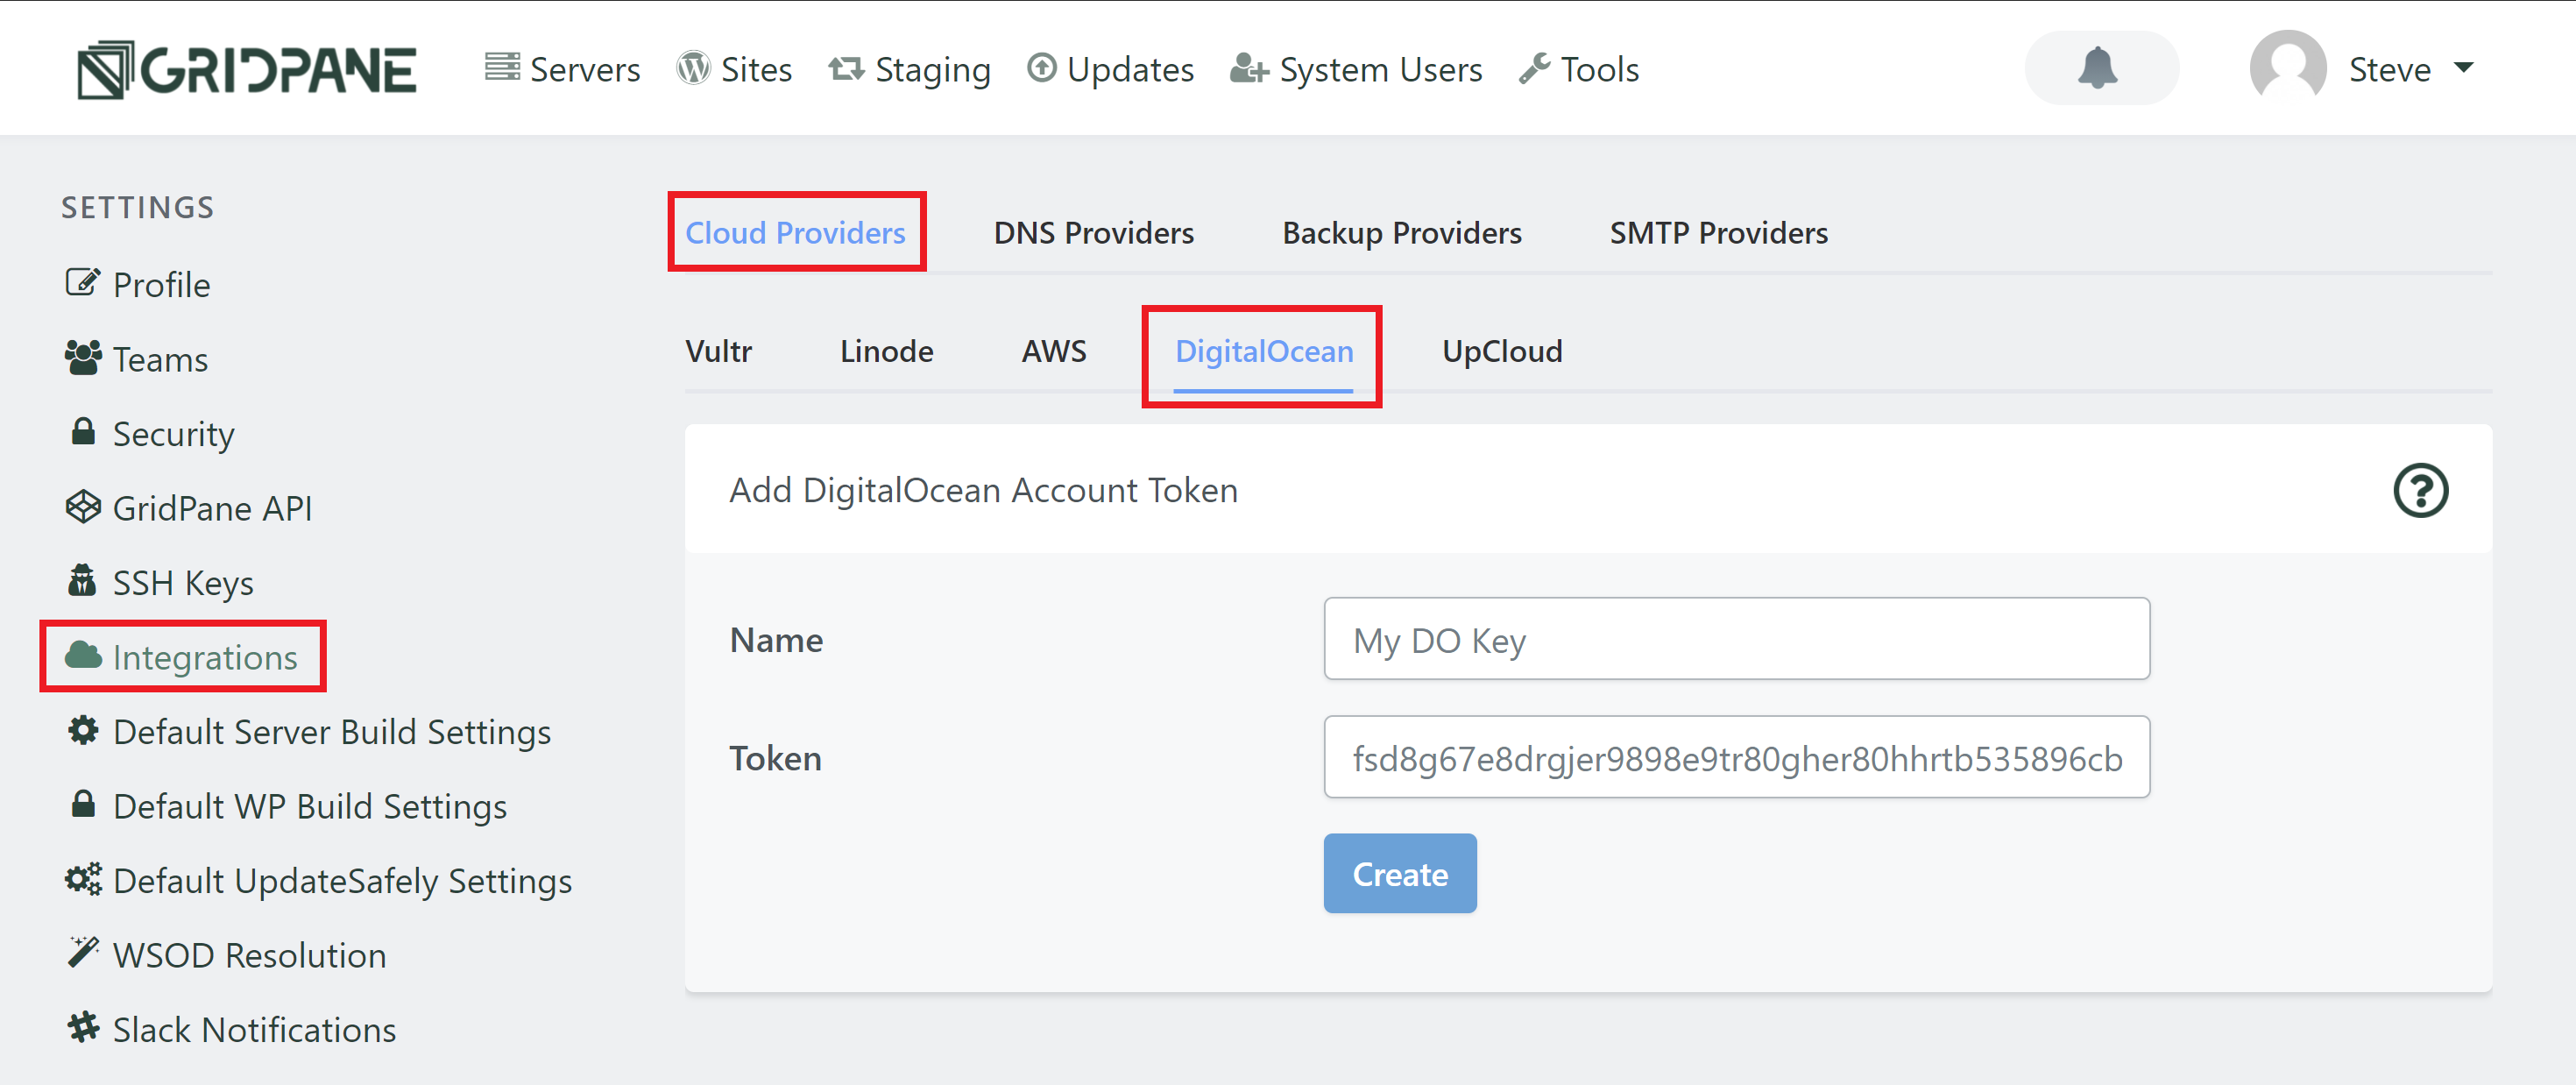
Step 6. Enter your DigitalOcean Personal Access Token in vCanopy
Locate and click the Integrations option in the left horizontal menu, and then within Cloud Providers select DigitalOcean, and then enter your Personal Access Token you copied in Step.4 above into the Token input field, give your key a name, and then click Create.
Step 7. View/Edit your Digital Ocean API Token
Your Digital Ocean API Token will now be available from this settings panel. If you wish to edit or change your API Token you may do this by clicking the down arrow for your specific key, and then clicking the edit button with the blue pencil icon.

Step 8. Go to the vCanopy Home to provision a Droplet
Now we have our Digital Ocean Access Token saved in our vCanopy settings we are able to provision Droplets from within vCanopy. To do this, first click Home from the vCanopy main menu to access the server provisioning tool.

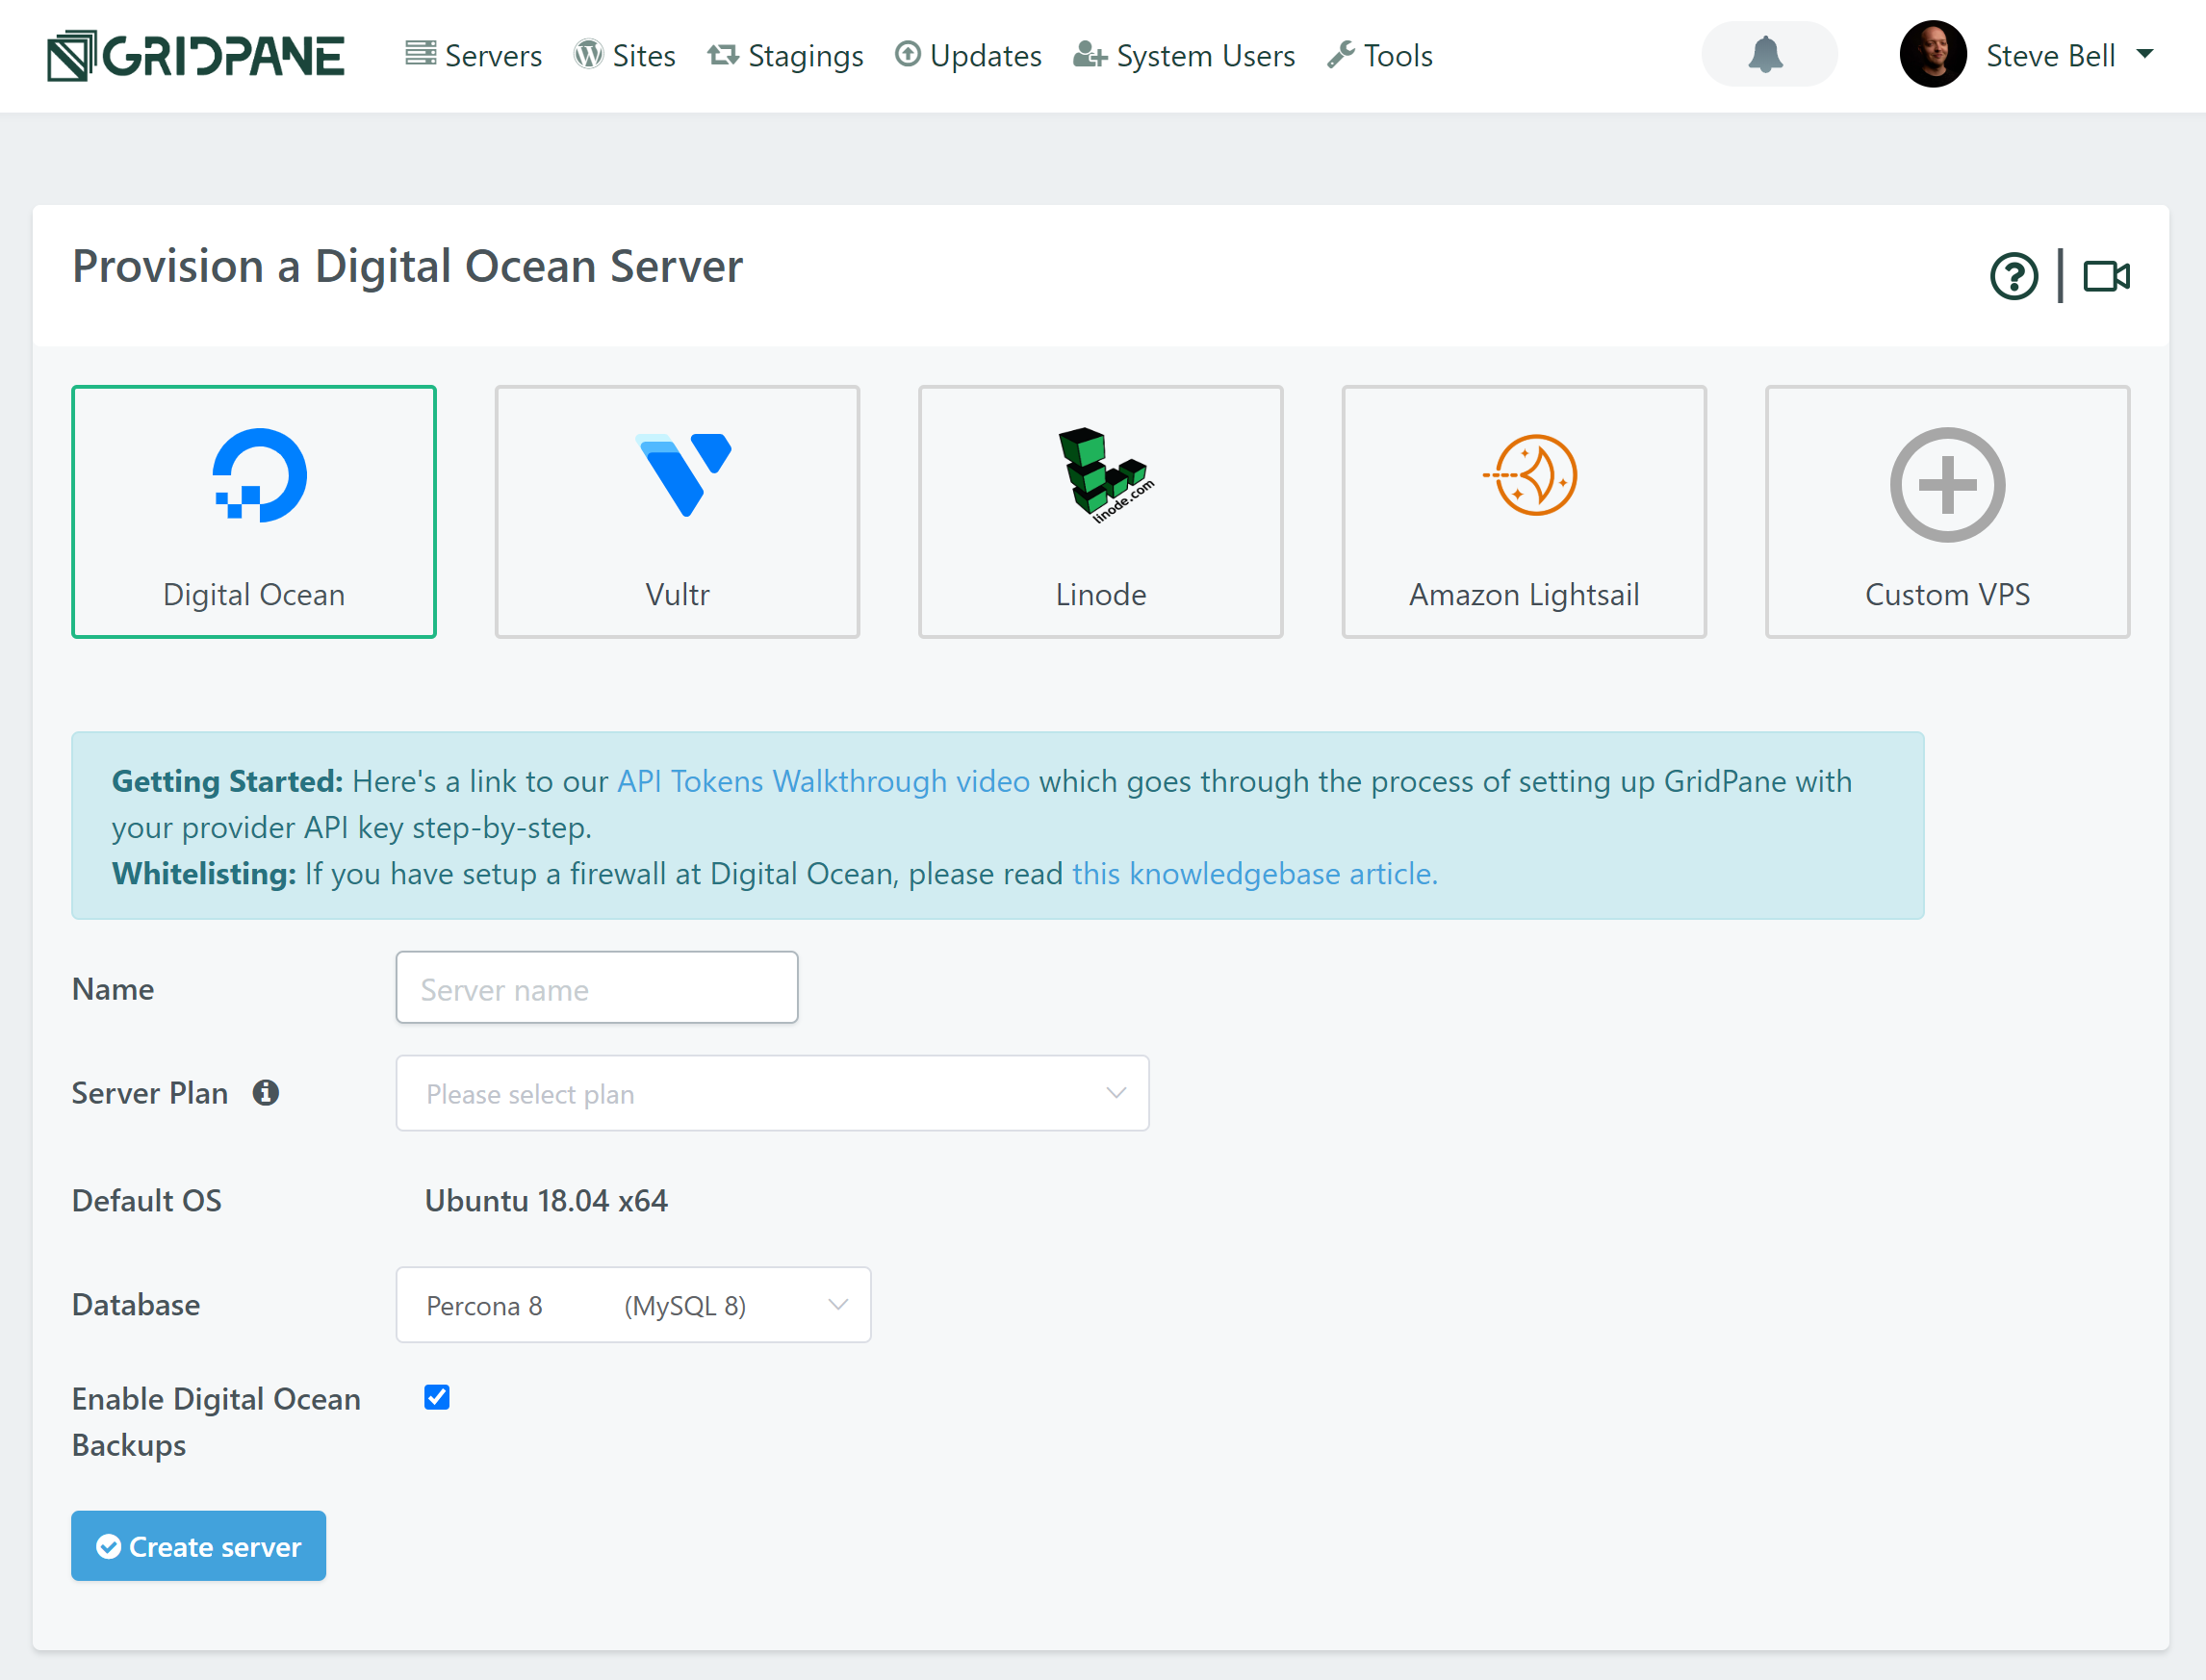
Step 9. Configure your Digital Ocean Droplet
Select Digital Ocean from the choice of Cloud VPS providers and a configuration panel will open.
Enter an appropriate name for your Droplet, and then choose a server plan and region from the dropdown selectors, before choosing whether or not you wish for Digital Ocean Backups to be enabled. Currently all Droplets are provisioned with Ubuntu 18.04 LTS as the default OS.
CHOOSE YOUR DATABASE
If you’re on the developer plan you’ll have the option to choose between Percona and MariaDB for your database.
Percona is based off the new MySQL 8. It has removed query caching (which was deprecated in 5.7 but was still available), and it has more advanced aspects for things like storing and managing json as a storage format. It will likely use more RAM than MariaDB.
MariaDB is still based on MySQL 5.7, which could mean fewer issues importing old WordPress websites from low-quality hosting environments. It will likely use less RAM than Percona.
Both are excellent options.
PROVIDER BACKUPS
We highly recommend that you enable provider backups. It’s a small price to pay for the extra insurance they offer.
CREATE YOUR SERVER
Click the Create Server button when you are happy with your configuration choices.
Step 10. Re-enable Password Authentication if you wish
Digital Ocean will disable SSH access by Password Authentication when a Droplet is provisioned by API and the vCanopy SSH Keys are added to allow for your vCanopy control panel to manage your server.
To be able to SSH in to your Digital Ocean droplet you will need to add your Public SSH Key to it. We have an easy to follow guide that will take you through this process step by step here.
Following that you can SSH in to your server, then if you would like to reenable SSH access by Password Authentication you may do so by opening your SSH configuration file for editing.
nano /etc/ssh/sshd_config
Within the SSH configuration file, locate the PasswordAuthentication configuration and change the setting from no to yes.
PasswordAuthentication yes
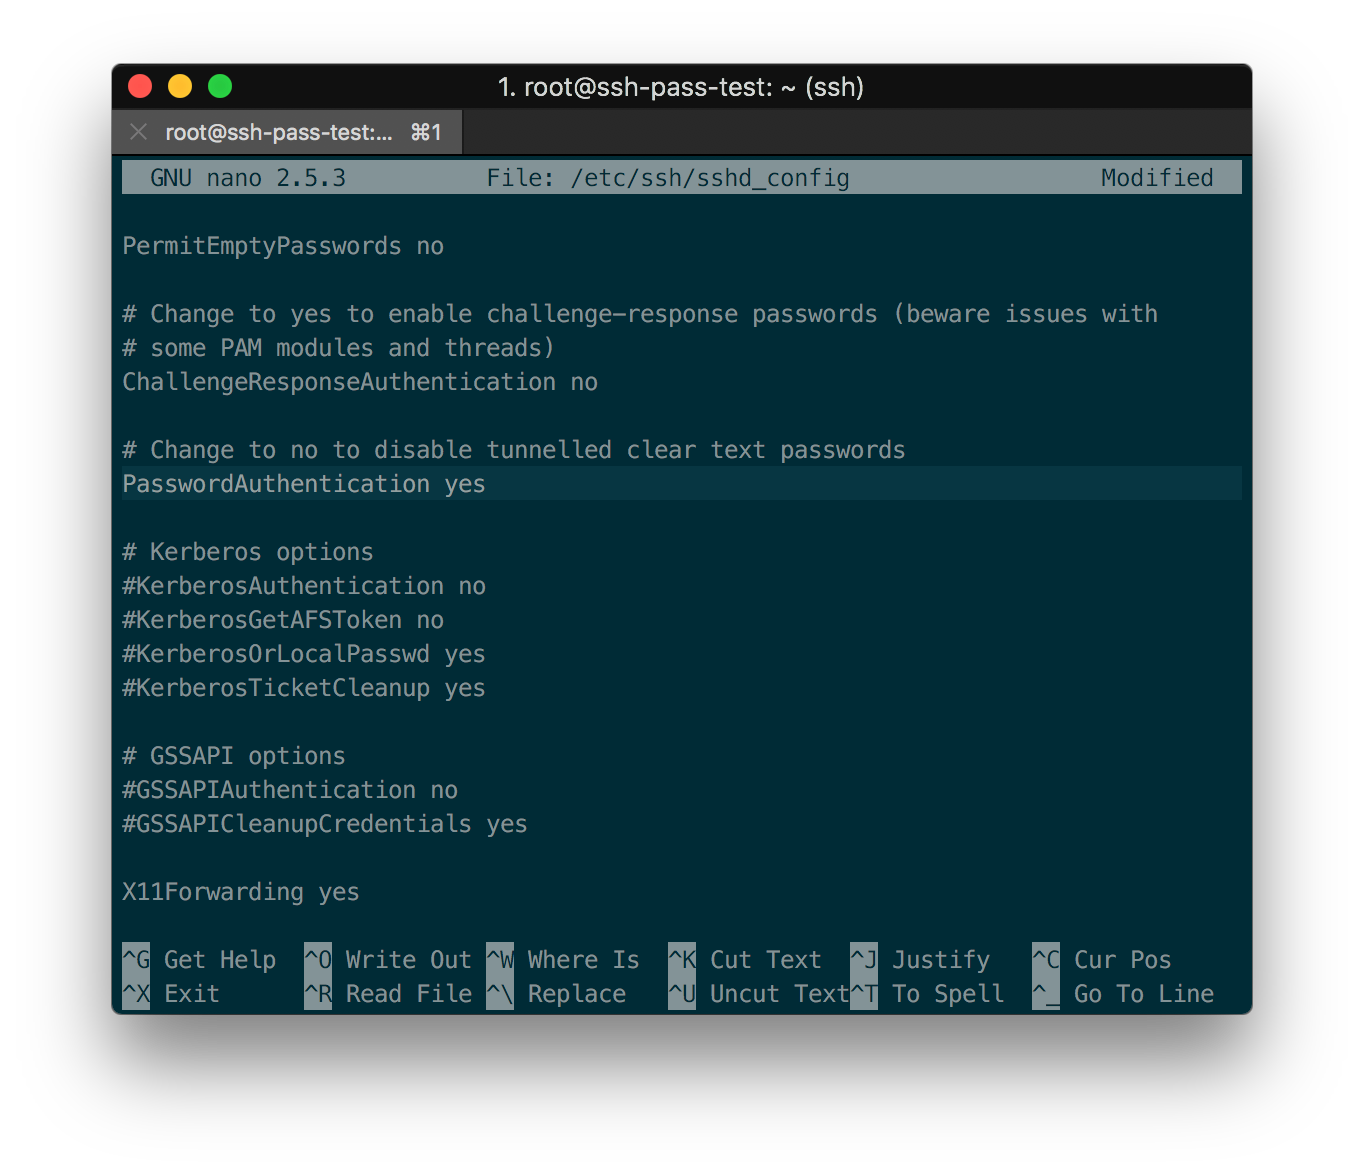
Save and exit the configuration file, and reload SSH and you will now be able to login by password.
service ssh restart
Step 11. Wait patiently while vCanopy provisions your Droplet
vCanopy will begin provisioning your server. You will now be able to see your server in the Active Servers list.

The process of provisioning your server may take some time depending on the location of your Droplet to the vCanopy servers. The process required to set up a highly optimized server stack for hosting Serious WordPress Sites is worth the wait, please be patient.
At any time during the provisioning process you may check what stage the process is at by rolling over the progress bar, a pop up window will display the current job being completed.
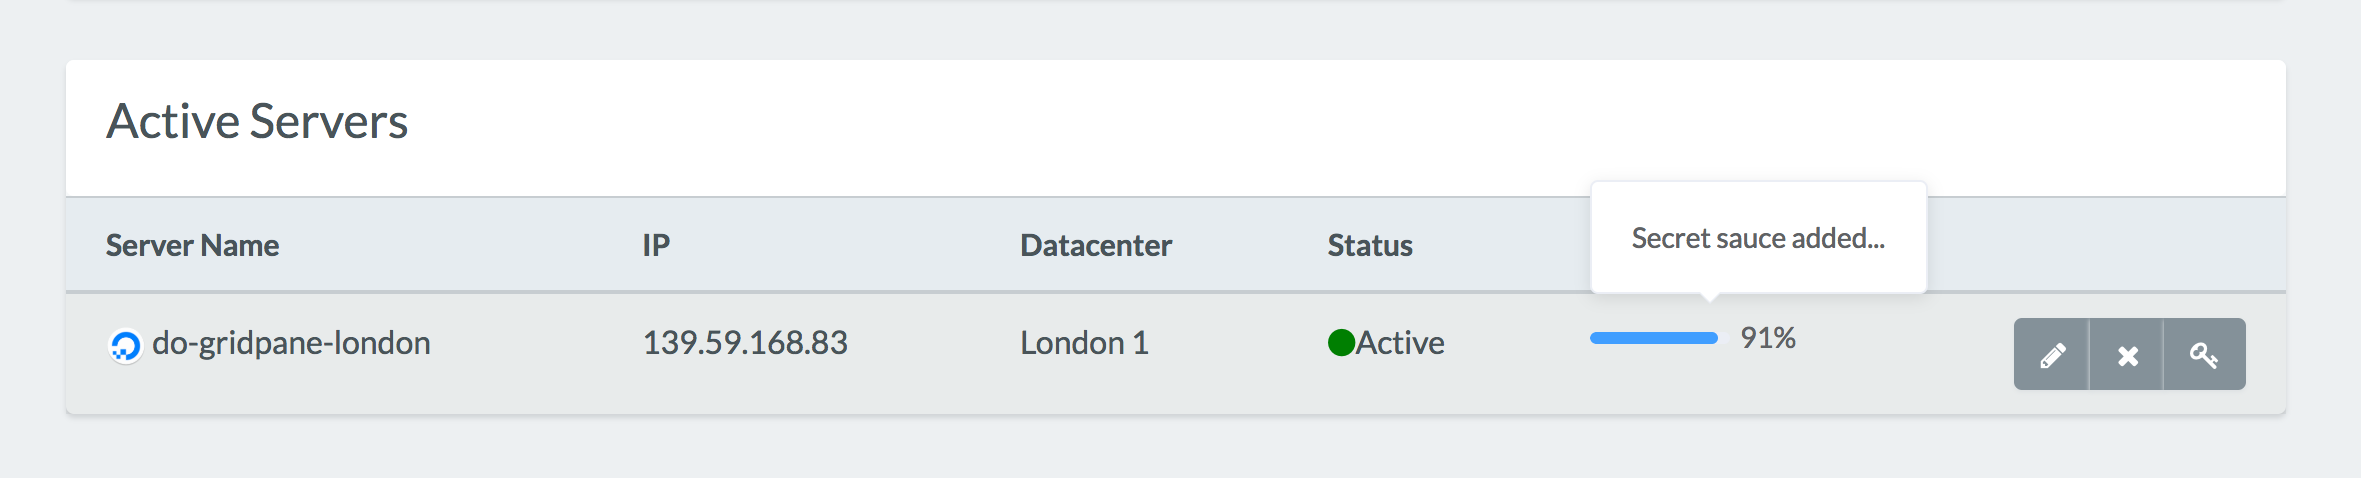
Once vCanopy has finished provisioning your Droplet the progress bar will turn green and you will now be able to deploy some Serious WordPress Sites on it.
Of course you may deploy multiple servers concurrently by clicking on a Cloud provider tab and repeating the above process at any time during the provisioning process.

Step 12. Deploy your vCanopy WordPress Sites on a Digital Ocean Droplet
To deploy a site click on the Sites link in the vCanopy main menu to begin the process. We have a separate article that details the steps in detail for you.
