Part 2: Creating a Team
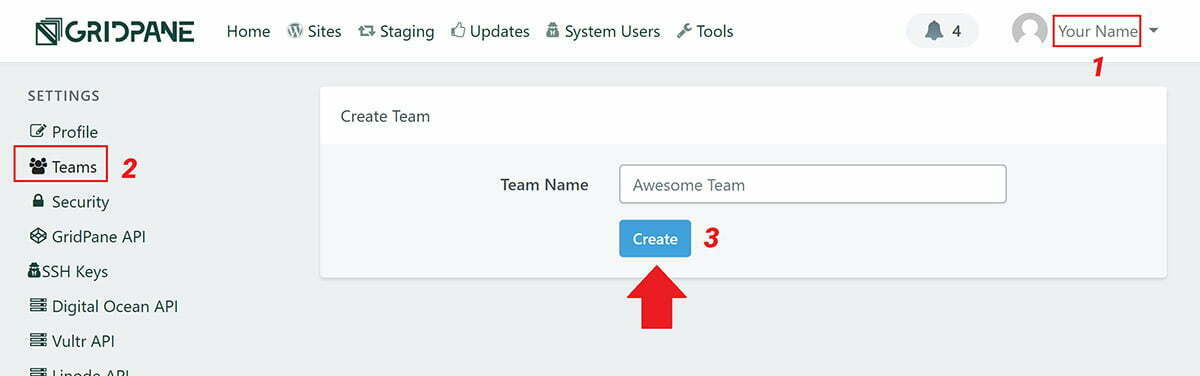
To get started, head on over to your account settings page (1) and click on the “Teams” in the left hand sidebar (2). Or you can select teams from the drop-down when you hover over your name in the top right corner.
Here you can give your new team a name, and then click create to create it (3).
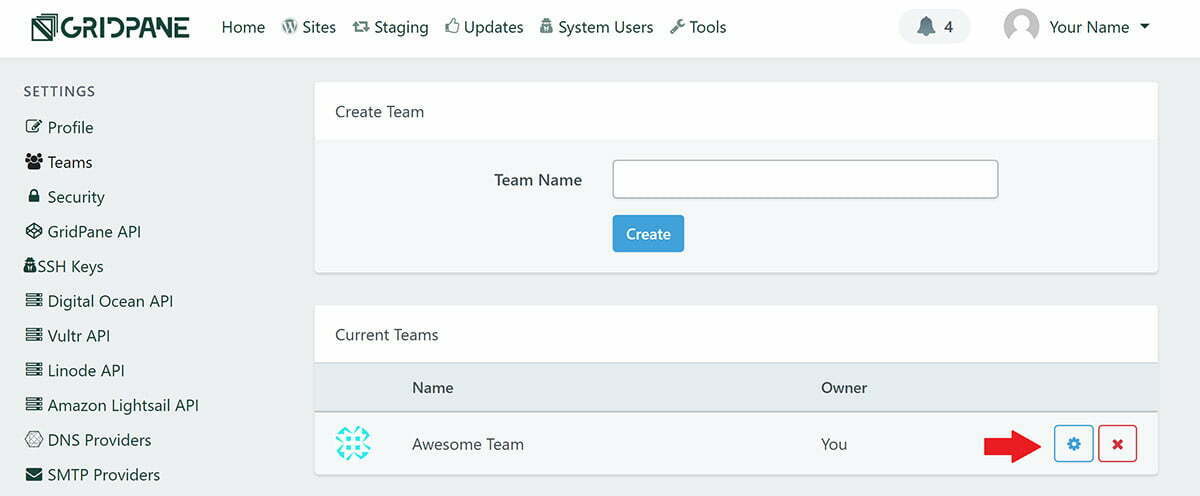
Once created, your new team will be listed below the create box and you now can edit and begin adding team members. To begin, click on the gear icon.
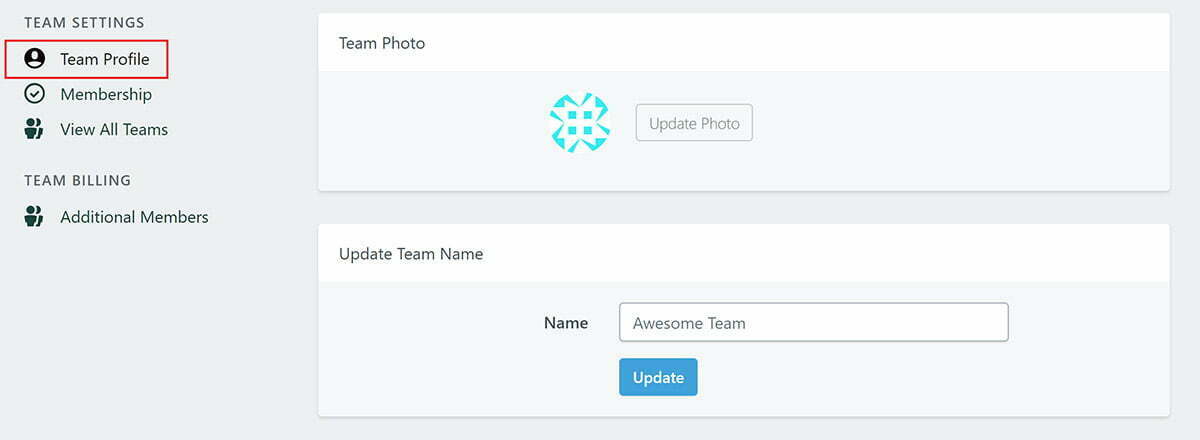
This brings you to the Team Profile page for this team. Here you can add an image/logo and change the team name if you wish to do so.
Part 3: Adding Team Members to your team
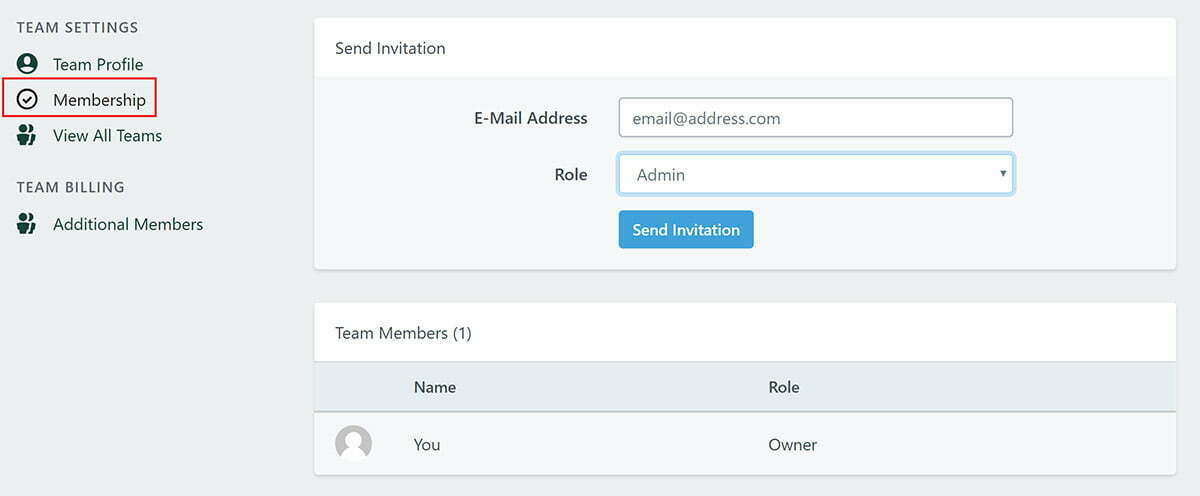
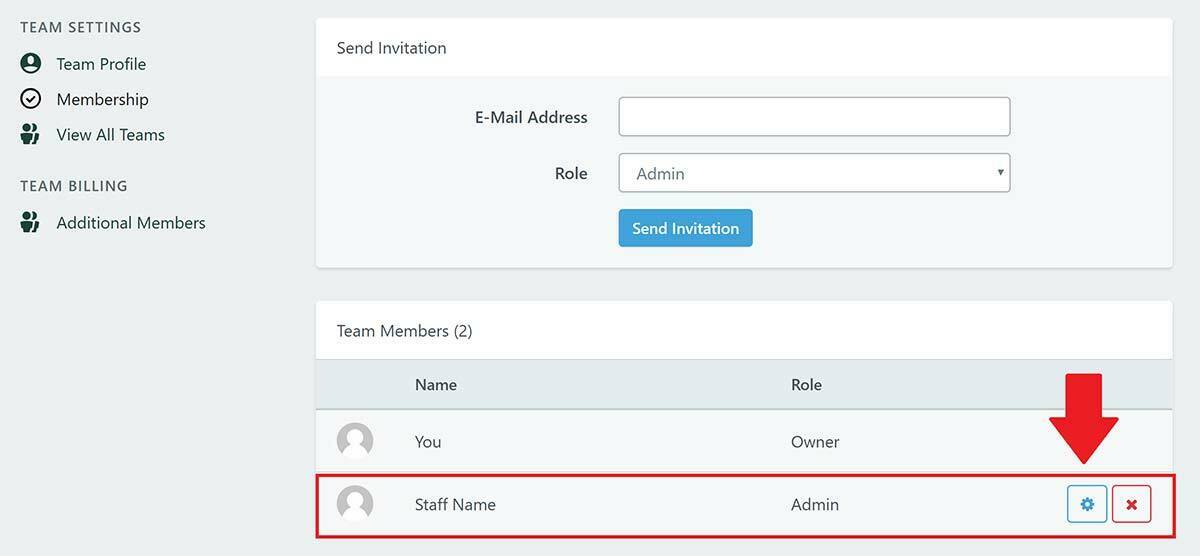
First, click on “Membership” in the left hand sidebar. This will take you to the Membership page for your team as shown below.
Here you can setup new team members. To do so, simply enter their email address and select a role for them, then click “Send Invitation“.
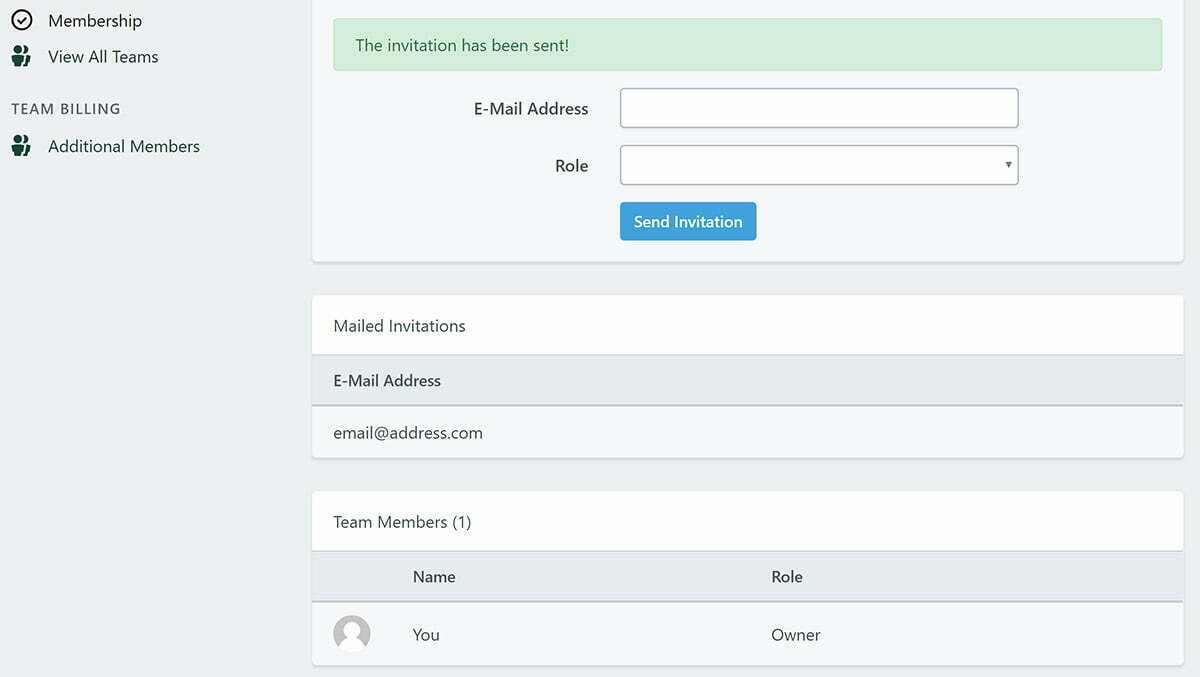
vCanopy will send an email to your new team member inviting them to join your team. In the mean time, your dashboard will display your pending invitation in the “Mailed Invitations” box.
The email invitation will contain a link they can click to get started. This will take them to the following registration page.
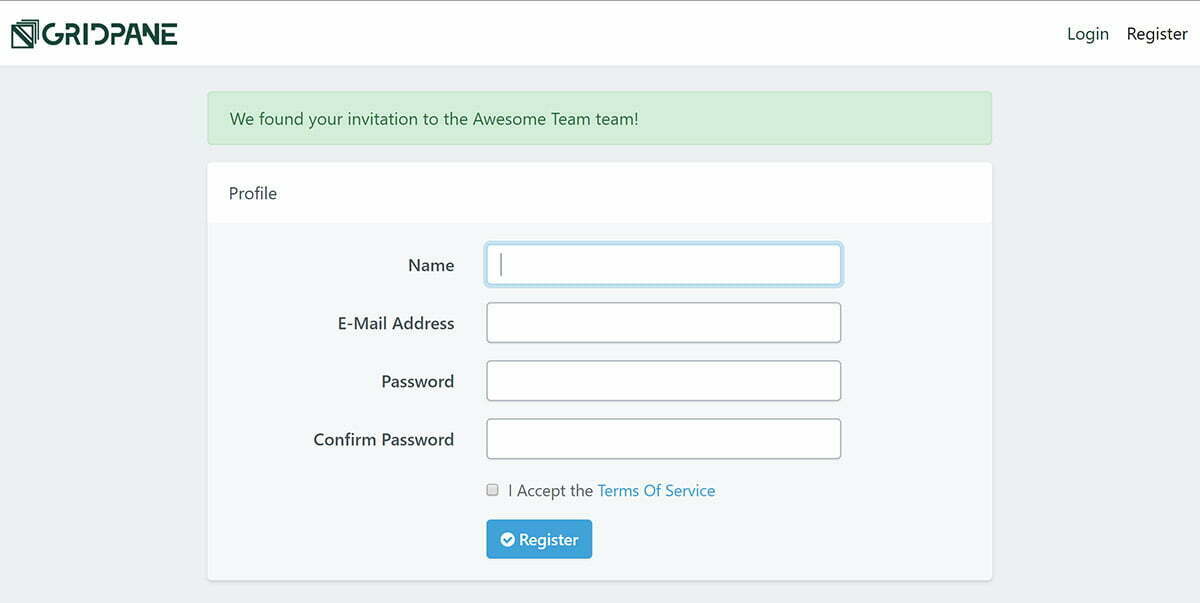
Here they can fill out their details, accept the Terms of Service and click “Register“. Once complete, they’ve now joined your team.
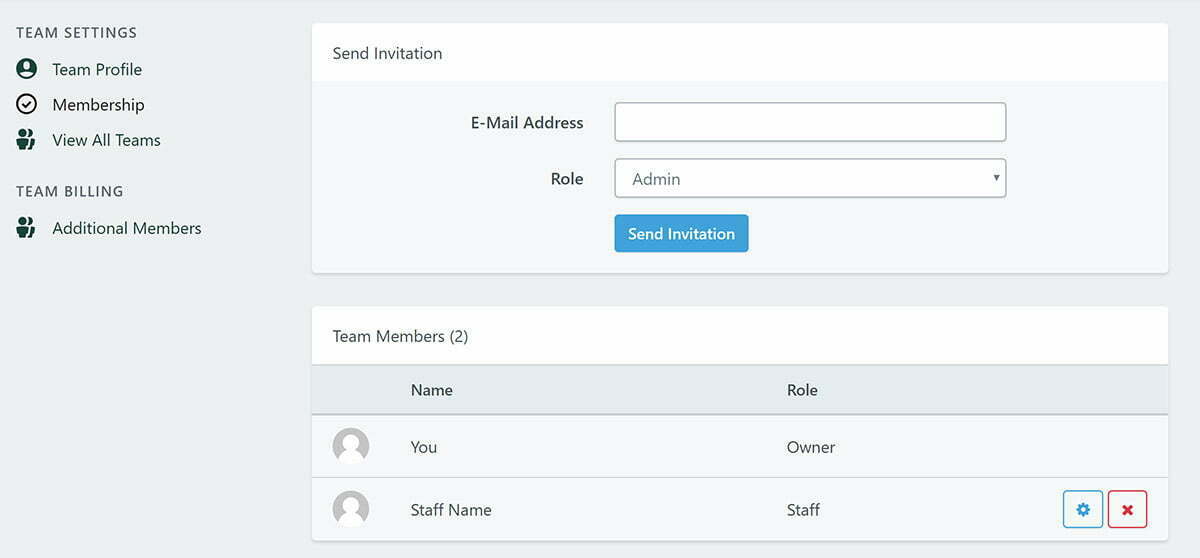
They will now be displayed as a member of your team in your teams page
Part 4: Assigning Team Members server and website privileges
If you assigned your new team member the role of “Admin“, they can now manage all of the websites and servers inside your account. If you’ve assigned them the role of either “Staff” or “Client“, continue below to configure their privileges.
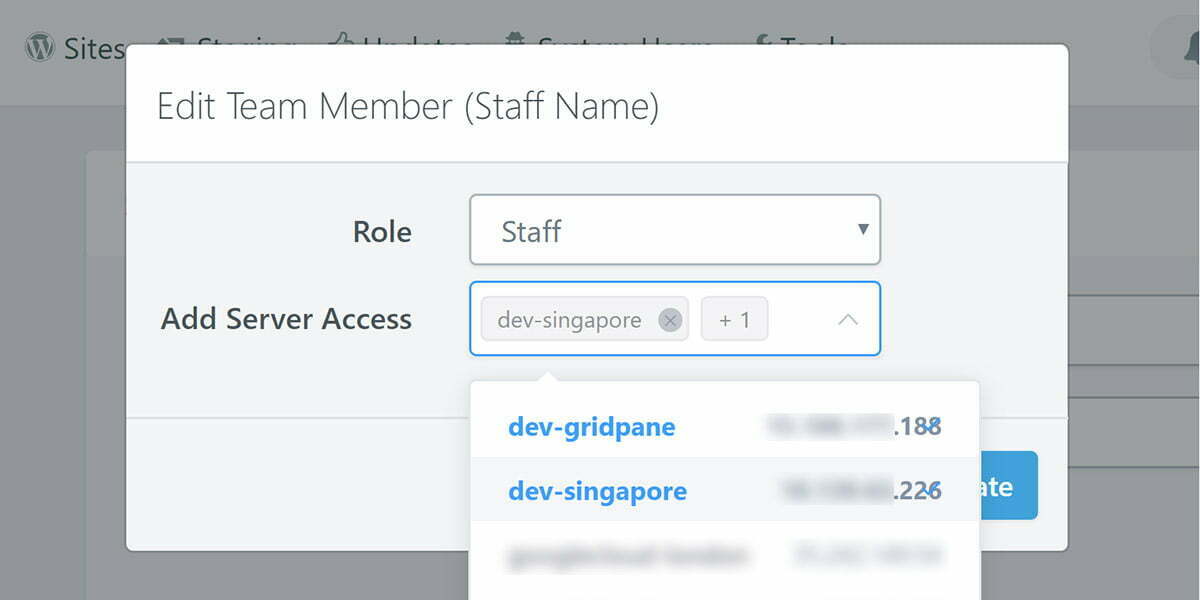
Staff Team Member privileges
Click on the gear icon next for your team member to bring up the modal displayed in the image below. Here is where you can give them access to different sites and servers. You can also change their role if you ever wish to do so in the future.
For this example, we’re giving our team member access to servers “dev-vCanopy” and “dev-singapore”. This means that they will be able to manage all of the websites that are hosted on these two servers, including their staging and update websites.
Once you’ve selected the servers you wish this team member to have access to, click the “Update” button.
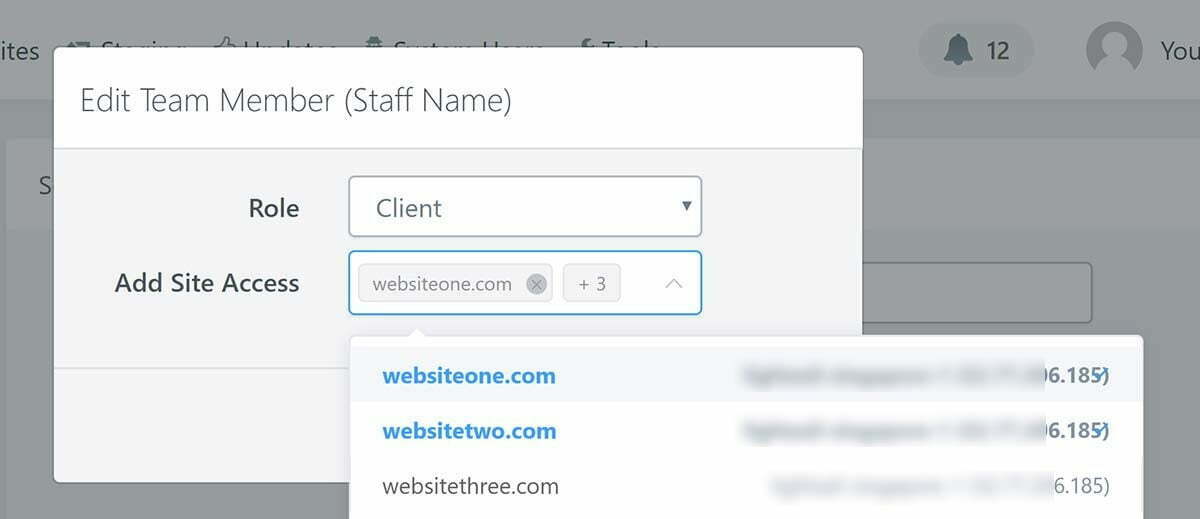
Client Team Member privileges
Click on the gear icon next to your clients name to bring up the configuration modal. This works the same way as the staff modal except here we can assign specific websites instead of servers. If you wish to assign your clients access to their staging websites, be sure to also select them from the dropdown as well as the primary website.
Once you’ve selected the websites you wish your client to have access to, click the “Update” button.
You’ve now setup your new team and first team member.
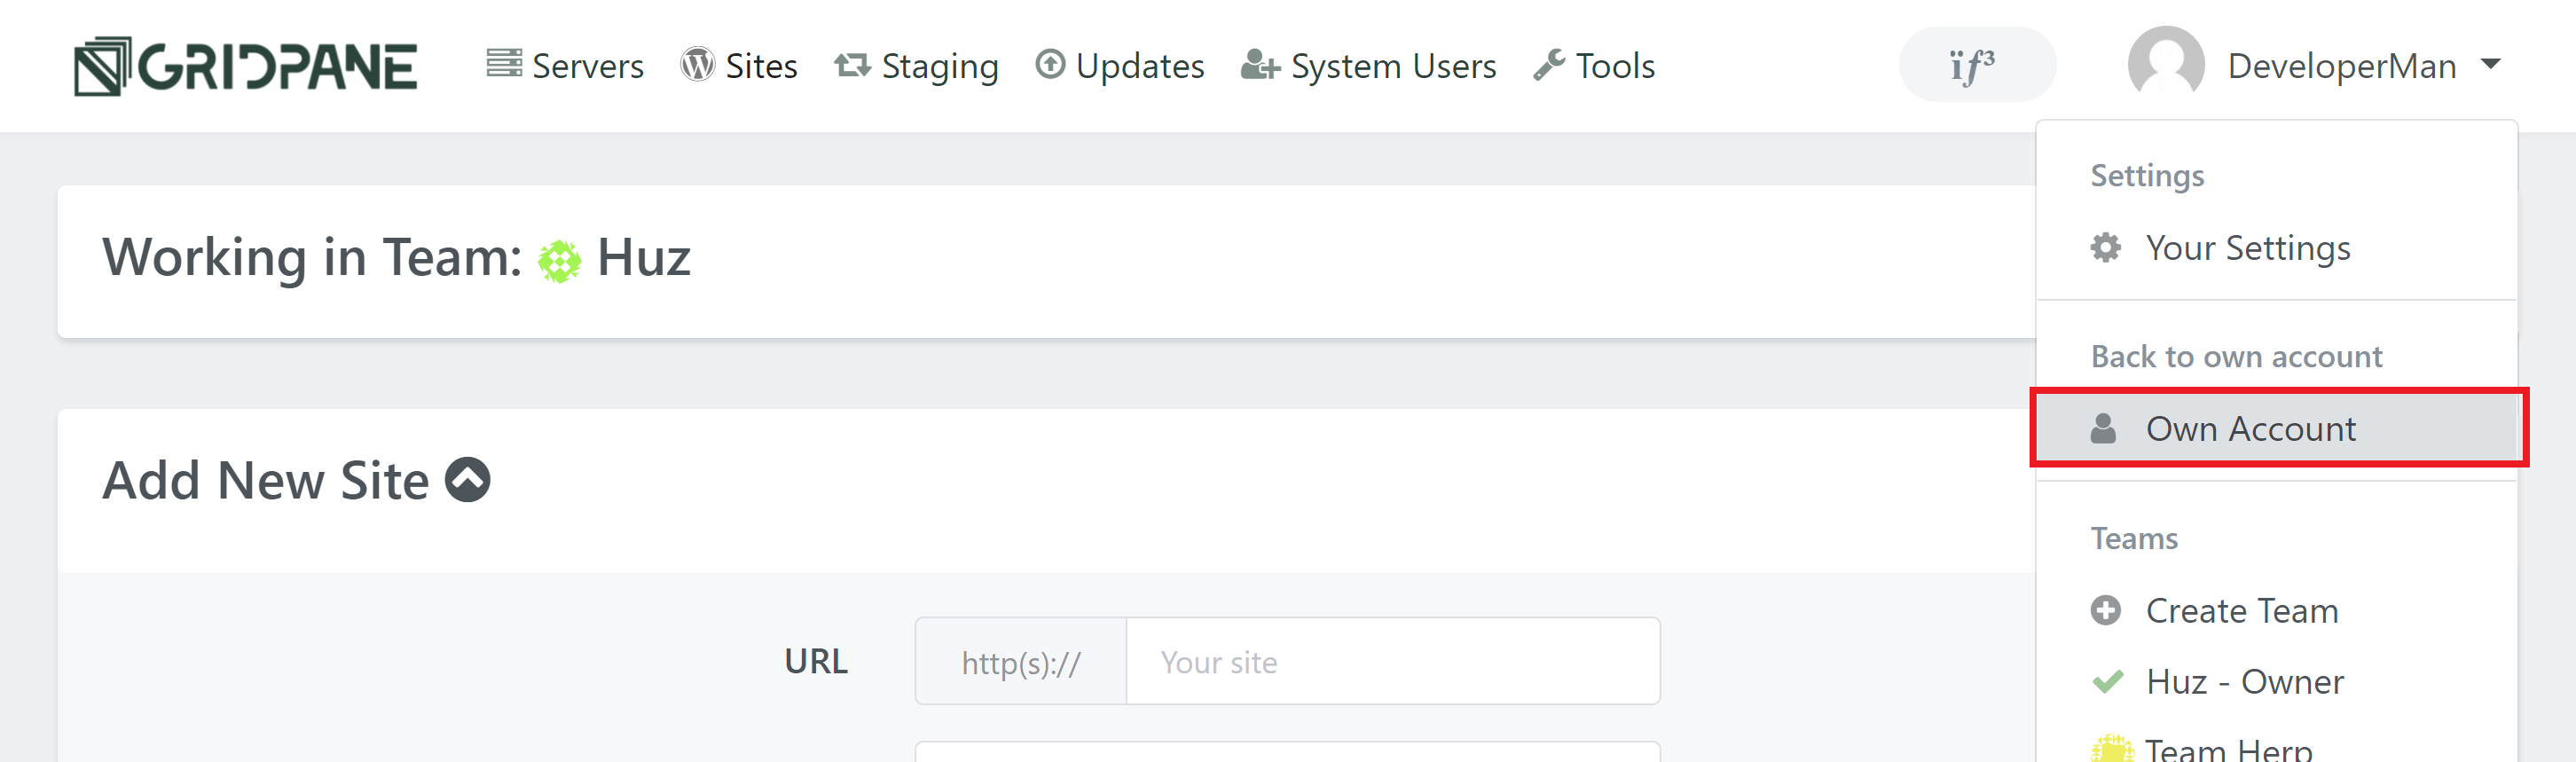
Part 5. Switching Between Your Main Account and Team Account
When you log in to your vCanopy account, you’ll be inside your own, personal account.
To switch into a Team account, click on your name in the top-right and then select the Team name from the dropdown:
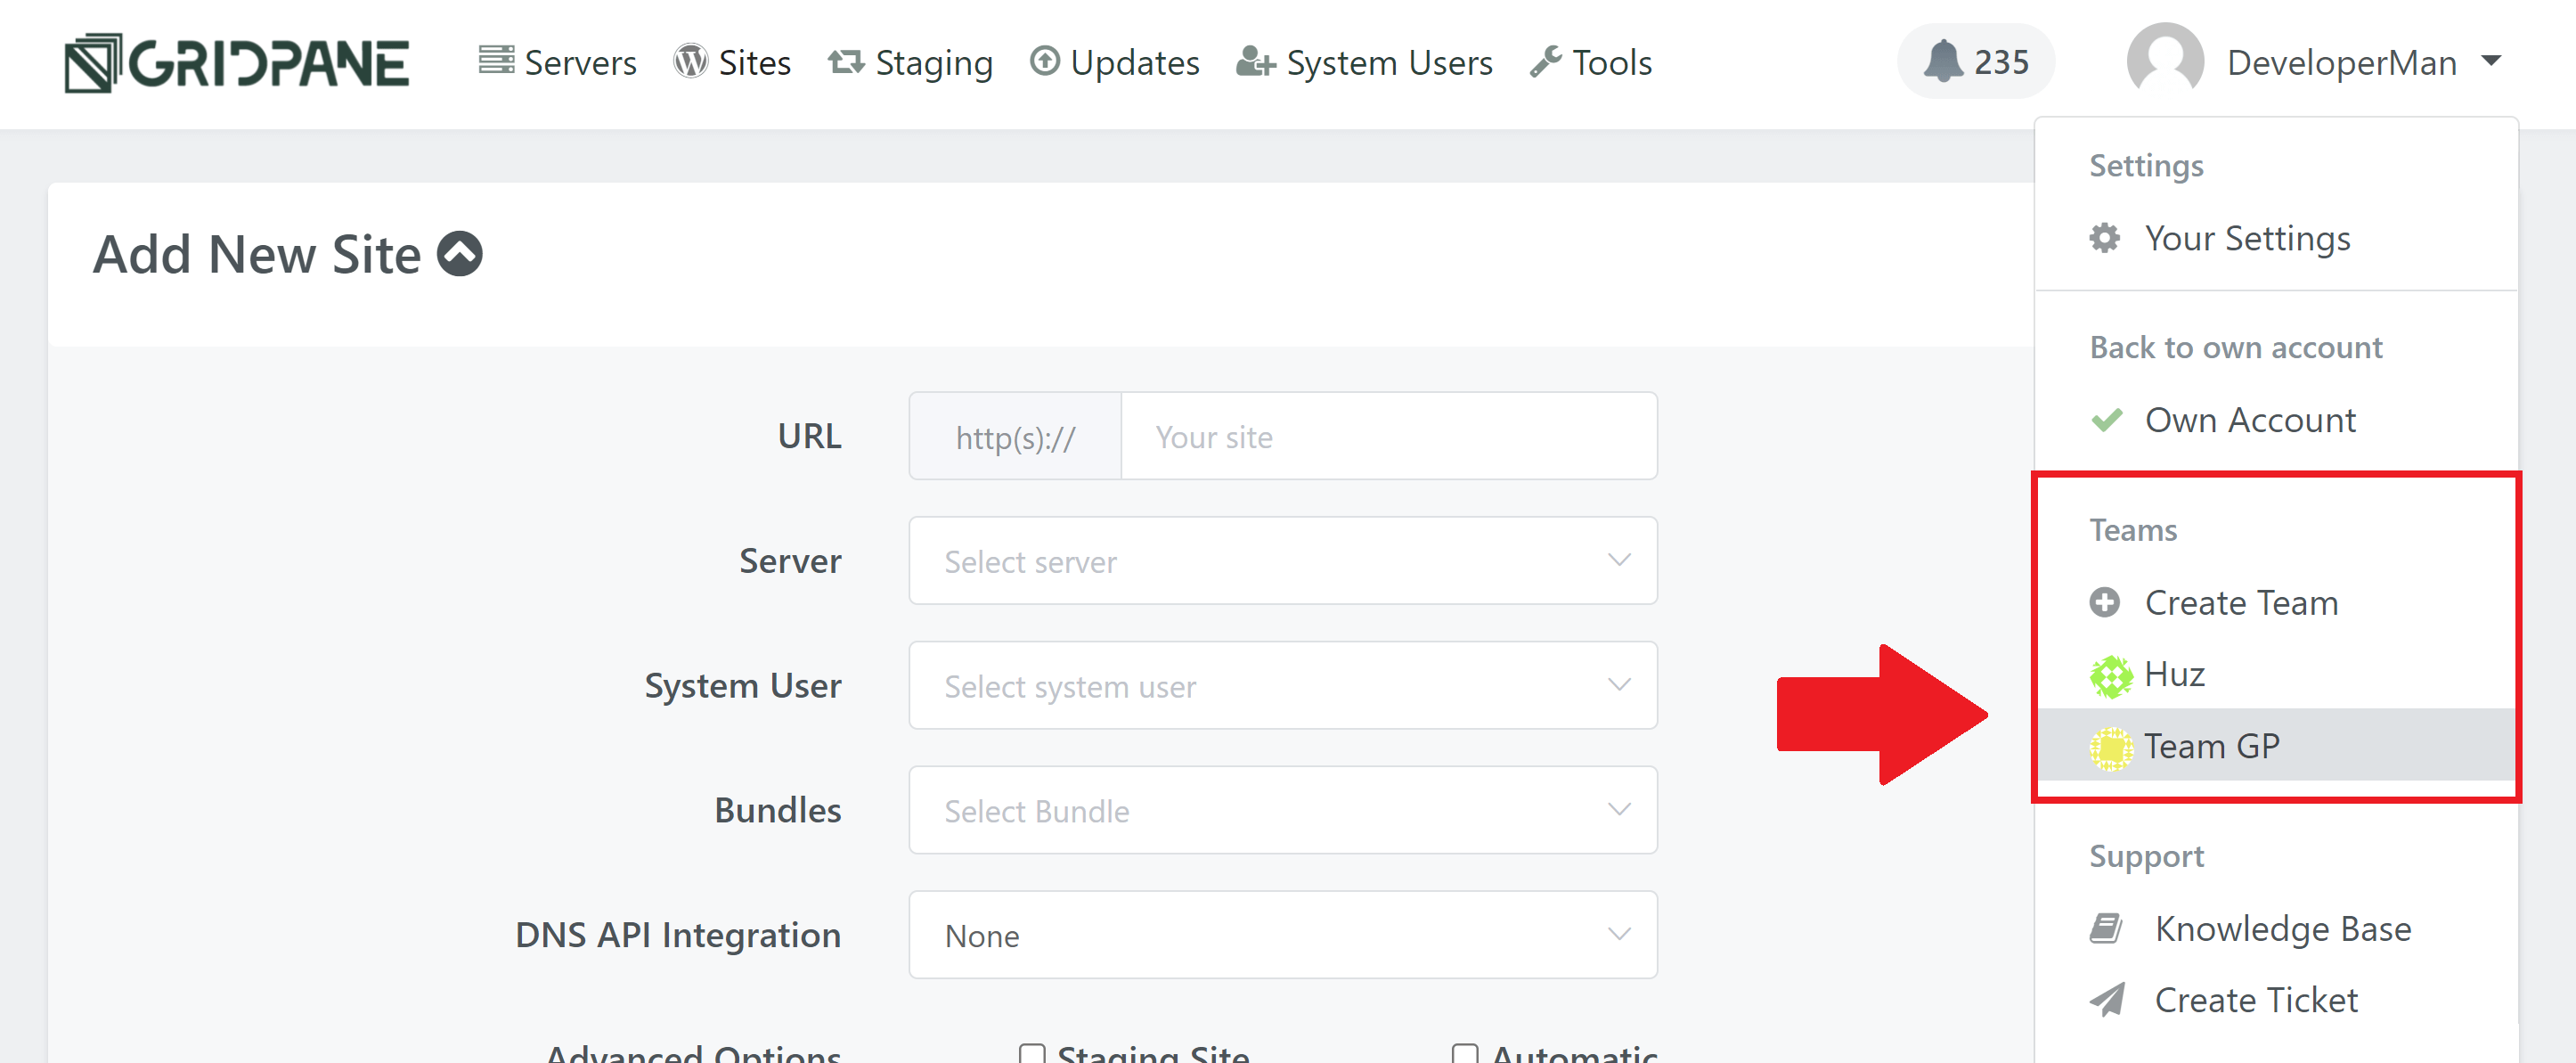
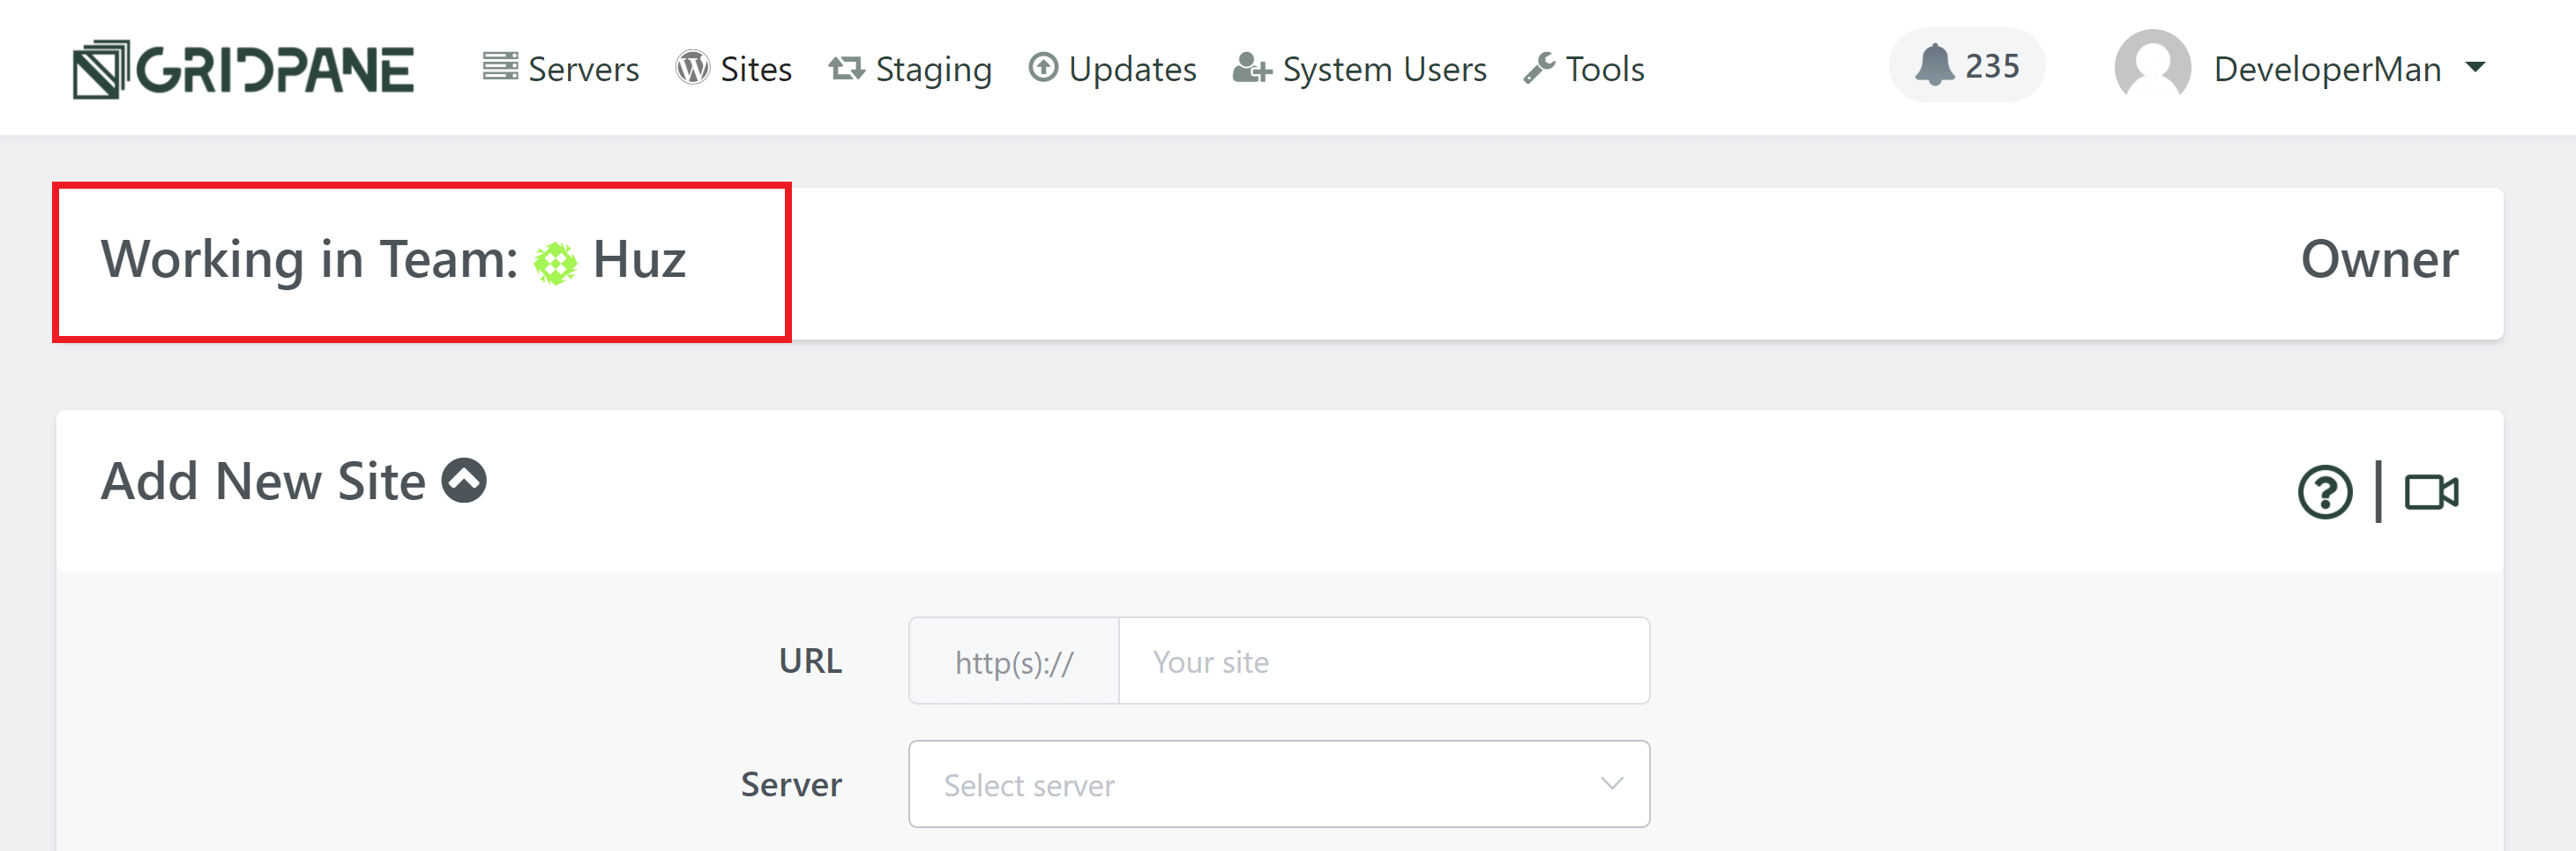
When working in a Team, the Team name will be displayed under the navigation bar:
To return to your own account open the settings dropdown again and select Own Account: