Verdant TCS

Using the vCanopy 7G Web Application Firewall on OpenLiteSpeed (OLS)

7 min read

Introduction

The vCanopy OpenLiteSpeed stack incorporates the 7G Web Application Firewall (the predecessor, 6G, is Nginx only). The 7G WAF was originally developed by Jeff Starr at Perishable Press for Apache-based servers. We have adapted it for OpenLiteSpeed, modularised it to allow for granular, per site and per rule block control, per rule whitelisting, and added logging, but none of this could be done without Jeff’s original incredible work.

7G is an excellent lightweight firewall that builds upon its predecessors in Jeff’s nG series of work over the years. It is the most recent iteration and was officially released out of beta on September 7th, 2020.

It works by parsing requests for anything anomalous or malicious looking, based on a collection of rules for: –

  • Bad Bots
  • Bad Methods (disallowed HTTP request methods)
  • Bad Query Strings
  • Bad Referrers
  • Bad Requests

These work to protect your websites against: –

  • Directory Traversal
  • HTTP Response Splitting
  • (XSS) Cross-Site Scripting
  • Cache Poisoning
  • Dual-Header Exploits
  • SQL/PHP/Code Injection
  • File Injection/Inclusion
  • Null Byte Injection
  • WordPress exploits such as revslider, timthumb, fckeditor, et al
  • Exploits such as c99shell, phpshell, remoteview, site copier, et al
  • PHP information leakage

Additionally, the 7G Firewall protects against a wide range of malicious requests, bad bots, spam, and other nonsense – quoted directly from Perishable Press, see the full article here.

Part 1. Enable the Firewall

STEP 1. PROVISION A SERVER AND DEPLOY A vCanopy SITE

We have documentation on provisioning up and managing servers here:

And documentation about deploying and managing vCanopy sites here:

STEP 2. ENABLE/DISABLE THE vCanopy 7G WAF

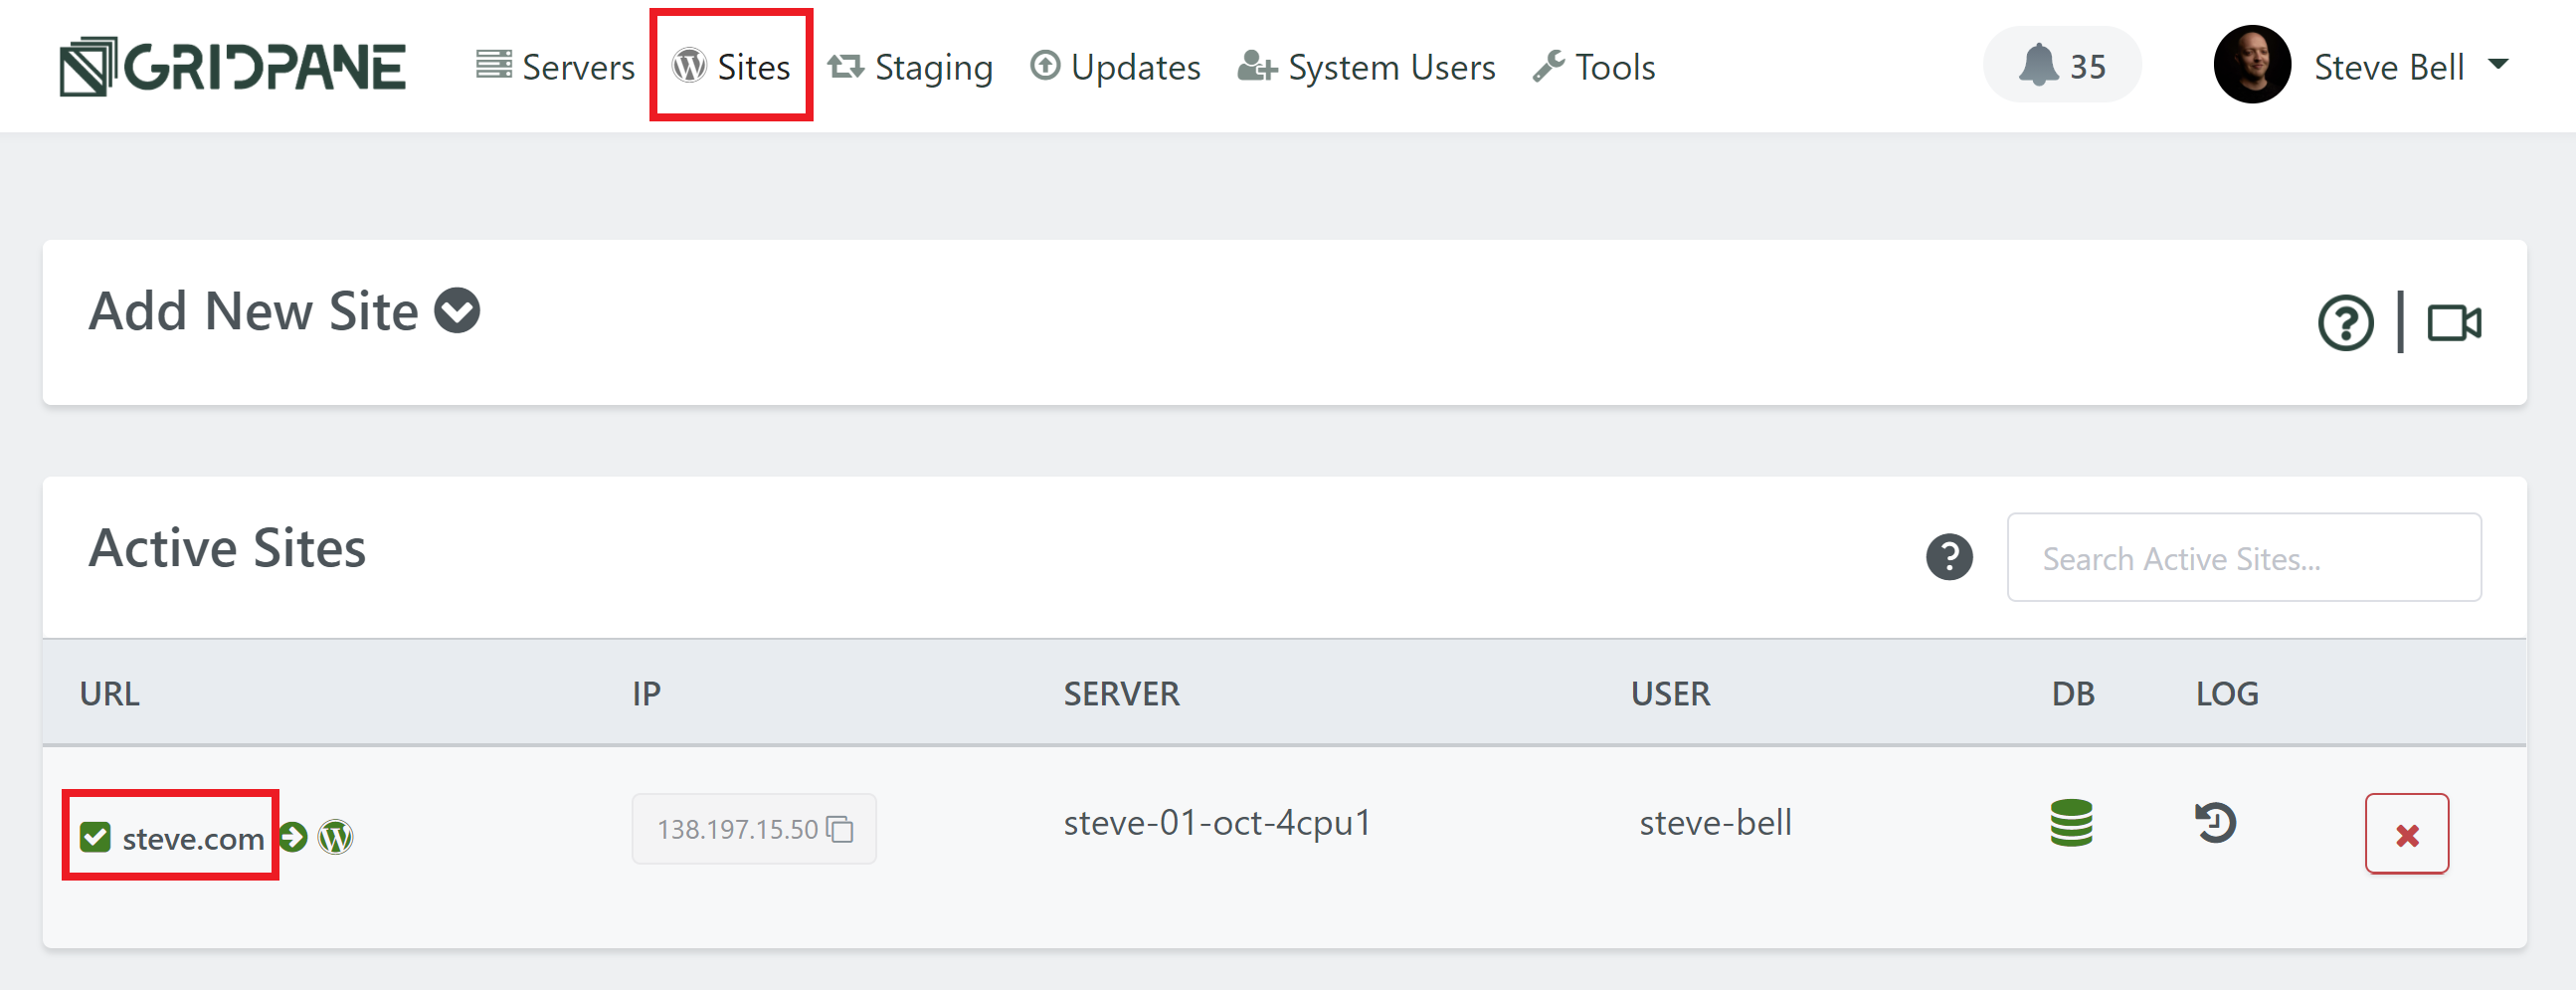
Head over to the Sites page of your vCanopy account, and click on the name of your website to open up the website configuration modal:

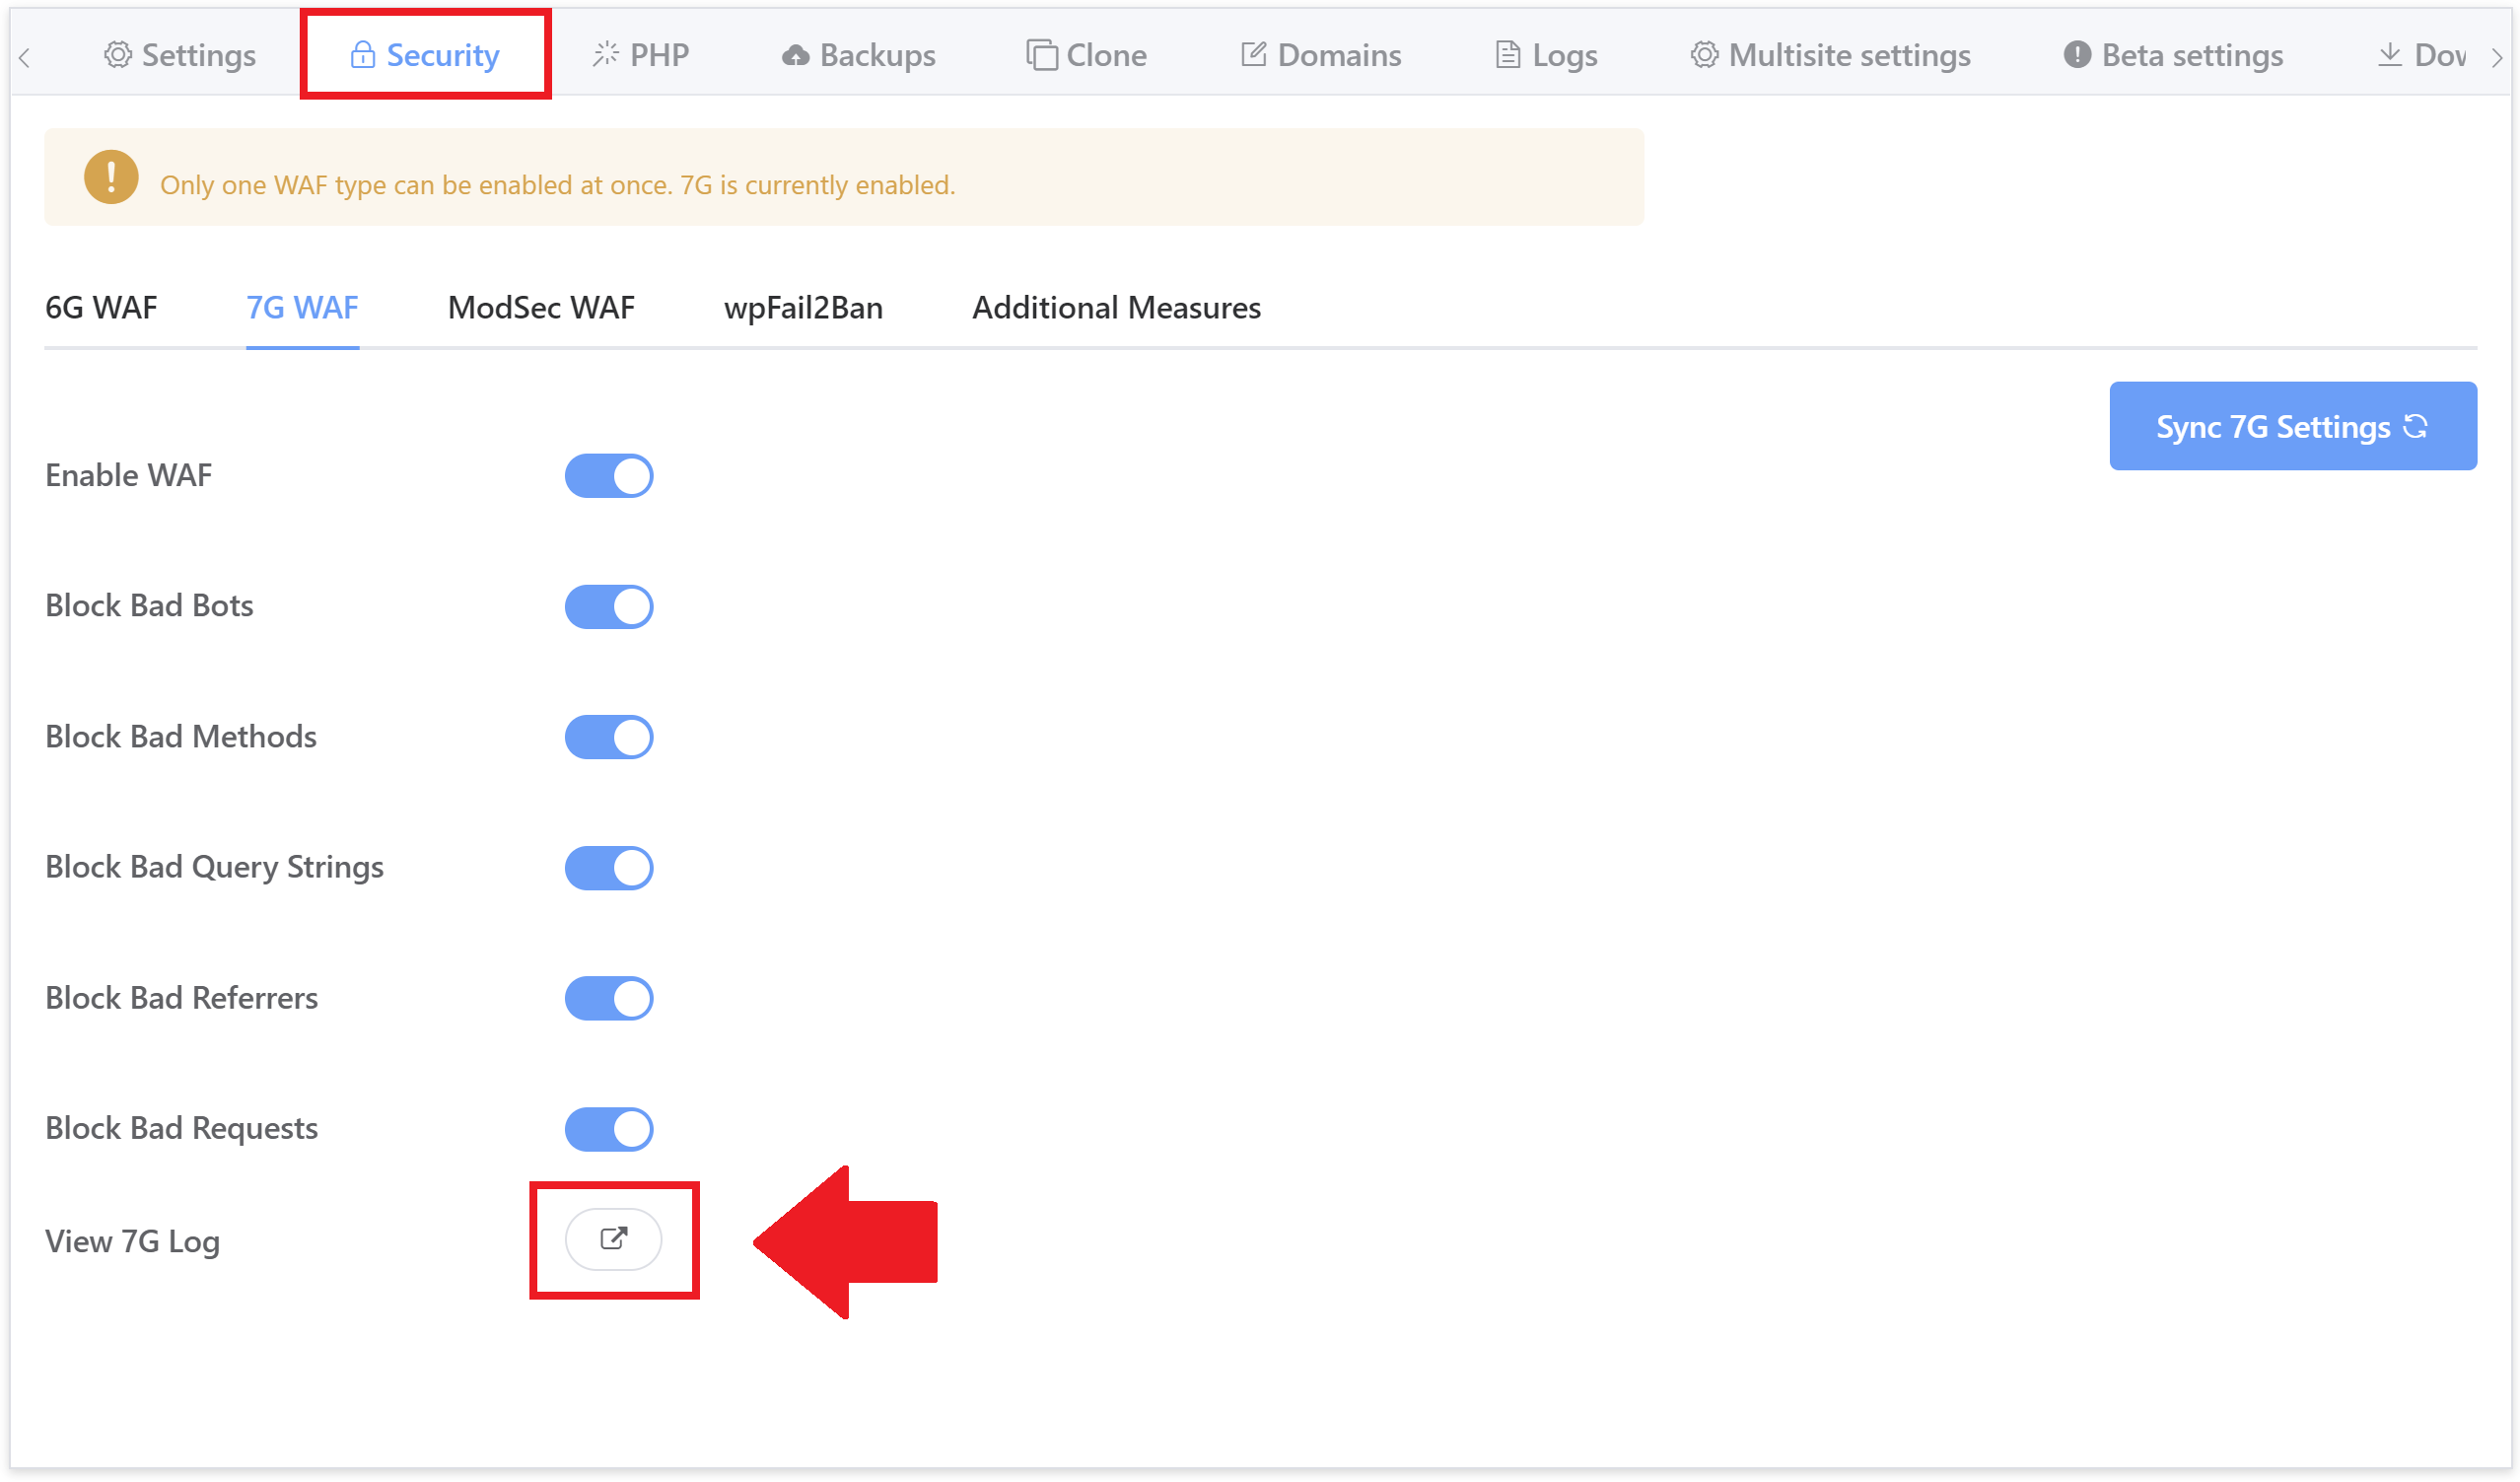
Click through to the security tab and you’ll several different options for securing your websites. Select the 7G firewall and toggle on the Enable WAF option:

Enabling the WAF will automatically enable all of its rulesets so that you won’t need to do so one by one.

Part 2. The 7G WAF Logs

To make it easier to troubleshoot, instead of a 403 error on OLS, you will see the following in its place:

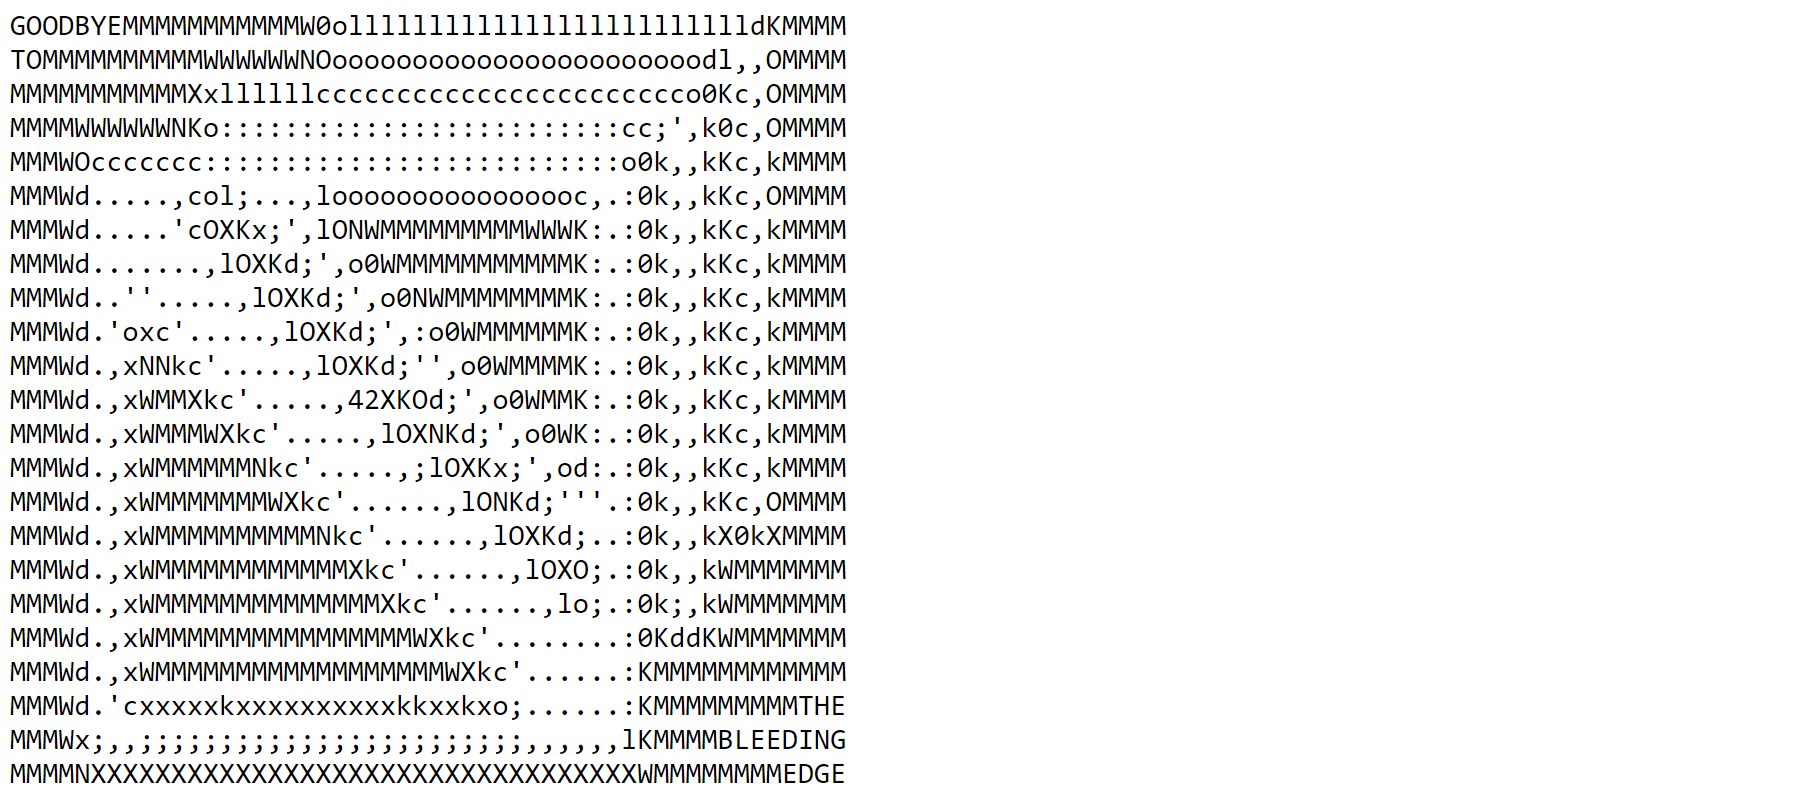
If you see this on one of your sites, check your 7G log.

7G LOGGING

We have enabled logging of all blocked requests with information regarding which ruleset and specific rule has blocked the request. The log is now available to view directly inside your vCanopy account inside the security tab here:

It can be also viewed by SSH/SFTP as root user here:

/var/www/{site.url}/logs/7g.log

Or accessed by SFTP as a system user here:

/Sites/{site.url}/logs/7g.log

The log provides useful information about the request that can be used to analyze whether a whitelist or exclusion needs crafting and to tune the firewall to ensure false positives are handled correctly.

Part 3. Enable/Disable 7G WAF Rulesets

The vCanopy version of the 7G WAF has been modularised so that each block of rulesets can be enabled and/or disabled individually. This can be done either directly inside the website configuration modal, or via GP-CLI by logging in to your server by SSH as root user. As mentioned earlier, by default when you enable the vCanopy 7G firewall for the first time all rulesets will be active. From inside the security tab, simply toggle rulesets on and off as needed, for example: 
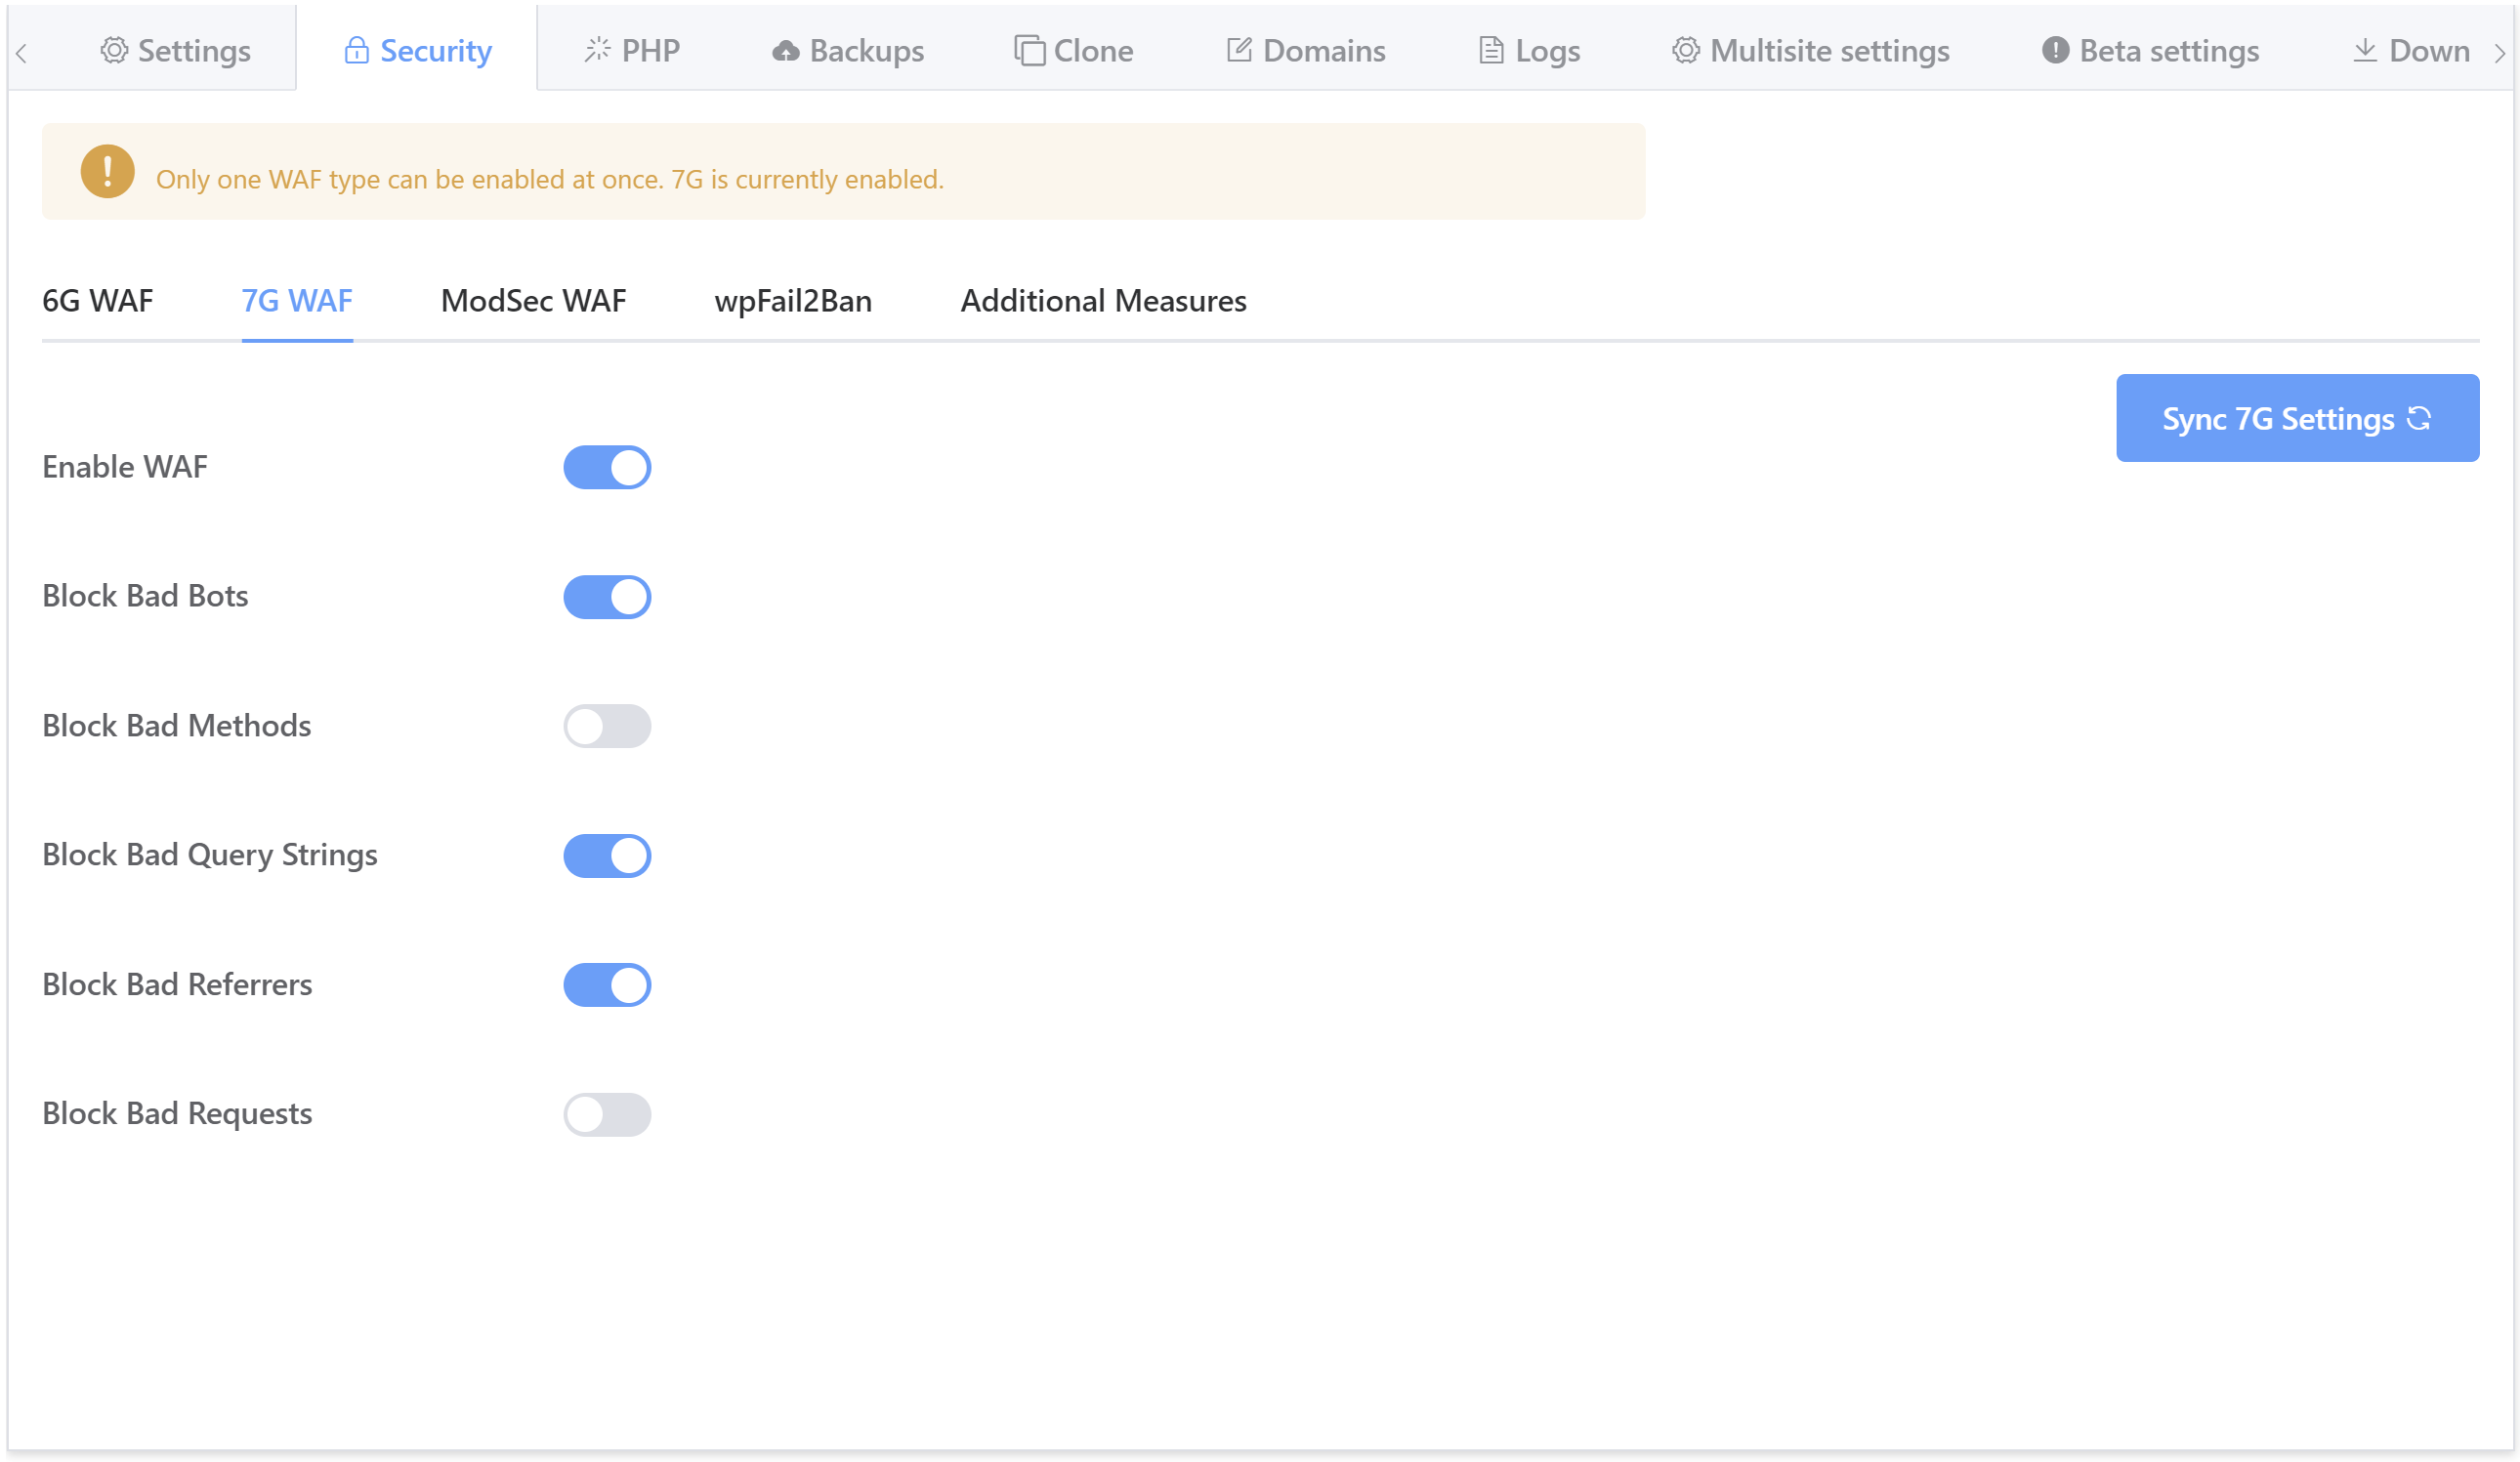
The GP-CLI commands to enable/disable each ruleset are as follows (replace {site.url} with your site primary domain): Bad Bots
gp site {site.url} 7g -bad-bots on
gp site {site.url} 7g -bad-bots off
For example:
gp site verdanttcs.com 7g -bad-bots off
Bad Query Strings
gp site {site.url} 7g -bad-query-string on
gp site {site.url} 7g -bad-query-string off
For example:
gp site verdanttcs.com 7g -bad-query-string off
Bad Referrers
gp site {site.url} 7g -bad-referer on
gp site {site.url} 7g -bad-referer off
For example:
gp site verdanttcs.com 7g -bad-referer off
Bad Requests
gp site {site.url} 7g -bad-request on
gp site {site.url} 7g -bad-request off
For example:
gp site verdanttcs.com 7g -bad-request off
Bad Methods
gp site {site.url} 7g -bad-methods on
gp site {site.url} 7g -bad-methods off
For example:
gp site verdanttcs.com 7g -bad-methods off

Part 4. Customizing the 7G WAF Ruleset Per Site

We can use the information provided by the 7G log (see part 2 above) to create WAF rules to whitelist any false positives that we may get or to ensure that requests we know to be safe bypass the firewall.

7G CONFIGURATION

Each site’s individual 7G configuration is stored in its vhconf.conf. This is important, as many changing your website’s configuration, will sometimes completely regenerate your site’s vhconf.conf, and completely remove any direct edits to the configuration.

Instead of editing the vhconf.conf directly, we can

ADDING ALLOW/DENY RULES

The following configuration files exist for each of the 7G rulesets.

Bad Referrers

7g-http-referrer-allow.conf
7g-http-referrer-deny.conf

Bad Query Strings

7g-query-strings-allow.conf
7g-query-strings-deny.conf

Bad Remote Hosts

7g-remote-host-allow.conf
7g-remote-host-deny.conf

Bad Methods

7g-request-method-allow.conf
7g-request-method-deny.conf

Bad Requests

7g-request-uri-allow.conf
7g-request-uri-deny.conf

Bad Bots

7g-user-agent-allow.conf
7g-user-agent-deny.conf

WHERE TO ADD THE CONFIG FILES

These files should be created in the /var/www/site.url/ols directory.

For example:

 /var/www/example.com/ols/7g-query-strings-deny.conf

to deny specific query strings, regex can be used too

(string1|string2|string3)
specificstring

Multiple rules can be placed in a single line, or you can create 1 individual rule per line. Examples of this can be found in the next section.

Part 5. Creating Whitelist Rules

We can use the allow configs listed in the previous section to craft our own custom rules and add them to the 7G WAF. 

This will allow you to create very specific exclusions should you encounter a false positive, instead of turning off the entire ruleset.

Crafting an exclusion is quite simple. Let’s look at some examples below.

EXAMPLE 1. WPVIVID DEACTIVATION BAD QUERY STRING

When deleting WPVivid with 7G active, you may run into the following error:

199.199.199.19 - 2021/12/01 16:00:18 - GET - HTTP/1.1 - /wp-admin/plugins.php - action=deactivate&plugin=wpvivid-imgoptim%2Fwpvivid-imgoptim.php&plugin_status=all&paged=1&s&_wpnonce= [bad_query_string:tim] - - - Mozilla/5.0 (Windows NT 10.0; Win64; x64) AppleWebKit/537.36 (KHTML, like Gecko) Chrome/96.0.4664.45 Safari/537.36

Here in the log, we can see the reason this is being caught is:

[bad_query_string:tim]

Here what you would actually do is simply disable the bad query string ruleset in the UI, deactivate the plugin, and then turn it back on, as it’s simple and doesn’t require an exclusion.

However, if needed, we could create an exclusion for this specific part of the rule.

We first need to create the “allow” configuration file for bad query strings. To create the config, run the following (switching out “site.url” for your domain):

nano /var/www/site.url/ols/7g-query-strings-allow.conf

We now have a few different options we could use.

Option 1. Whitelist a specific part of the string (the best approach)

Here, we can whitelist the specific string, so that all other requests that include tim still get caught by the WAF:

action=deactivate&plugin=wpvivid-imgoptim%2Fwpvivid-imgoptim.php
Option 2. Whitelist “wpvivid”

We could whitelist all query strings that include “wpvivid”:

wpvivid
Option 3. Whitelist all “tim” requests

We could also simply whitelist “tim”:

tim

Once you’ve added your exclusion you can now save the file with CTRL+O and then Enter to save the file. Exit nano with CTRL+X.

Set the rule live

Now regenerate the site vhconf with the following (switching out “site.url” for the URL):

 gpols site site.url

For example:

gpols site example.com

And finally check your OLS syntax is all good with:

/usr/local/lsws/bin/openlitespeed -t

EXAMPLE 2. BAD REQUEST DUE TO .ASPX

The .aspx extension is blocked by the bad request ruleset:

94.137.186.125 - 2021/12/01 16:22:05 - GET - HTTP/1.1 - /something.aspx [bad_request_uri:.] [bad_request_uri:aspx] - - - - Mozilla/5.0 (Windows NT 10.0; Win64; x64) AppleWebKit/537.36 (KHTML, like Gecko) Chrome/96.0.4664.45 Safari/537.36

Here in the log we can see the reason this is being caught is:

[bad_request_uri:.] [bad_request_uri:aspx]

We first need to create the “allow” configuration file for bad query strings. To create the config , run the following (switching out “site.url” for your domain):

nano /var/www/site.url/ols/7g-query-strings-allow.conf
Option 1. Whitelist a specific part of the string (best approach)

Here we could whitelist only the specific pages we need, so that all other requests that include tim still get caught by the WAF:

something.aspx
anotherpage.aspx
another-example-uri.aspx
Option 2. Whitelist all “.aspx” requests

We could also simply whitelist “.aspx”:

.aspx

Once you’ve added your exclusion you can now save the file with CTRL+O and then Enter to save the file. Exit nano with CTRL+X.

Set the rule live

Now regenerate the site vhost with the following (switching out “site.url” for the URL):

 gpols site site.url

For example:

gpols site example.com

And finally check your OLS syntax is all good with:

/usr/local/lsws/bin/openlitespeed -t

EXAMPLE 3. WHITELIST AHREFS

The ahrefs crawler is blocked by 7G. If you need to whitelist it for one of your websites the process is straightforward but does need to be done on each site individually.

We first need to create the “allow” configuration file for bad user agents. To create the config, run the following (switching out “site.url” for your domain):

nano /var/www/site.url/ols/7g-user-agent-allow.conf

Add “ahrefs” to the file:

ahrefs

Now save the file with CTRL+O and then Enter to save the file. Exit nano with CTRL+X.

Set the rule live

Now regenerate the site vhost with the following (switching out “site.url” for the URL):

 gpols site site.url

For example: 

gpols site example.com

And finally check your OLS syntax is all good with:

/usr/local/lsws/bin/openlitespeed -t

Part 6. Creating Additional Deny Rules

We can use the deny configs to craft our own custom rules and add them to the 7G WAF. 

An interesting example for this would be blocking troublesome bots that take up your server resources with absolutely no benefit to you or your clients. 7G actually has an excellent list of bots that it will automatically block from the get-go, but you can also add your own custom rule to block other bots. We’ll use this use case as our example custom rule.

EXAMPLE RULE: BLOCKING ADDITIONAL BAD BOTS

7G will block bots based on the user_agent name, so as long as you know that, you can create a custom rule to block any bots you want with 7G.

To do, this you can first create a configuration file making use of the 7g-user-agent-deny.conf config as follows:

nano /var/www/site.url/ols/7g-user-agent-deny.conf

The rule will look as follows:

botname1

If you’re blocking more than one bot you can separate them like so:

(botname1|botname2)

For example, here is a list of some bots that have been flagged by the “Bad Bot Blackhole” plugin (also created by Jeff Starr) on one of my websites:

(adsbot|aiHitBot|Barkrowler|clarabot|mauibot|scrapy|smtbot)

Hit CTRL+O and then Enter to save the file. Exit nano with CTRL+X.

SET THE RULE LIVE

Now regenerate the site vhconf with the following (switching out “site.url” for the URL):

 gpols site site.url

For example:

 gpols site example.com

Search the Knowledge Base

New to vCanopy?

Get started with our FREE Core plan today! We bring the software, you bring the hardware.