


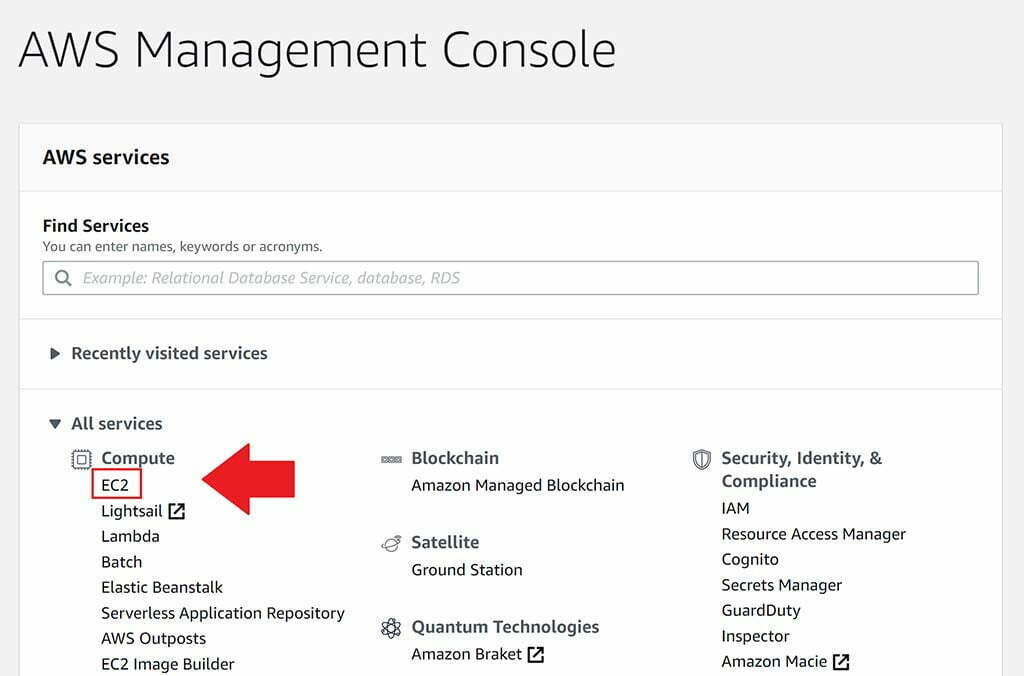
Step 1. Login to your AWS Management Console and click through to EC2
EC2 can be located in the “Compute” service list as shown below, or you can search for “EC2” in the find services search.
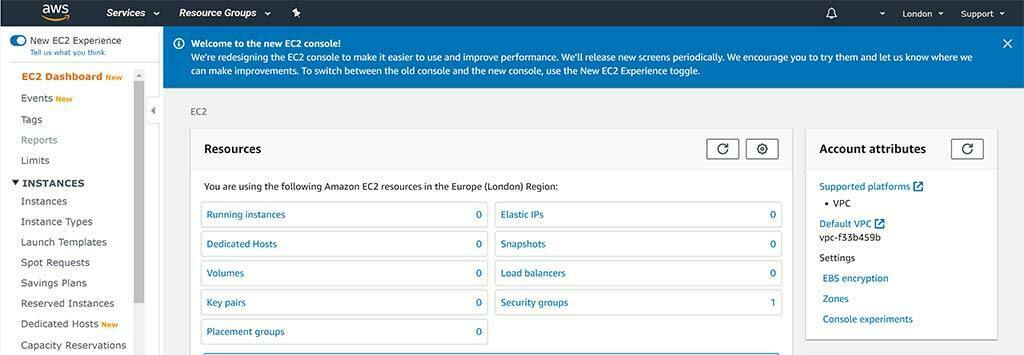
Step 2. Launch an EC2 Instance
EC2 are making changes to their UI. At the time of writing, this is what it looks like:
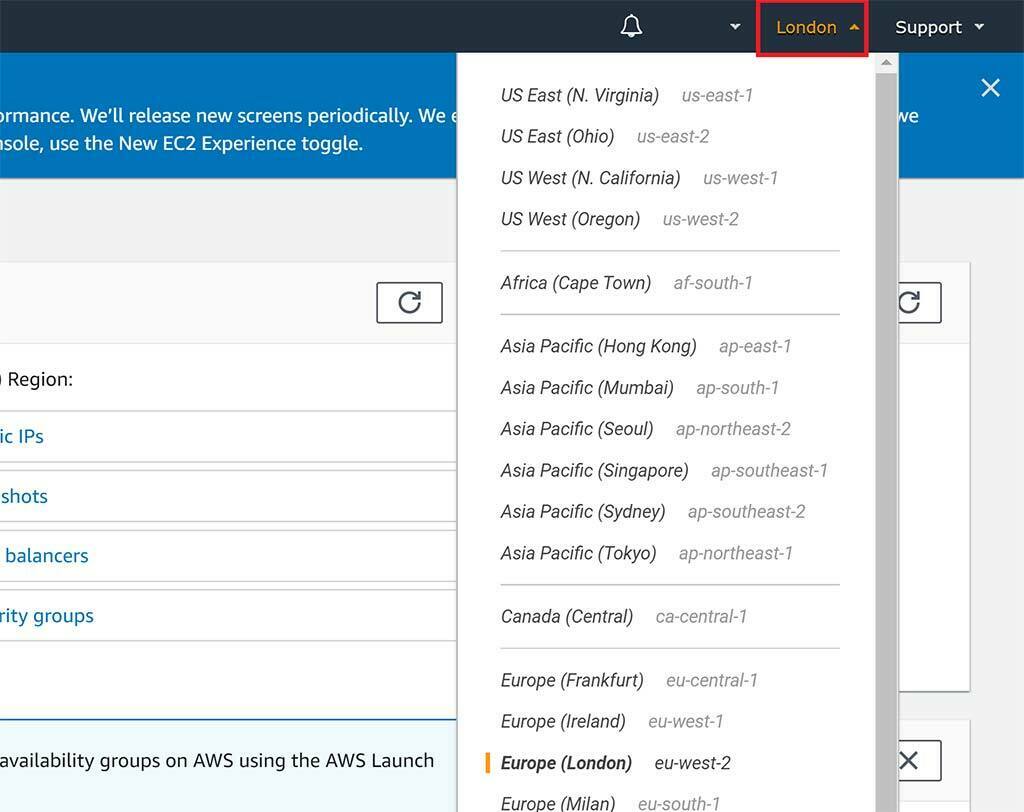
Be sure to check you’re launching in the correct region in the top right-hand corner. I’ll be selecting London for this instance:
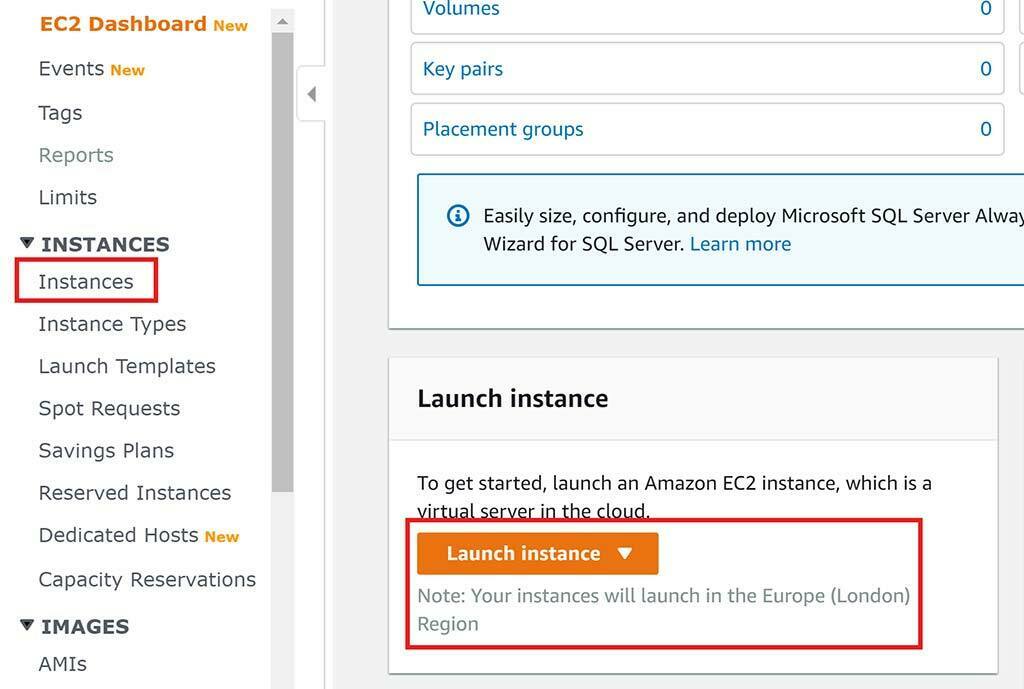
Next, you can either click through to instances or click the orange Launch instance button:
CHOOSE AN AMAZON MACHINE IMAGE (AMI)
Here, use the search bar to bring up the Ubuntu images. We’re looking for “Ubuntu Server 18.04 or 20.04 LTS (HVM), SSD Volume Type”:

Please note that ARM servers are not supported by vCanopy and they will not be able to provision successfully.
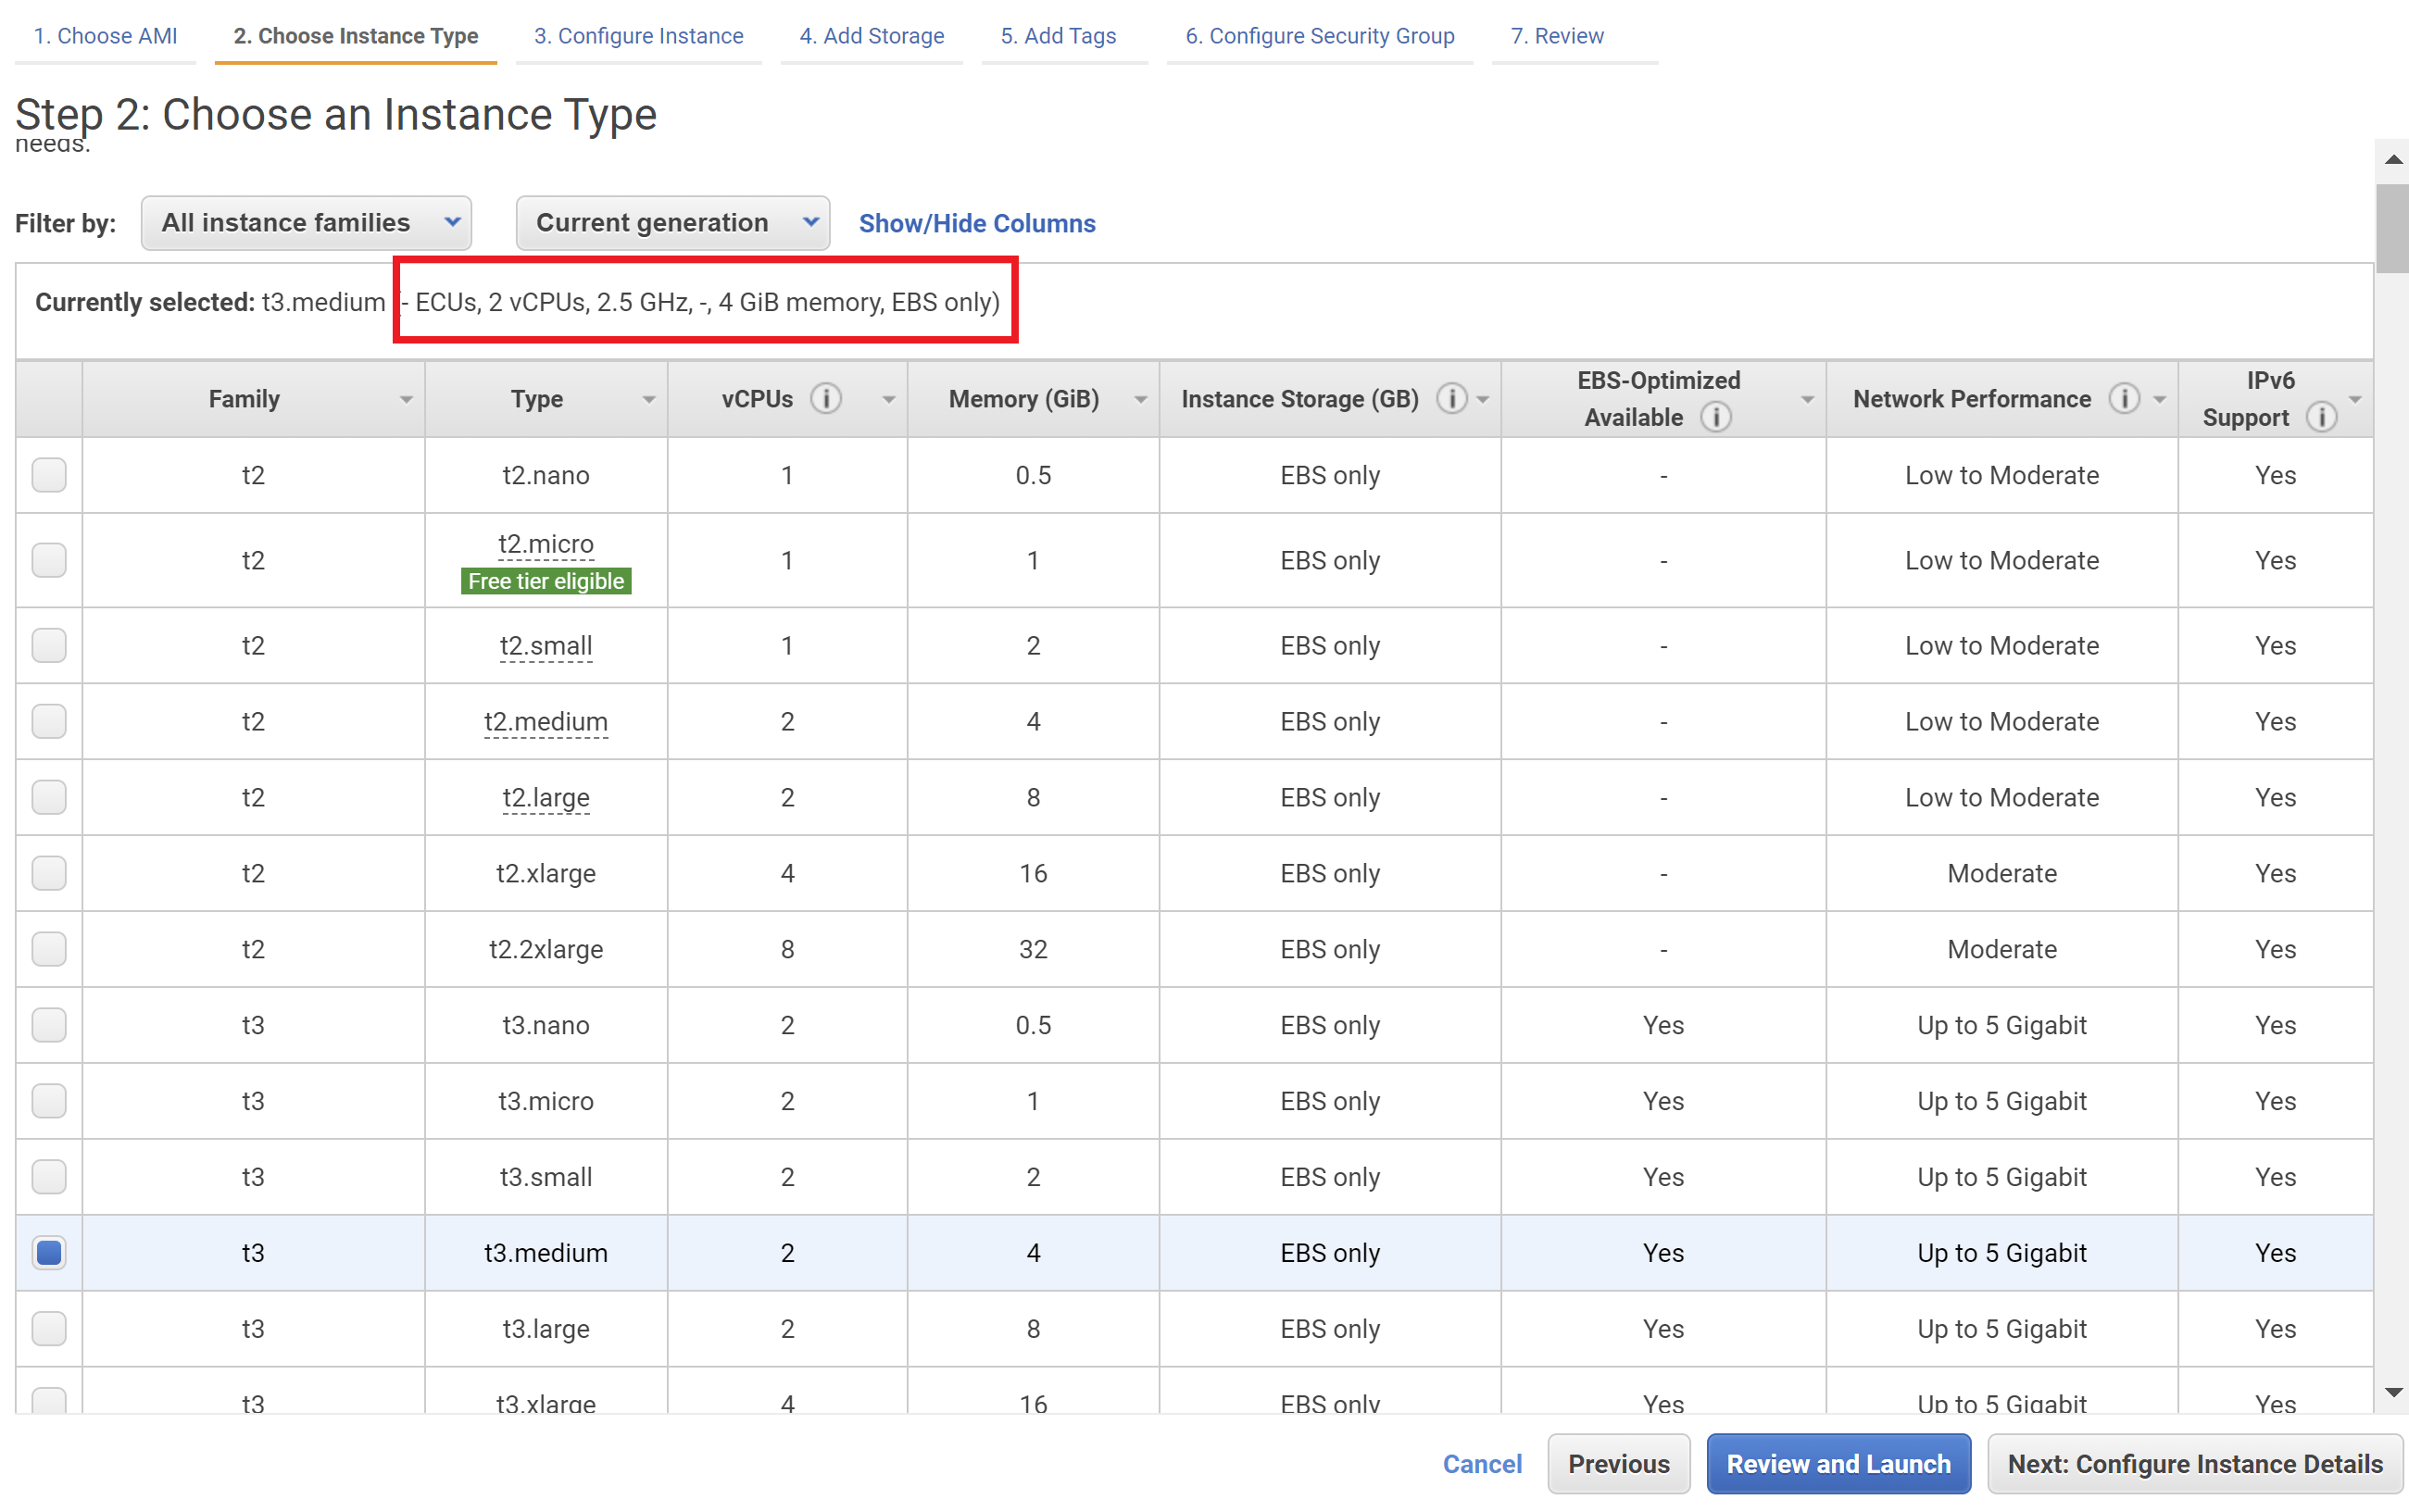
CHOOSE AN INSTANCE TYPE
EC2 has A LOT of options to choose from. I’m keeping it simple with a t3.medium instance – 2vCPU 4GB RAM. The t2.small would be the smallest we recommend – we don’t recommend you use any VPS with less than 2GB RAM.
You can see the instances specs as highlight below:
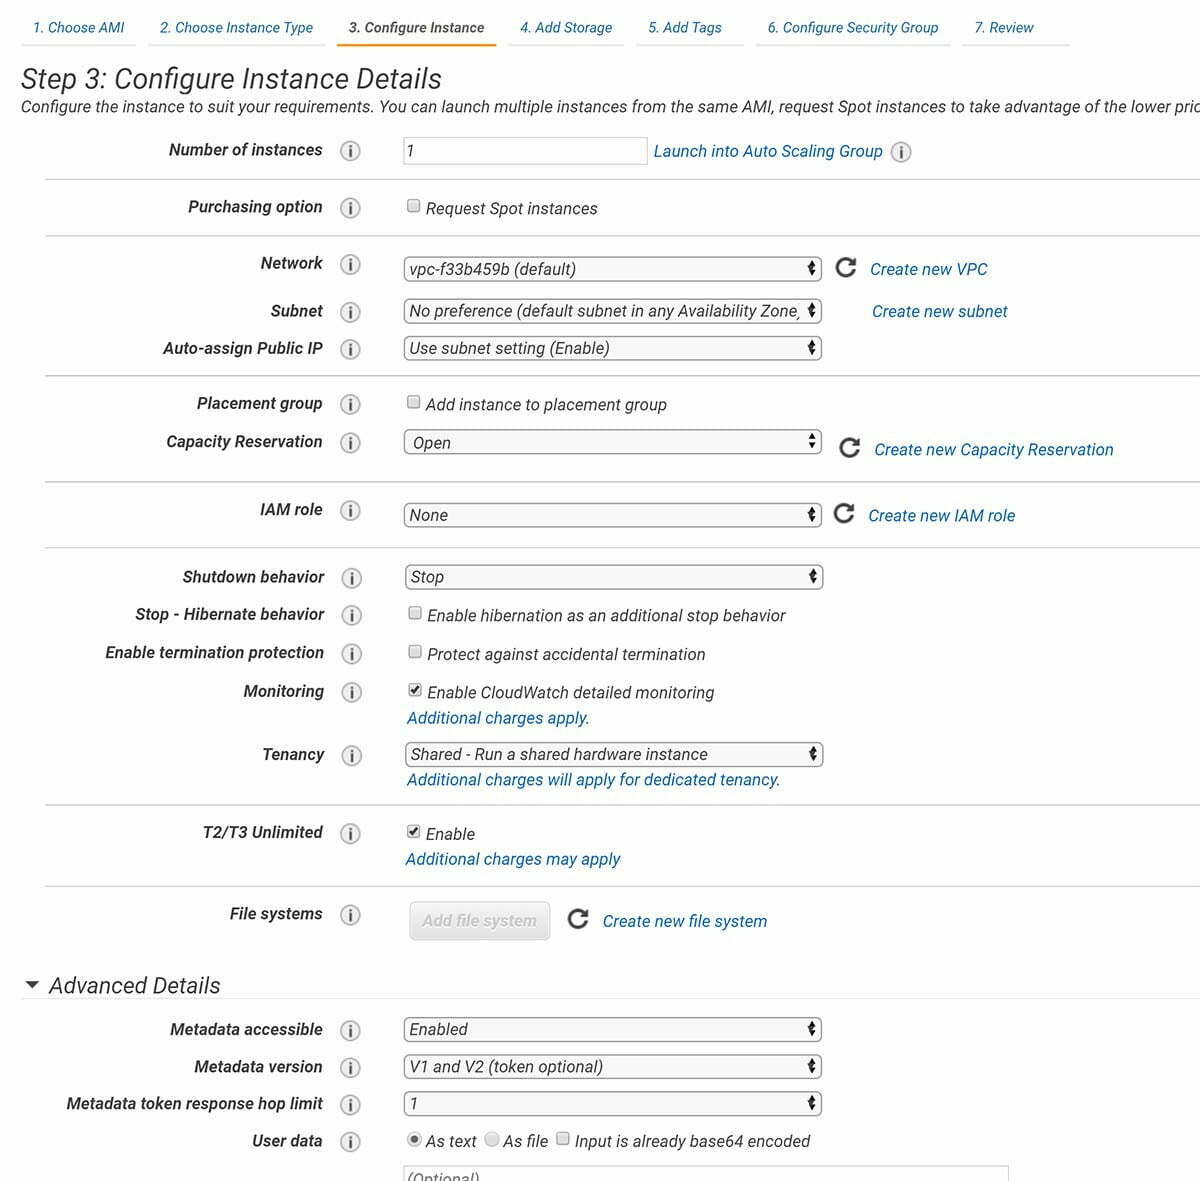
CONFIGURE INSTANCE DETAILS
This part is a little more complex. We’ll be keeping it most of it as the default setting, but adding in a couple of optional extra’s. Here are the options I’m selecting:
Number of instances: 1 (I don’t require auto scaling)
Purchasing option: Leave unchecked – spot instances are not suitable for a production environment
Network: Default
Subnet: No preference – but feel free to choose one if it makes sense for you
Auto-assign Public IP: Leave as default. We’ll need to setup a persistent IP address for you server in step 3.
Placement group: Leave unchecked
Capacity Reservation: Open
IAM Role: None
Shutdown behaviour: Stop
Hibernate behavior: Unchecked
Enable termination protection: I’ve left unchecked, but feel free to check if you want the additional security.
Monitoring: I’ve chosen to enable CloudWatch, but please note that additional charges may apply and this is not necessary. Feel free to leave this unchecked and/or learn more here:
https://docs.aws.amazon.com/AWSEC2/latest/UserGuide/using-cloudwatch-new.html
Tenancy: Shared
T2/T3 Unlimited: If you’re expecting bursts of traffic or would like your server to be able to sustain high CPU usage should it ever be required, this option is pretty cool. AWS may need to approve your account for this service and additional charges may apply. Learn more here:
https://docs.aws.amazon.com/AWSEC2/latest/UserGuide/burstable-performance-instances-unlimited-mode.html
File Systems: N/A
Metadata accessible: Enabled
Metadata version: V1 and V2
Metadata token response hop limit: 1
User data: Default
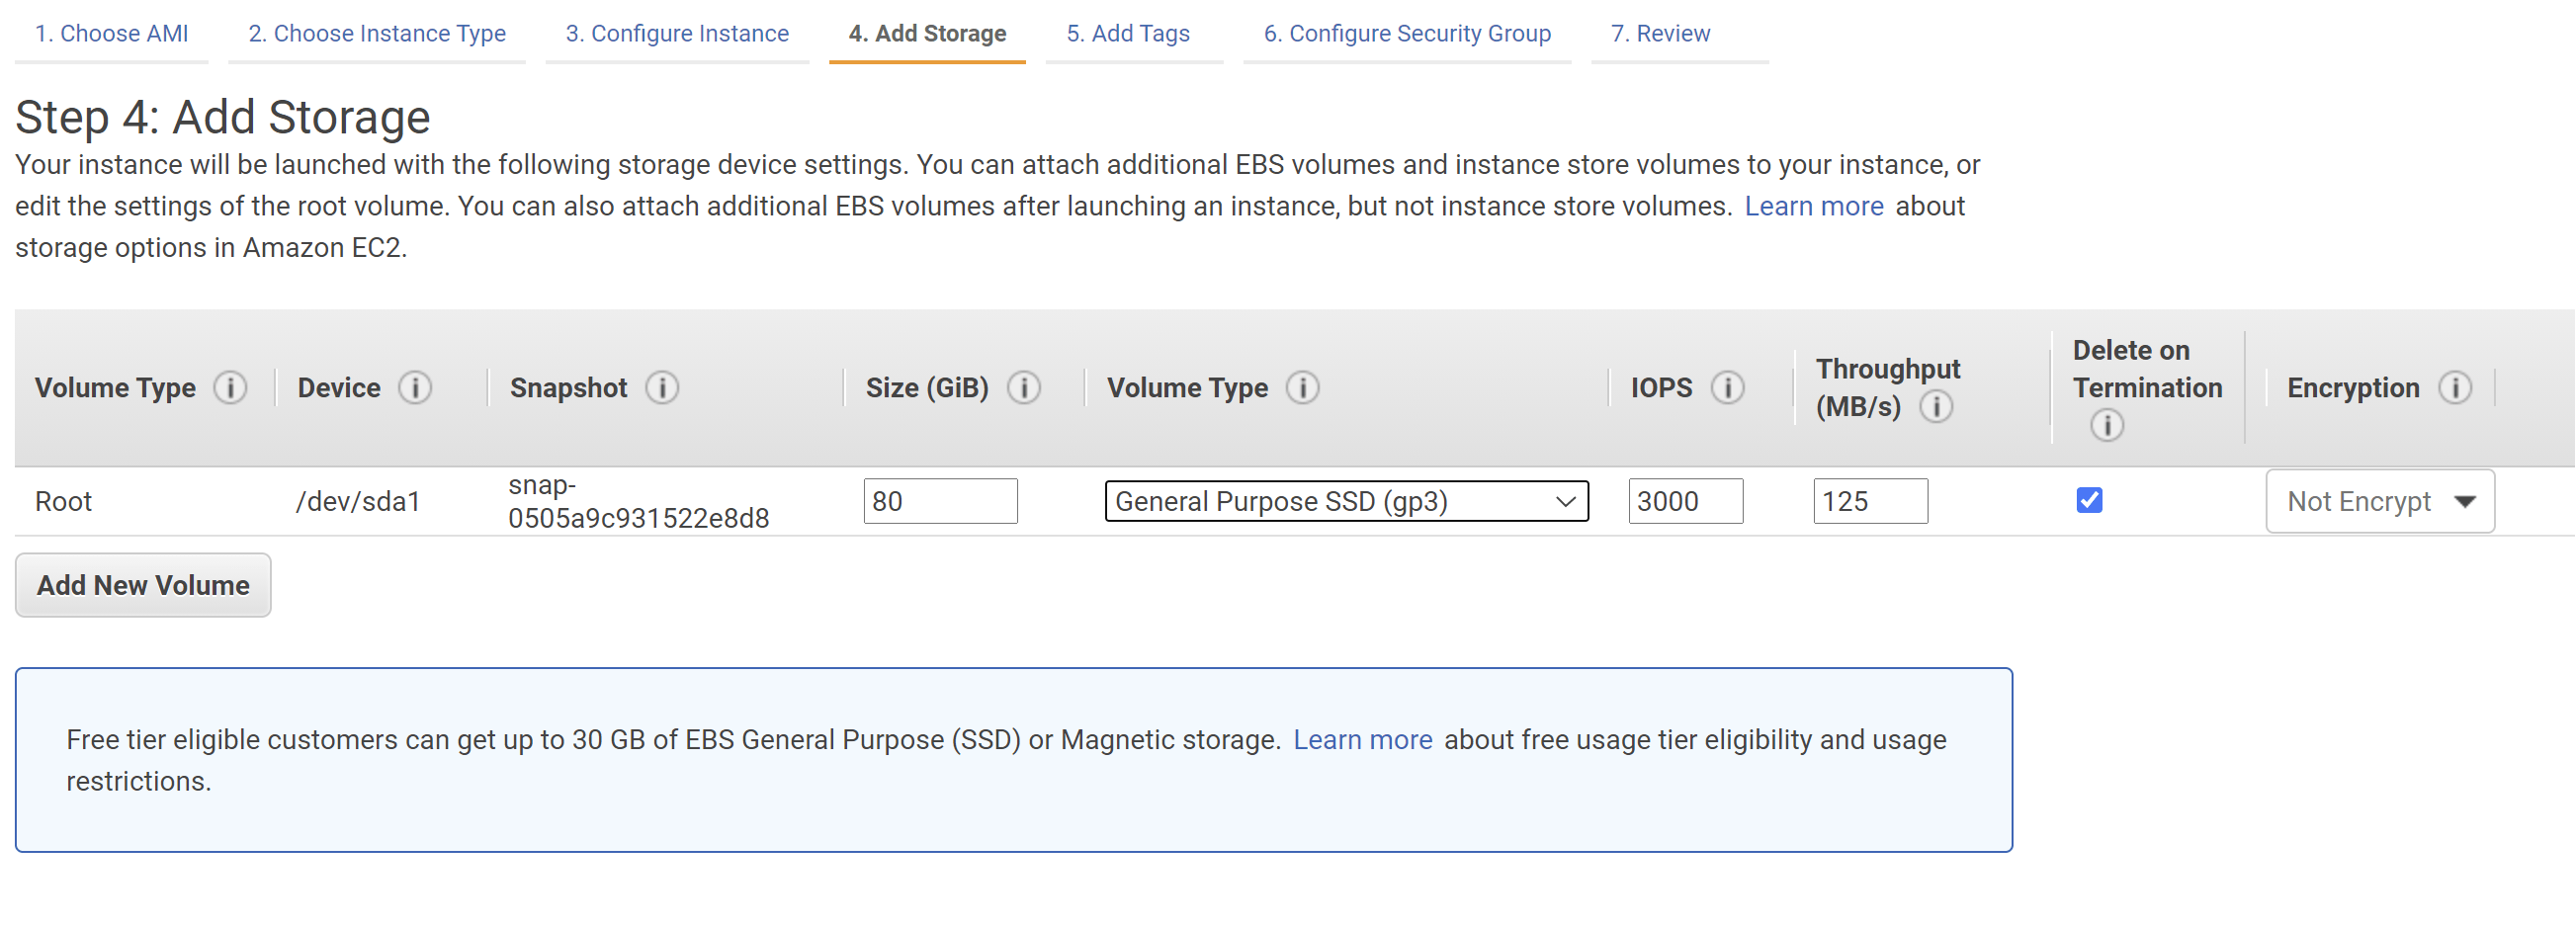
ADD STORAGE
I’ve chosen 80GB General purpose SSD – you may select whatever size best suits your needs. General purpose SSD is suitable for most purposes but you can learn about the available storage options here:
https://docs.aws.amazon.com/AWSEC2/latest/UserGuide/ebs-volume-types.html
Update: One of our awesome clients sent this in: “AWS recently launched GP3 which has a much higher base IOPS than GP2, does not suffer from a credit bucket system and throttling, while being roughly 20-25% cheaper than GP2 and without the risks of unexpected costs”.
GP3 storage is the better option to go for when choosing between GP2 and GP3.
https://aws.amazon.com/about-aws/whats-new/2020/12/introducing-new-amazon-ebs-general-purpose-volumes-gp3/
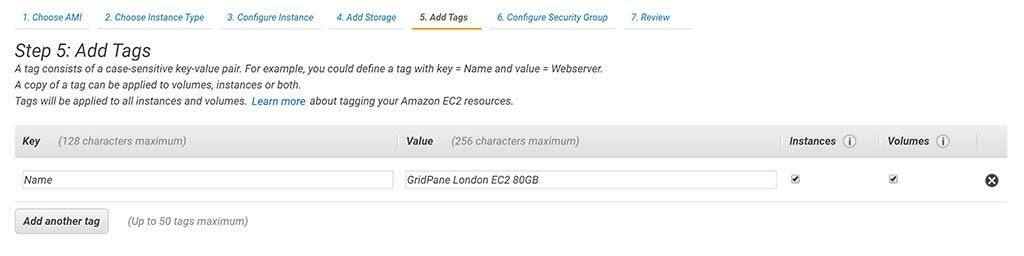
ADD TAGS
Here I’ve given my VPS a name and I’d recommend you do the same as it will make it easier to manage your servers at a glance.
CONFIGURE SECURITY GROUP
Here we need to set up our firewall rules. We need to set SSH, HTTP, and HTTPS (which will all default to the correct value), and then a custom rule.
For the custom rule, selected “Custom TCP Rule” and set the port to 11371, and select “anywhere” under source.
This custom Firewall rule will allow all incoming traffic any IP address to your server’s TCP port 11371.
vCanopy’s security will lockdown and protect this port from any traffic originating from any location other than vCanopy, directly on the instance via UFW.
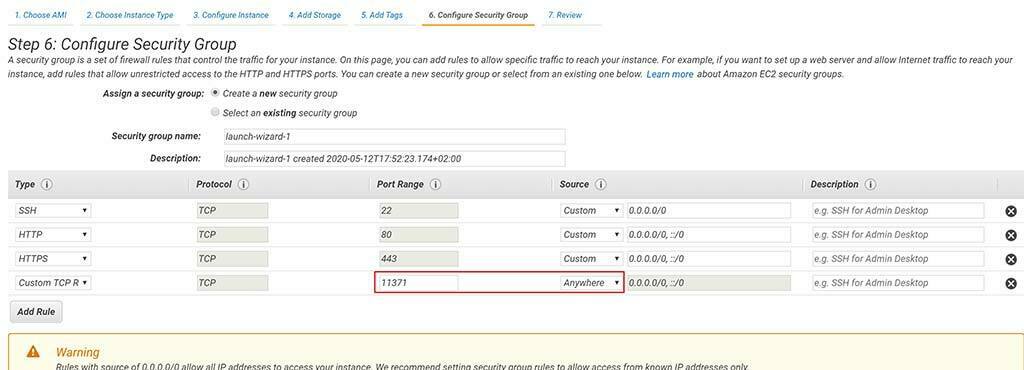
Note: I haven’t done so in the image above, but here you can give your security group a specific name like “vCanopy Servers” and reuse it on any future servers that you spin up.
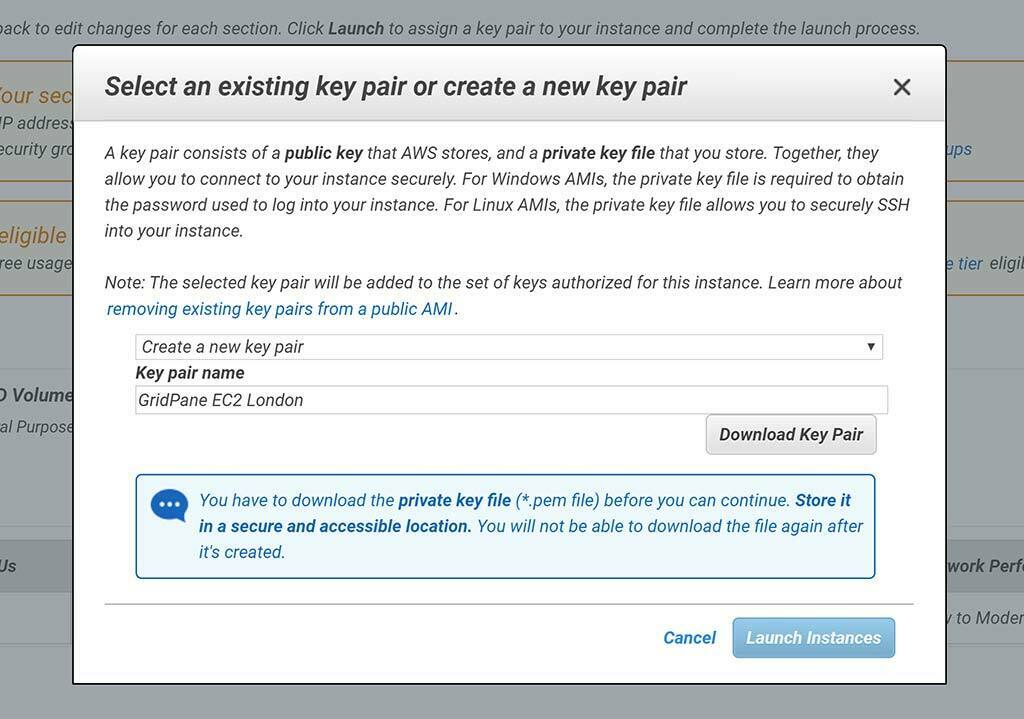
REVIEW AND LAUNCH
Review your details and click Launch in the bottom right-hand corner.
You’ll be asked to select an existing key pair or create a new one. Feel free to select a pre-existing pair if one already exists, but if not you’ll need to create a new one. You’ll need this to connect to your server in step 5.
Next click the Launch Instances button, and in a few minutes your new server will be live.
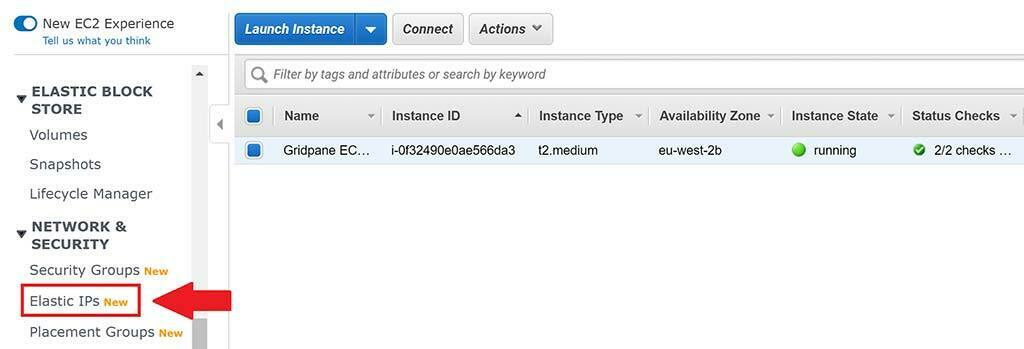
Step 3. Setup a Static IP
Now that we’ve created our instance, we need to give it a Static IP. This is VERY IMPORTANT as vCanopy cannot manage your server without having a Static IP Address to reference, and the other options AWS provides during the setup of your EC2 instance may not persist forever.
Select “Elastic IP” from the left hand sidebar:
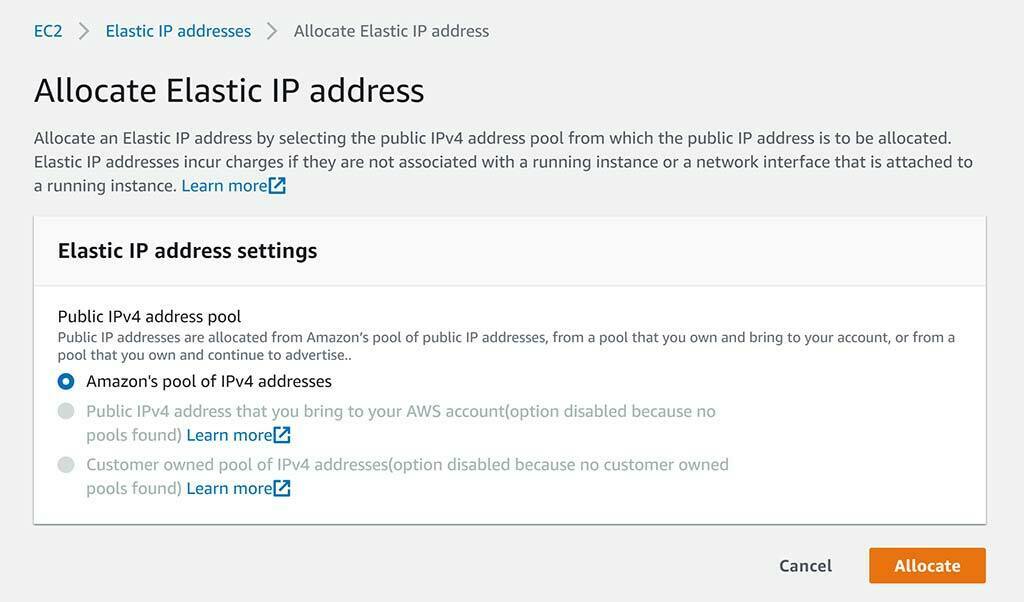
And then click the orange “Allocate Elastic IP Address” button:
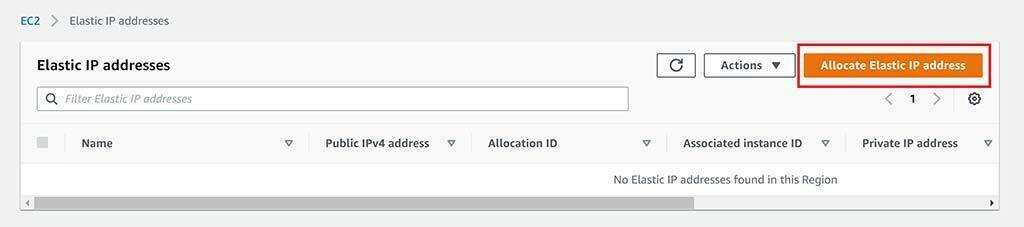
Click the allocate button:
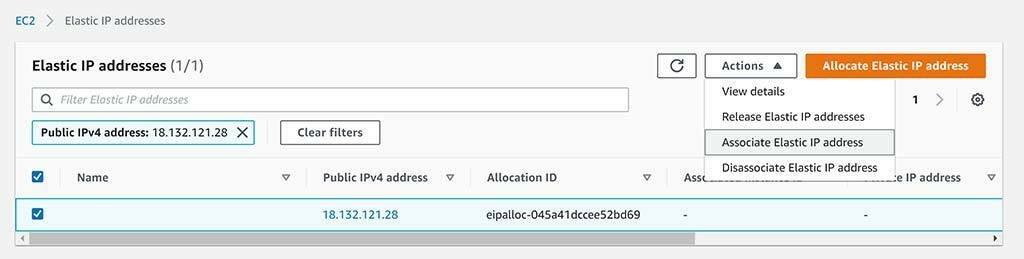
We now have a static IP address that we can associate with our server. Select “Associate static IP address” from the actions dropdown (or click directly on the IP address):
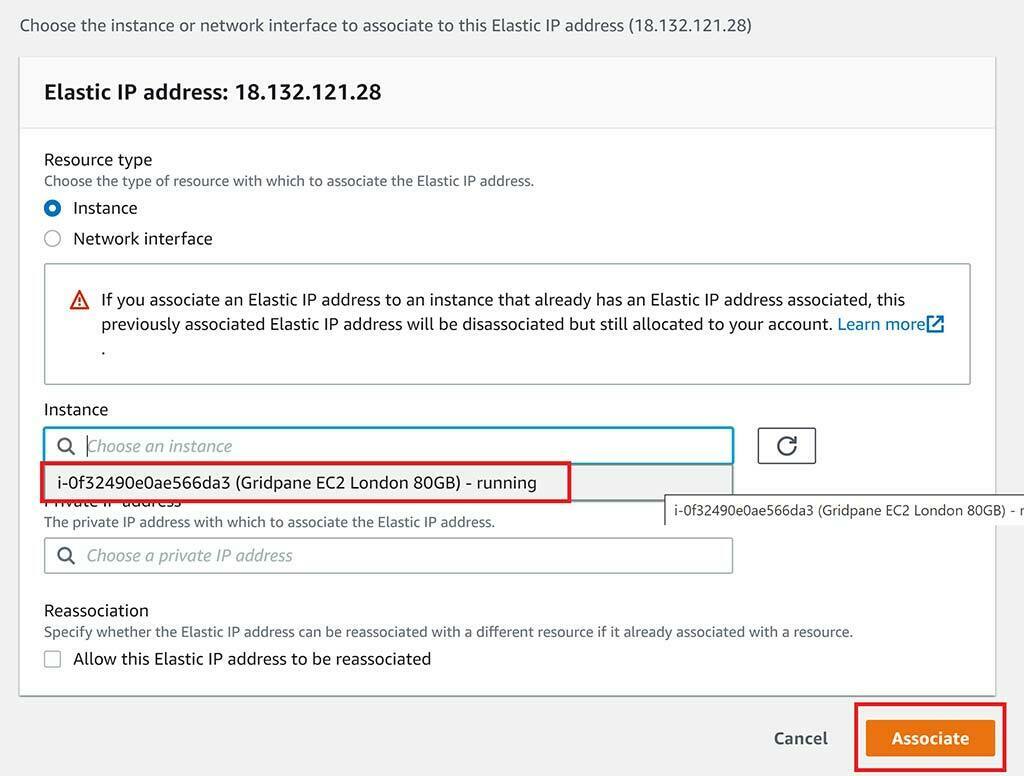
And then choose your instance and click the “Associate” button.
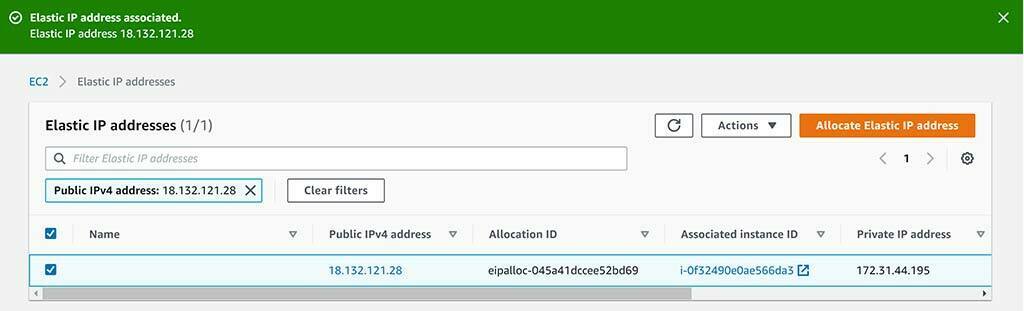
You’ve now associated your IP with your EC2 instance! Phew… nearly there.

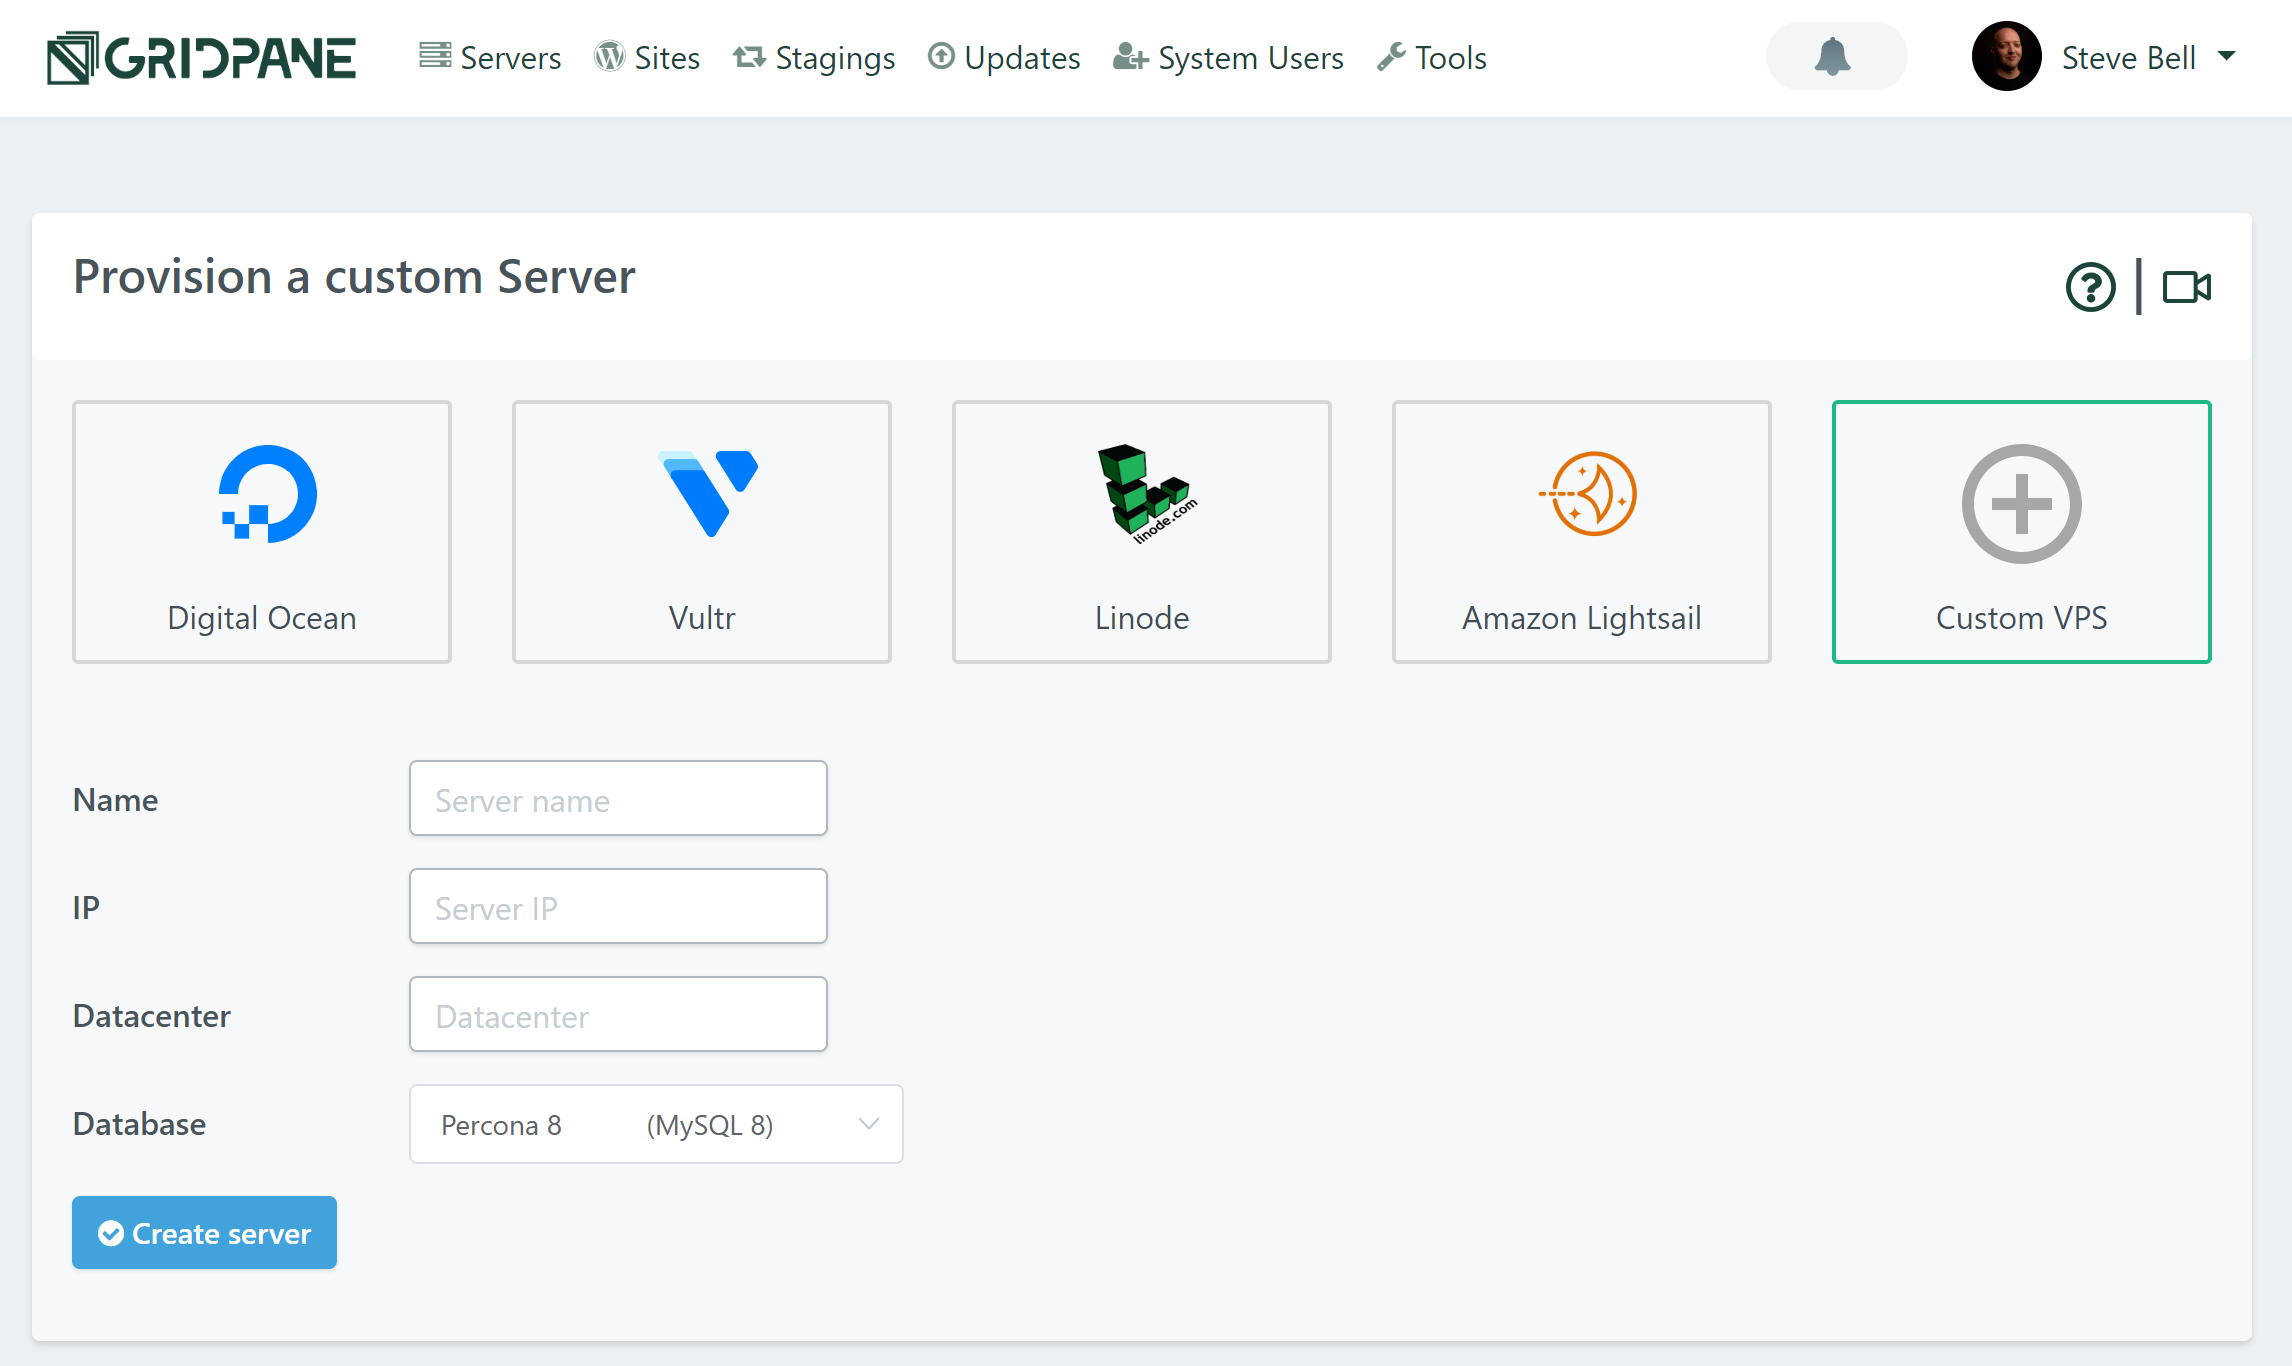
Step 4. Connect Your Server to vCanopy
Back in your vCanopy dashboard, click on Custom VPS from the servers page. Enter the name, IP (the elastic IP Address we set in step 3), and the Datacenter name you wish to use.
Note: The Datacenter name is for your reference only, so feel free to give it a name that makes the most sense for you. As this examples server is in London, UK, we’ll go ahead and enter this.
CHOOSE YOUR DATABASE
If you’re on the developer plan you’ll have the option to choose between Percona and MariaDB for your database.
Percona is based off the new MySQL 8. It has removed query caching (which was deprecated in 5.7 but was still available), and it has more advanced aspects for things like storing and managing json as a storage format. It will likely use more RAM than MariaDB.
MariaDB is still based on MySQL 5.7, which could mean fewer issues importing old WordPress websites from low-quality hosting environments. It will likely use less RAM than Percona.
Both are excellent options.
PROVIDER BACKUPS
We highly recommend that you enable provider backups. It’s a small price to pay for the extra insurance they offer.
CREATE YOUR SERVER
Click the Create Server button when you are happy with your configuration choices.
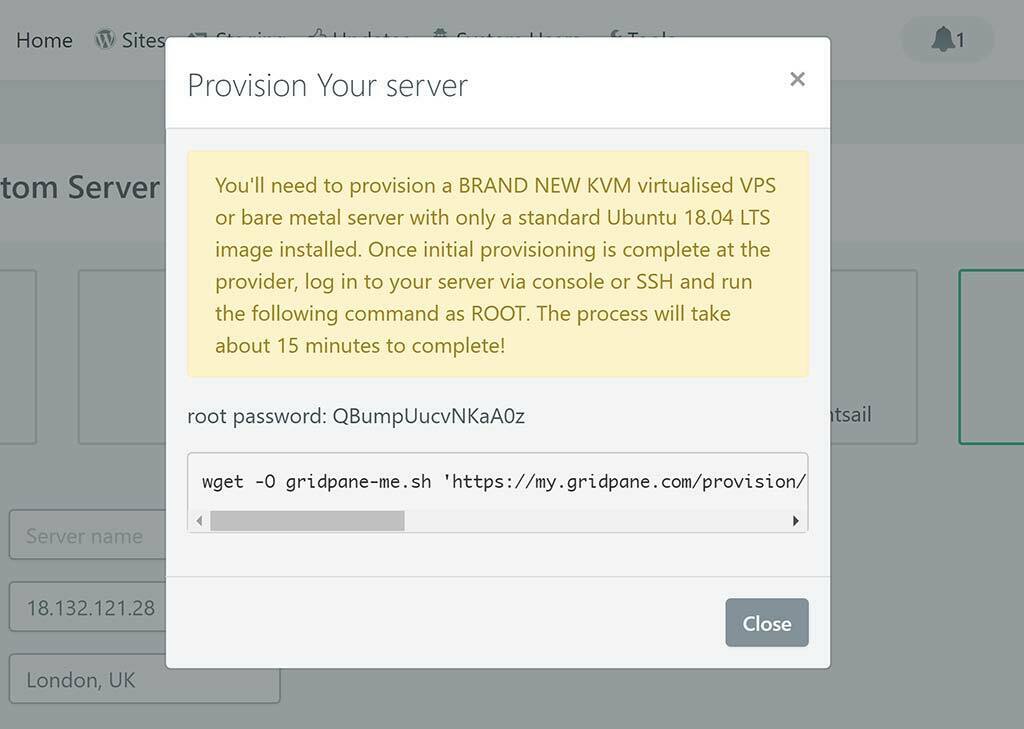
Once you click Create Server, a popup modal will contain your root password and a command line string. Copy that string – you’ll need it in a moment.
Step 5. Connect to Your EC2 Server
Connecting to your EC2 instance isn’t as simple as connecting to a Lightsail instance. Please see Amazon’s documentation on how to connect:
https://docs.aws.amazon.com/AWSEC2/latest/UserGuide/AccessingInstances.html
NOTE: You may need to first protect your key.pem with the following command:
chmod 400 /path/to/key.pem
CONNECTING
In my case, I’m using Cmder. First I add:
ssh -i
And then drag and drop the key file I created into Cmder to add in the correct key path, and then finish by adding the highlighted server path:
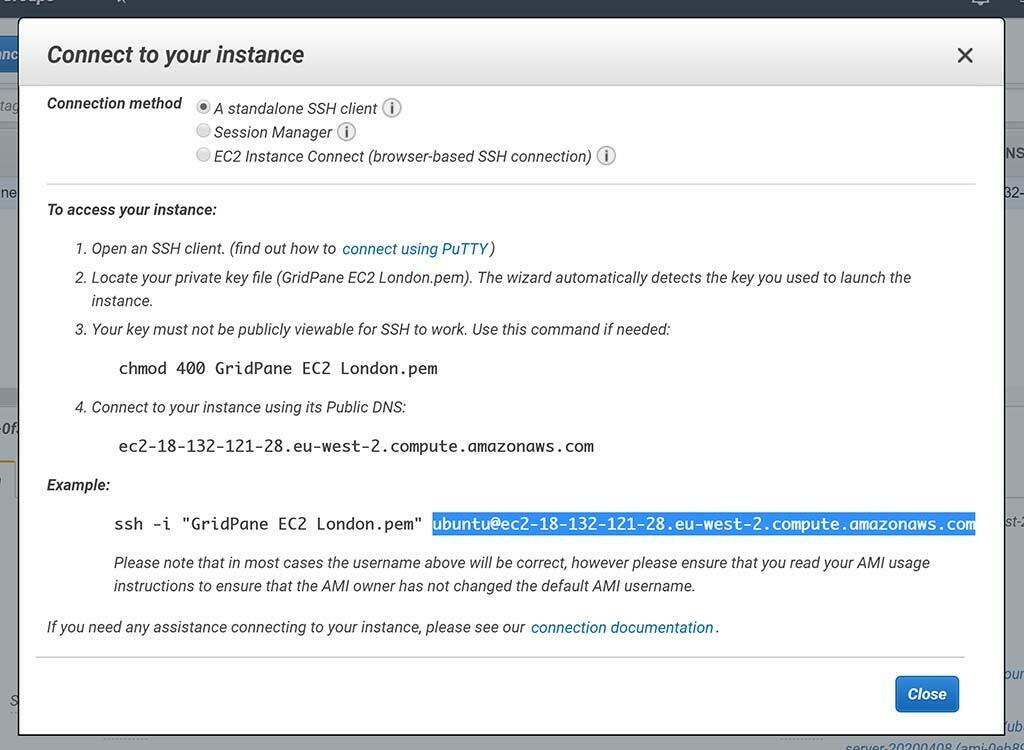
In full on Windows it looked like this in my case:
ssh -i "C:\Users\Username\Desktop\vCanopyEC2London.pem" ubuntu@ec2-18-132-121-28.eu-west-2.compute.amazonaws.com
Now inside your server we need to run our provisioning code as the root user. To switch to root, type:
sudo -s

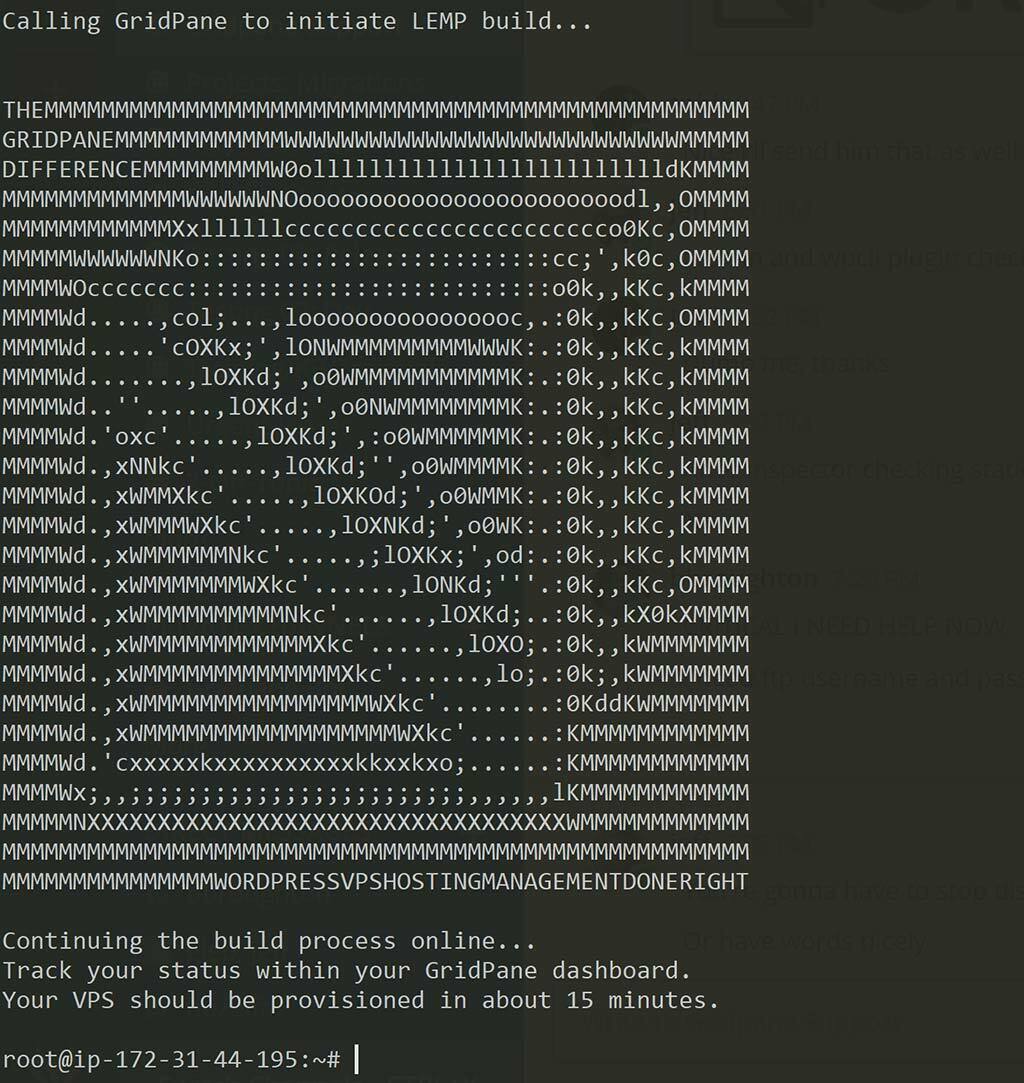
We’re now ready to enter the string copied from the vCanopy Custom VPS popup modal to install vCanopy:
This will initiate Stage 1 of installation.
A few minutes later you’ll see this:
And you can now monitor your VPS’s progress inside your vCanopy account.
In around 10 minutes or so your server will be ready to go:
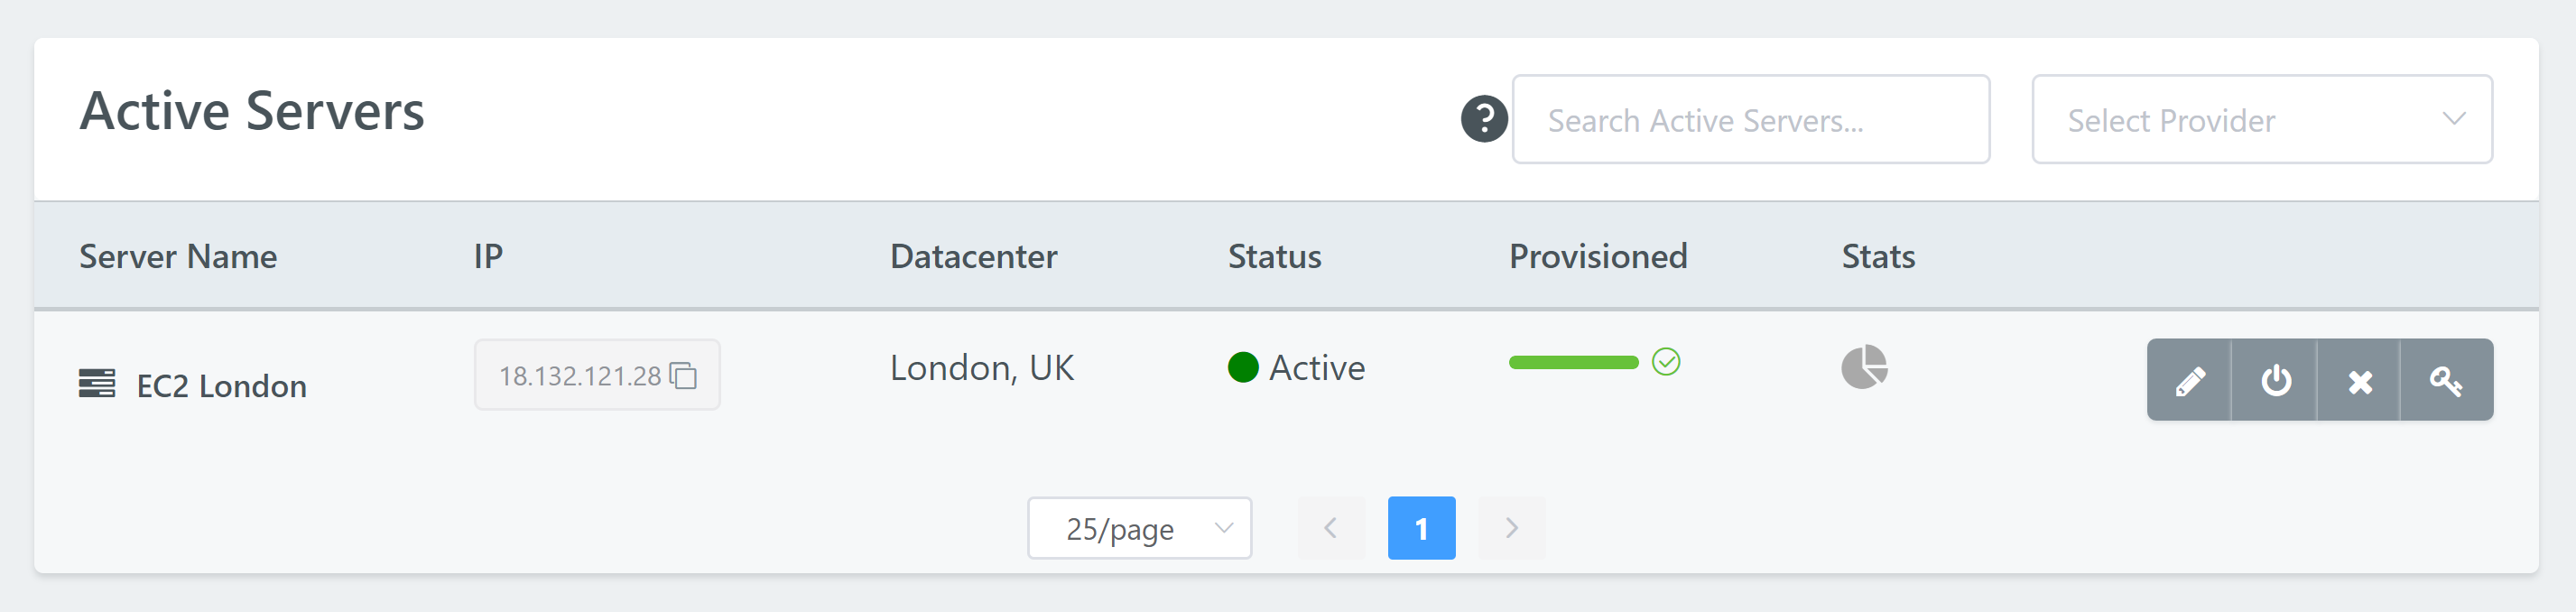
Hurray!