Step 0. Make sure you have SSH access to the DB server
Make sure you have added your vCanopy user SSH Key to the server that is hosting the database that you wish to manage. We have an easy to follow guide that will take you through the steps to add your SSH key to a server here.
Step 1. Open your Database Management Client
In this tutorial we will be using Sequel Pro to connect to our database, however, most of the available tools are very similar and have directly analogous configurations.
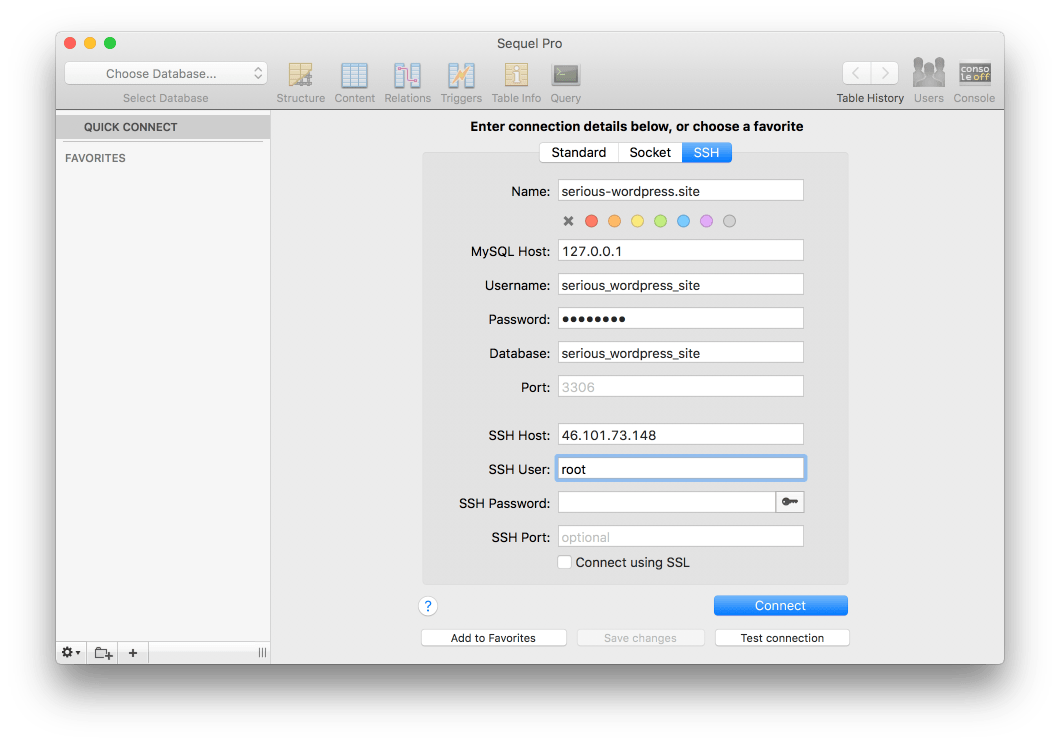
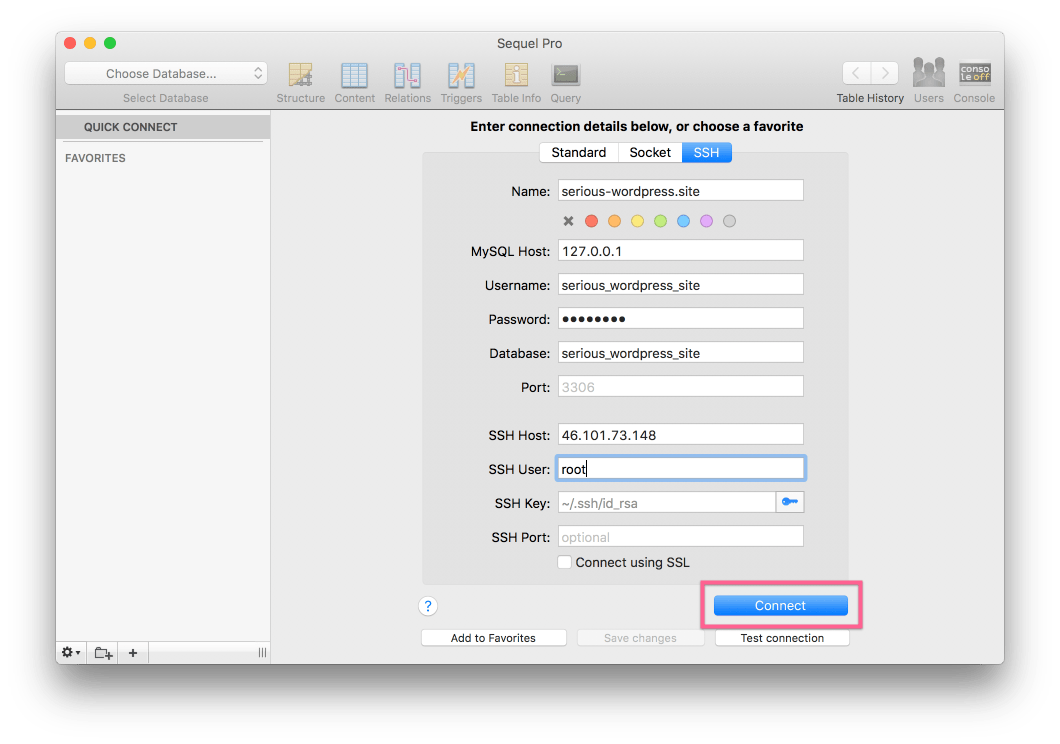
Open your Database management client and navigate to the connection configurations for SSH connections to a remote database. In Sequel Pro, that looks like this:
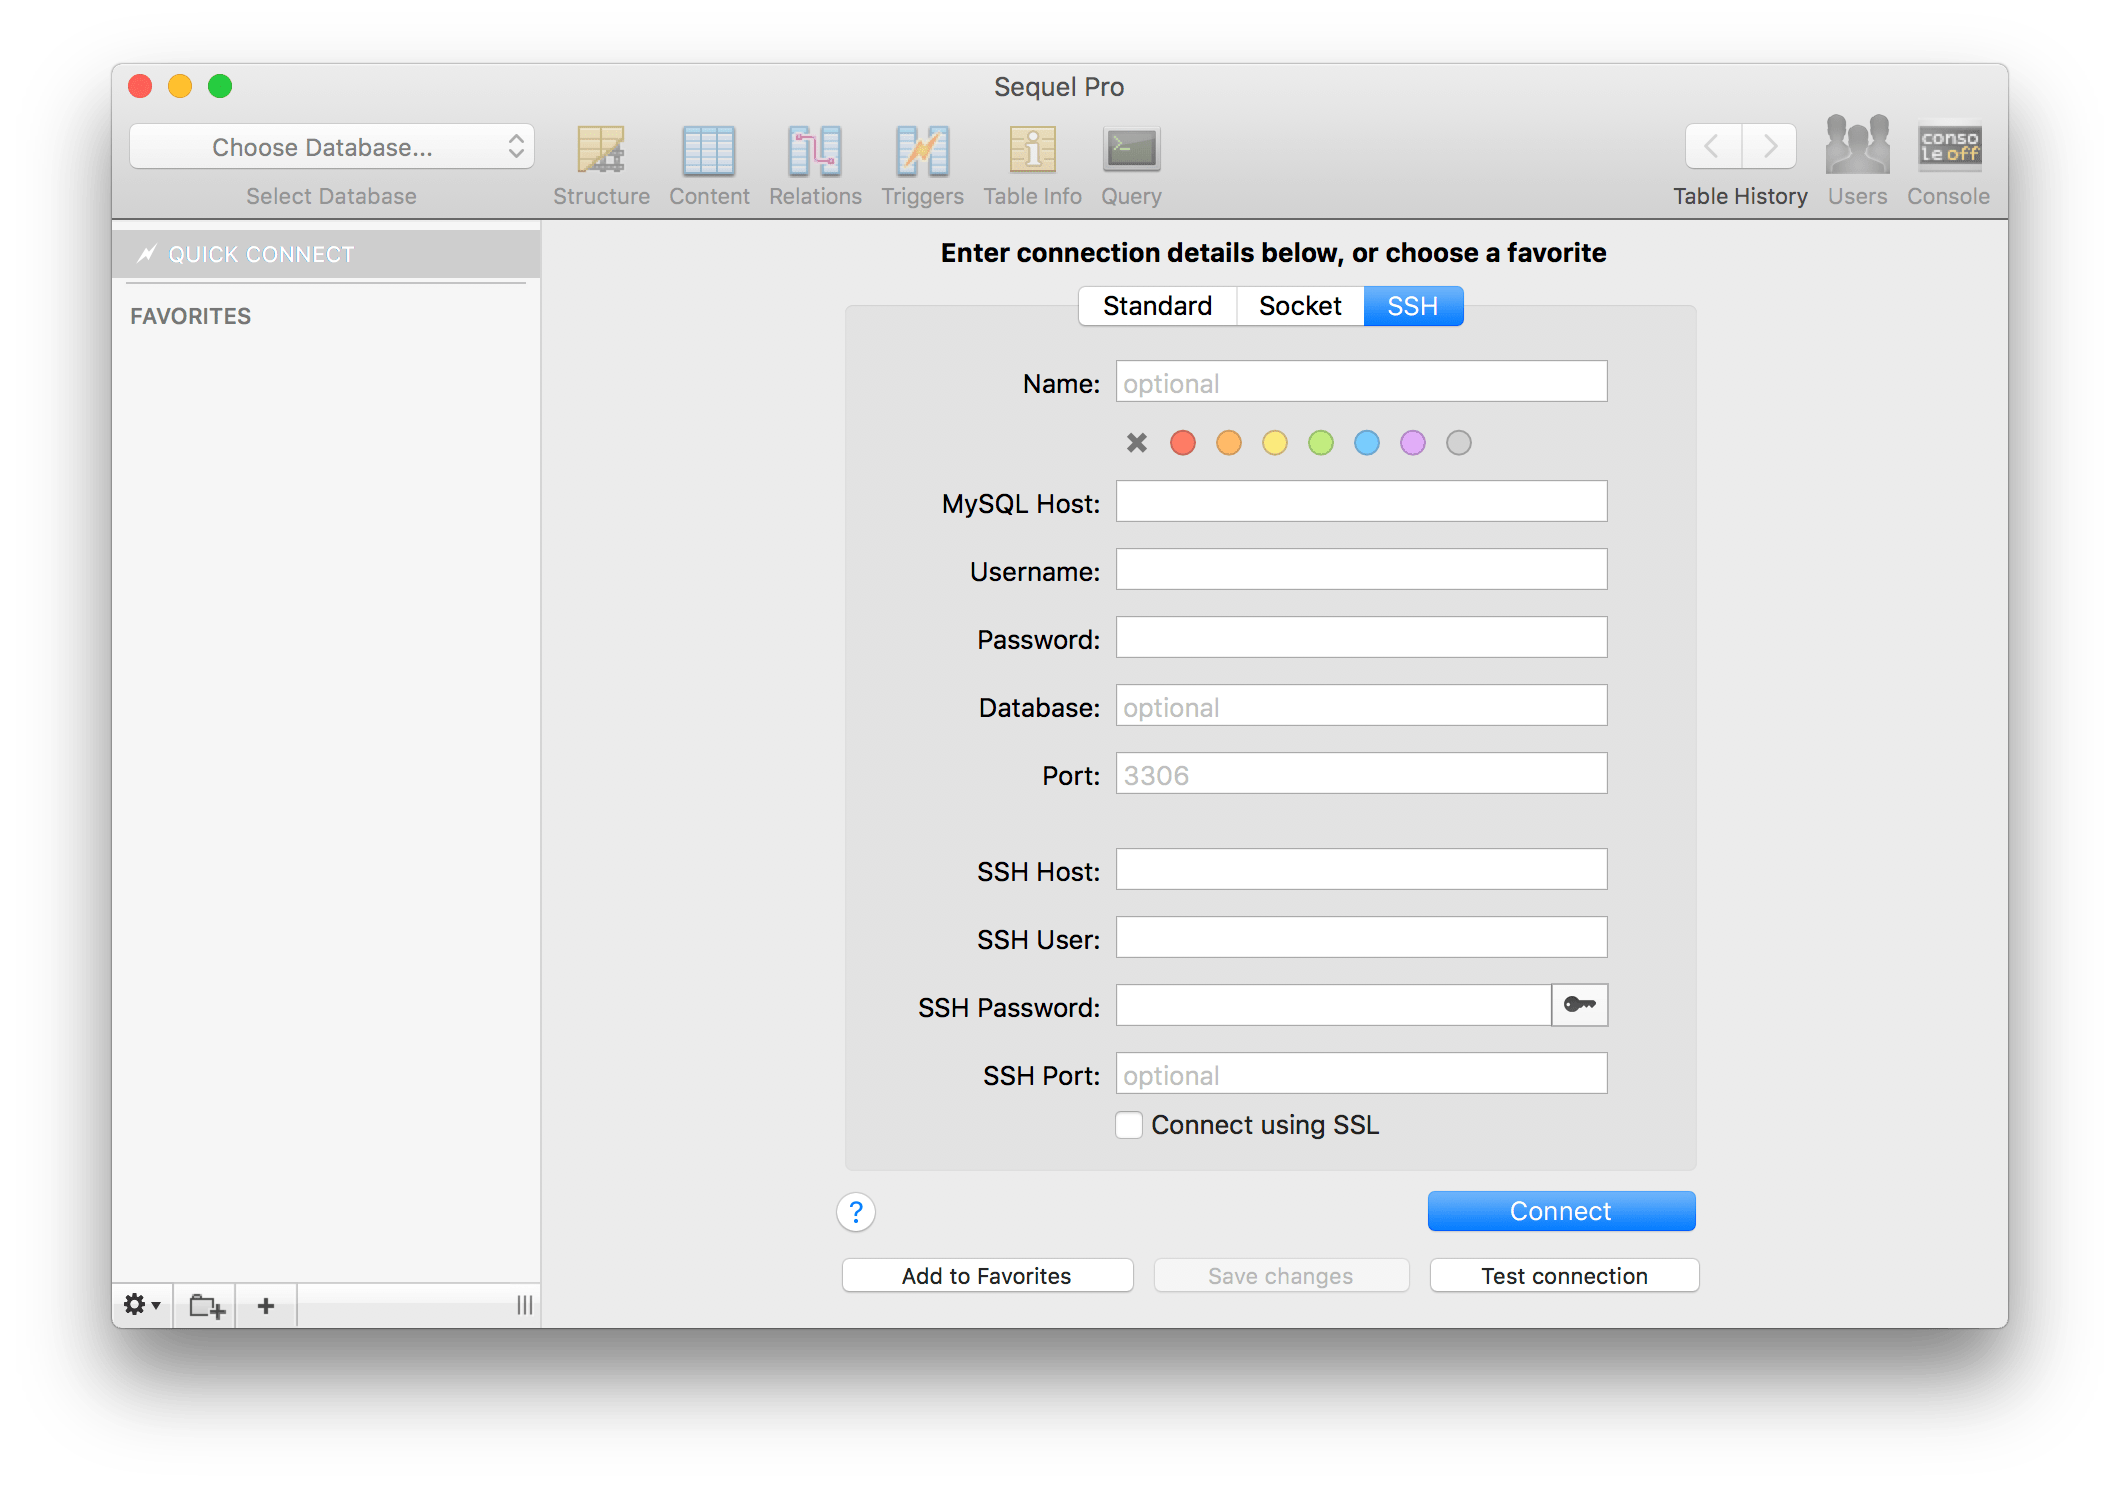
To connect to our database we will need to provide the following configuration details.
For Percona:
- MySQL Host
- Username (Database Username)
- Database (Database Name)
- Password (Database Password)
- Port Number (Optional)
- SSH Host (Server IP Address)
- SSH User (User associated with SSH Key pair)
- SSH Password/Key Location
Port Number is optional and defaults to Port 3306. As we will be connecting by SSH Port 22 we do not need to specify the port number nor open Port 3306 in the vCanopy Site Customizations Panel.
Step 2. Go to the Sites Section of the vCanopy Control Panel
Click on the sites link in the vCanopy main menu to go to the Sites management page.

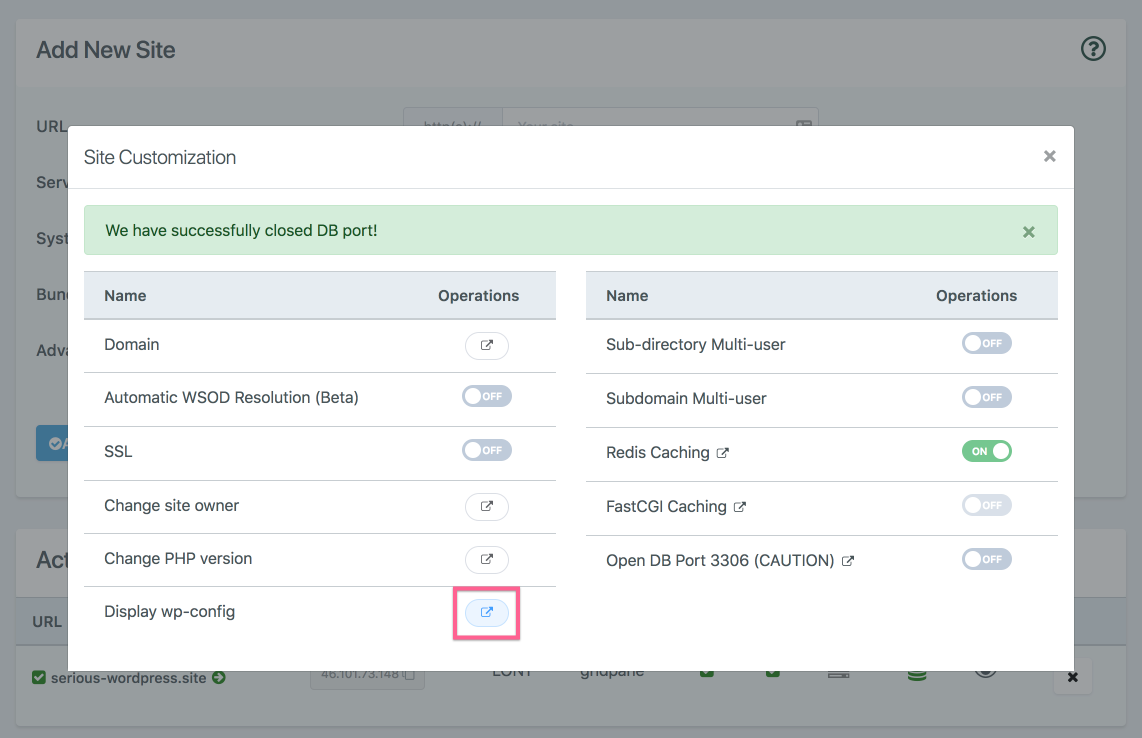
Step 3. Open the Site Customization Panel for your chosen Site
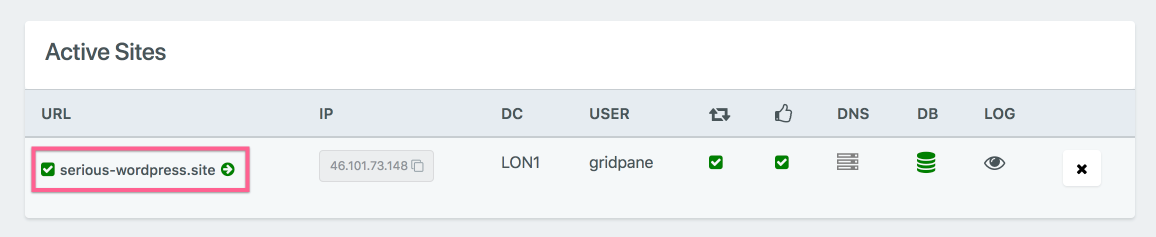
In the Active Sites panel, click on the domain in the URL column to open the Site Customization pop up box for the site for which you wish to manage the database.
Step 4. Get Database Configuration details from vCanopy
Return to vCanopy and the Site Customization panel from Step 3. above. This time locate the Display wp-config button and click it.
vCanopy will retrieve your wp-config file and display its contents in a popup modal window. You will need to make note of your WordPress site MySQL database settings.
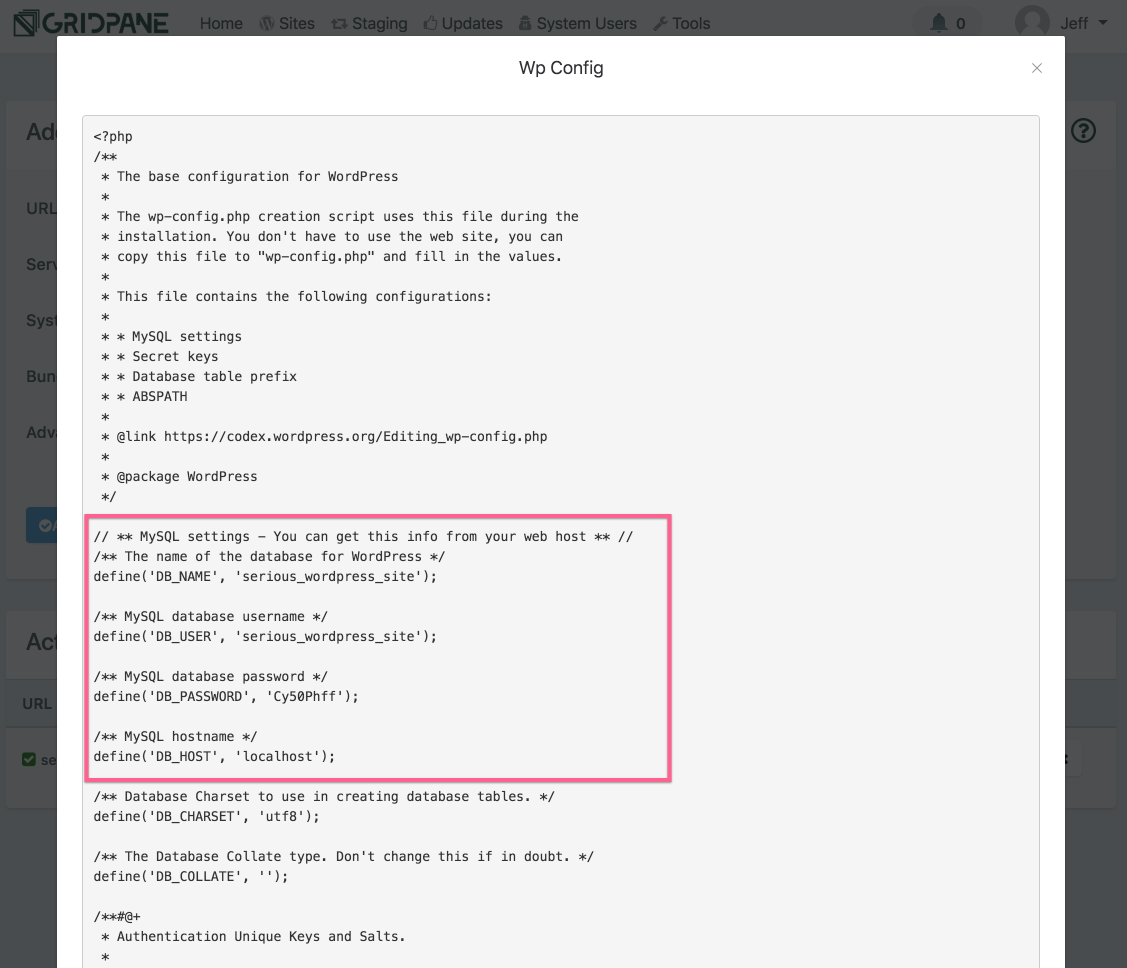
Take note of the following connection configuration details that the desktop MySQL client requires:
- DB_HOST = MySQL Host
- DB_USER = Username (Database Username)
- DB_NAME = Database (Database Name)
- DB_PASSWORD = Password (Database Password)
Note – Your DB_HOST will be set to localhost. Some DB clients require you to replace localhost with the IP 127.0.0.1
Step 5. Copy your server IP address
The desktop MySQL management client requires an SSH host to make the SSH connection, this is the IP address of the server hosting the database.
You can get the IP address by copying it from the IP column of your site in the active site’s panel: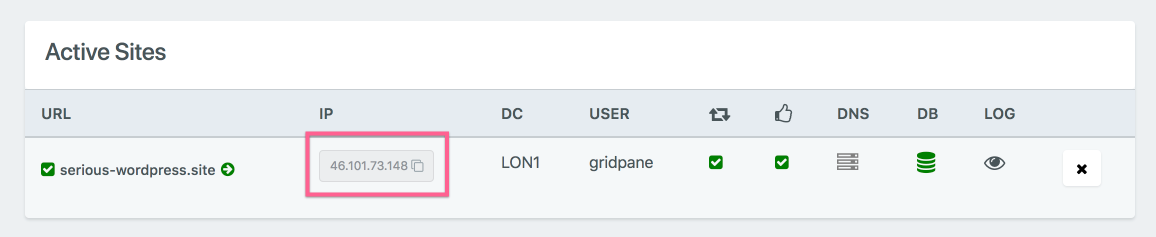
Alternatively, if you click on the copy button beside the IP address it will be automatically copied to your computer’s clipboard.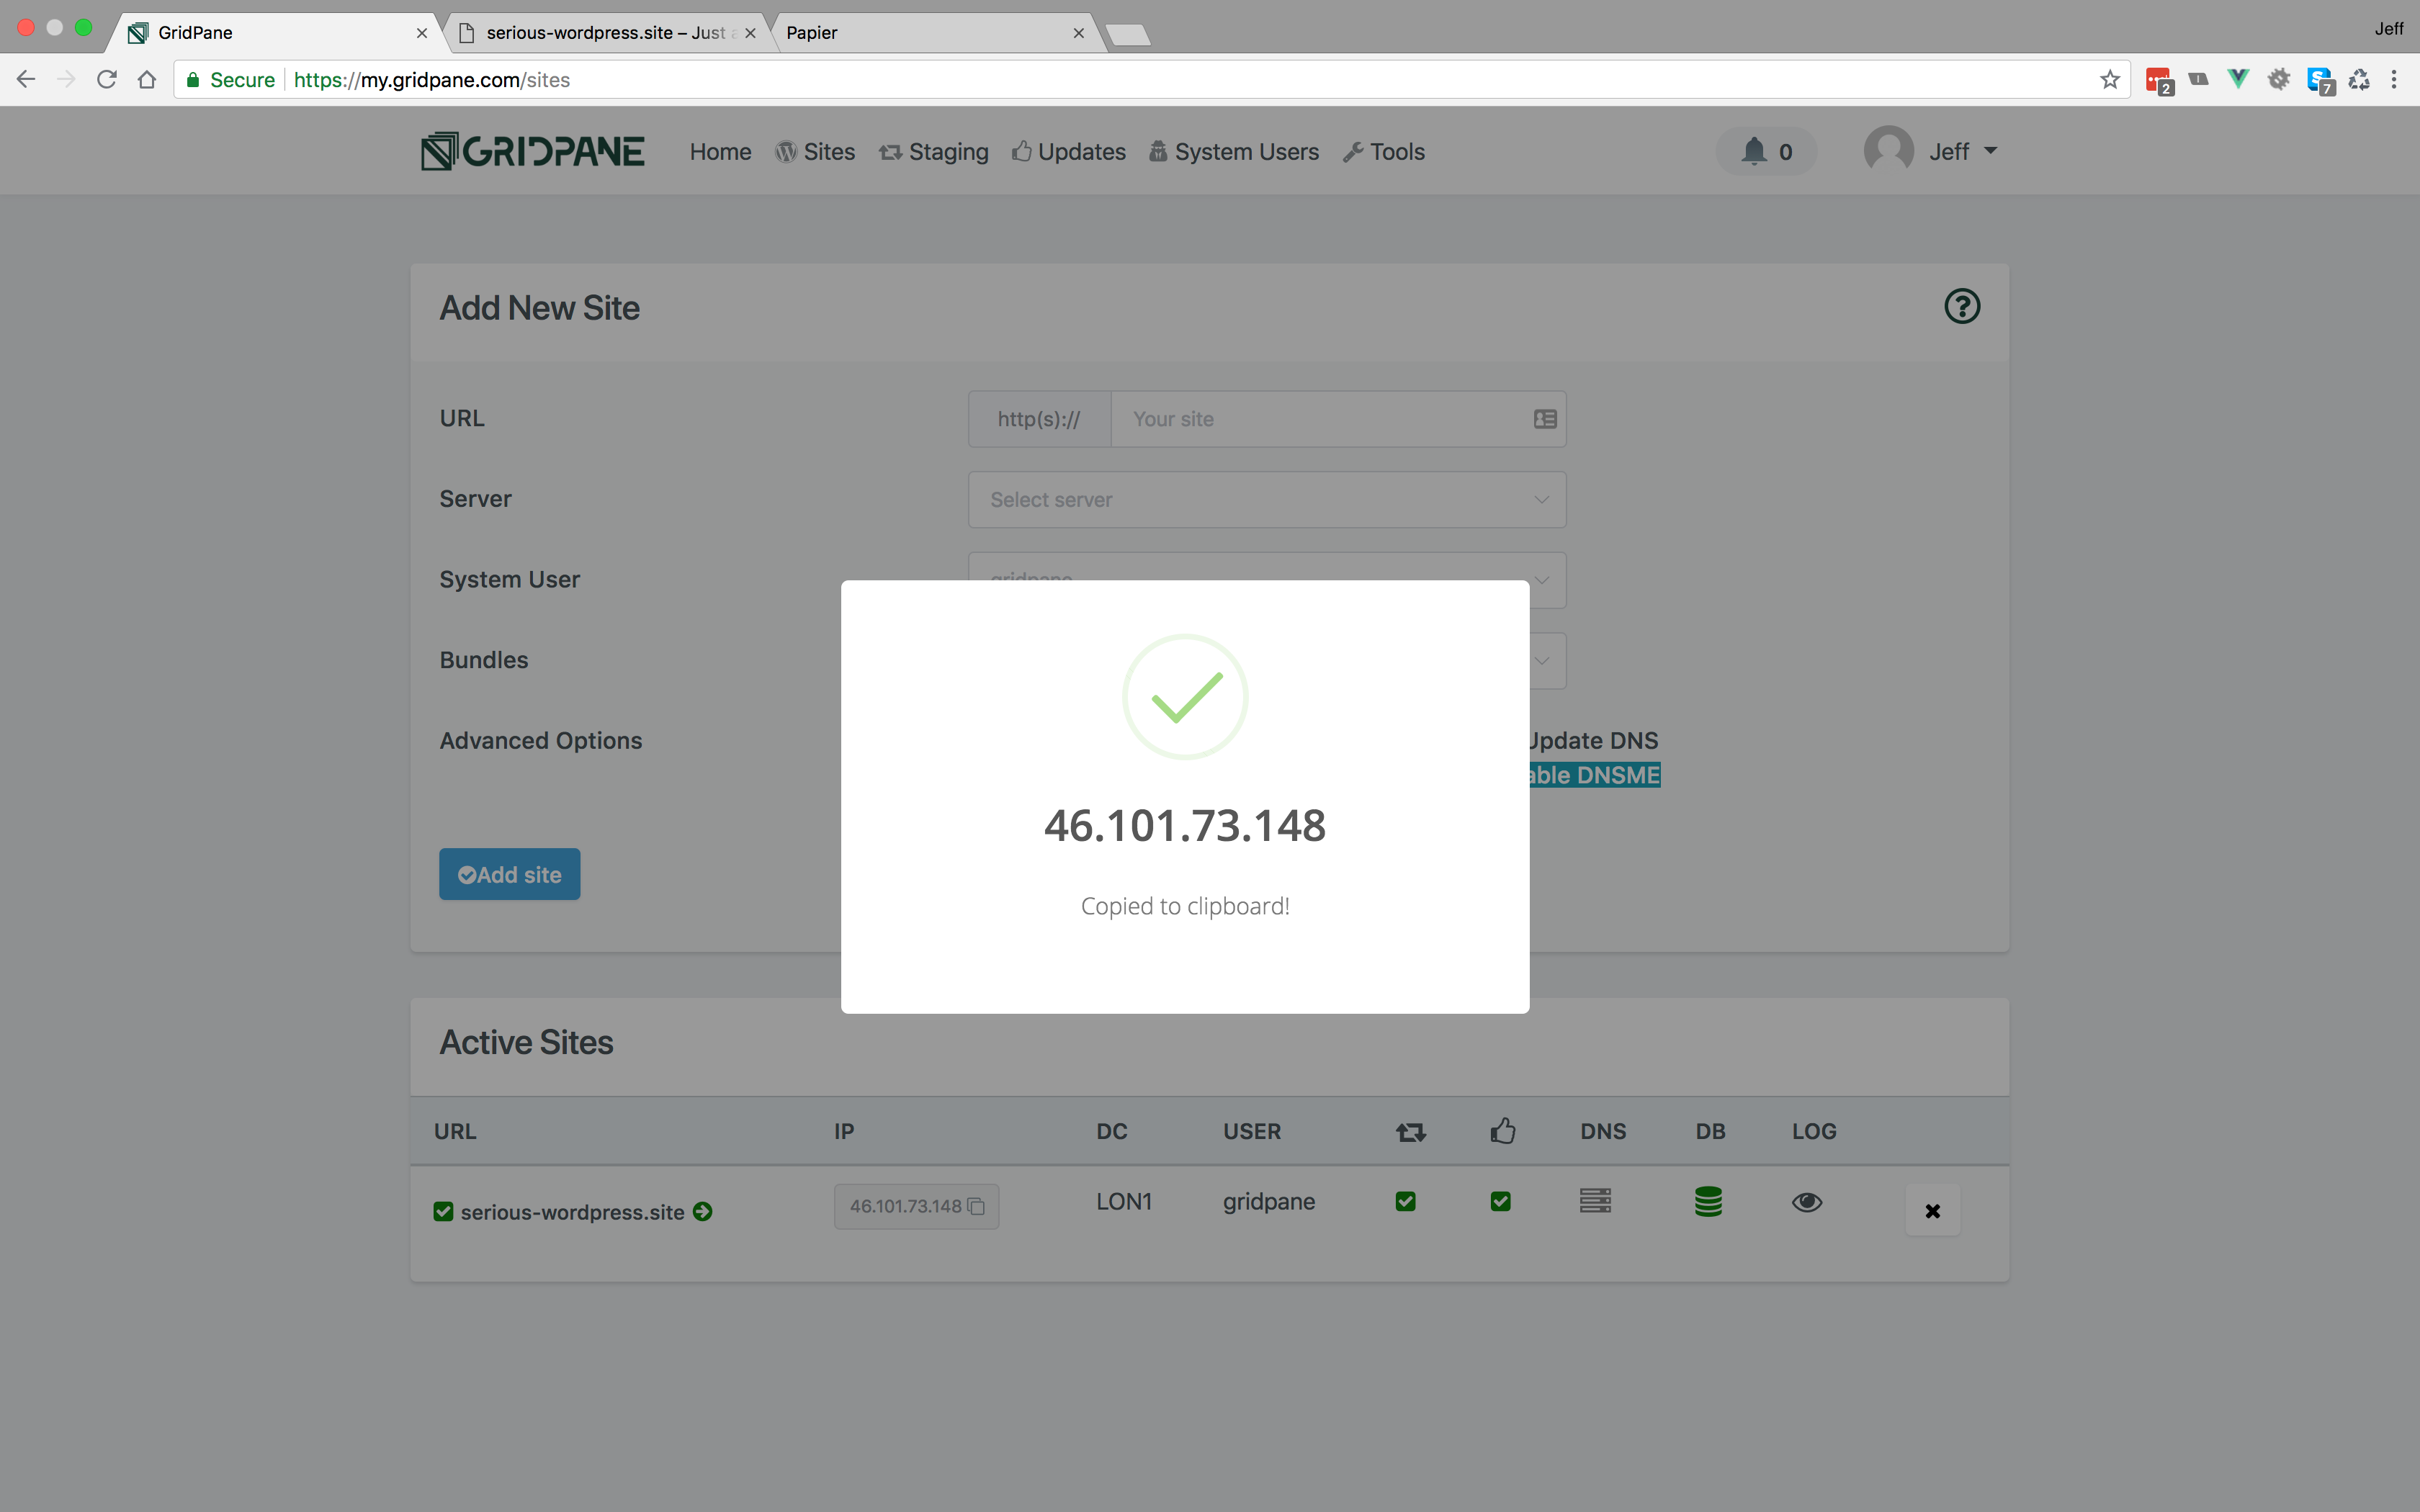
Step 6. Configure your Desktop Client and Connect
Configure your client using the details you have taken note of in Step 5. and Step 6. above. For SSH User on Percona, enter root.
For MariaDB, you will need to choose “Socket” and the enter the socket path: /run/mysqld/mysqld.sock.
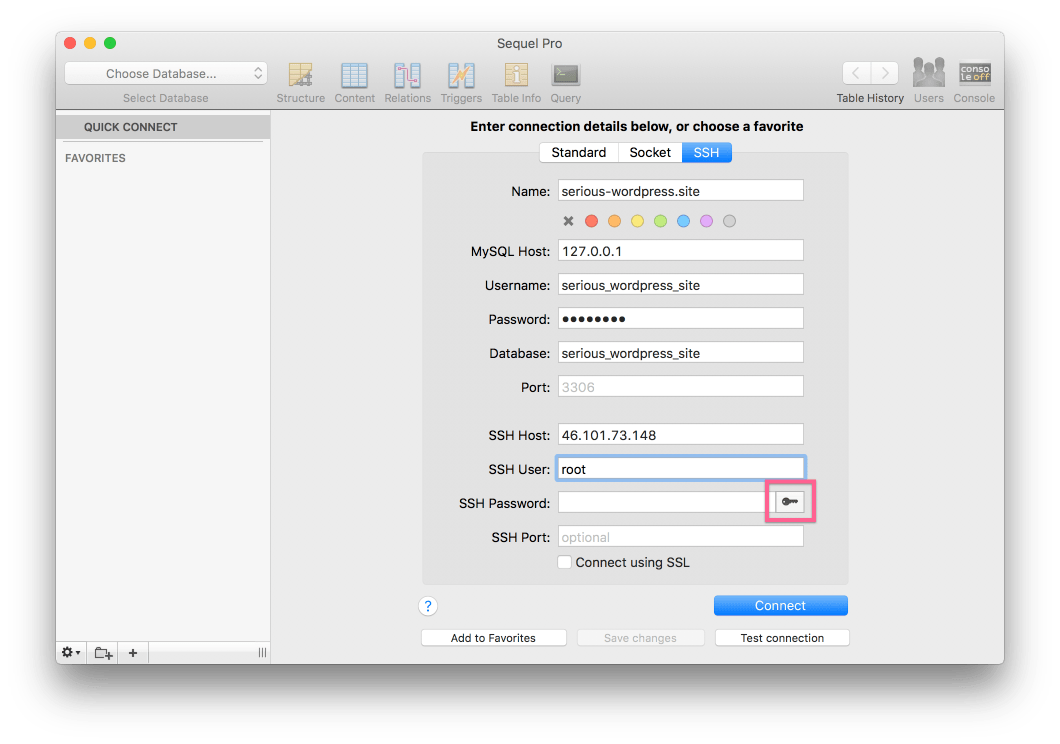
Most Clients will allow you to connect by SSH using either a key pair or password. vCanopy will only allow SSH root connections with the more secure key pair method.
Depending on your client there will be an option to browse to locate your machine’s private SSH key. In Sequel pro, it means clicking on the little key icon next to the SSH Password box.
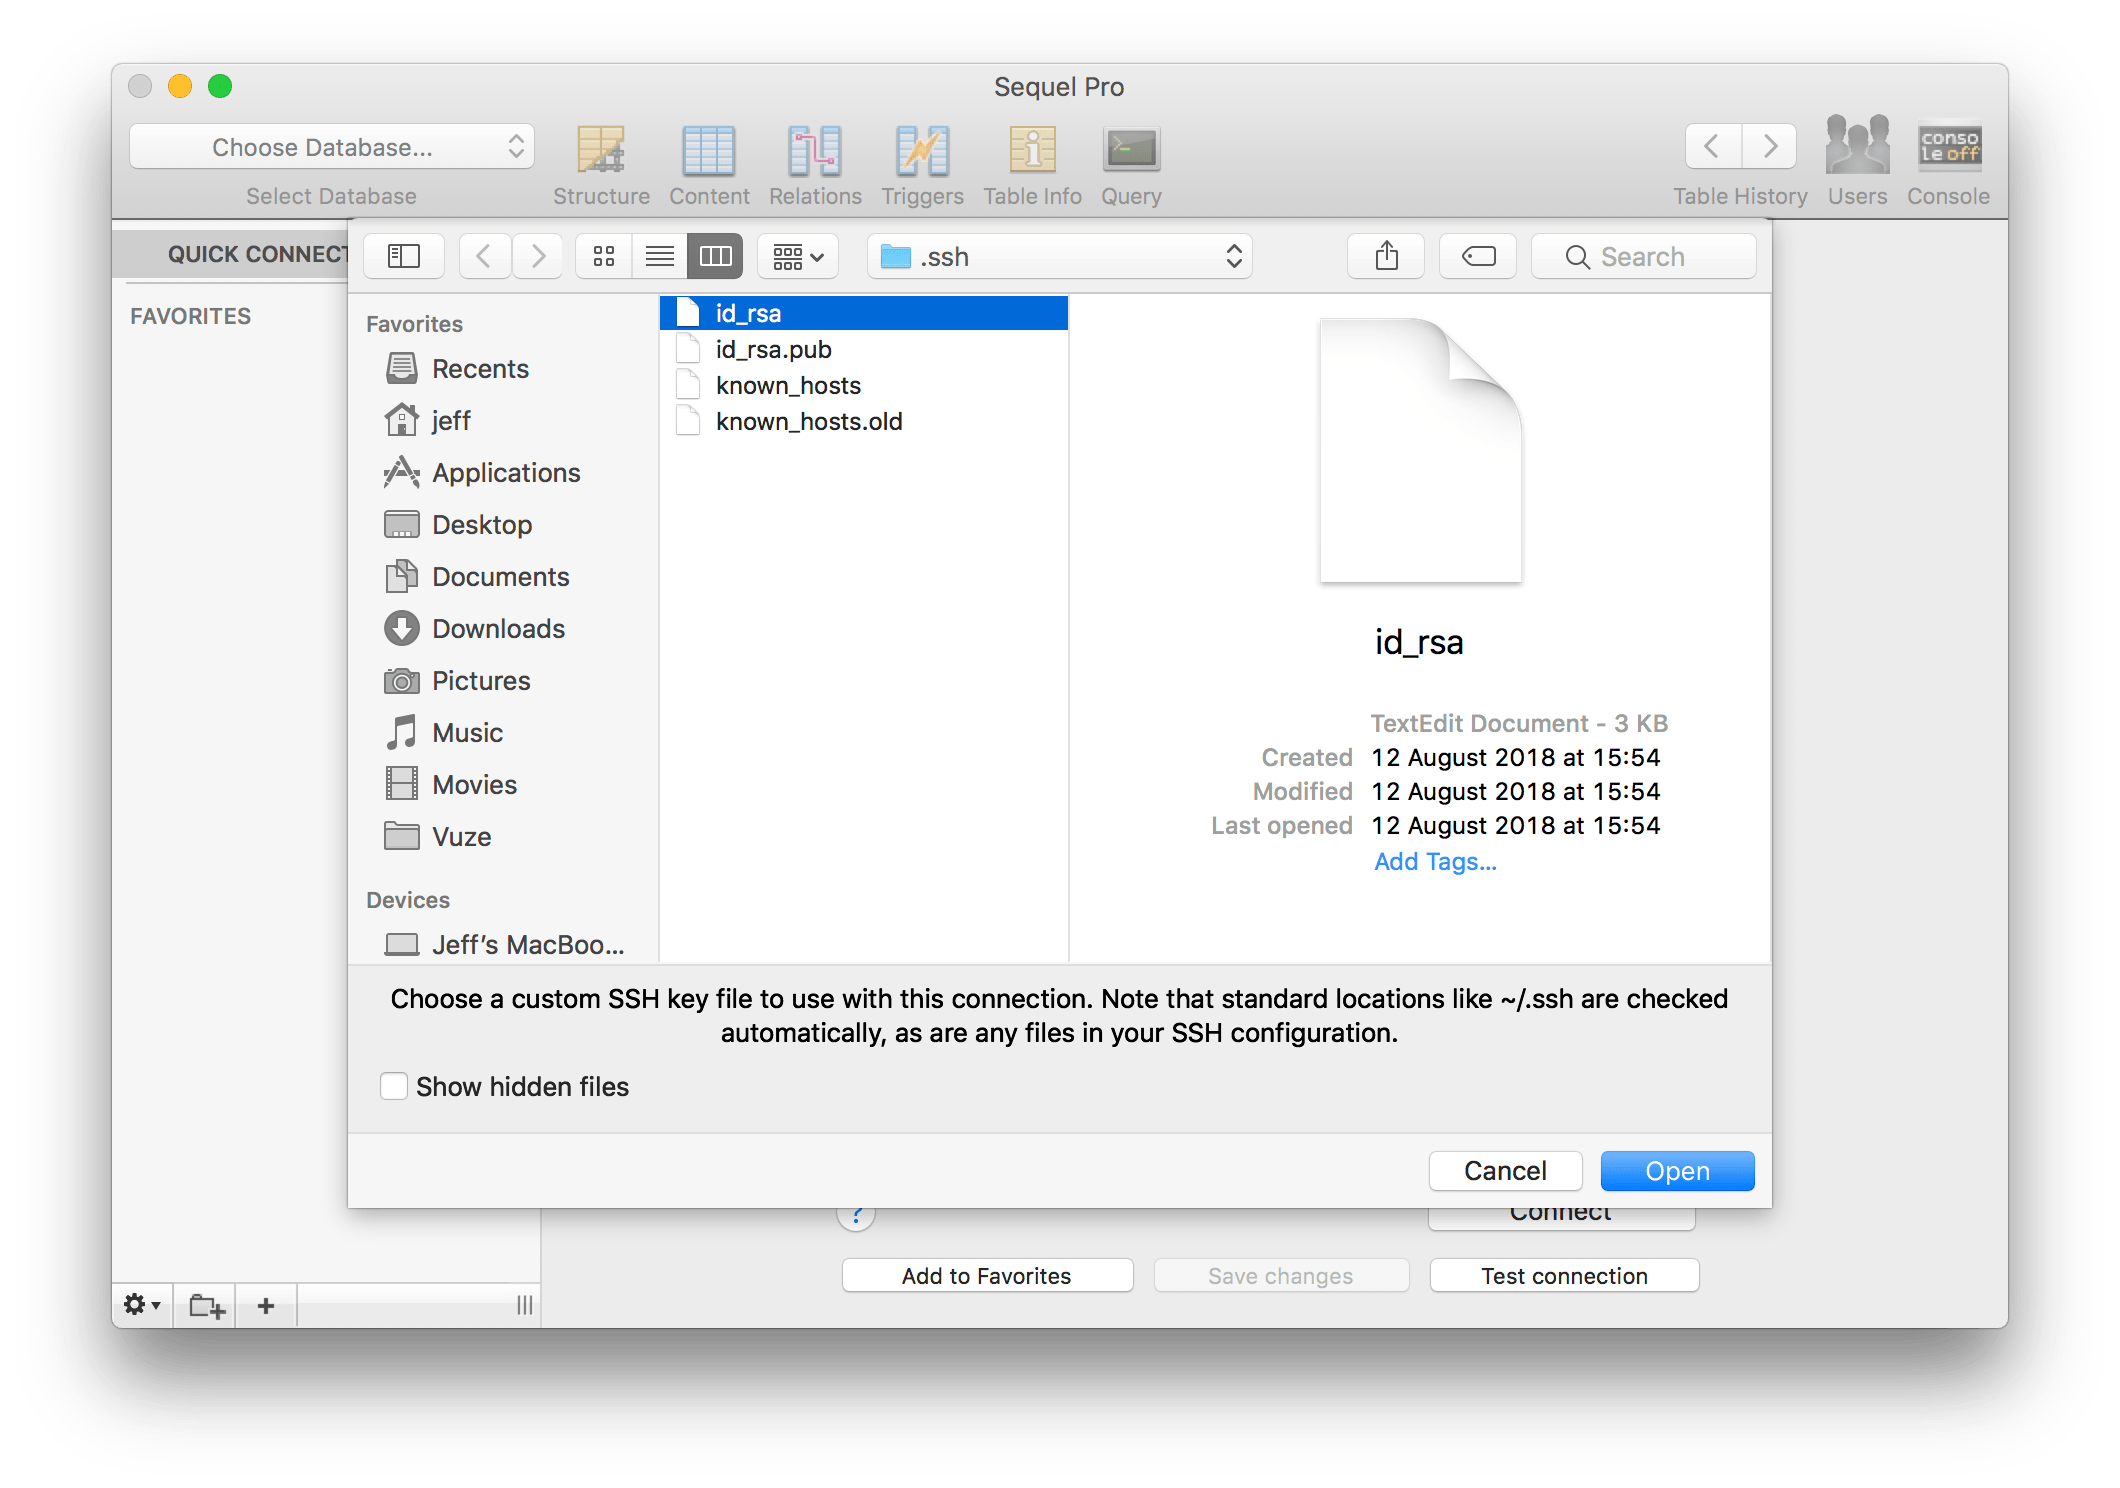
A pop-up window will appear and allow you to browse your system to the directory containing your SSH Key pair.
Remember, your server has the public id_rsa.pub key so you need to select your private id_rsa key from your SSH Key Pair.
Your key location should appear in your client’s SSH Key input field. In Sequel Pro the SSH Password field has been replaced with a completed input field showing the location of my private key.
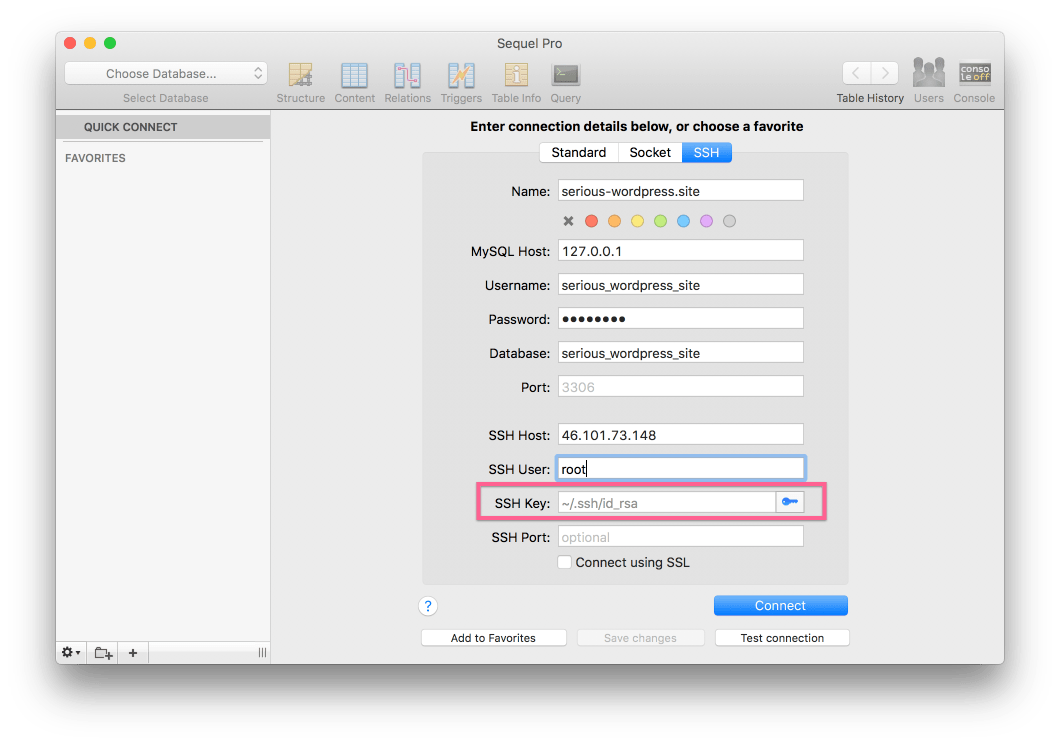
With the connection configurations completed, you can now click connect.
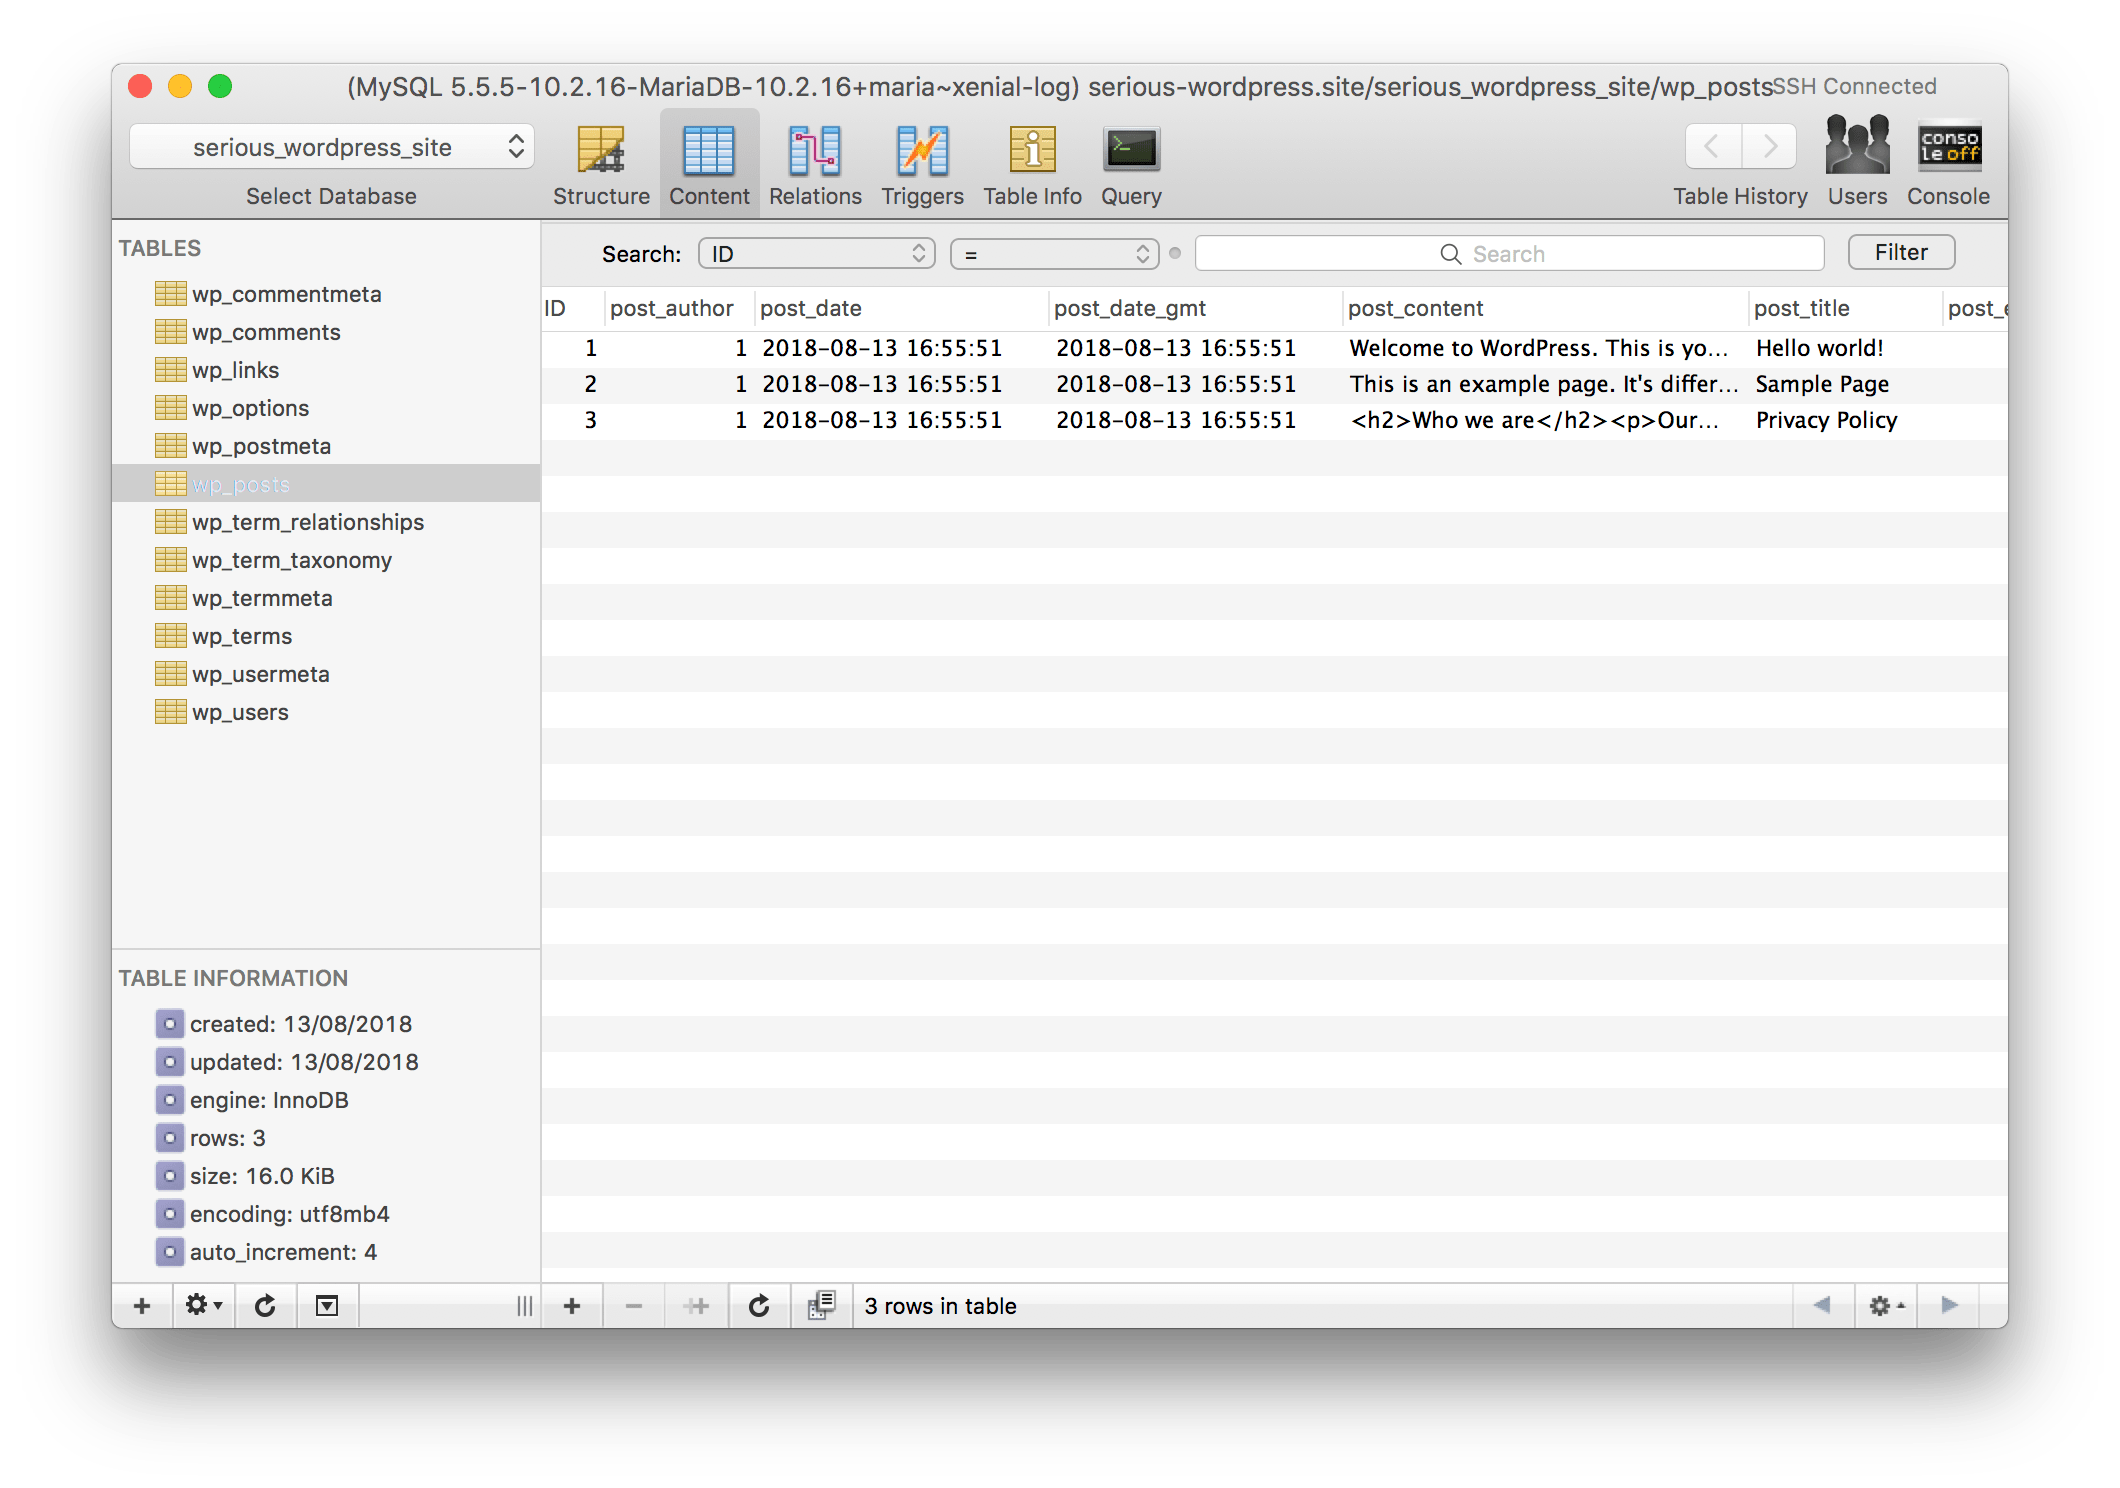
Your MySQL client will connect to your database, and you can manage your WordPress database securely, and with ease, using the tools and features provided.