Verdant TCS

Cloning a site with the same URL to a different server

4 min read

UPDATE: MULTISITE CLONING AND IMPROVEMENTS

Same-domain multisite cloning is now fully operational. We've also made improvements to our cloning scripts, and replaced WP-CLI Search Replace with Interconnectit Search Replace, and MySQLDump and import with MyDumper/MyLoader. Multisite staging/cloning to a new domain is coming soon!
*Developer plan and above only

Introduction

There may be times when you need to clone a site from one server to another. vCanopy makes this process simple and you can use the vCanopy single site migration/cloning tool located in the site configuration mode > backups tab.

This article is for cloning a duplicate site with the same URL to a different server, but you can also: –

  1. Clone a site to a new URL on a different server
  2. Clone a site to a new URL on the same server

Cloning a site with the same URL to a different server 

Our cloning tool will replicate a near-identical state for the cloned site. The duplicate site will belong to the same owner if that user exists on the server, and it will match all the main control panel settings including:

  • WordPress Core
  • WordPress Database structure
  • SSL
  • System User (this will be created if it doesn’t already exist)
  • PHP version and settings
  • All General customizer settings including caching
  • All Security customizer settings
  • SMTP
  • Routing (www or none/root)

We will also duplicate your site-specific PHP in settings and PHP process manager settings that GP-CLI manages, alongside the GP-CLI adjusted site-specific Nginx settings and any includes in your site level Nginx directory.

There’s 2 things that don’t currently transfer over when cloning. These are: –

  • HTTP Auth
  • AutoSSL

IMPORTANT: DEACTIVATE WP_DEBUG FIRST

If you've had WP_DEBUG active, be sure to deactivate it before you proceed as it may cause a fatal error on the destination site.

Step 0. Disk Space Preparation

For your clone to begin, our systems require that your destination server has at least 110% of the origin site in free disk space, but you ensure you have ample free disk space before you proceed.

Step 1. Navigate to your Sites page

Click on the Sites link in the vCanopy main menu to go to the Sites management page.

Step 2. Open the site customizer

Click on the URL of the site you want to clone a duplicate of in the active site’s panel.

This will open the site customizer.

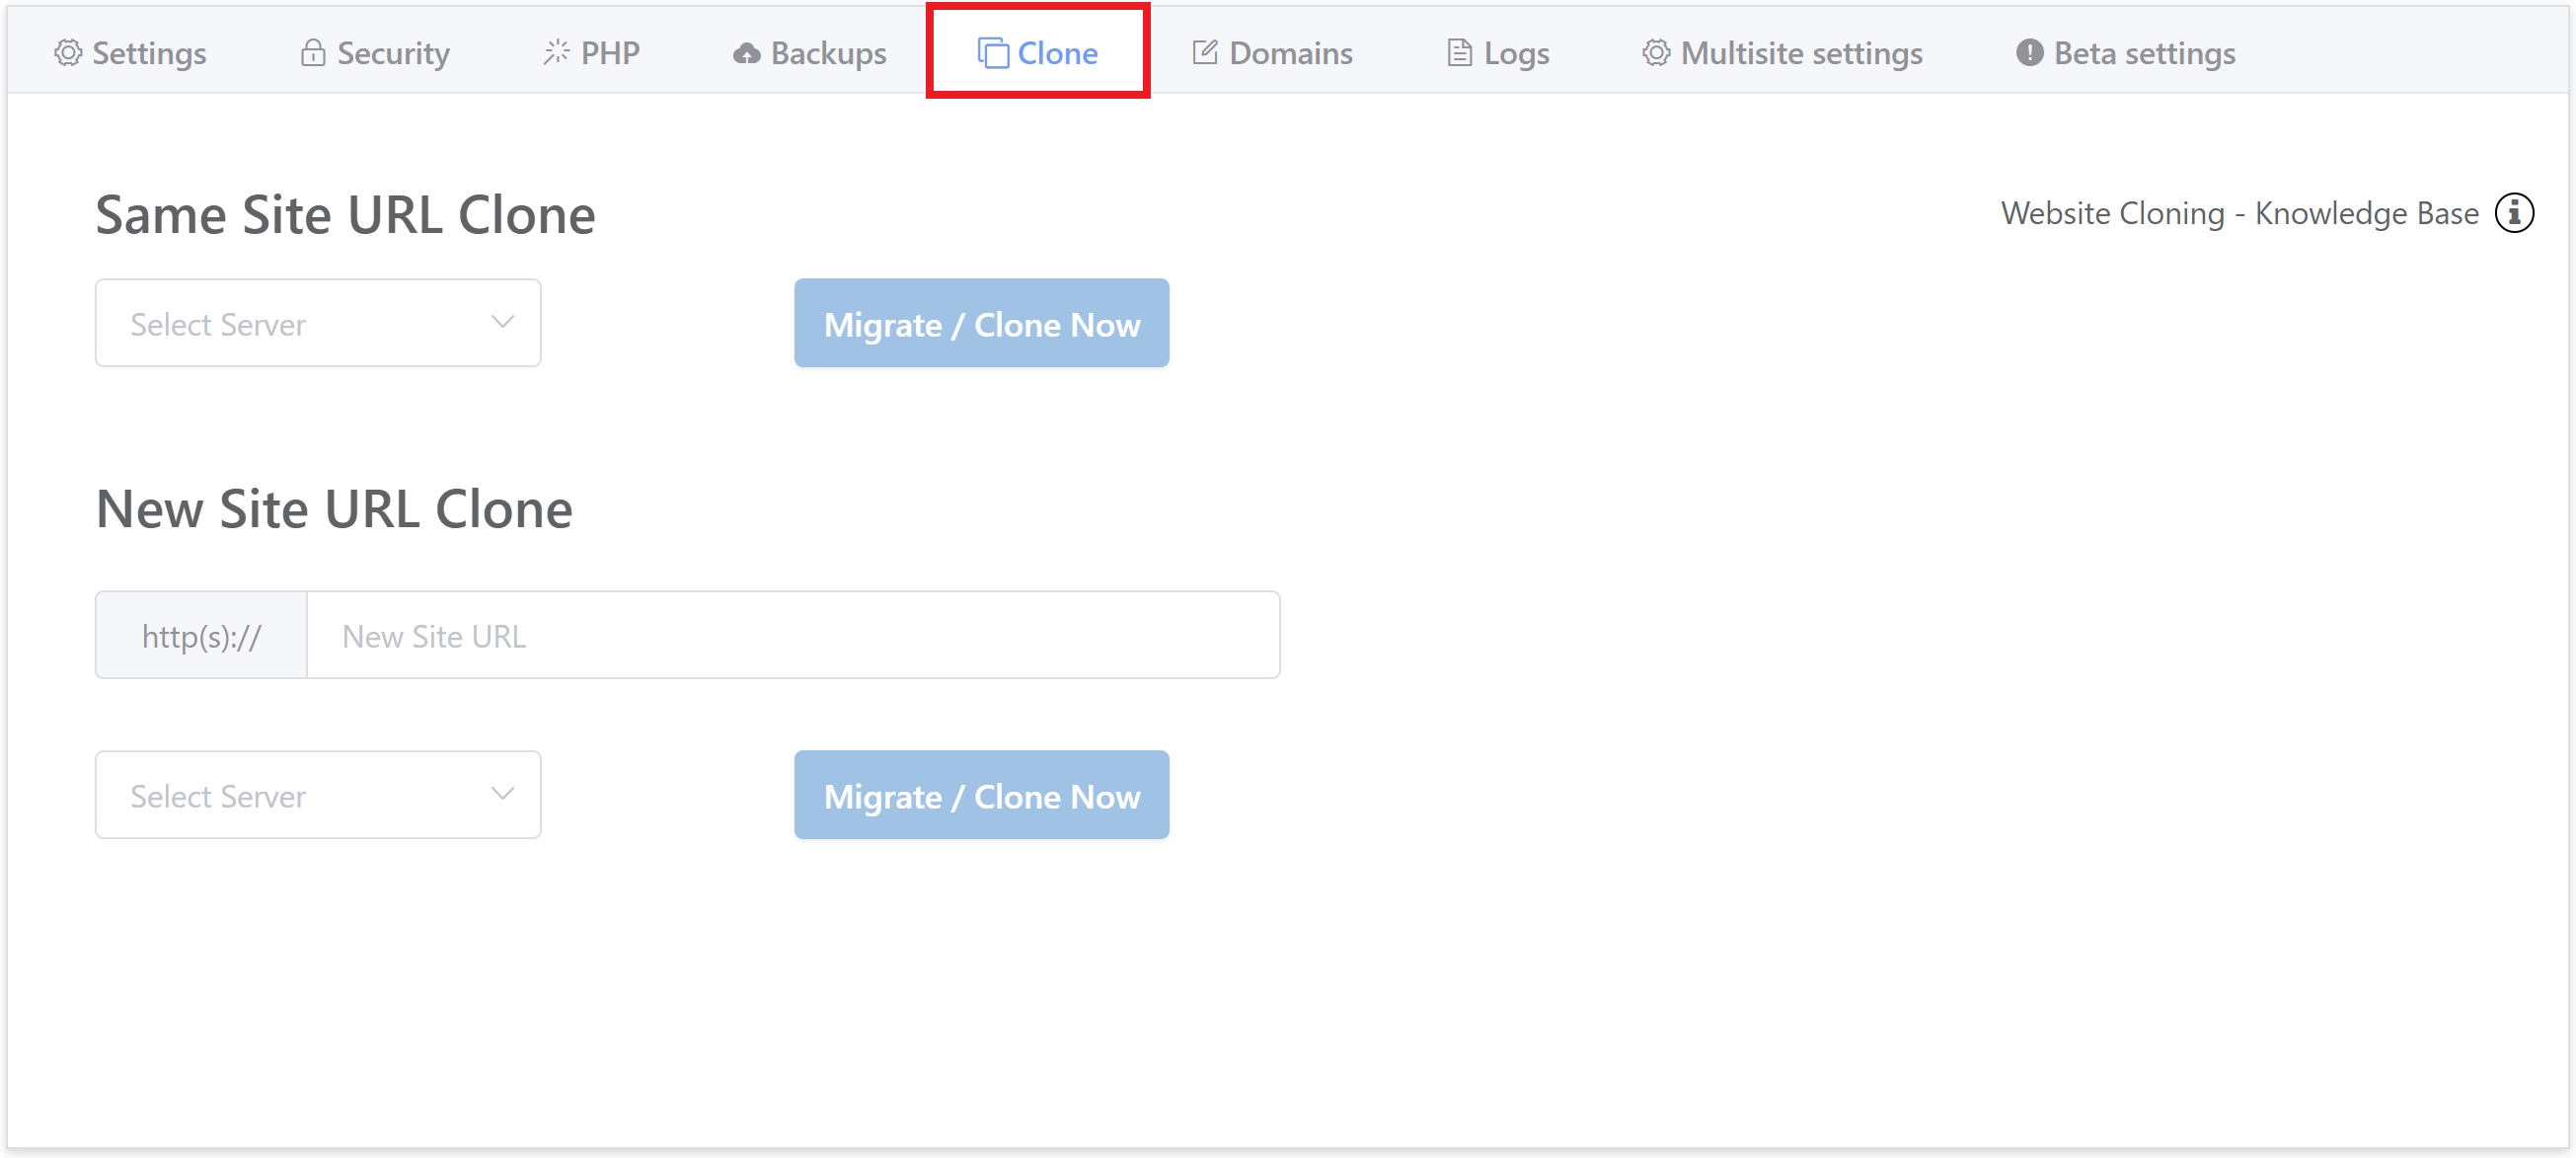
Step 3. Open the Migrate/Clone tab

Click through to the Clone tab in the site customizer. Here you will find the Migrate/Clone tools:

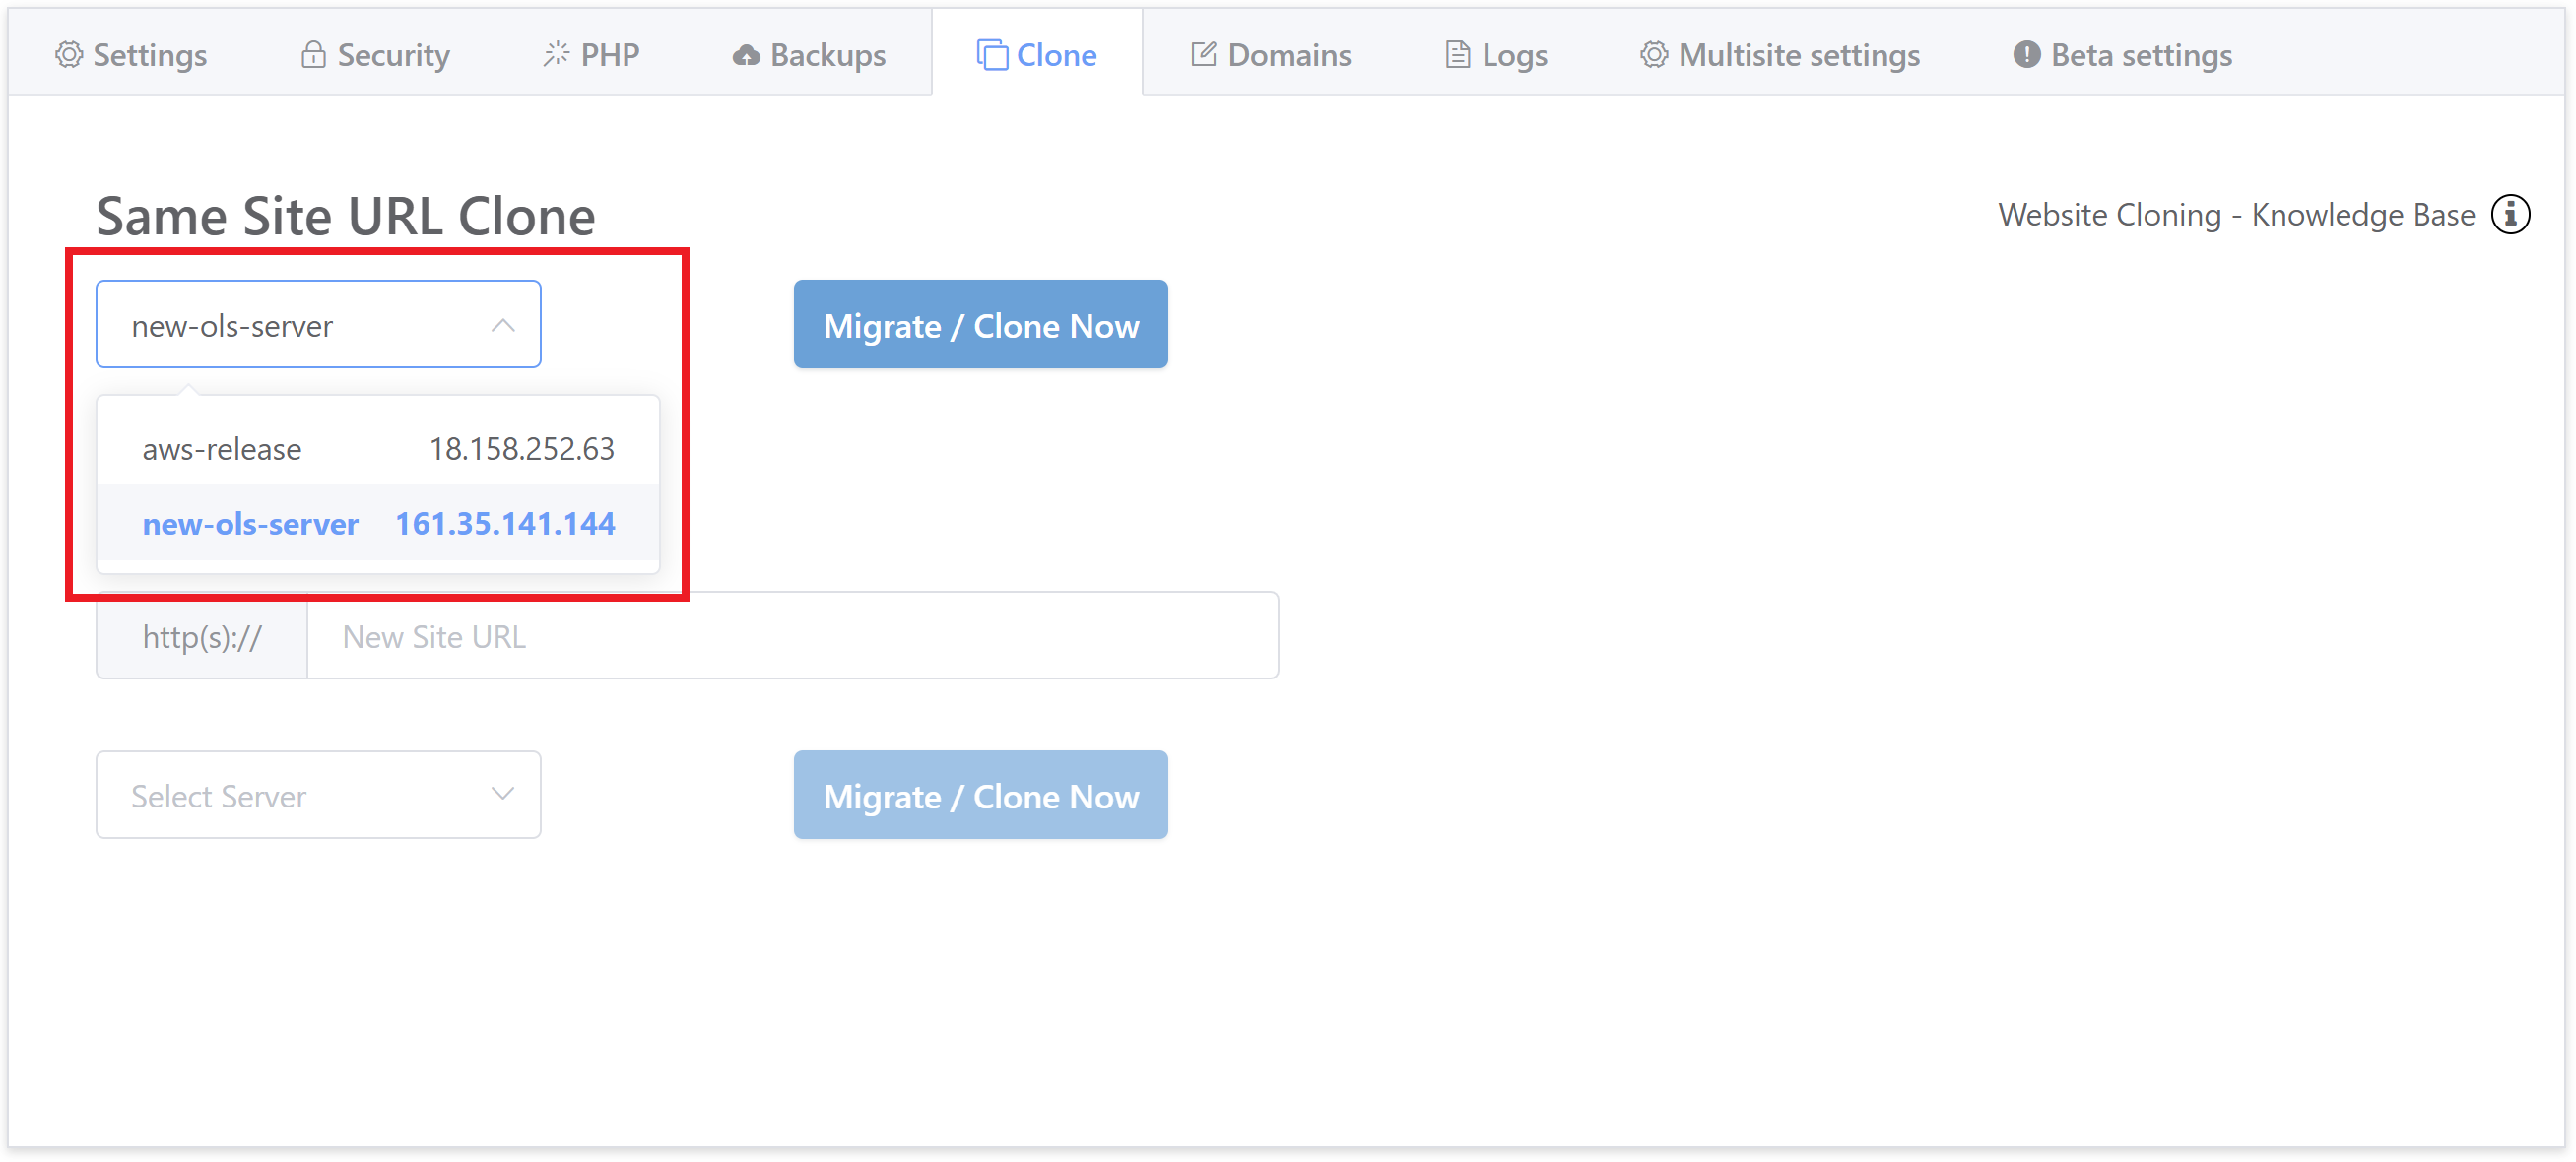
Step 4. Click Migrate/Clone Now

Here we’ll make use of the first of the two options.

Simply select the new server from the dropdown list as pictured below:

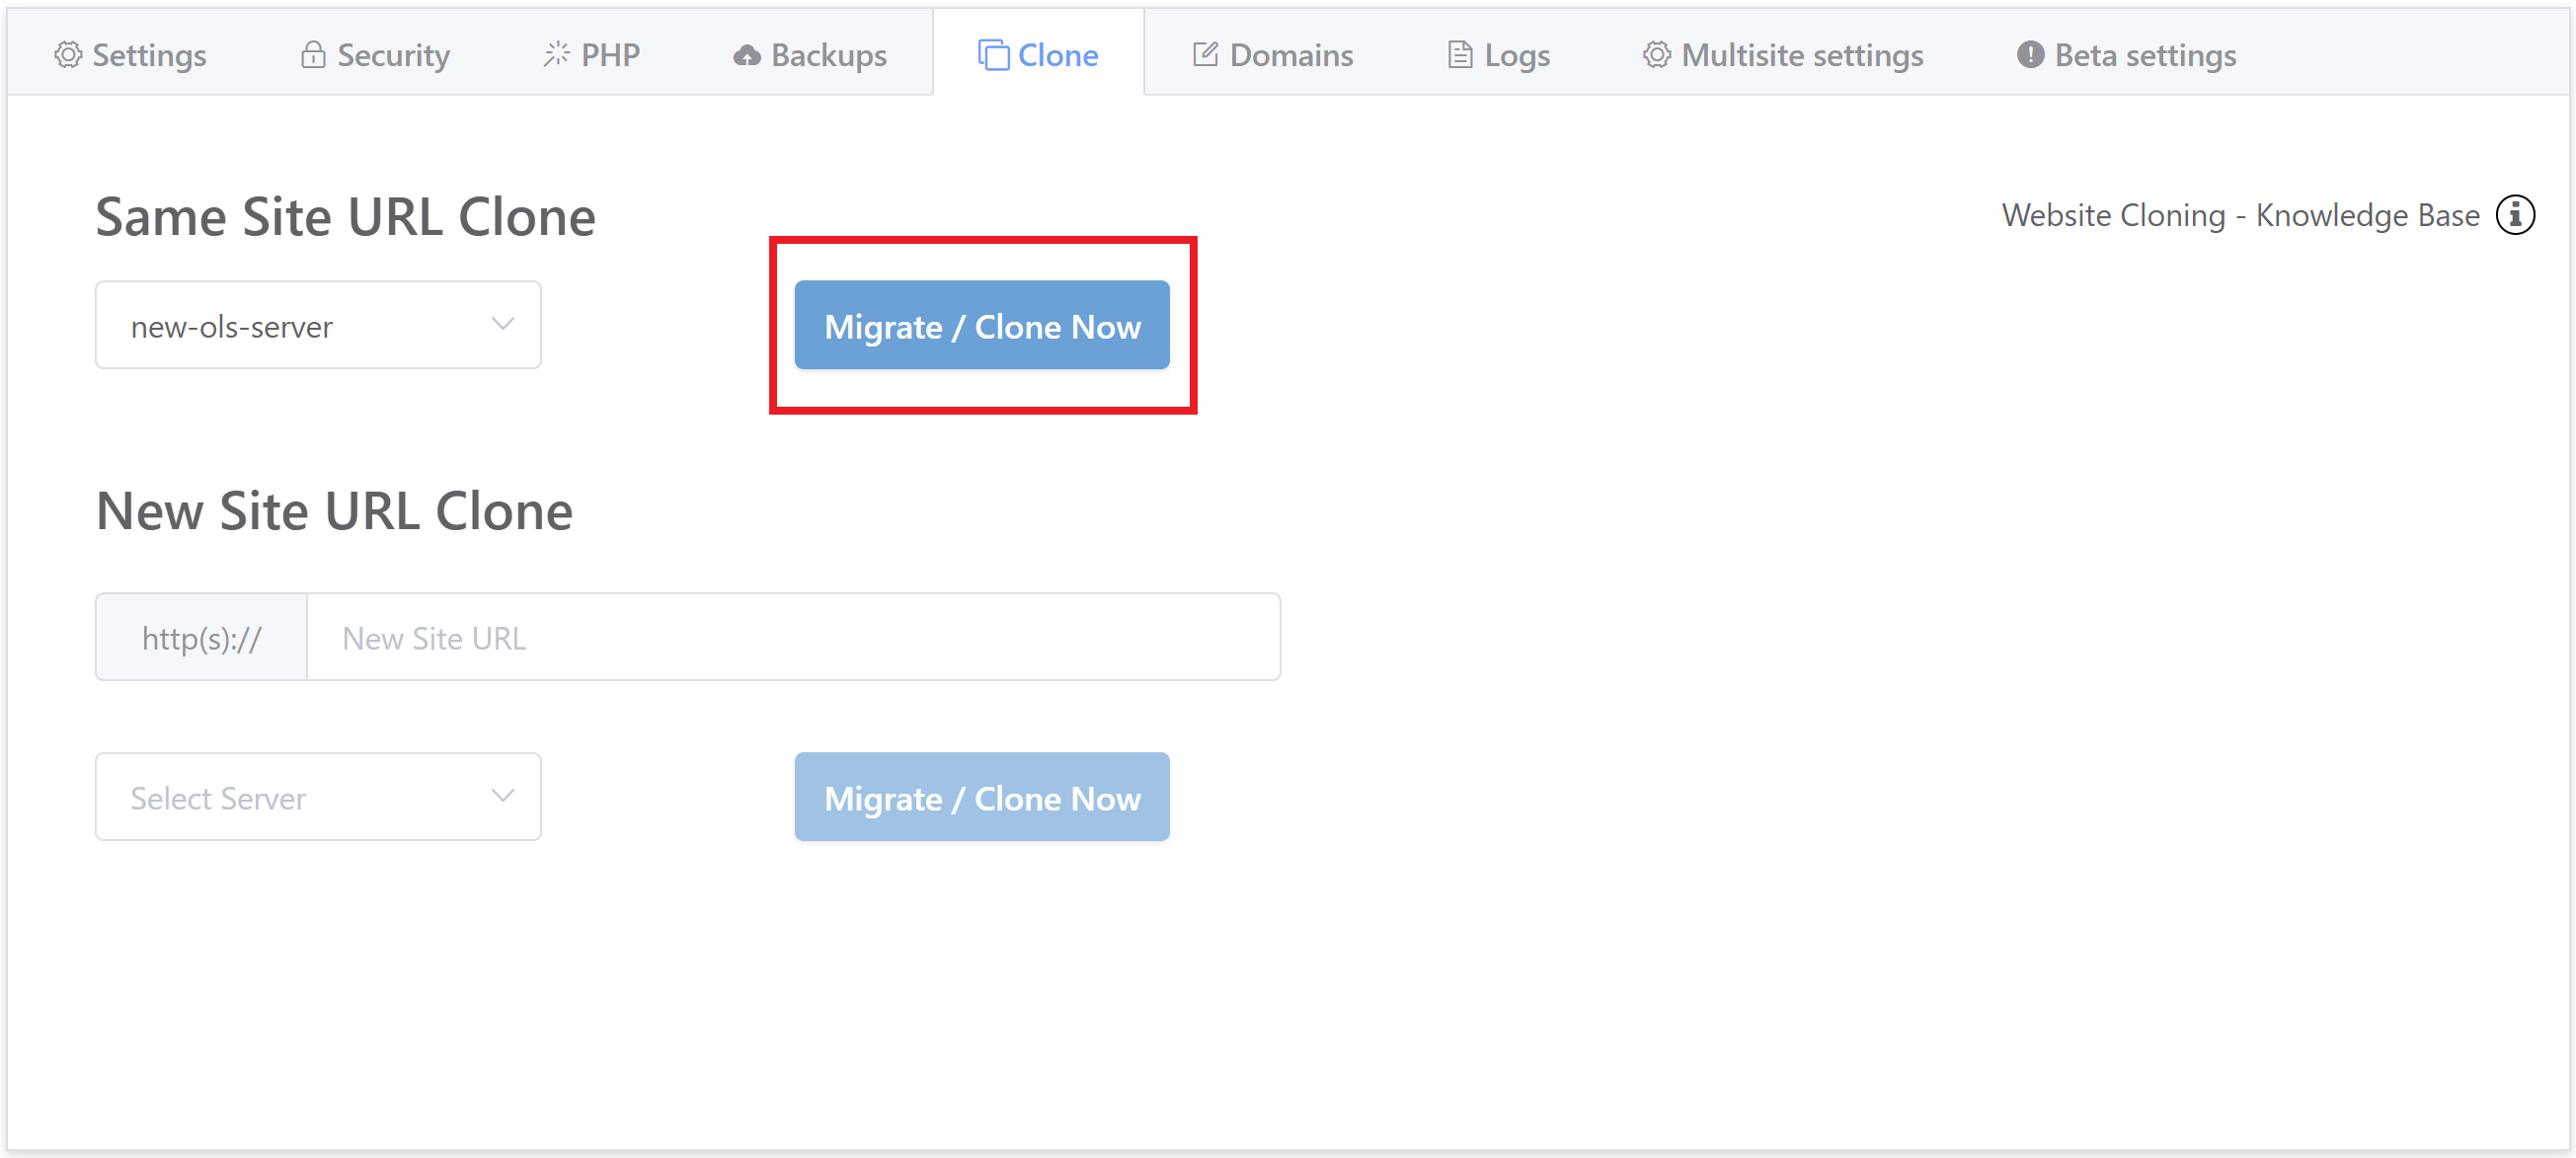
Then click the Migrate / Clone Now button to start the cloning process.

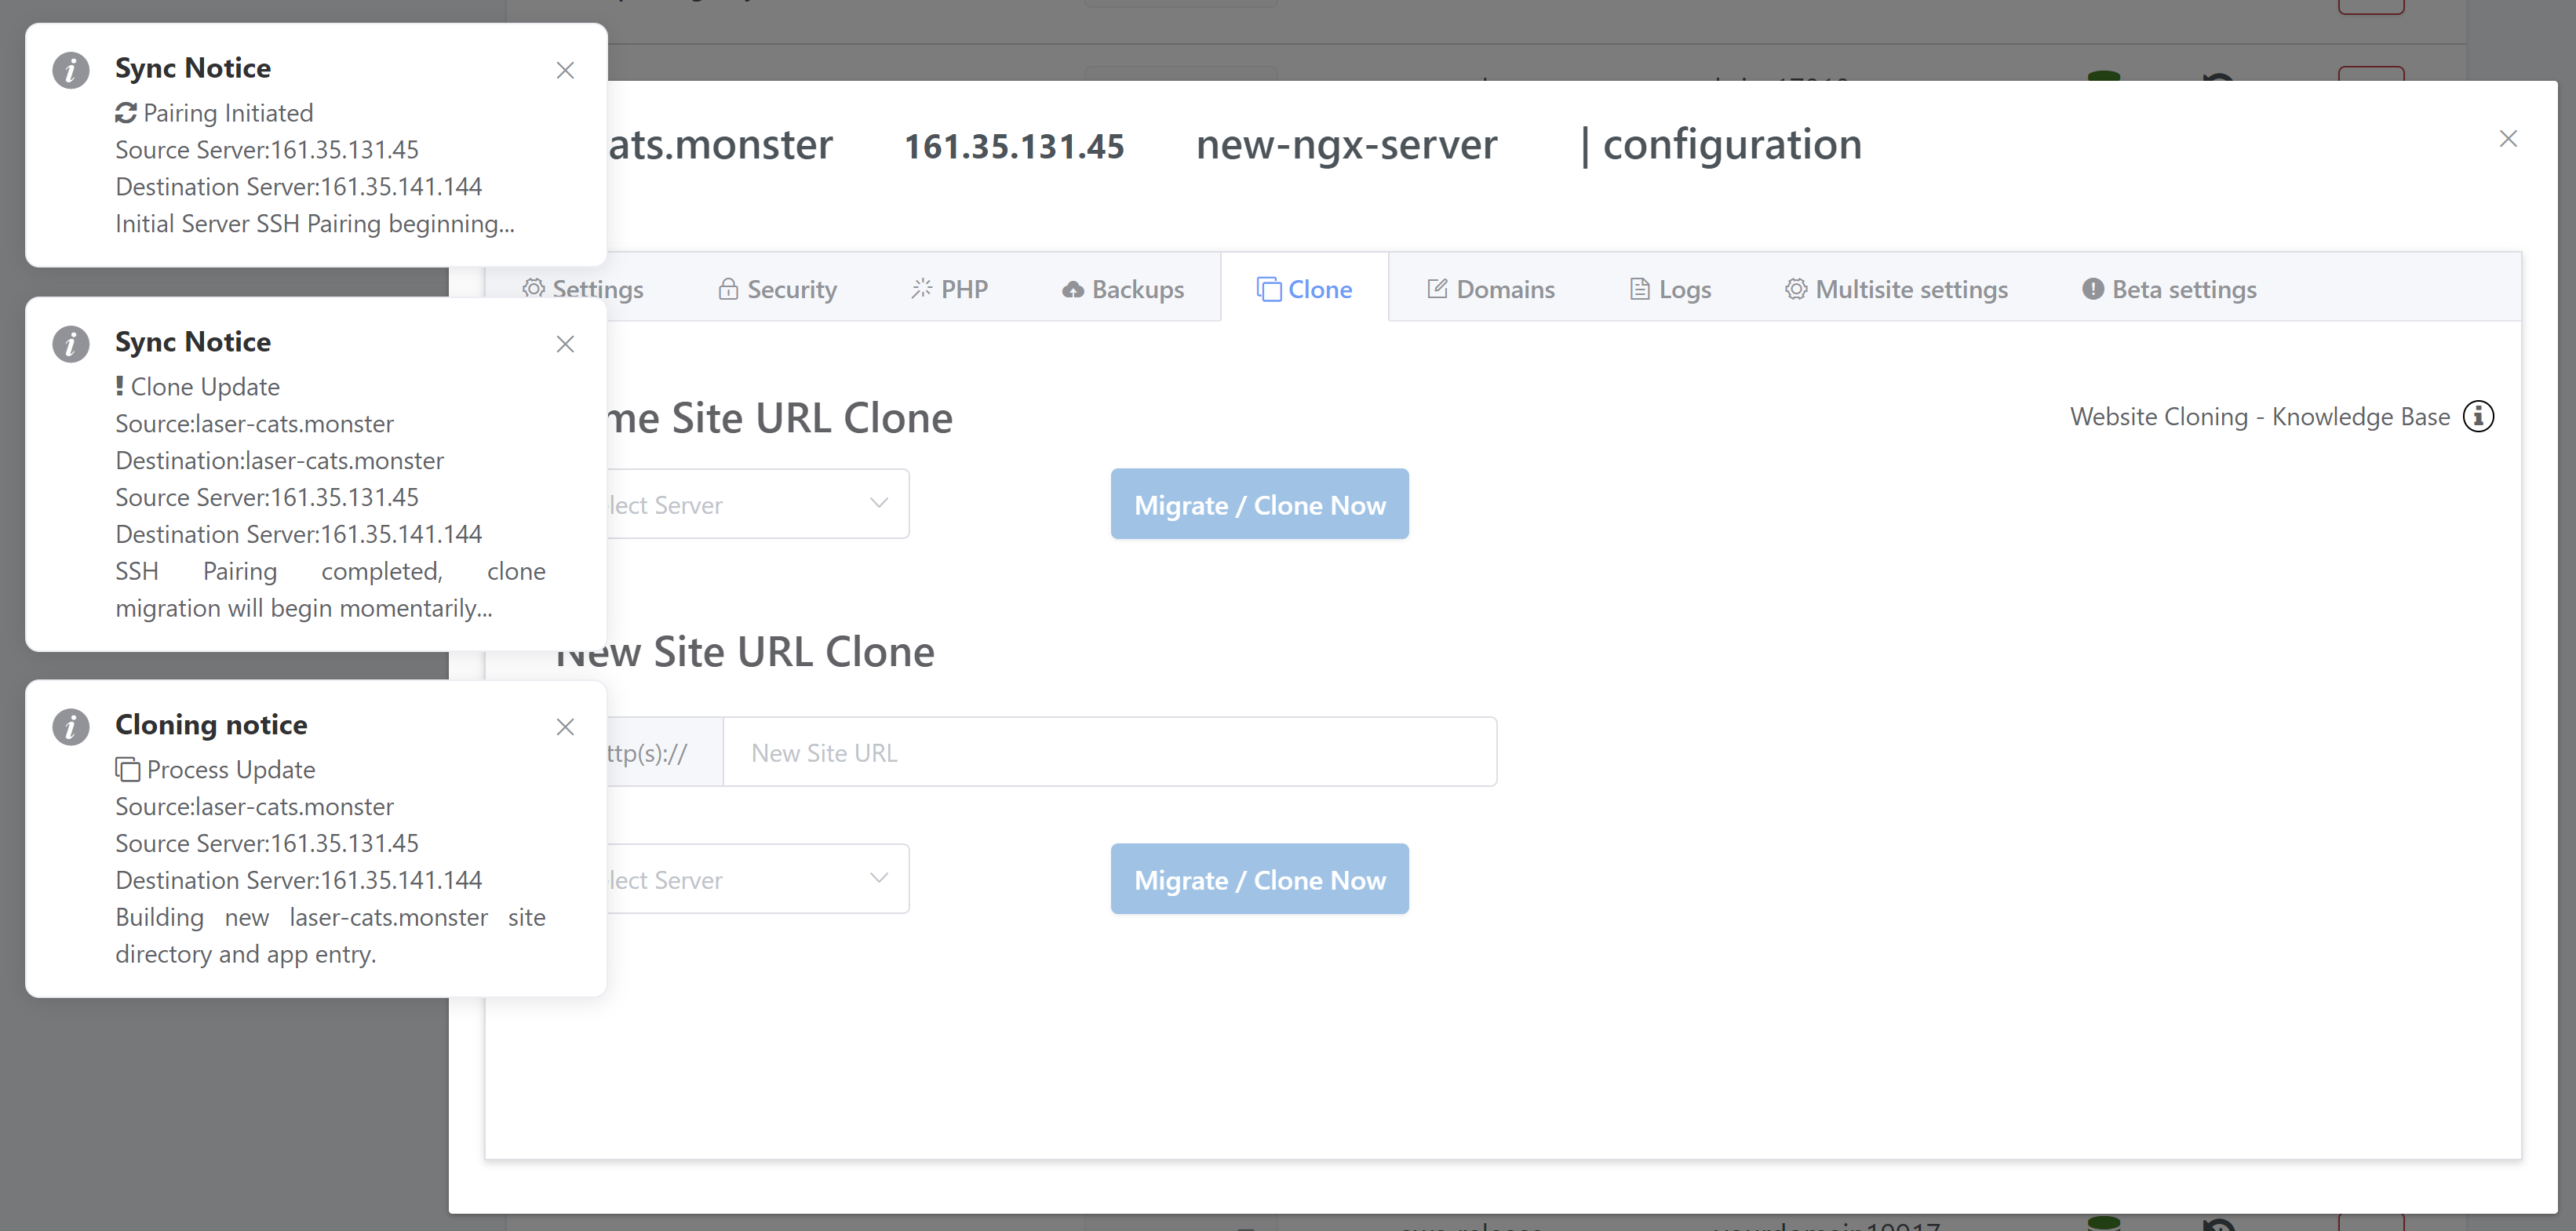
Please be patient while the duplicate cloning process is ongoing and refrain from making any changes to your site and either the origin server or the destination server.

You will receive a string of notifications to keep you informed about how the migrate/clone is proceeding throughout the process. Please pay attention to these.

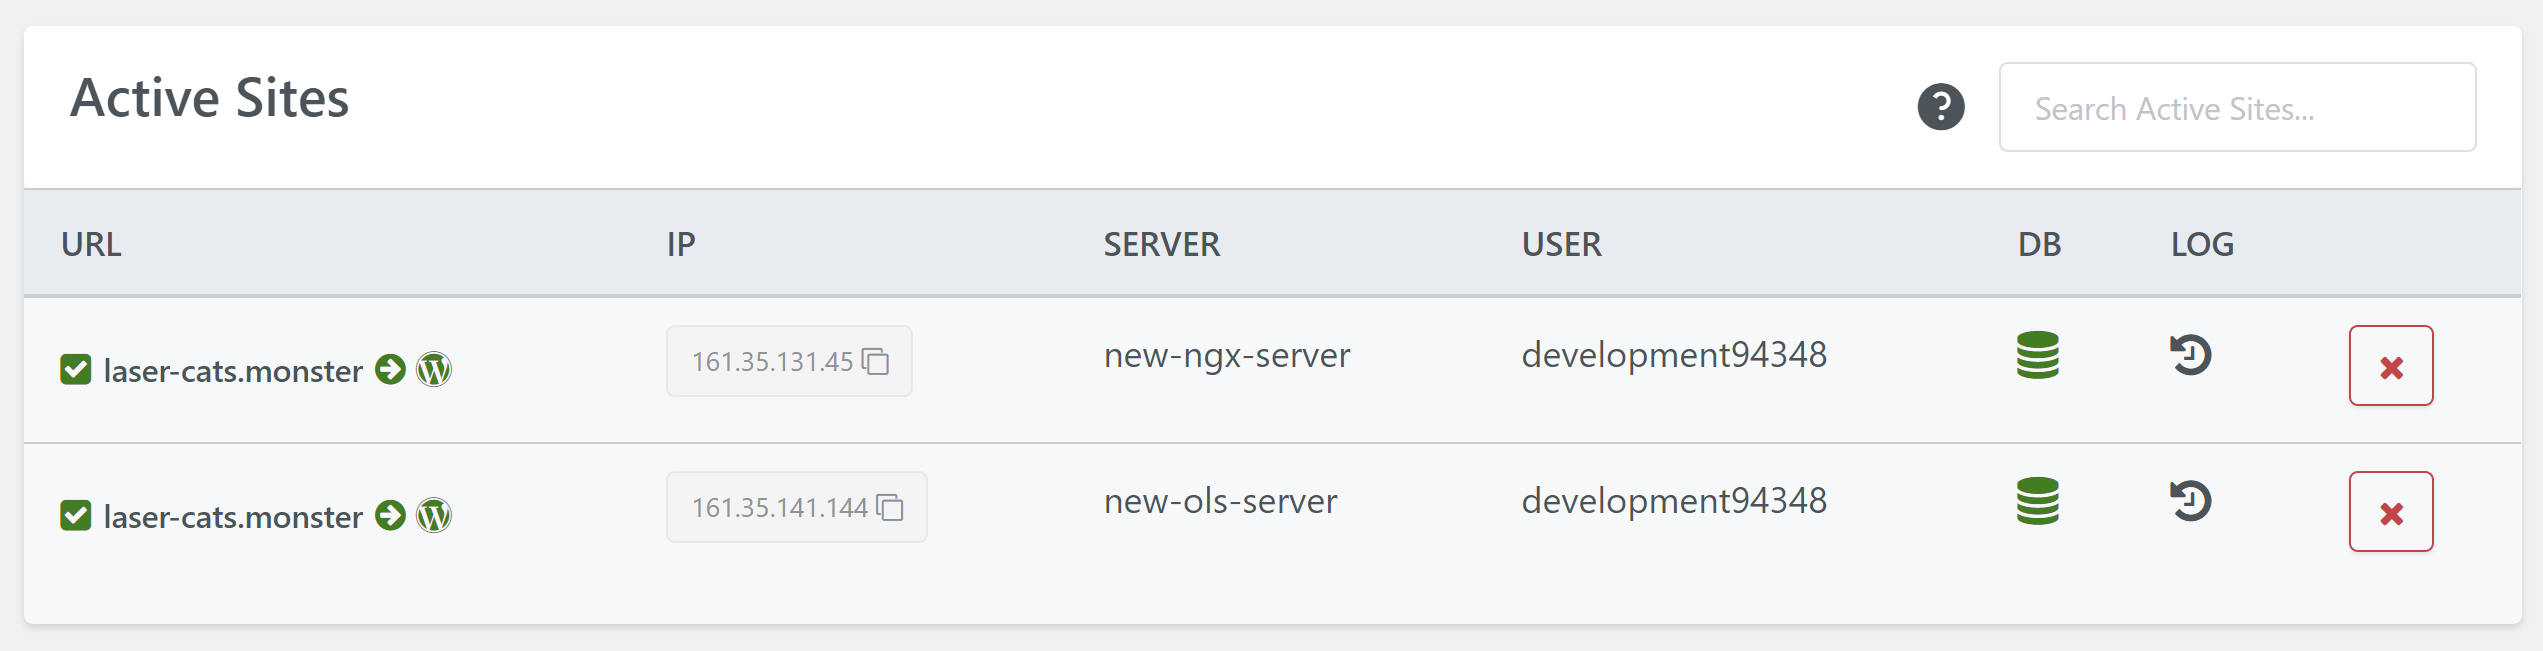
When the process is complete your new site will appear in the active sites list.

Your settings on your newly cloned website will match up with your origin site.

Step 5. Check your cloned duplicate site

You should check your duplicate site to make sure everything is as expected. The content and database will have been cloned across and the URLs and file paths will have been updated to the new URL.

We will have matched most states for the vCanopy features, including all PHP ini settings, PHP process manager settings, and Nginx configuration settings that have been adjusted by GP-CLI. We will also have migrated across cloned files from your Nginx includes directory.

Please ensure that all has cloned correctly before deleting your previous site, and consider keeping the original for 1-2 weeks while backups have time to take place. 

NOTE

Should a site clone fail to complete for any reason, it will leave a copy of the gzip file in place that looks like GPBUP-2.website.com-CLONE.gz. We have had one report of this being left behind after a successful clone. This is very uncommon, but should you find the process has not deleted this gzip file after successfully cloning your website, you can delete this manually.

Cloning and Staging Websites

You can’t create or clone staging sites to staging subdomains on vCanopy. For example, if you try to create the website “staging.website.com” as a regular site, it will fail and result in an error message. This will also fail during the cloning process.

You can clone it to a different URL either on the same server or a new server if you have a need to do so though. You will find the same options in your staging site’s customizer.

CLONING STAGING + LIVE SITE TOGETHER

Cloning both the production website along with it’s existing staging site is something that isn’t possible at this time. Each can be cloned individually, but not as a couple. 

Search the Knowledge Base

New to vCanopy?

Get started with our FREE Core plan today! We bring the software, you bring the hardware.