Verdant TCS

Using SendGrid SMTP for Transactional Emails

5 min read

IMPORTANT

SMTP providers now almost always require domain verification and/or email verification. Without this, they may not send your emails, or you may get flagged as spam. Please ensure you verify your domains and have all the correct DKIM/SPF records in place to ensure deliverability. For troubleshooting SendGrid, please check out this article: Troubleshooting the SendGrid SMTP Integration

Introduction

vCanopy has an easy to use, one click SMTP integration with SendGrid to make sure that all vCanopy WordPress sites have fully functioning transactional emails.

Unlike most shared hosting, when you move to the cloud you will find that you don’t have an email solution automatically provided. Actually, we strongly advise against setting up an email server on any server hosting websites, and vCanopy does not configure an email server on any vCanopy managed box. 

We recommend either using one of the many, many, fantastic and highly reliable hosted email services (GSuite, Rackspace, Zoho, Office etc ) for your clients email solution, or alternatively you could provision an email server using on of the reputable Open Source email solutions (iRedMail, Mailinabox etc).

Even so, a WordPress site requires transactional emails for it to be fully functional. A third party SMTP solution is required to send administrative emails, at the very least. 

About SendGrid 

SendGrid is, without doubt, the easiest to use SMTP provider, and their free plan comes with 100 emails per day, around 3000 per month, more than enough for most sites requirements. With SendGrid, unlike other providers, you can get started sending emails with just an API key, there is no need for additional DNS records on your domain.

(We have integrations with other SMTP providers coming soon – next up Mailgun, and a deeper integration with the SendGrid API that will allow for automatic domain registration)

In the meantime, if you want to authenticate your domain with SendGrid, take a look at their support article How To Set Up Domain Authentication on how this is done and the benefits of doing so.

**May 2020 Update: We highly recommend that you authenticate your domains with SendGrid. While our integration still usually works out of the box, we’ve had numerous reports recently that they simply won’t send emails until domains have been authenticated. It’s also beneficial for your domain long term and will ensure ongoing delivery of your website mail to your inbox.

STAGING AND SMTP

Our SendGrid integration does not work on staging sites by design as most people do not want to accidentally send emails from those environments. If you require this, you may wish to use a plugin such as WP Mail SMTP or Post SMTP Mailer, and that way you can push back and forth between live and staging without losing email functionality.

Step 1. Create a SendGrid API Key 

If you haven’t already, then sign up for an account at SendGrid.

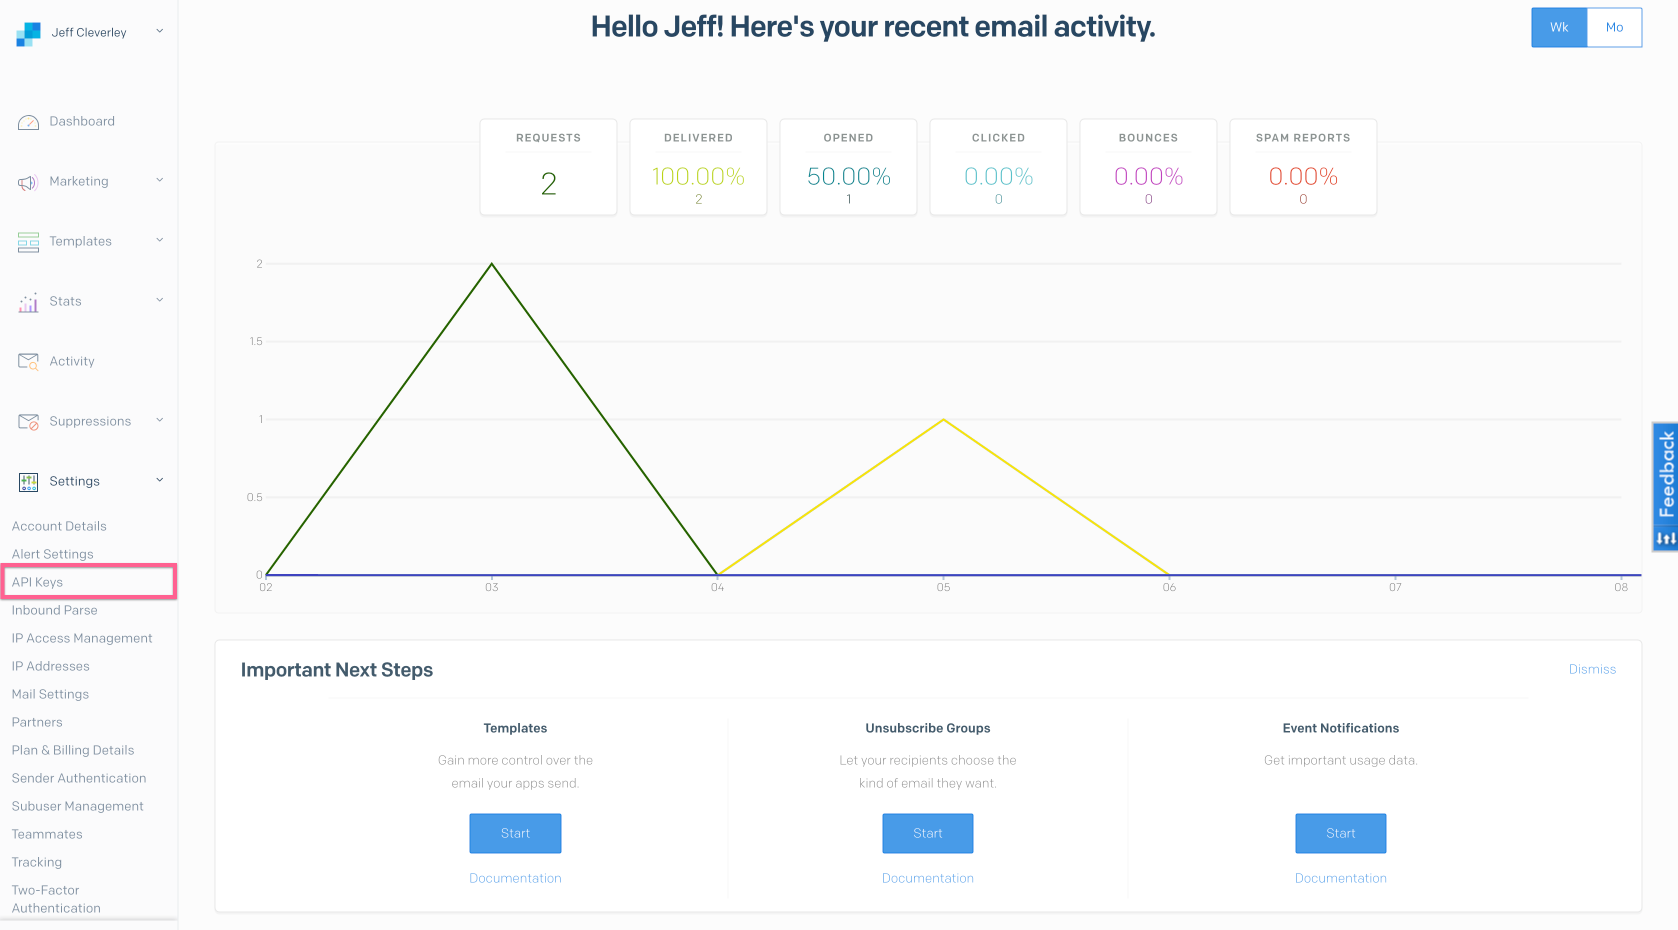
Log in to your SendGrid account, under Settings in the left-hand navigation you will see the link to set your API Keys, click the link.

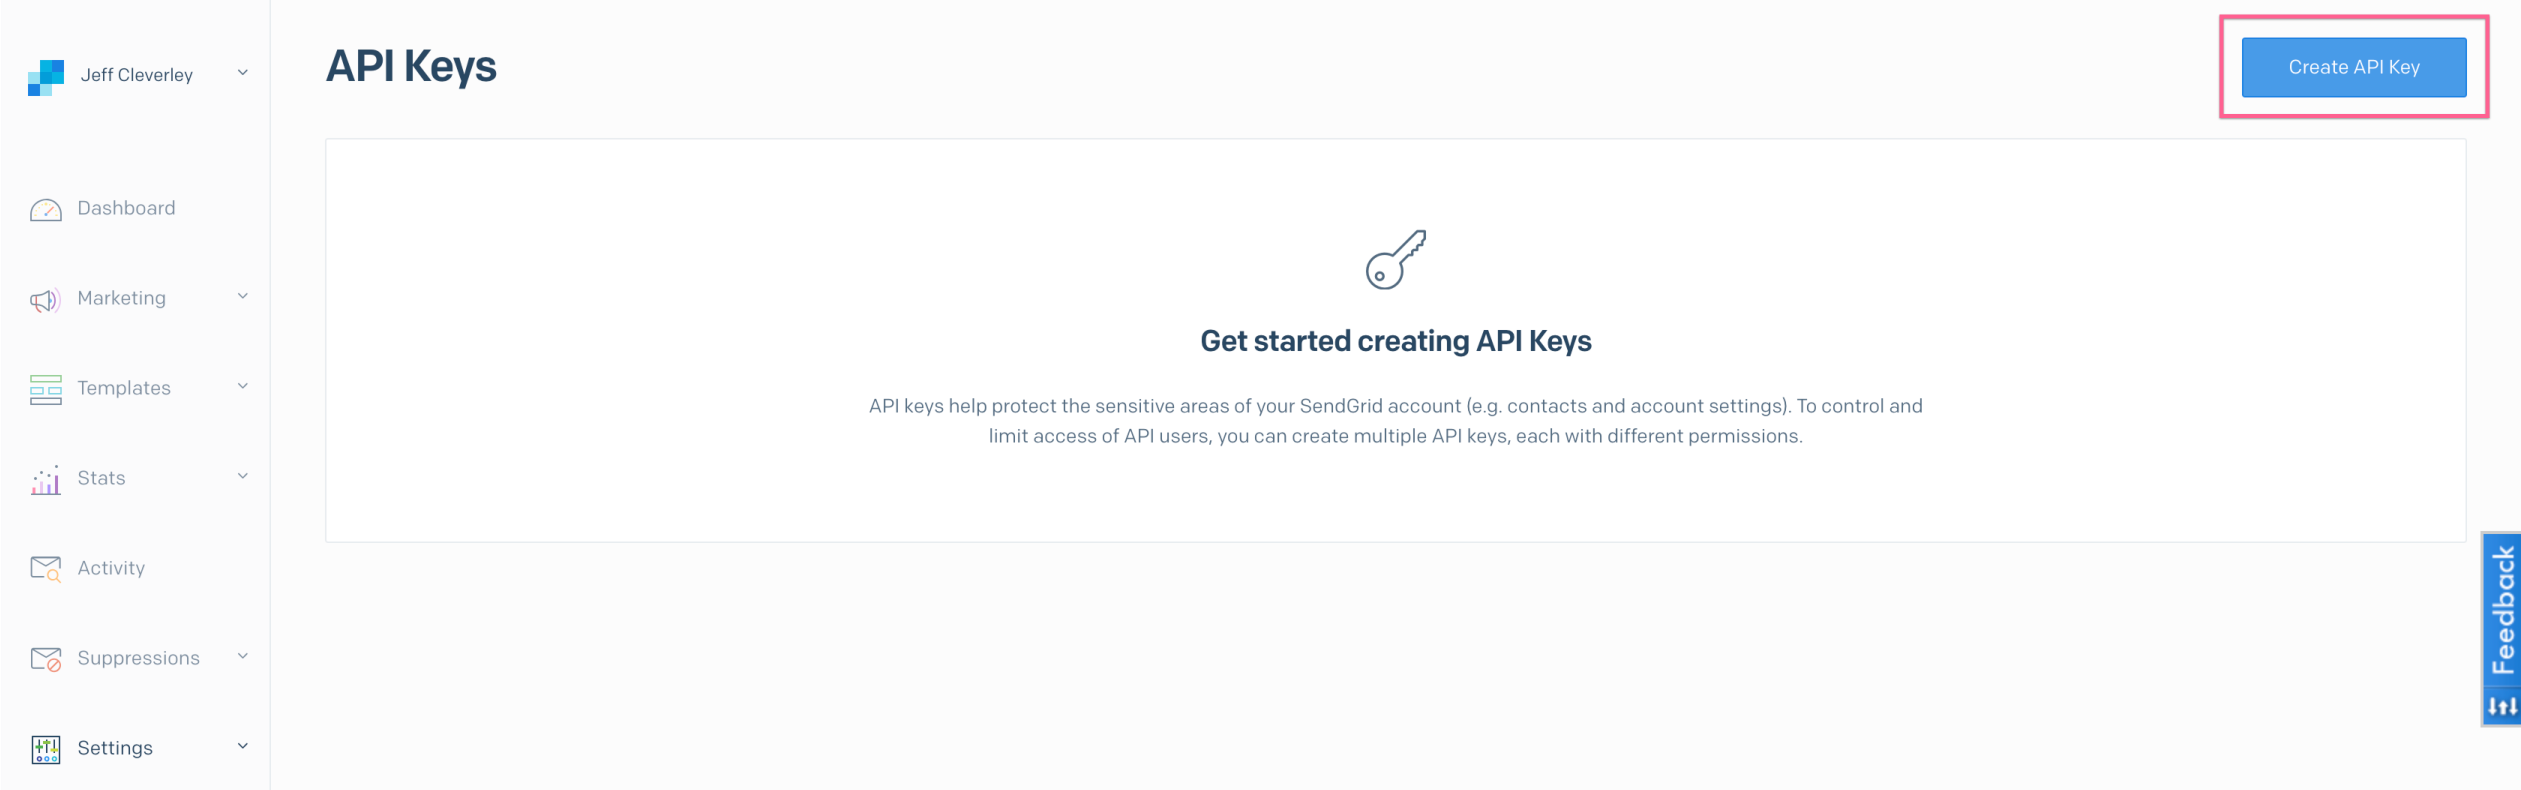
On the API Keys page, click the blue Create API Key button in the top right corner.

You will be asked to set an API Key Name and configure your API Key Permissions.

You can set the key to have Full Access.

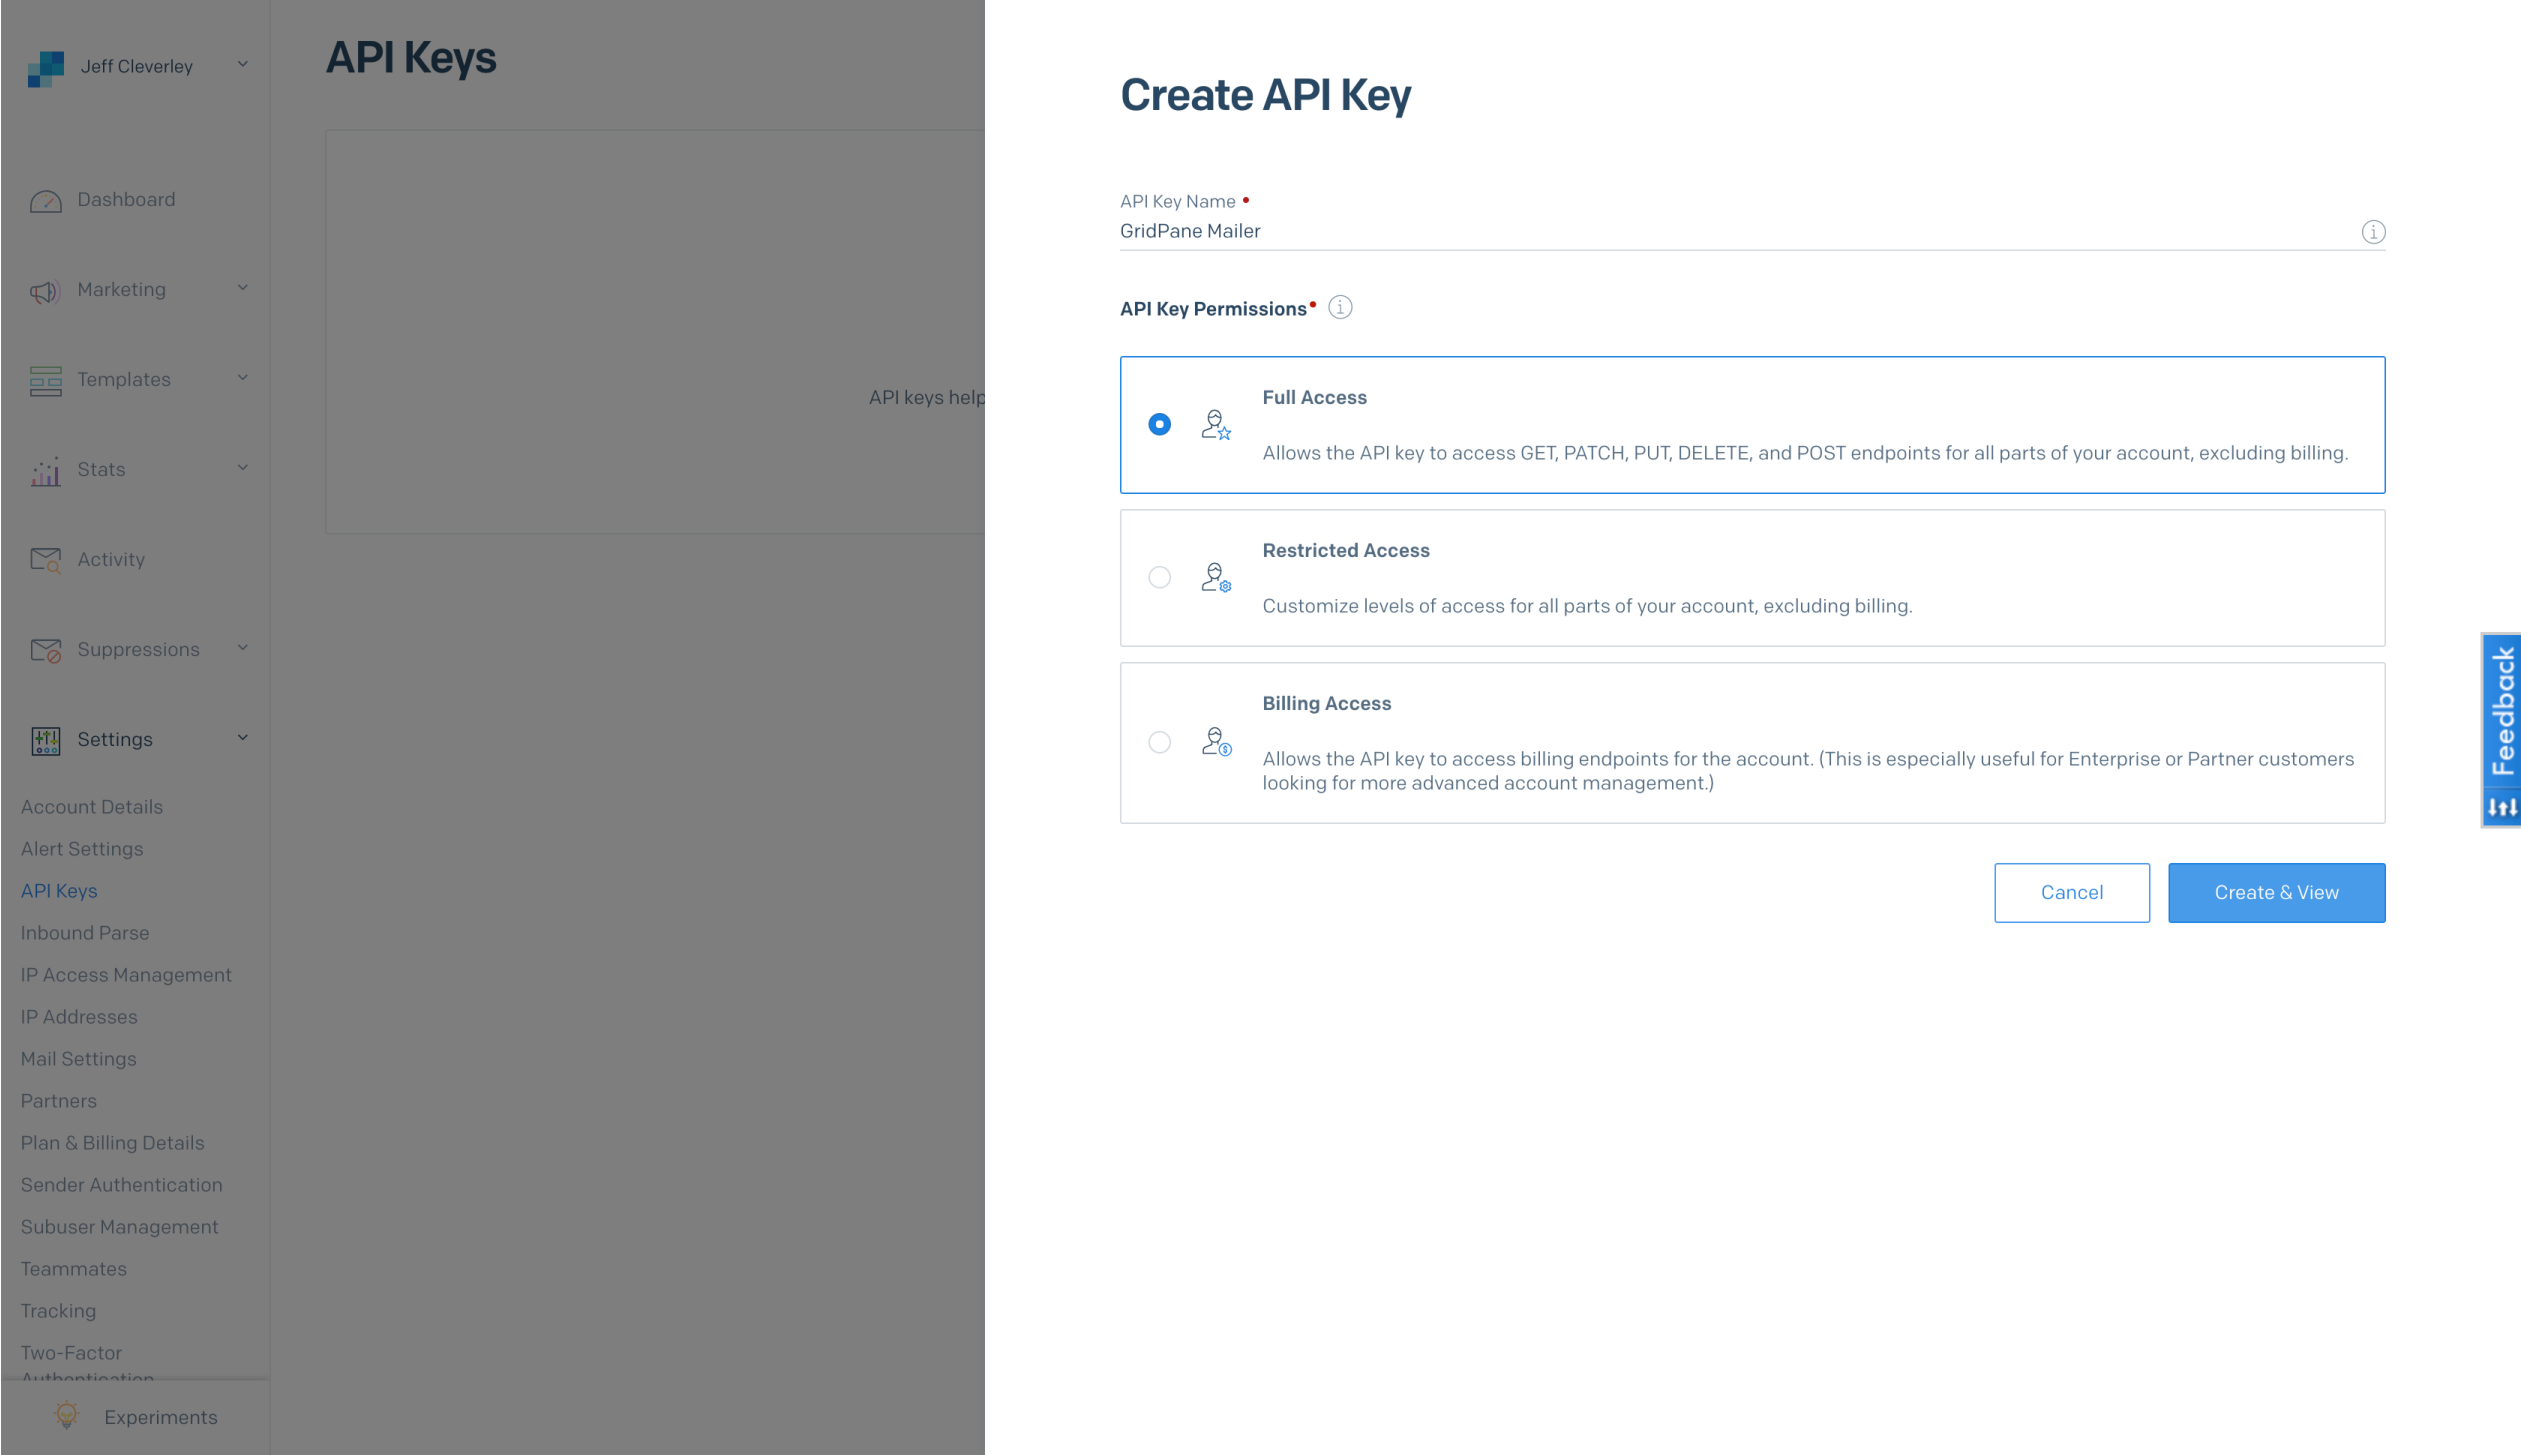
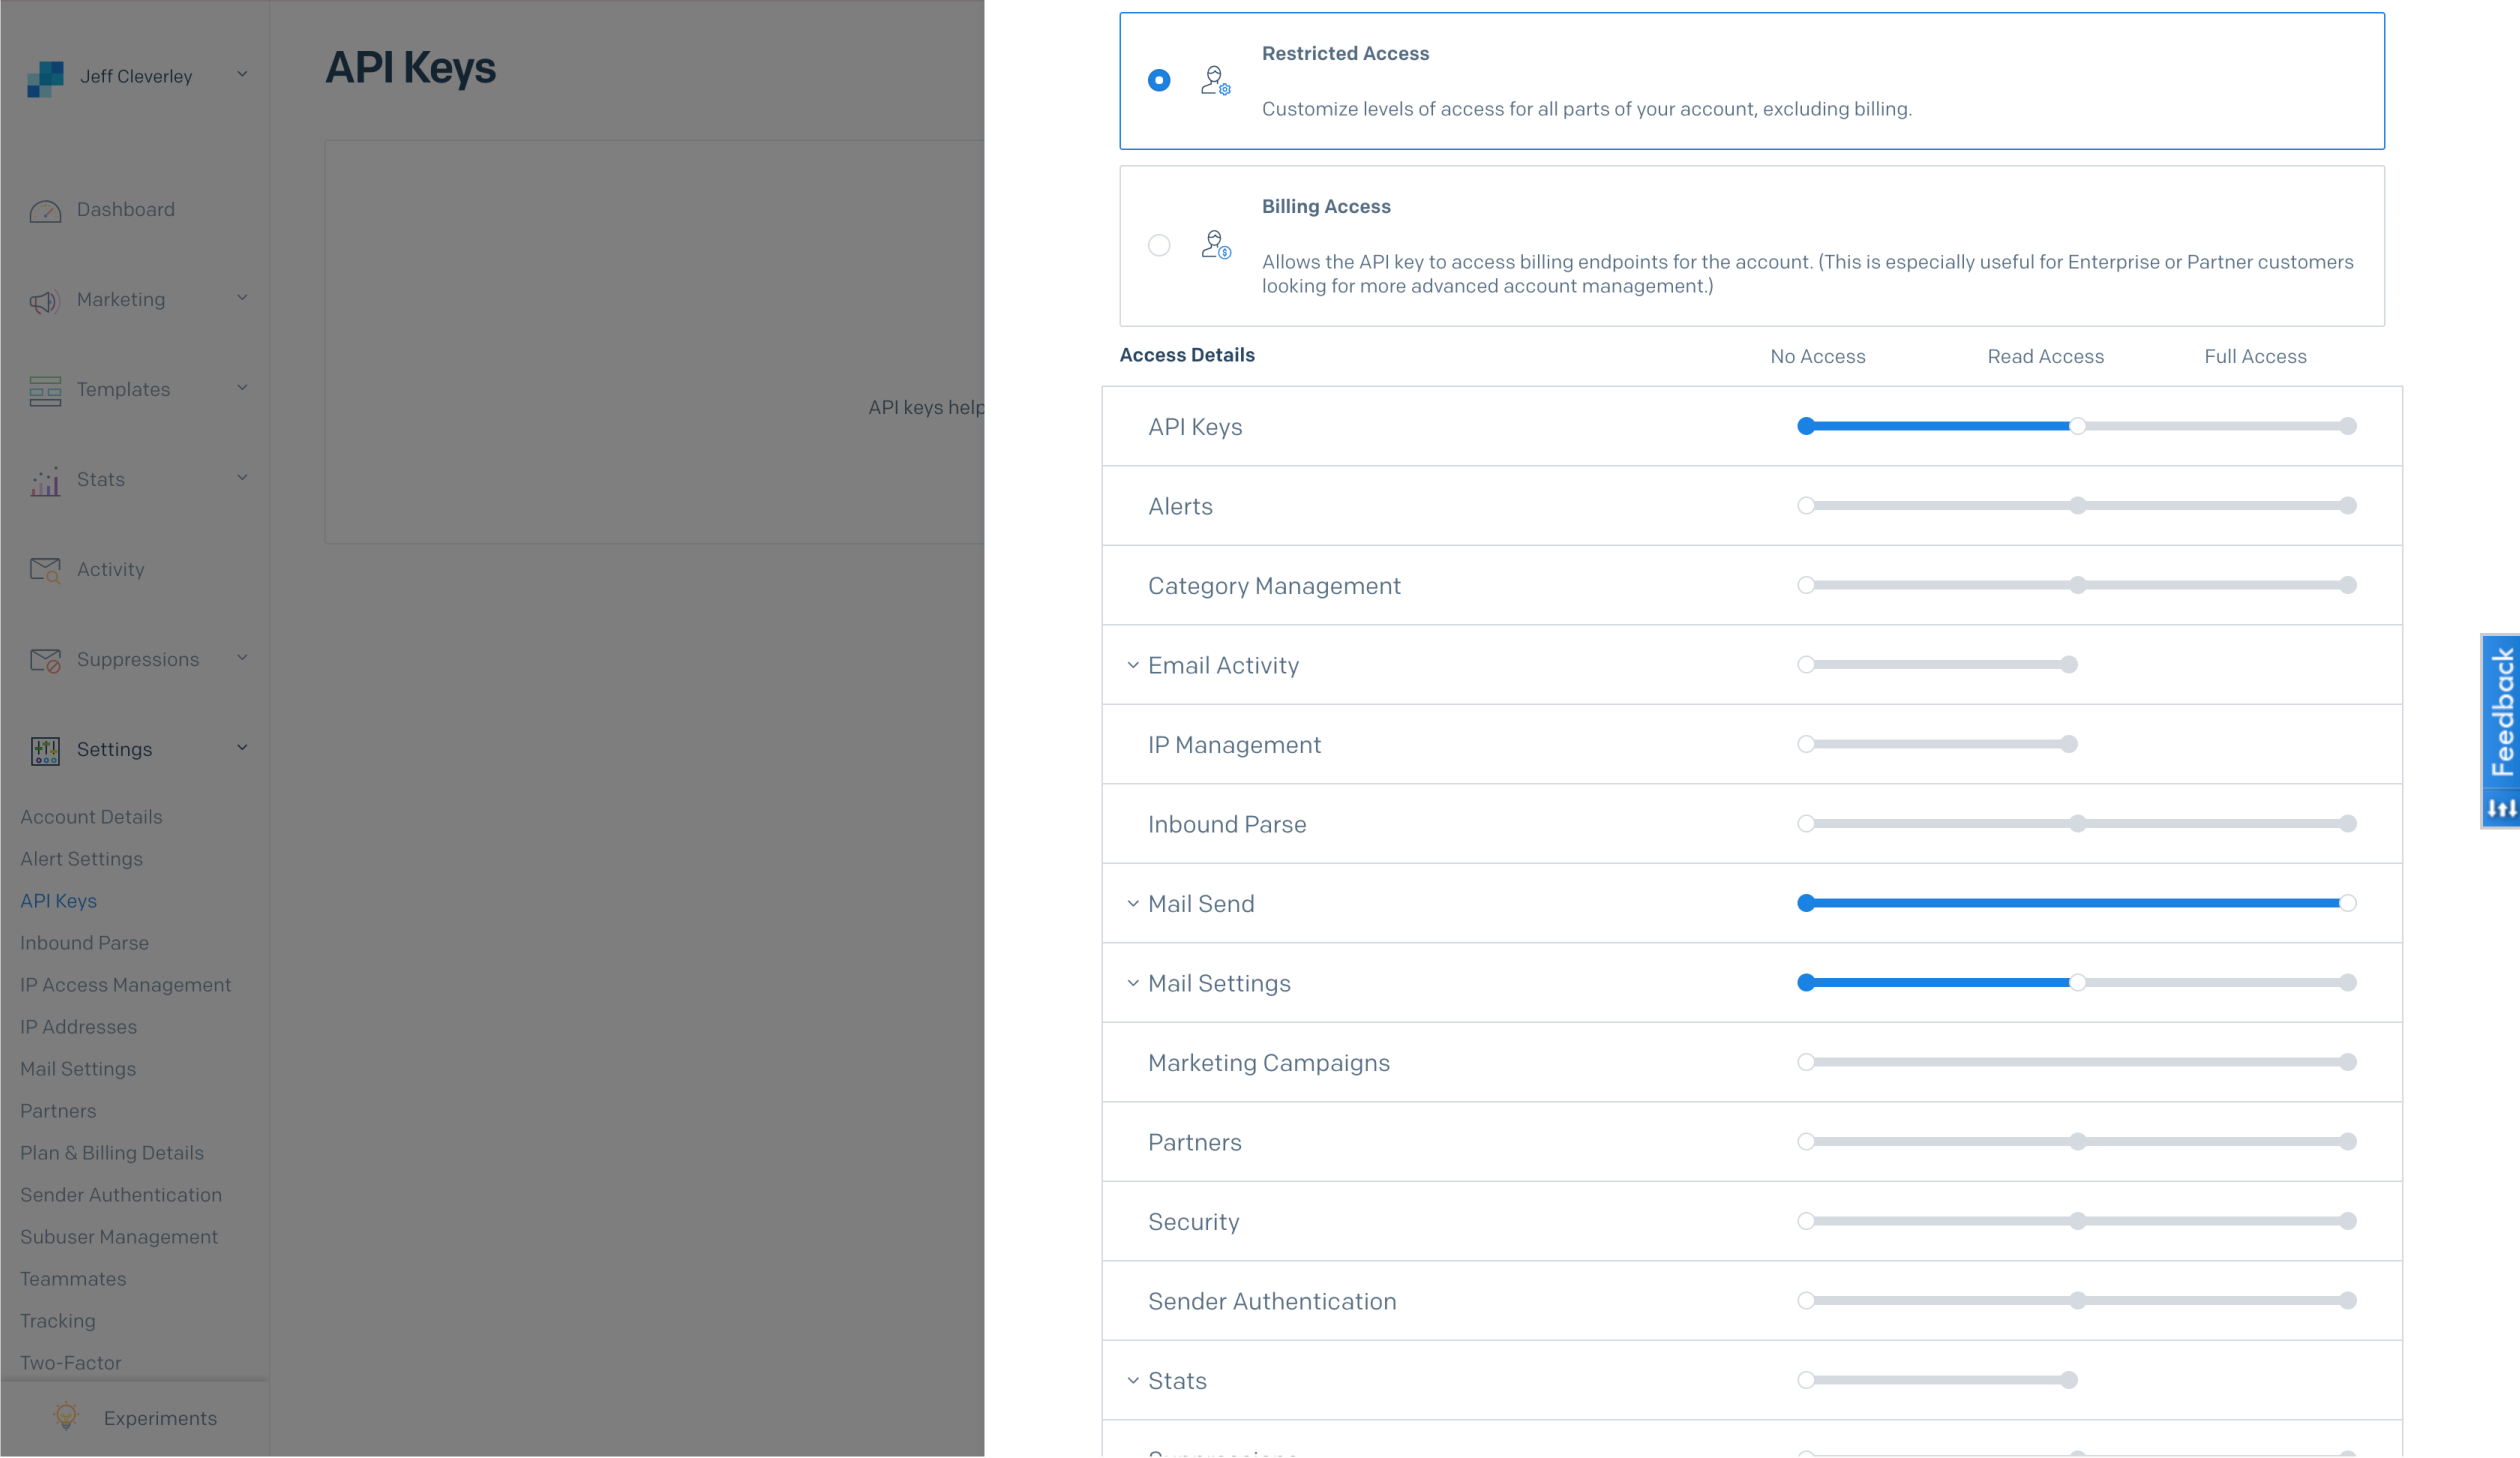
Or you could set the key to have Restricted Access and grant permissions on a more granular basis. If you do this make sure that the correct Mail Send permissions are granted as Full Access.

Once you have configured your key correctly, click the Create & View button, and you will be presented with your API Key.

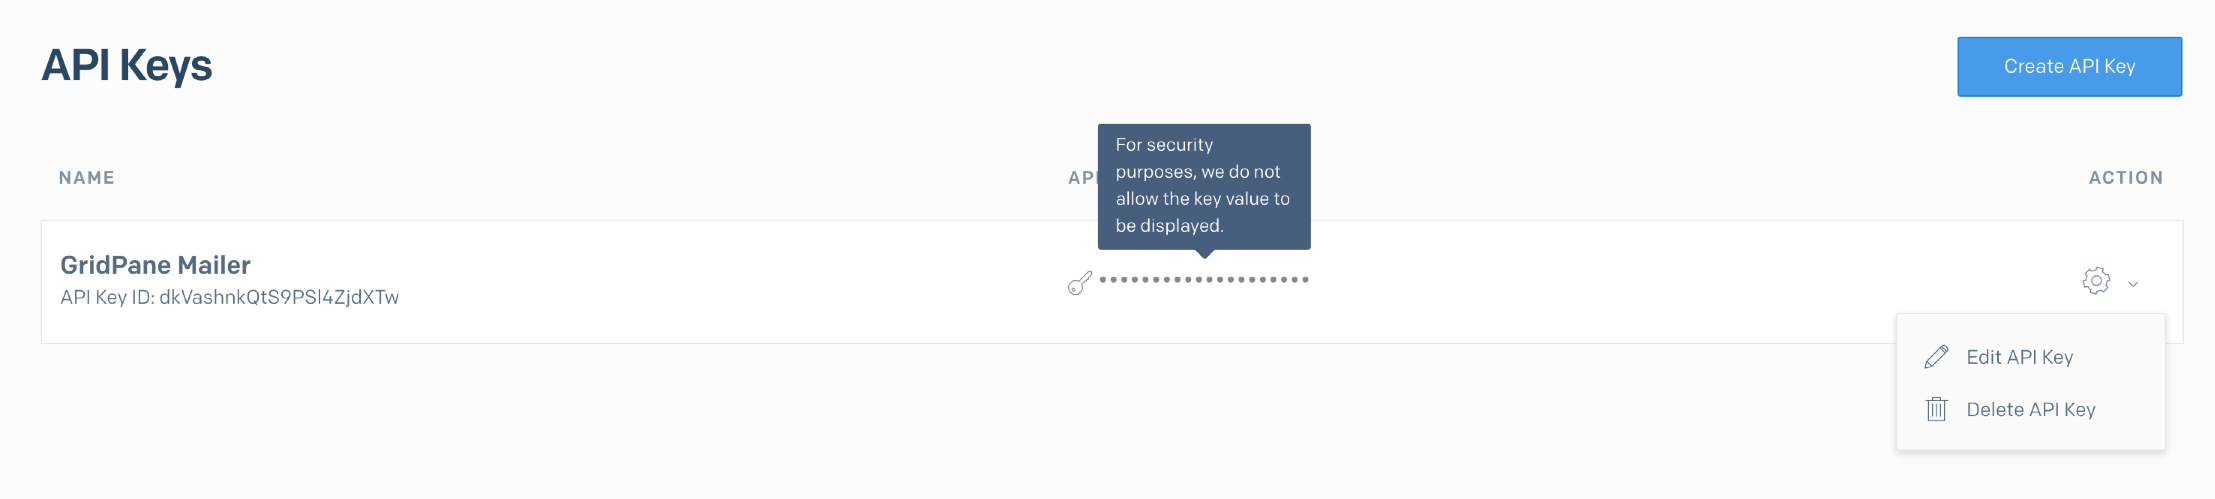
For security purposes, this is the only time your key will ever be shown. You need to copy it and keep it safe.

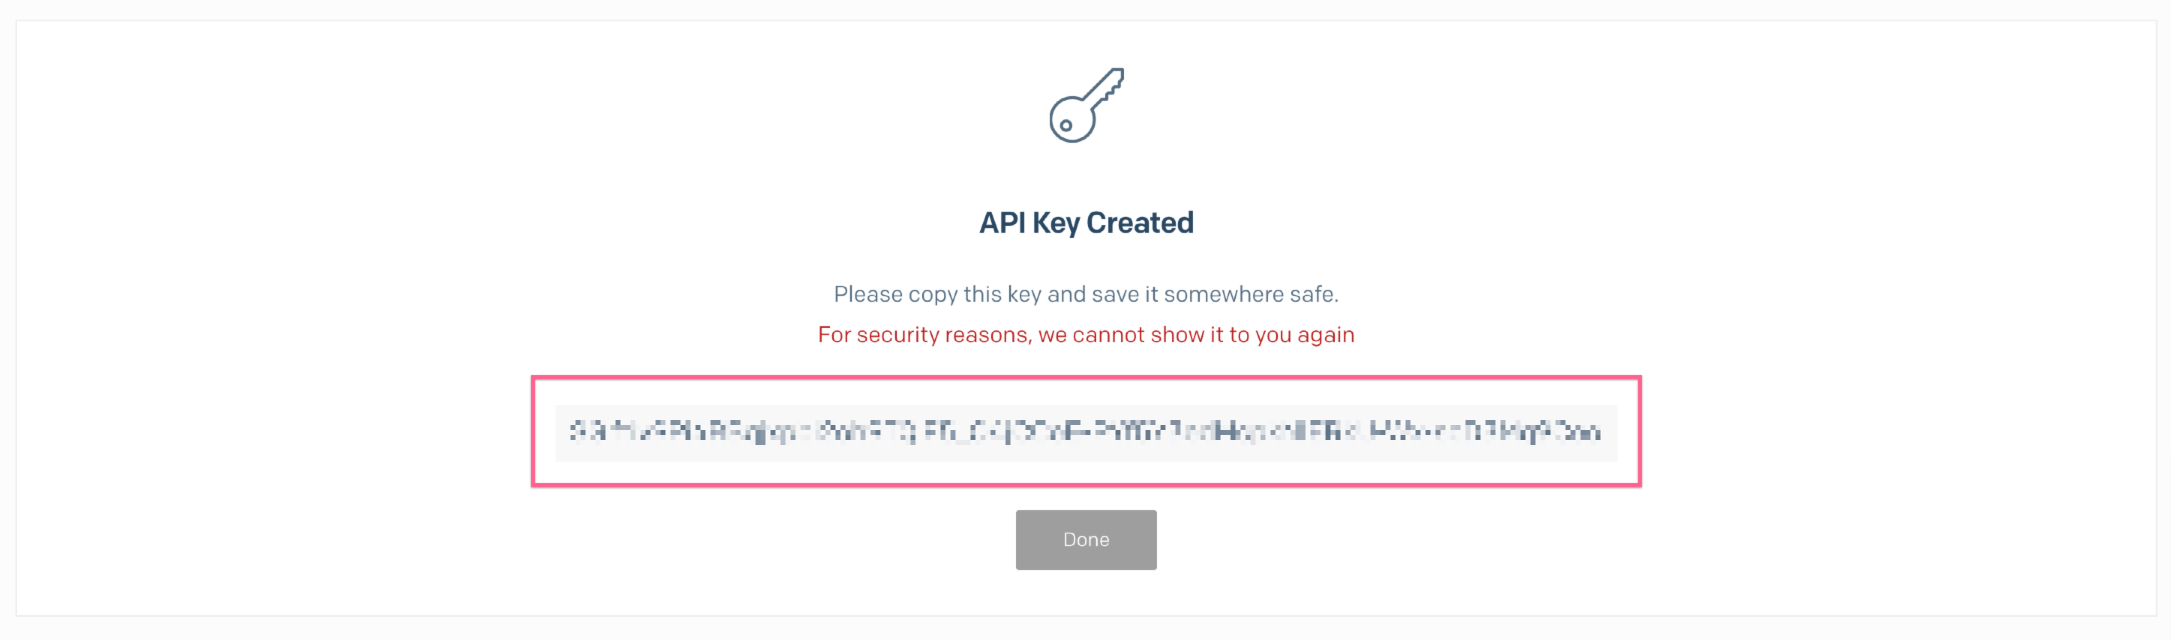
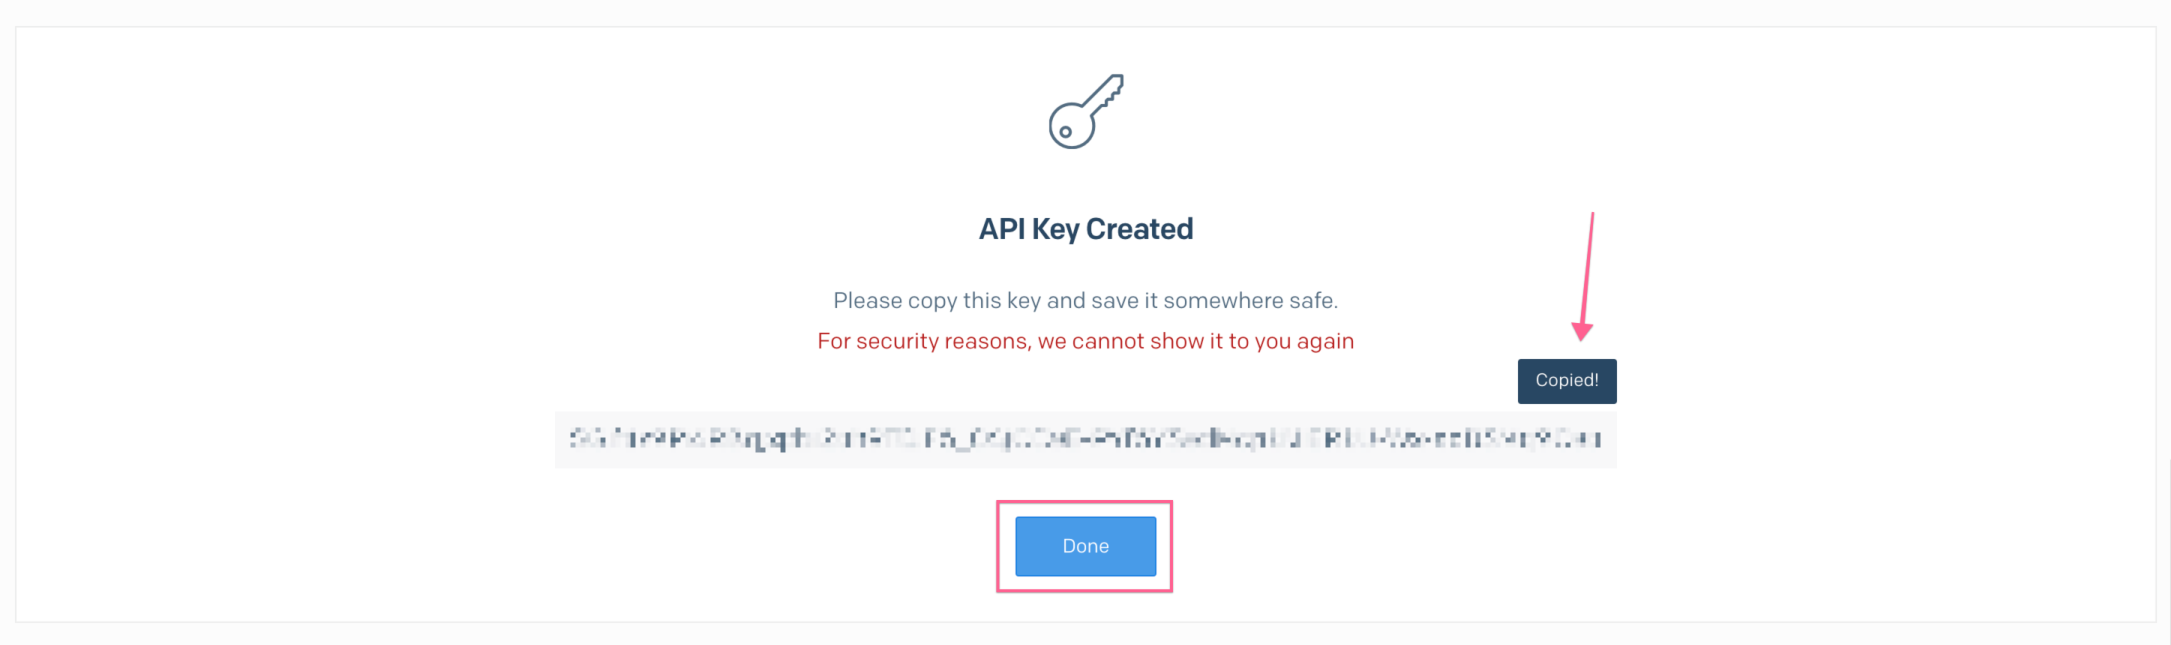
You can easily copy the API Key by clicking on it, and once you have stored it somewhere safe, click Done.

You will see your API Key in the API Keys list. As mentioned, you will not be able to view the key again, so if you lose it then you will need to delete the key and create a new one. You can find this functionality in the cog icon at the right of the key row.

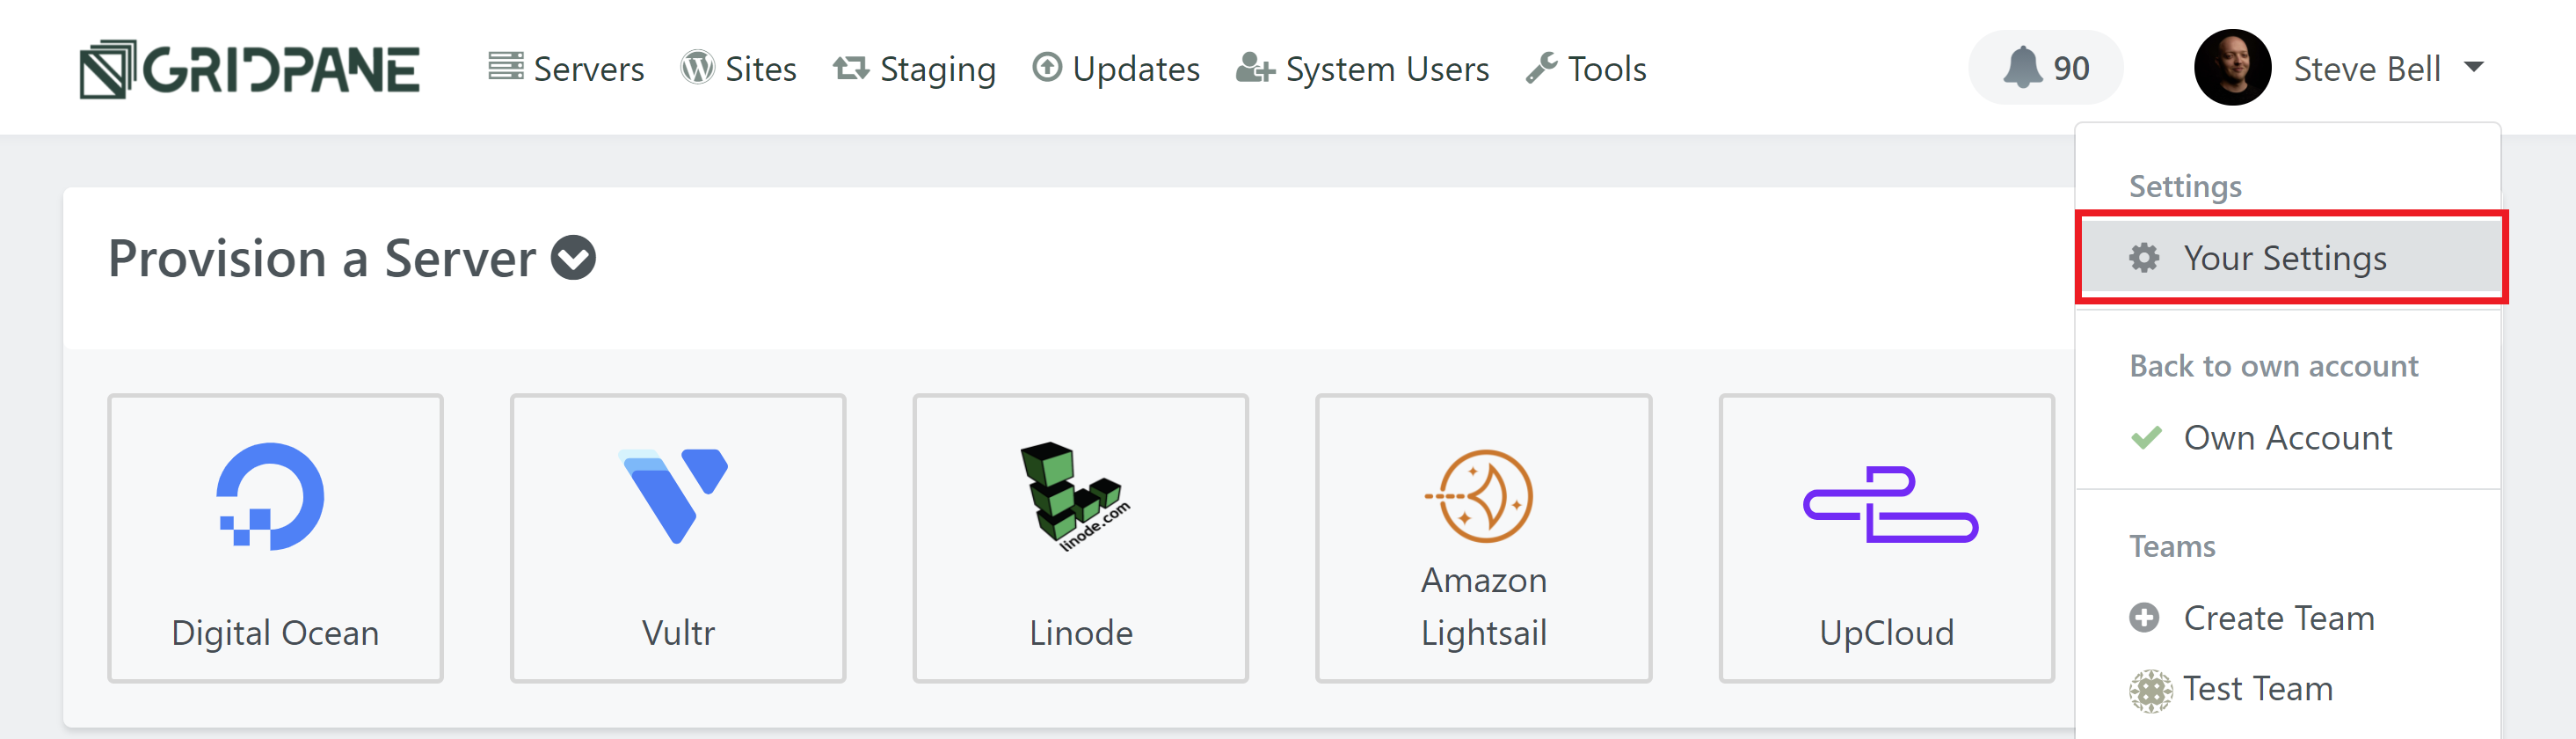
Step 2. Store your SendGrid API Key in your vCanopy settings 

Go to your account settings in your vCanopy account.

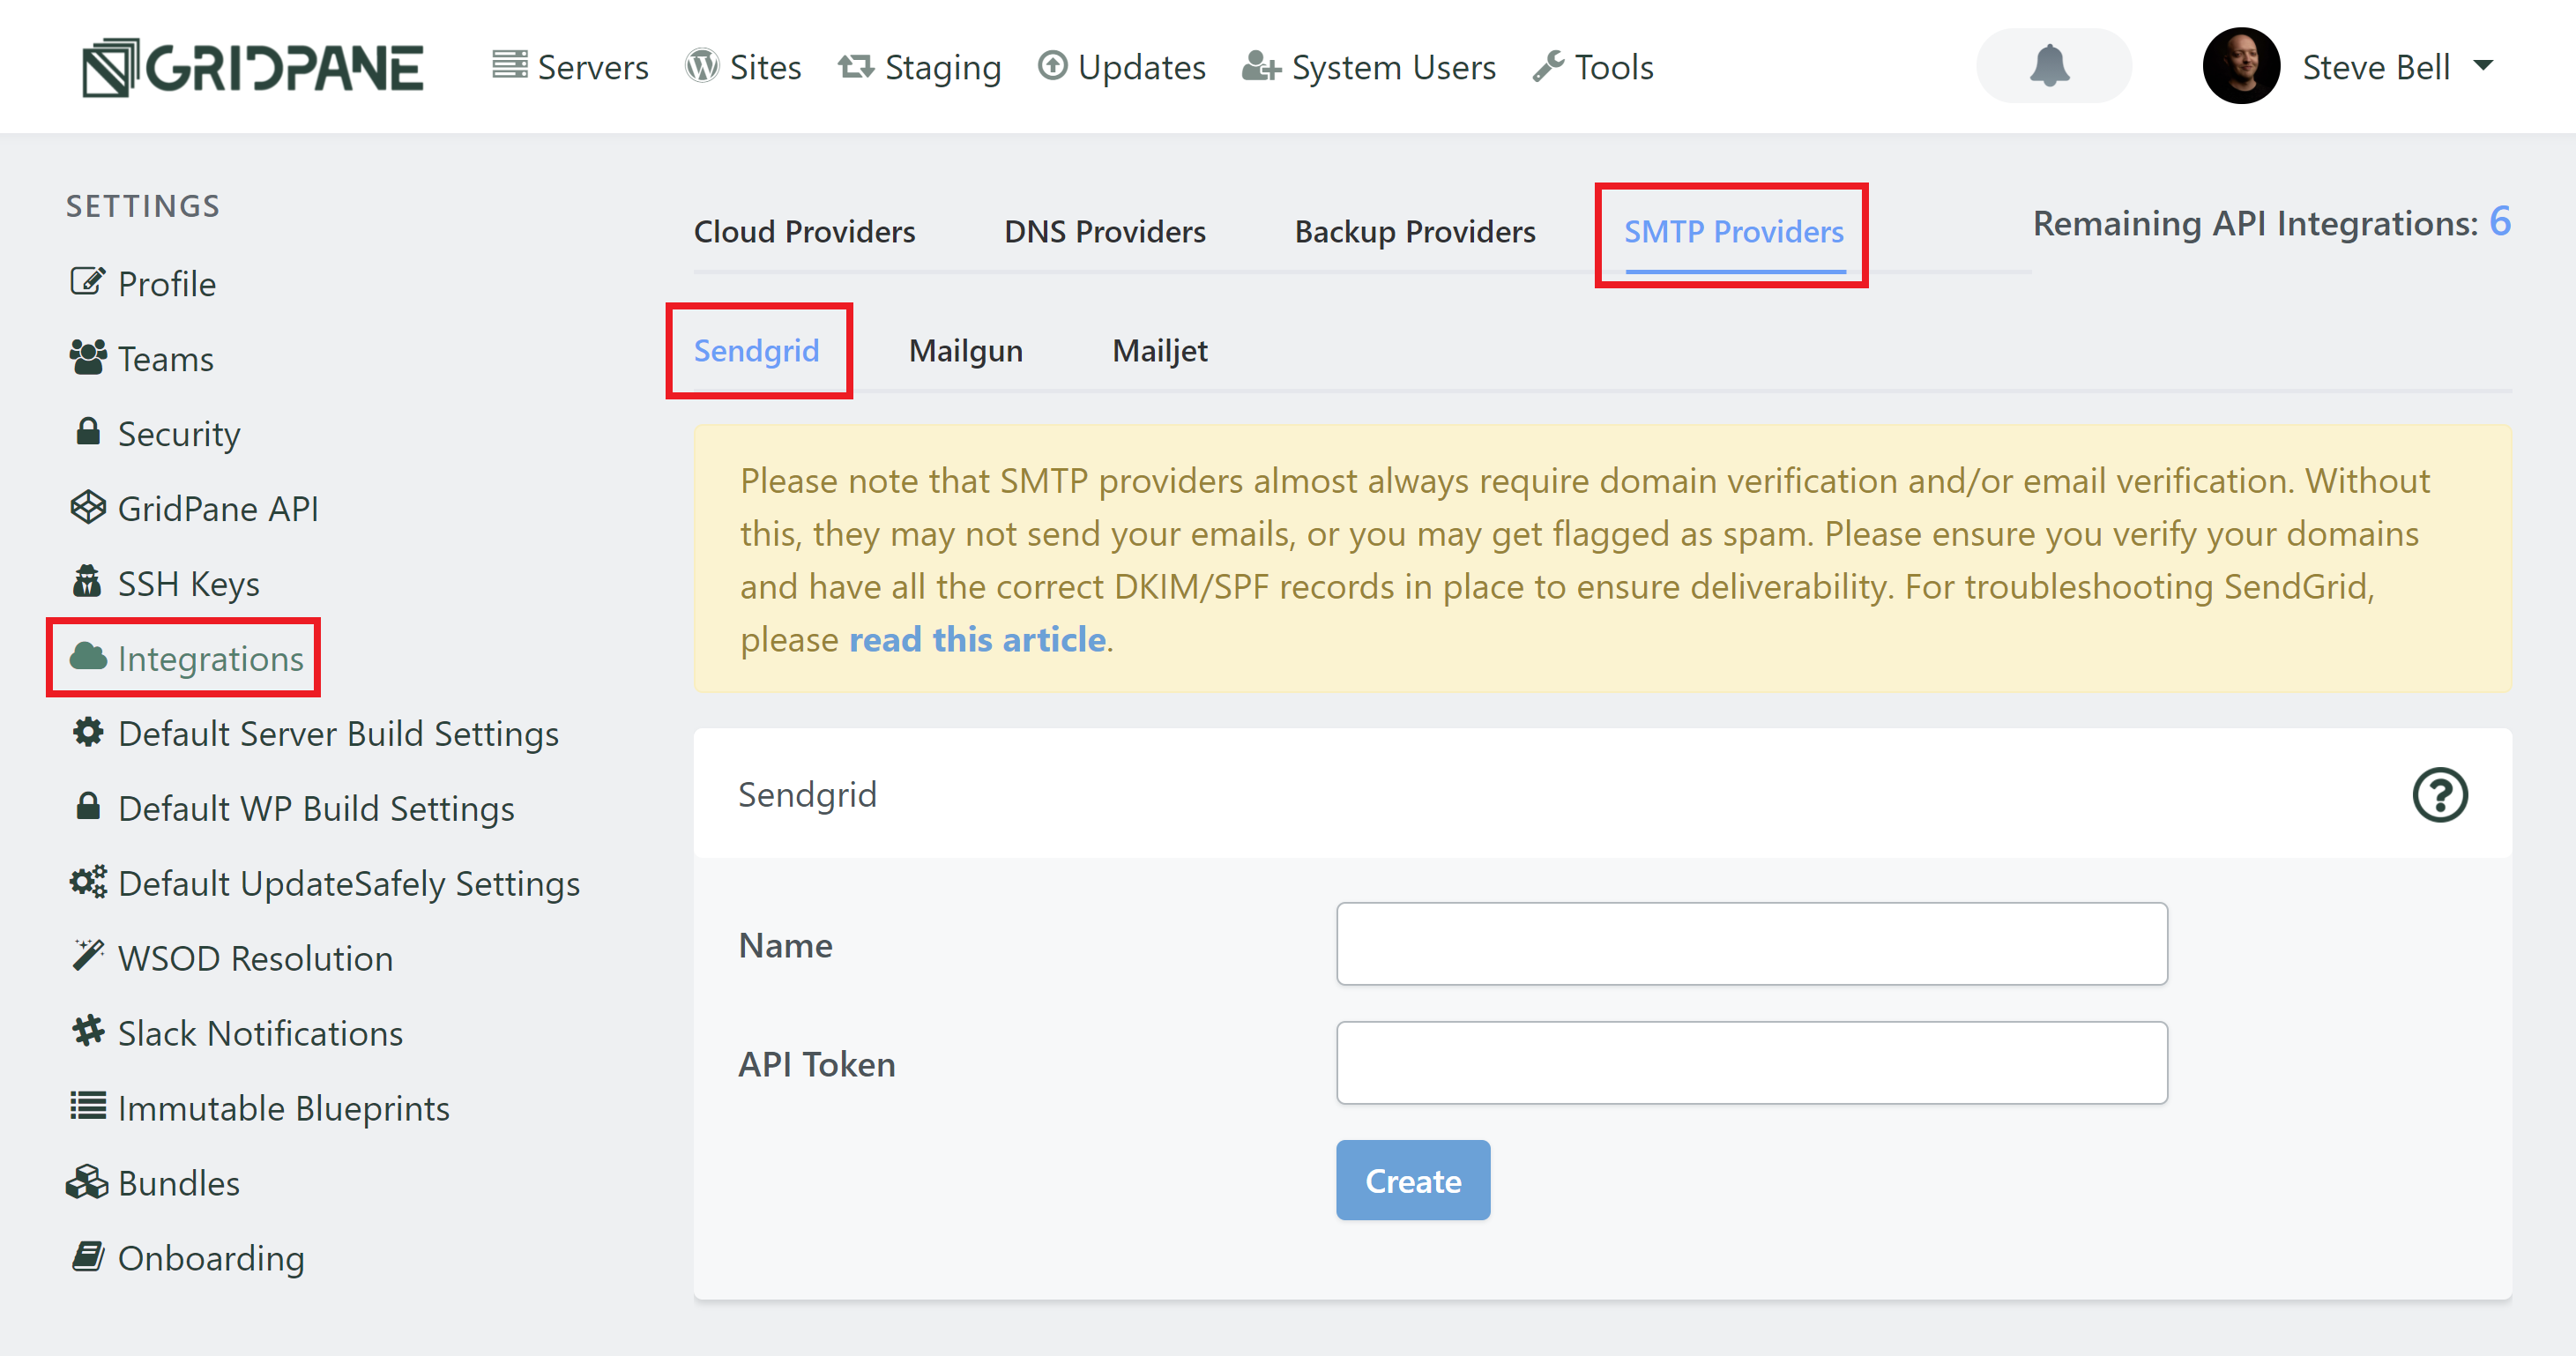
Under Integrations, click on the SMTP Providers tab, and then SendGrid.

Give your key a name and add your API Key to the API Token field and click Create.

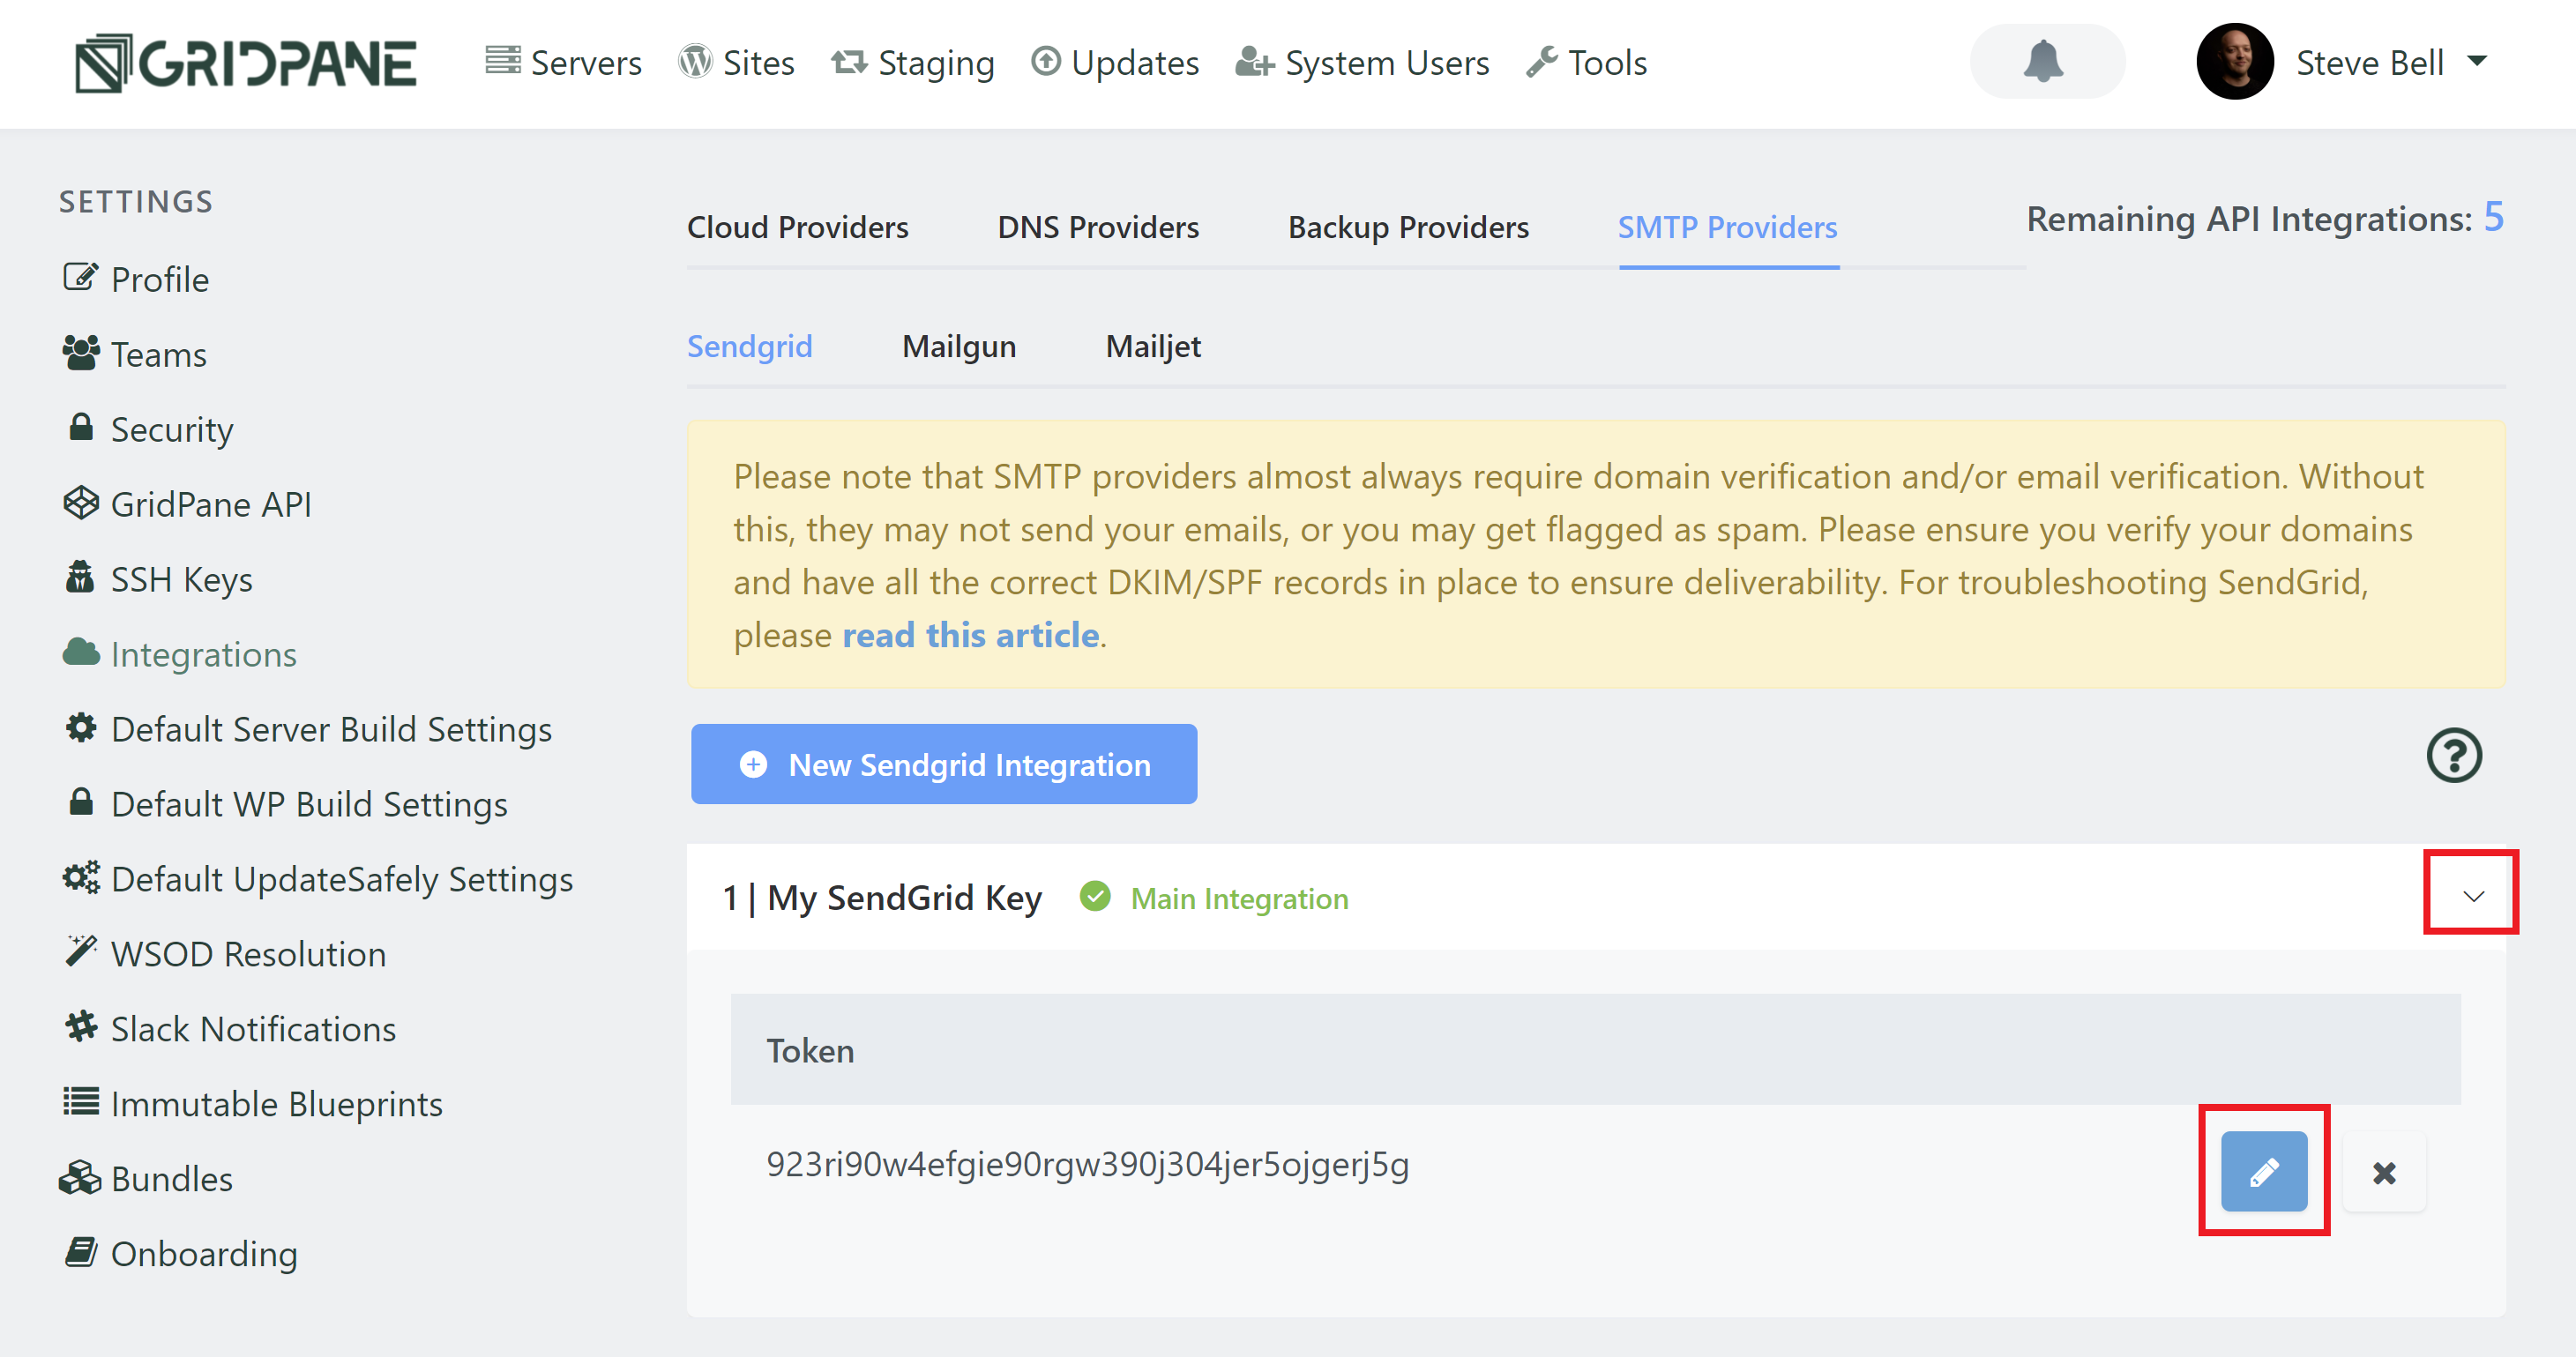
If you want to update or delete the token, by clicking on the down arrow and using the edit (highlighted) and delete buttons.

Step 3. Enable SendGrid SMTP email for a site

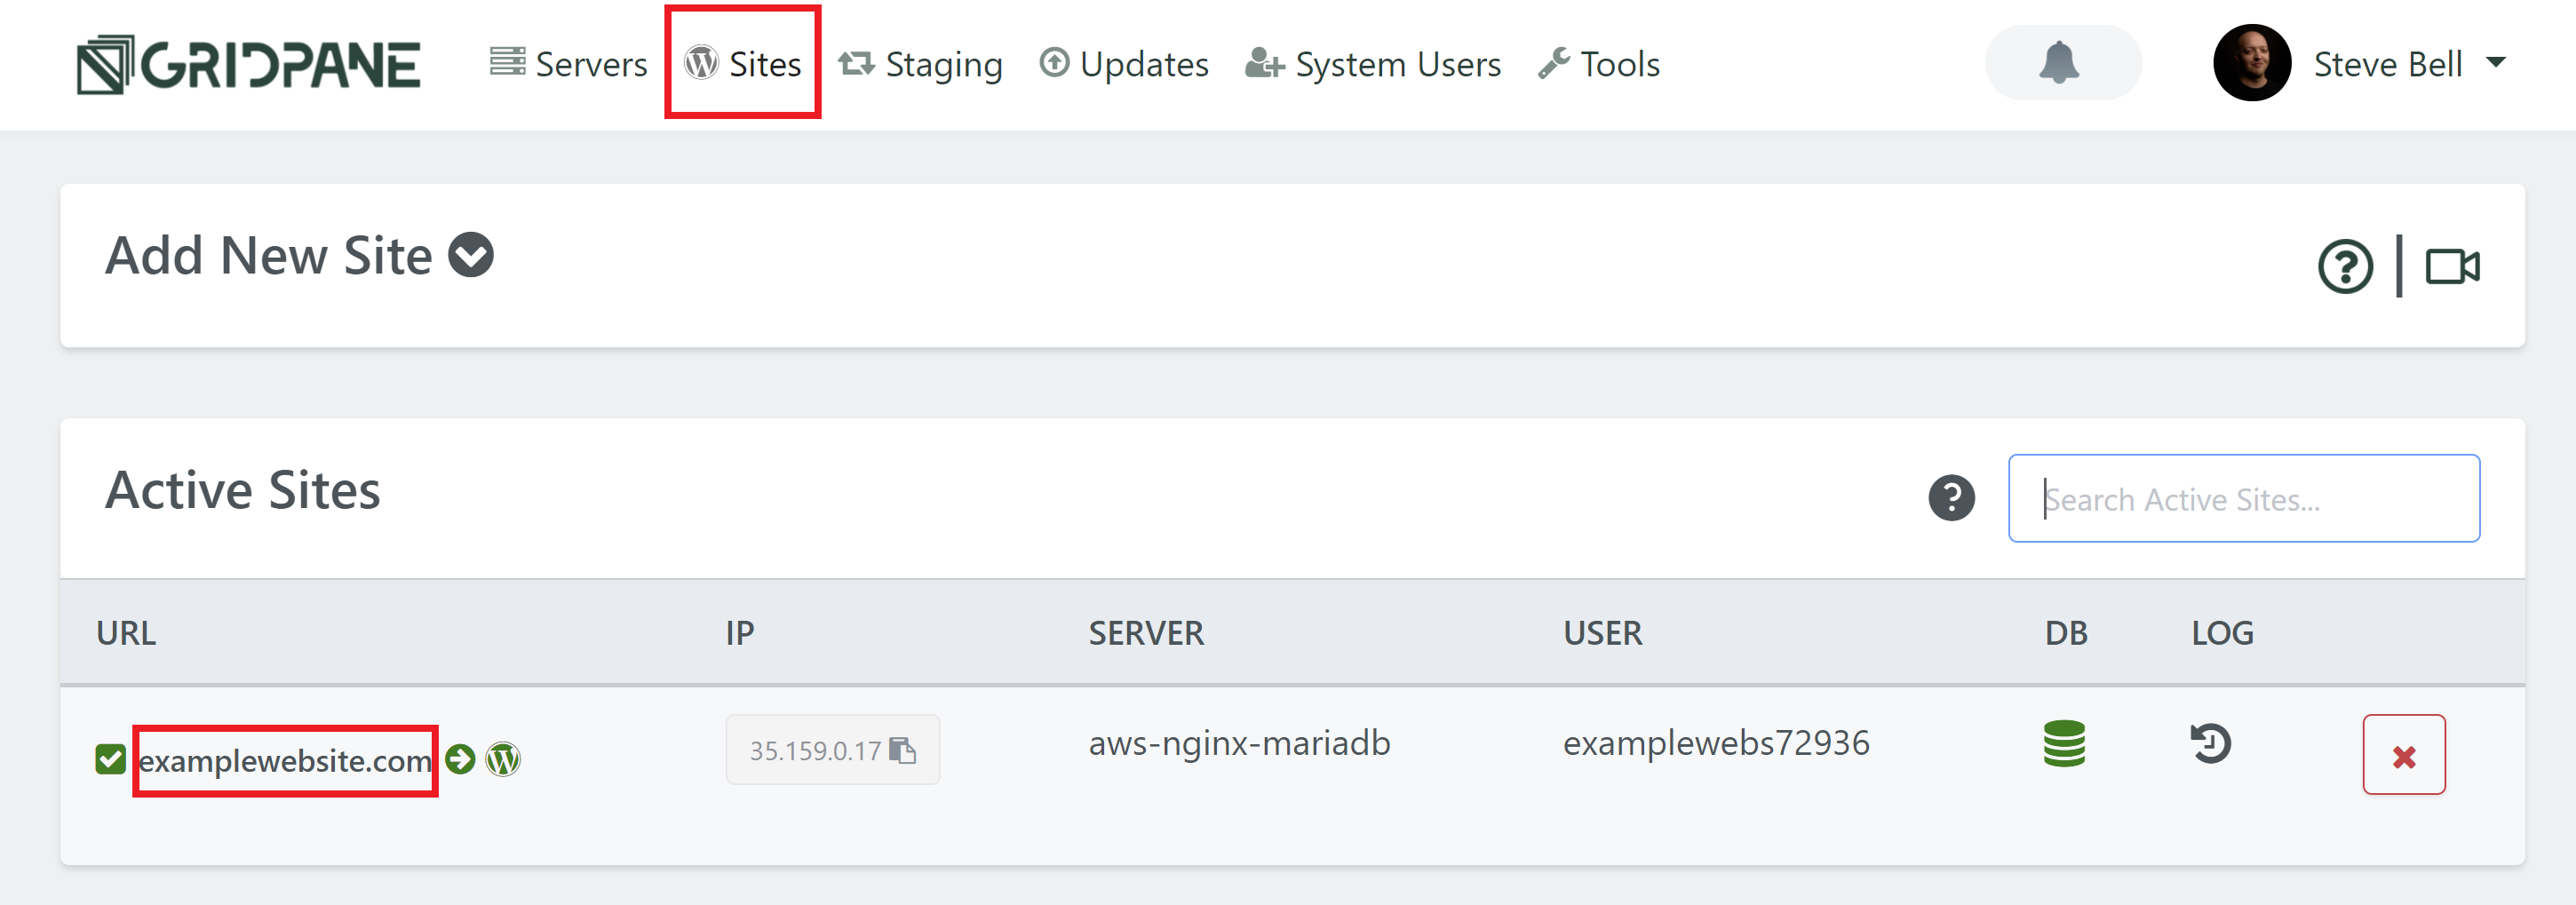
Open your Site Customizer by clicking on its URL in the Active Sites panel: 

Select your key from the drop-down and then enable the SendGrid SMTP Provider toggle:

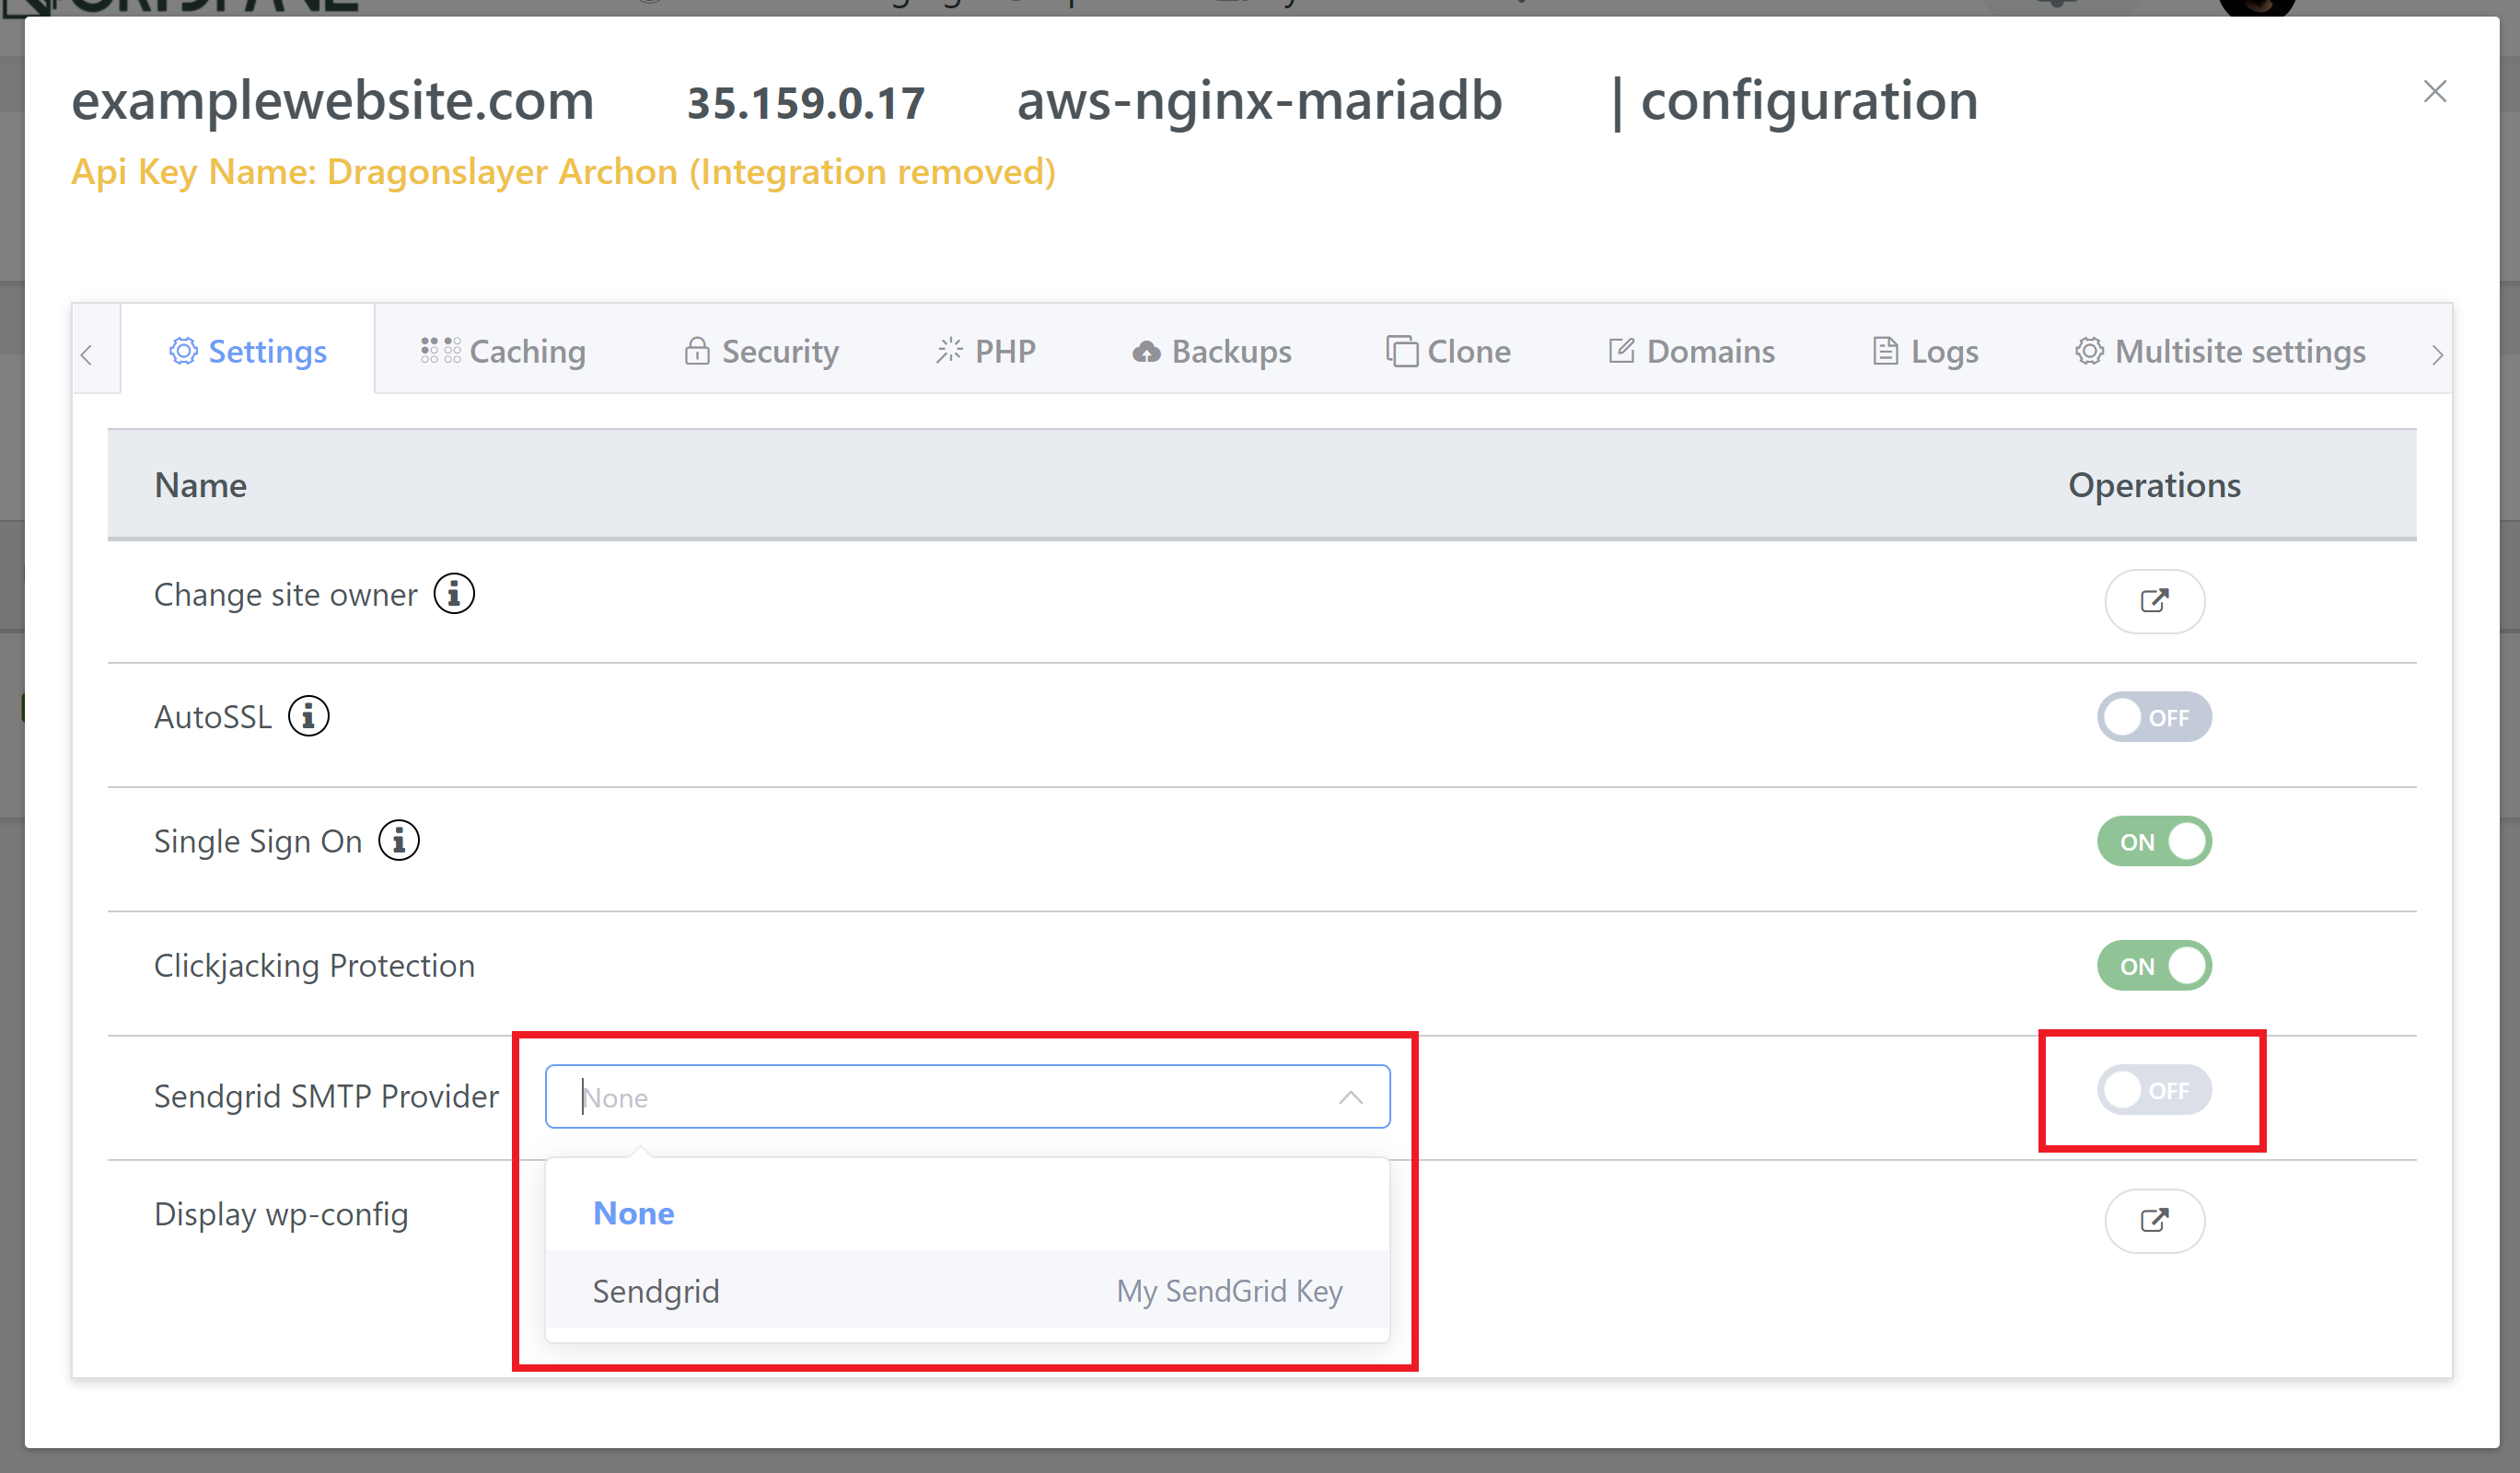
vCanopy will now autoconfigure SendGrid as the SMTP provider for your site’s transactional emails.

And that is it…. it really is that simple, no configurations, done. 

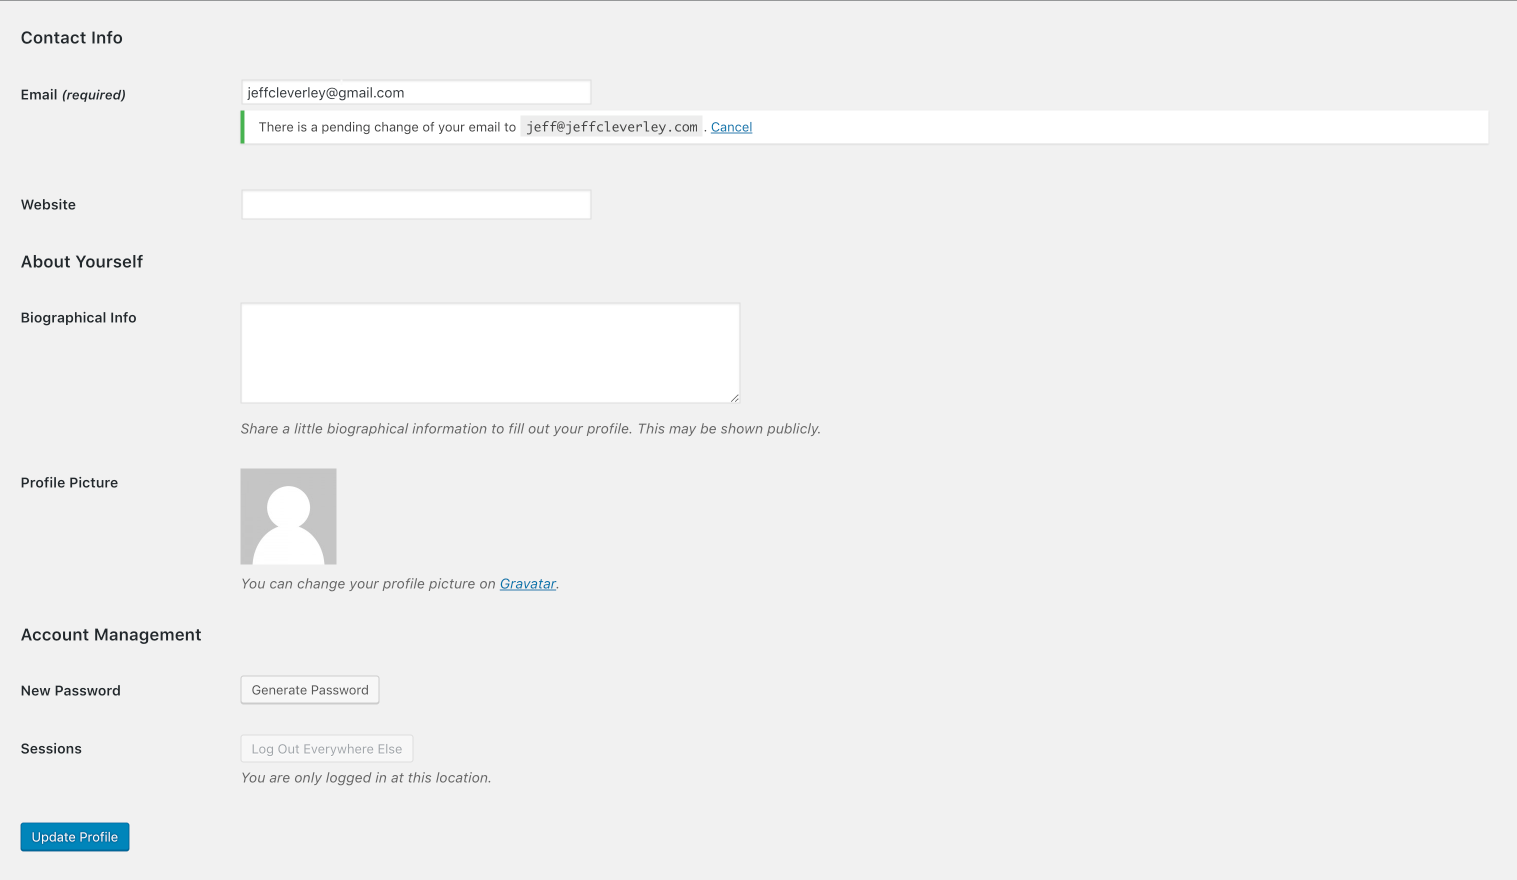
Step 4. Use WordPress Transactional Emails

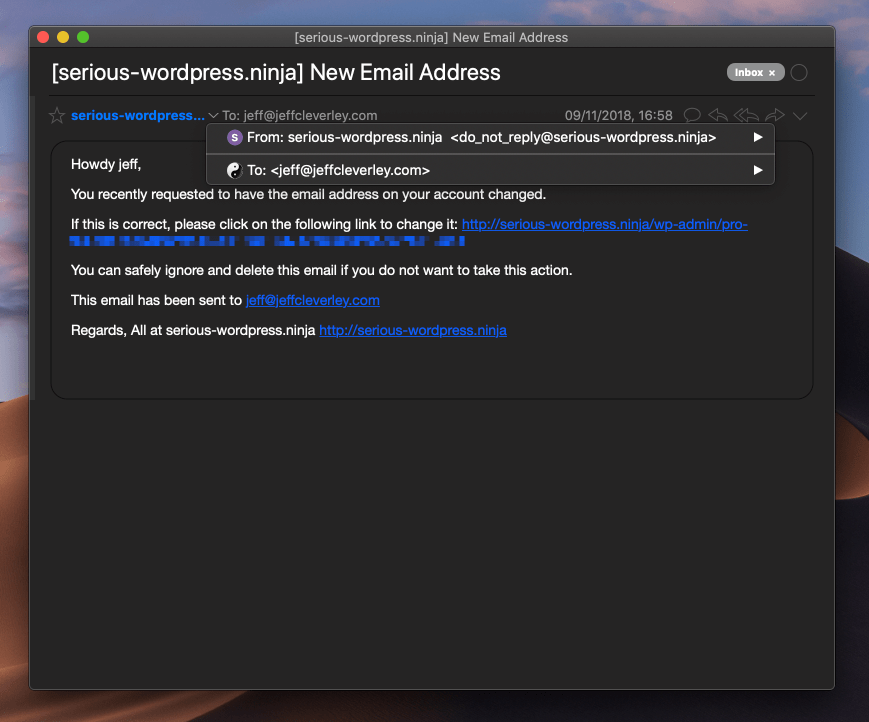
As an example, you might reset your user email address, for security purposes this WordPress function requires the clicking of a link sent to the existing email before it can be completed. 

All emails will be autoconfigured to be sent from [email protected]but we will soon be updating this feature to allow for the from sender to be user-defined.

Troubleshooting 

Always be sure to test that your emails are sending once you’ve turned our integration on for your website.

SMTP providers almost always require domain verification and/or email verification. Without this, they may not send your emails, or you may get flagged as spam. Please ensure you verify your domains and have all the correct DKIM/SPF records in place to ensure deliverability. For troubleshooting SendGrid, please read this article:

Troubleshooting the SendGrid SMTP Integration

Note for Linode users: Linode restricts access to ports which are used for mail delivery via SMTP. Follow this article to get them unblocked for your server.

Search the Knowledge Base

New to vCanopy?

Get started with our FREE Core plan today! We bring the software, you bring the hardware.